Nexgrill
Pellet Grills

Pellet Grills Articles

News, advice and articles about Pellet Grills

Latest Pellet Grills Articles

Nexgrill Oakford 1125 Pro Pellet Smoker GrillPellet Grills

Nexgrill Oakford Review Method: A 5-Step Pellet Smoker Test Plan (and the Mistakes That Ruin It)

Why a Useful Oakford Review Starts With a Tape Measure, Not a Spec Sheet Most Oakford reviews you will read online are written from a spec sheet. The reviewer never lifted the lid, never taped the grate, never watched a controller hold 225°F for half an hour. That is why so many pellet smoker reviews disagree with what owners actually experience after a month. This guide takes the opposite approach: it gives you a repeatable test plan you can run yourself, on any Oakford Pro you own or are about to buy, in roughly one afternoon. One housekeeping note before the method. The documented Oakford Pro pellet models on nexgrill.com are the 875 Pro and the 1125 Pro. Buyers who arrived here searching for a "1150" should treat that number as unverified until they have photographed the data plate and matched it against the documented 875/1125 sizes. The proximity of 1150 to 1125 is the honest reason the confusion exists, but a tape measure and a plate photo settle it in minutes. From here on, the steps work on either model. A review that never measured anything is an opinion, not a review. Treat every unverified square-inch figure as marketing until your own tape measure disagrees or confirms. Prerequisites: Stage These Five Things in 15 Minutes You do not need special tools. You need the right five items laid out before you start, or you will skip steps without noticing. A tape measure (25 ft is overkill but fine; a 12 ft retractor is enough). A phone or camera to photograph the data plate and any red flags. A note-taking app or a paper log with a column for time, set temp, displayed temp, and measured temp. An independent temperature probe - a wired or wireless meat/ambient thermometer you trust, not the lid gauge. Two bags of the same pellet brand, because you will burn through more than you expect during a 30-minute hold test on a cold day. A word on brand context, used once and not again: Nexgrill was founded in 1993, is headquartered in California, and merged with Megamaster to form Global Leisure. That matters only in the sense that support, manuals, and parts channels are established rather than fly-by-night - which is exactly what you want when you later need a controller or a replacement gasket. Step 1 - Photograph the Data Plate and Copy Model and Serial Verbatim The data plate is your anchor. It is usually a sticker or a stamped tag on the cart or hopper assembly. Photograph it flat and close so every character is legible, then type the model and serial into your log exactly as printed - including any suffix letters. Do not "correct" what looks like a typo. Serial numbers matter when you contact Nexgrill support later; a serial lets them pull the specific build, whereas a model name only gets you a generic manual. This step also resolves the identity question. If your plate reads 875 Pro or 1125 Pro, you own a documented model. If it reads something else, you now have the exact string to compare against the live product pages rather than a guess. Step 2 - Tape-Measure the Grate Footprint and Count the Racks Yourself Listings quote square inches optimistically. Measure the usable grate length and depth in inches and multiply; do it per rack, then sum. Then count the physical rack levels. On a pellet smoker the difference between two rack positions and three is the difference between cooking one brisket and cooking a brisket plus ribs. Measure twice Usable grate area is almost always smaller than the headline sq-in figure because of hopper and ledge encroachment. Step 3 - Run a 30-Minute Temperature-Hold Test at 225°F and 350°F This is the single most informative test you will run. Light the smoker, set 225°F, and once it stabilizes start logging every five minutes for 30 minutes: set temp, displayed temp, and your independent probe reading near grate level. Repeat at 350°F. Note the highest and lowest reading - that is your swing. A controller that undershoots then overshoots by 30°F on a calm day is behaving differently than one that drifts gently and self-corrects. Do not run this test in wind or rain and then blame the grill. Baseline it in reasonable conditions, then note the weather. That single discipline separates a fair review from a skewed one. Step 4 - Verify Controller, Auger Feed, and Fire-Pot Behaviour Against the Manual Watch three things: how the auger primes on startup, how quickly the fire pot lights, and how much ash accumulates after your hold test. Compare each against the manual's described behaviour. If the auger primes slowly but the manual says a short prime is normal, that is not a fault. If the fire pot is half full of ash after one short test, clean it out - restricted airflow is the most common cause of temperature swing, and it is a maintenance issue, not a design flaw. Step 5 - Score the Build: Lid Gasket, Hopper, Cart Welds, and Cover Fit Run the "dollar bill test" on the lid gasket: close a bill in the lid edge at several points. If it slides out with no drag, smoke is escaping there too. Check hopper capacity against the manual's stated pounds and note how the lid seals. Push the cart from side to side to feel for wobble and look at the welds where the legs meet the shelf. Finally, fit the cover - the 875 Pro ships as a cover bundle on its product page, so the cover you were given should actually fit. A cover that does not sit properly is a small but real build signal. What the Documented Oakford Pro Sizes Tell You ( 875 Pro vs. 1125 Pro ) The two documented models differ chiefly in grate real estate and intended throughput, not in the test method. The 875 Pro sits in the mid-size bracket and is sold as a cover bundle; the 1125 Pro is the larger sibling in the same Pro family. Measure both the same way and the decision becomes arithmetic rather than marketing. Try comparing two products side by side below to see which fits best.

Oct 22, 20269 min read
Read more
Nexgrill Oakford 1125 Pro Pellet Smoker GrillPellet Grills

Nexgrill Oakford 875 Pro Manual: Startup, Shutdown, and Controller Guide

Your 875 Pro Is Assembled and the Paperwork Is Gone - Start Here The hopper is full, the cart is level on the patio, and the little bag of hardware is empty - but somewhere between the driveway and the deck, the booklet disappeared. That is the exact situation this guide is written for. You do not need a model-identification walkthrough or a rating-plate decoding session; you need to know what the Oakford 875 Pro's documentation says about feeding pellets, lighting, and shutting down, plus how to run those sequences correctly from memory. One reality check first: a plain search for "Oakford 875 Pro manual" frequently returns nothing model-specific. Nexgrill publishes its materials on the product page rather than on a public manual library, and retailer listings change tabs without notice. So treat the document hunt as a short, ordered procedure rather than a single search - and treat the operating sequences below as the part of the manual that actually matters on cook day. The 875 Pro ships with a fitted cover included - a detail that separates it from the larger Oakford 1125 Pro and from most neighbouring models. If your box had one, you already have everything the paperwork promised except the paper itself. What the Oakford 875 Pro Actually Is (and What Its Manual Covers) The Oakford 875 Pro is a pellet smoker-grill in Nexgrill's Oakford Pro line, built around a digital controller that meters pellet feed from the hopper into a fire pot, where a hot-rod igniter lights them and a fan drives heat and smoke through the chamber. That architecture defines what the manual spends its pages on: assembly torque values, hopper and auger priming, the startup sequence, controller set-point behavior, the shutdown cycle, and cleaning of the fire pot and temperature probe. Assembly pages are one-time use. The startup, shutdown, and probe-cleanliness pages are the ones you will re-read - which is why losing the booklet hurts more in month three than in week one. Before You Light Anything: The Five-Minute Pre-Start Checklist Do these five things before the first ignition of any session. They are the difference between a clean start and a smoky, stalled one. Empty and inspect the fire pot. Ash and leftover pellets from last week choke airflow. Scoop them out with the pot cool. Check pellet condition. Dry, firm pellets only. Swollen or dusty pellets jam the auger - the single most common pellet-grill failure. Confirm the grease tray is seated. A misaligned tray blocks heat flow and creates hot spots. Wipe the RTD probe. The temperature sensor inside the chamber collects smoke residue; a coated probe reads low and the controller overfeeds pellets chasing a temperature it cannot reach. Verify the lid gasket and latches sit flat. Air leaks make the controller work harder and lengthen recovery time. Never store pellets in the hopper through a humid week. Clumping pellets fed into the auger are the leading cause of hard starts and jammed augers on any pellet smoker. Step 1: Pull the Right Documents From Three Real Sources, In This Order Work through these in sequence and stop at the first hit. Order Source What to Look For 1 The 875 Pro product page on nexgrill.com Resources, manuals, or support-document tab embedded on the listing 2 The retailer's listing for your exact SKU A "Guides & Documents" or "Specifications" tab - confirm the link loads before relying on it 3 Nexgrill customer support Request the PDF by model and, if you have it, serial number If neither the product page nor the retailer tab carries the file, contact support with your model number and a photo of the rating label. That is faster than hunting an unofficial mirror of a manual you cannot verify is current. Step 2: Prime the Auger Before Your First Cook A brand-new auger tube is empty, so the controller's first ignition attempt can time out before pellets reach the fire pot. Priming fixes that: fill the hopper, then run the controller through its feed or prime function - on most Pro-series controllers that is holding the power or feed control for several seconds while the auger turns - and watch until you hear pellets dropping into the pot. Stop there. Over-priming is its own problem, because a pot packed with pellets before ignition can smolder and produce a heavy, dirty start. Step 3: The Lid-Open Start - The Sequence Owners Most Often Get Wrong Start with the lid open . The controller feeds and ignites pellets while the chamber is open, which lets the initial surge of combustion gases escape instead of pressurizing the chamber. Leave it open until you see a steady flame and clean smoke rising from the pot - typically a few minutes - then close the lid and set your temperature. Closing too early traps gas and can produce a sharp pop, and it gives the controller a false temperature signal while the pot is still catching. Set temperature in increments on the digital controller rather than jumping straight to 400°F+. Incremental set-points let the auger feed stabilize and reduce overshoot during warm-up. Step 4: The Burn-Off Cook That Comes Before Any Food Manufacturing oils coat the cooking chamber and grates on arrival. Run the empty grill at high heat - roughly 450°F, or the HIGH setting - for about 30 to 45 minutes, lid closed, with nothing on the grates. This burns off residues and starts seasoning the metal. Expect some smoke and an odor during this first burn; that is normal. Let the grill cool, wipe the grates, then cook. Try Comparing Two Products Side by Side Below to See Which Fits Best Once you have the startup sequence down, the next question is whether the 875 Pro is the right size for how you cook. Use the comparison tool below to weigh it against another Oakford or a different Nexgrill model on capacity, cover inclusion, and intended use.

Oct 22, 20269 min read
Read more
Nexgrill Oakford 1125 Pro Pellet Smoker GrillPellet Grills

Nexgrill Oakford 1150 Pro Review: Confirm the Model, Then Nail Your First Three Cooks

Why an 'Oakford 1150 Pro' Review Has to Start With a Model Check If you searched for a Nexgrill Oakford 1150 Pro review, you probably have a listing, a marketplace link, or a memory of a model number in front of you. Here is the honest starting point: as of this writing, Nexgrill's published Oakford pellet line lists the Oakford 875 Pro (sold with a cover) and the Oakford 1125 Pro . A model named exactly 'Oakford 1150 Pro' does not appear in the brand's product resources, and we will not invent hopper capacity, cooking area, BTU, or price figures for a grill we cannot verify. That is not a dead end - it is a five-minute prerequisite. Model numbers get transposed in listings, in third-party seller copy, and in forum threads. Sometimes '1150' is a typo for 1125. Sometimes it refers to an older or regional designation. Either way, the practical work is identical: confirm the unit on the rating plate, then run the setup and first-cook sequence properly. This guide does the second part in detail, because that is where new pellet owners actually get into trouble. Do not assume '1150' maps to a specific cooking area, hopper size, or price. Treat any such claim in a listing as unverified until you read it off the rating plate or the manual that ships in the box. The Oakford Naming Puzzle: 875 Pro, 1125 Pro, and the Unconfirmed 1150 Pellet grill naming is a minefield because digits often encode a series or generation, not a specification. A buyer sees a bigger number and reasonably assumes a bigger cooker. That assumption is exactly what causes post-purchase disappointment. Use the table below as your verification workflow rather than trusting the listing headline. Listing name you see What Nexgrill resources confirm Your action Oakford 875 Pro Confirmed product page; sold with cover Read the spec block on the product page; note cooking area and hopper size there Oakford 1125 Pro Confirmed product page Compare its spec block against the 875 Pro before paying 'Oakford 1150 Pro' Not verified in published Oakford lineup Ask the seller for a photo of the rating plate; cross-check the manual Bundle or open-box listing Specs vary by bundle Confirm what is included: cover, probe, drip tray Prices across the Oakford range shift with promotions and retailer bundles, so quote nothing as fixed - confirm at the point of sale in USD. What does not change is the verification method: rating plate, manual, product page, in that order. Before the First Cook: A Five-Minute Model and Parts Check Once the crate or box is in your driveway, do this before you start wrenching. It saves hours if a part is missing or the unit is not what you ordered. Photograph the shipping carton and any damage before opening. Locate the rating plate (typically on the back or side of the hopper/barrel assembly) and photograph it. Match the plate model number against your order confirmation and against the manual's cover. Lay out hardware bags and compare the contents against the parts list page by page. Check that the controller, auger motor, and fan are present and undamaged - these are the electric heart of a pellet grill. Confirm you have a grounded 120V outlet within reach of the cord. A pellet grill needs mains power for the auger and controller; an extension cord should be rated for outdoor use. Two people make assembly of any full-size Oakford dramatically easier. The barrel, hopper, and legs are awkward for one person to hold square while bolting. What You Actually Need On Hand Before You Fire It Up Pellet smoking is a small supply chain, and missing one item stalls your first cook. Put these together ahead of time: Food-grade hardwood pellets - labeled for cooking, not heating. Heating pellets can contain binders and are not meant for food. A grill cover - the 875 Pro ships with one; confirm whether your unit includes it. Aluminum foil or disposable drip pans for the grease tray. An instant-read or leave-in meat probe - the single most useful accessory for low-and-slow cooking. Grill tongs, a sturdy spatula, and heat-resistant gloves. A pellet scoop or small cup for loading the hopper without spilling. Step-by-Step: Assembly and the Manufacturer Burn-Off Follow the manual that came with your unit - it is the authoritative source for your specific model. The sequence below is the order that matters most. Assemble on a flat, level surface following the manual's torque and sequence notes. Do not fully tighten every bolt until the frame is squared. Install the legs and casters and confirm the unit sits stable with the lid open. Fit the grease tray, drip liner, and heat baffle per the manual diagram. Load pellets into a clean, dry hopper - roughly a third of a hopper is enough for a burn-off. Prime the auger as described in your manual (most controllers have a prime or feed function). You will hear the auger motor turn. Run the burn-off at the manufacturer's recommended temperature and duration to clear manufacturing oils from the cook chamber and grates. Cool fully, then brush the grates. Season the Grates, Then Learn Your Temperature Zones After the burn-off, coat the cooking grates lightly with a high-smoke-point oil such as canola or grapeseed, run the grill at a moderate setting for 20-30 minutes, and let it cool. Repeat once. This builds a thin, non-stick layer and protects the metal. Next, learn the grill's personality before you cook anything expensive. Set a target, let the controller settle, and note where the built-in probe reads versus an independent thermometer clipped at grate level. Pellet grills cycle - the auger feeds, the fan runs, temperature rises, then it idles. Expect variation of roughly 10-25°F around your setpoint on a typical cook; that is normal cycling, not a fault. Knowing your grill's real swing is what turns a nervous first brisket into a calm one. If you want to see how a pellet unit compares, read this Oakford pellet grill review for setup and running guidance. Try comparing two Oakford options side by side below to see which fits best:

Oct 22, 202610 min read
Read more
Nexgrill Oakford 1125 Pro Pellet Smoker GrillPellet Grills

Nexgrill Oakford 715 Manual: Pellet-Specific Startup, Shutdown, and Controller Fixes

Your Oakford 715 Is Loaded With Pellets and the Manual Is Missing - Start Here This is written for the owner who has already filled the hopper, plugged in the Oakford 715, and realized the paperwork is either lost, water-damaged, or never made it out of the carton. Pellet smoking punishes guesswork in a way gas grilling never does: feed rate, burn-pot airflow, and a proper fan-driven cool-down are all decisions the manual makes for you, and getting them wrong is how augers jam and hoppers smolder. Before anything else, be honest about the SKU question. Nexgrill's live site currently lists the Oakford 875 Pro and Oakford 1125 Pro . A specific 715 product page and a Nexgrill-hosted 715 PDF could not be verified at the time of writing, so treat the 715 as most likely a retailer-tier or regional pellet SKU and confirm your exact model string before you trust any download. The steps below work either way - they teach you to match the document to your data plate rather than to a name on a marketing banner. If the burn pot has visible ash buildup and the last cook ended with the controller switched off mid-cycle, do not run another startup until you clean the pot. Residual pellets plus an unverified startup sequence is the classic recipe for a flare in the fire pot. Why a Pellet Smoker Manual Is Not a Gas Grill Manual (Read These Pages First) If you have owned a Nexgrill gas grill, you know the manual's center of gravity: leak testing, burner tube alignment, and crossover ignition. A pellet unit is a different machine with different failure modes, and pages that matter on gas are simply absent here. On the Oakford 715 the high-value pages are, in order: First-burn and seasoning sequence - the oil coat and the timed run that cures the cooking chamber. Startup and shutdown - specifically the cool-down stage where the fan runs the fire out before power-down. Controller settings - feed rate or P-setting adjustment, low-pellet sensor behavior, and any Wi-Fi pairing steps if your revision is equipped. Fault codes - what the display shows and what the manual tells you to do about it. Parts diagrams - auger motor, hot rod igniter, RTD temperature probe, and burn pot, each with a part number. A pellet controller's shutdown routine is not cosmetic. Skipping it leaves burning pellets in the pot and can push heat back up the auger tube - the reason that page deserves a folded corner. Prerequisites: Six Things to Stage Before You Search, Season, or Cook Line these up on one work surface before you open a browser tab. Owners who chase a PDF first usually end up re-searching because they cannot answer the model question halfway through. A phone photo of the data plate - typically on the rear of the hopper or printed inside the hopper lid. Capture the full string, letter suffix included. The box label or shipping confirmation, which often carries a retailer-specific item number that differs from the grill badge. A retractable tape measure, if you plan to order a replacement part. Pellet details - wood species and bag weight. Some manuals specify a maximum moisture level or pellet grade. Two clean, dry rags and a high-smoke-point cooking oil such as canola or grapeseed for seasoning. A notes file or a scrap of paper taped inside the hopper lid for settings and codes. Step 1: Confirm You Own an Oakford 715 and Copy the Full Data-Plate String Read the plate character by character and transcribe it twice. Suffix letters and digits - the difference between a

Oct 21, 20268 min read
Read more
Nexgrill Oakford 1125 Pro Pellet Smoker GrillPellet Grills

Nexgrill Oakford 930 Manual: Pellet Grill Startup, Step by Step

What 'Nexgrill Oakford 930 Manual' Usually Means - and What to Do First Most people searching for a Nexgrill Oakford 930 manual are not doing research for fun. They have a pellet grill on the patio, a bag of pellets in the garage, and a question that needs answering tonight: how do I start this thing without ruining dinner? The frustrating part is that a search for the exact string often returns nothing labeled "930." As of this writing, the current Oakford pellet line on Nexgrill's own store reads 875 Pro and 1125 Pro - the 930 may be a retailer-specific SKU, a regional variant, or a renamed model. That does not mean you are stuck. It means you should stop chasing the label and start matching your machine by product type and controller, because the startup logic across the Oakford pellet family is nearly identical. This walkthrough assumes you already own the grill. It covers what the manual would tell you, in the order it actually matters: fuel and fire pot prep, sourcing the right document, the first light, the burn-off, and the shutdown cycle that too many owners skip. If you are still deciding between models, read anyway - the process explains the product better than any spec sheet. Do not trust a random PDF from a forum or a file-sharing site. Pellet grill controllers vary, and a wrong sequencing guide can lead you to light the fire pot incorrectly. Confirm your unit first, then use the matching document. Before You Start: Hopper, Pellets, and a Clean Fire Pot Whatever the manual says next, these three things come first. Fill the hopper with dry, food-grade hardwood pellets - not heating pellets, which are not intended for cooking. A 20 lb bag typically runs $12-$18 in the U.S., and a first burn-off plus a short seasoning cook will use a noticeable fraction of it, so budget for a second bag. Next, open the lid and look into the fire pot. On a brand-new grill it should be empty and free of packing material or stray pellets. On a used grill, scoop out ash with a small cup or shop vac (only after the unit is fully cold). A fire pot packed with old ash chokes airflow, and poor airflow is the root cause of most temperature swings owners blame on the controller. Dry hardwood pellets, sealed and stored out of humidity A clean, empty fire pot and a clear grease tray Lid open, grill on a level surface, away from walls and overhangs Your phone or a notebook, so you can log controller settings Step 1: Confirm You Have a Pellet Grill, Not the Charcoal Homestead Nexgrill sells an Oakford Homestead 24, and it is a charcoal grill - a completely different fuel type with a vent-and-damper startup. It shares the Oakford name but none of the startup logic below. Before you follow any pellet procedure, confirm you see a hopper with an auger, a controller with Smoke and temperature settings, and a fan. If your unit has a charcoal grate and adjustable dampers instead, you have the Homestead and need the charcoal guide , not this one. Step 2: Pull the Manual From the Two Real Sources (Brand Support and Retailer Guides Tab) There are exactly two dependable places to get a document that matches your unit. The first is Nexgrill's own support channel via Nexgrill's contact page - send your model number and serial from the rating plate and request the use-and-care PDF. The second is the retailer product page for your exact grill; look for a "Use and Care Manual," "Info & Guides," or "Specifications" tab, which typically hosts the downloadable PDF next to the assembly video. Match by product type and controller, not marketing name. If your manual hunt returns an Oakford 875 Pro or 1125 Pro document, that is usually the right family to follow - both are pellet smoker grills with the same startup and shutdown logic, and the same approach applies when tracking down a guide for your exact model . Browse the current Nexgrill product range to see which document set most closely resembles your unit. Step 3: Prime the Auger and Light for the First Time (Lid-Open Rule) This is the step that separates a clean first cook from a frustrating one. A new grill's auger tube is empty, so pellets have not yet reached the fire pot. Set the controller to Smoke (or the lowest setting) and let the auger feed until you hear pellets dropping into the pot - usually a couple of minutes, though it varies by unit. Never assume the pot has fuel just because the hopper does. Then start the ignition cycle with the lid open. Leave it open until you see a steady flame and thin, bluish smoke. Only then close the lid and dial to your target temperature. A closed lid during initial light smothers the fire, produces thick white smoke, and can cause a temperature overshoot as unburned fuel ignites all at once. Do not skip priming. A dry auger is the single most common cause of a first-start flame-out. If the grill shuts off shortly after ignition, stop, empty the pot, and repeat the prime with the lid open. Step 4: Run the Burn-Off and Seasoning Cook Before Any Food Goes On New grills ship with manufacturing oils on the interior surfaces. Run the unit at a moderate-to-high setting for roughly 30-45 minutes with the lid closed and nothing on the grates. That burn-off clears the residues. Then do a low-and-slow seasoning cook on the Smoke setting for about an hour - this lays down the first layer of seasoning on the cooking surfaces and lets you watch how your controller holds temperature before food is at stake. Pellet Startup vs. Charcoal Startup: Why the Sequence Order Matters Stage Pellet grill (Oakford) Charcoal grill (Homestead 24) Fuel prep Fill hopper, prime auger to fire pot Load chimney, light coals separately Ignition Controller start with lid open Dump lit coals, adjust vents Control Digital setpoint via controller Manual damper and vent tuning Shutdown Fan burn-off cycle, pot empties Close vents, coals burn out The lesson: pellet grills move the thinking into the controller and the shutdown cycle, while charcoal grills move it into vent management. Following a charcoal procedure on a pellet unit - or vice versa - is where first cooks go wrong. Common Mistakes That Ruin a First Pellet Cook No auger prime: flame-out within minutes of starting. Closed-lid initial light: smothered fire, dirty white smoke, temperature overshoot. Overfilled fire pot: a rich fire that runs hot and smoky. Ash not cleared between cooks: restricted airflow and erratic temps. Skipped shutdown: the next cook starts on a fuel-packed pot. Try comparing two products side by side below to see which fits best - the startup routine is the same, but hopper size and cook capacity differ meaningfully across the Oakford family.

Oct 18, 202610 min read
Read more
Nexgrill Oakford 1125 Pro Pellet Smoker GrillPellet Grills

Nexgrill Oakford 36A Review: What It Really Is and How to Run an Oakford Pellet Grill

Is the Nexgrill Oakford 36A Actually a Real Model? No product carrying the exact name "Nexgrill Oakford 36A" appears in Nexgrill's current catalog. The Oakford name is real; the "36A" suffix is not part of any manufacturer listing. What exists is a genuine Oakford line from Nexgrill, a California outdoor cooking company founded in 1993, covering pellet smoker grills and one heavy-duty charcoal grill. Nexgrill's Oakford family is a pellet-and-charcoal line today. No gas Oakford exists, and no "36A" model is listed by the brand at the time of writing. The Three Oakford Products Nexgrill Currently Lists The confirmed products are the Oakford Pro 875 Pellet Smoker Grill , the Oakford 1125 Pro Pellet Smoker Grill , and the Oakford Homestead 24 Heavy Duty Charcoal Grill . Two burn wood pellets through a controller-driven auger; one burns charcoal with manual vent control. There is no third fuel option in the range. Why "36A" Shows Up in Search Results The suffix most likely leaked in through marketplace or reseller naming, forum shorthand, or cross-contamination with Nexgrill's 36-inch-class griddle models - the Daytona 36" 4-burner flat top shares that number and is a completely different product. Listings using an unverified model name are harder to warranty and harder to match to replacement parts. If a seller insists a 36A exists, ask for the printed model number on the unit's data plate. Five Things to Confirm on Any Oakford Listing Before You Pay 1. The Exact Model Number and Fuel Type Get the model number off the rating label, not the marketing title. Confirm whether the unit is pellet, charcoal, gas, or griddle - a pellet smoker and a 36-inch griddle share nothing but the brand. 2. Cooking Area and Grate Material Total square inches and grate material drive capacity and searing. Check the brand's own product page for published figures; if a third-party listing quotes a number that does not match, trust the manufacturer page. 3. Hopper Capacity and Controller Type Hopper size determines how long an unattended smoke can run - a long brisket cook can consume pellets for 12 hours or more. The controller type (basic dial versus digital setpoint) determines how tightly you can hold a target temperature. 4. What Is Included in the Box Covers, temperature probes, and front shelves are sometimes bundled and sometimes sold separately - the 875 listing explicitly bundles a cover, which changes the real cost comparison between two otherwise similar grills. 5. Warranty Terms in Writing Warranty coverage on pellet grills is split by component - burn pot, controller, and auger motor often carry different terms. Read the warranty document attached to the specific model. Step-by-Step: Setting Up and Seasoning a New Oakford Pellet Grill Do not cook food on a factory-new pellet grill. The first firing is a burn-off to clear manufacturing oils - not dinner. Step 1 to 3 - Unbox, Position and Check the Fire Pot Step 1 - Unbox and inventory. Match every part against the parts list before assembly. Missing hardware is the most common setup delay. Step 2 - Position it. Place the grill on a level, non-combustible surface with clearance on all sides, away from walls, railings, and overhead structures. Step 3 - Inspect the fire pot. Remove the grate and heat deflector, and confirm the fire pot is empty and the auger opening is clear of packing material. Step 4 to 6 - Prime the Auger, Load Pellets and Run the Burn-Off Step 4 - Fill the hopper. Use dry, fresh hardwood pellets only. Do not mix in chips, chunks, or damp pellets. Step 5 - Prime the auger. Run the controller's feed function until pellets drop into the fire pot. The feed tube is empty from the factory, and skipping this step is why so many new grills appear to fail on first start. Step 6 - Run the burn-off. Set roughly 350-400°F and run 30 to 60 minutes with the lid closed to burn off manufacturing residue. Step 7 to 8 - Verify Temperature Accuracy and Apply Cooking Oil Step 7: compare a trusted probe reading at grate level against the controller's displayed temperature. A 10-25°F variance is common on pellet grills of every brand, so learn your offset. Step 8: once cool enough to handle, wipe the grates with a high-smoke-point oil such as canola to lay down a seasoning layer. What to Expect on Your First Cook: Temperatures and Timings Heat-Up Time and Temperature Swing at Low Settings A pellet grill typically reaches cooking temperature in about 10 to 15 minutes. At 225°F, expect a wider swing than on a gas grill - a controller holding "225" may cycle between roughly 210°F and 245°F at grate level. That is normal pellet combustion behavior, not a defect. Brisket, Ribs and Poultry Targets in One Table Cook Typical Smoker Temp Typical Time Pull Target Packer brisket, 12-14 lb 225°F 12-16 hours 200-205°F, then rest Pork ribs 225°F 3-2-1 method Bend test, ~195°F Spatchcock chicken 375°F 45-60 min 165°F in the breast Those pull temperatures come from USDA FSIS guidance - 165°F for poultry and 160°F for ground meats - while whole cuts of beef and pork are safe at 145°F with a rest. Treat the times as typical ranges, not guarantees; wind, ambient temperature, and pellet quality all move the clock. 30-60 min Typical burn-off length on a new pellet grill before its first cook Compare Two Oakford Options Side by Side Before You Decide The 875 and the 1125 share a fuel source and controller philosophy but differ in capacity and bundled accessories, and the Homestead 24 sits in an entirely different lane as a charcoal cooker. Try comparing two products side by side below to see which fits best - that is where the capacity-versus-cost trade-off becomes obvious.

Oct 15, 202610 min read
Read more
Nexgrill Oakford 1125 Pro Pellet Smoker GrillPellet Grills

Nexgrill Oakford 36A Manual: Setup, First Cook, and Troubleshooting Guide

Your Oakford 36A Manual: What to Do Before You Download Anything If you searched for a Nexgrill Oakford 36A manual and came up empty, you are not alone - and you are also not stuck. Pellet grill model naming across the outdoor cooking industry changes faster than documentation gets indexed, and a model badge on the front of the unit does not always match the file name on a support page. The practical move is to stop hunting for a PDF by name and start by identifying the exact unit on your patio, then work from the documentation that genuinely applies to it. Nexgrill has been building outdoor cooking equipment since 1993 and its Oakford line covers pellet smoker grills such as the Oakford Pro 875 and Oakford 1125 Pro, which are published on the brand's product catalogue. Those listings are useful reference points because pellet grills share a common operating logic: a hopper feeds an auger, the auger drops pellets into a fire pot, a fan feeds combustion air, and a controller manages the whole cycle. Once you understand that chain, most setup and troubleshooting questions answer themselves regardless of which badge is on your lid. Do not assume that a manual you found for a different Oakford model matches your grill. Controller firmware, igniter position, hopper capacity, and grate layout vary between SKUs, and using the wrong wiring diagram or clearance figure can create a real safety problem. How to Confirm Which Oakford Model You Actually Own Before downloading anything, walk outside with a phone and photograph the rating plate. On Nexgrill pellet grills this data sticker is typically fixed to the back or side of the hopper assembly or the inside of the cart leg. You need three strings of characters: Model number - the full alphanumeric string, not just the marketing name Serial number - needed for any parts request or warranty conversation Date code or manufacture date - tells you which production revision you have Write those down before you contact support. When you reach out through the Nexgrill contact page at Nexgrill Support , that information lets the team pull the correct exploded parts diagram and assembly instructions for your specific revision instead of a generic file. It also protects you from a very common and expensive mistake: ordering a replacement auger motor, igniter, or controller board for the wrong revision and finding it does not fit. 3 data points Model, serial, and date code from the rating plate resolve almost every manual and parts question. If your unit is a current Oakford model, start with the published product pages rather than a third-party PDF scan. The Nexgrill product catalogue lists the Oakford pellet models currently sold, and matching your rating plate against those listings is the fastest way to confirm whether you own a current SKU or an earlier revision. Third-party manual aggregator sites often host outdated revisions with incorrect clearance distances and obsolete controller instructions. Before You Turn It On: What to Have Ready A pellet grill first run goes badly when people improvise. Gather these items before you open a single box panel: a #2 Phillips screwdriver, a 10mm and 13mm wrench or socket set, a level, food-safe hardwood pellets (not charcoal, not chips, not a blend with added oils), a grill cover, and a grounded outdoor outlet. Budget roughly 60 to 90 minutes for assembly alone on a full-size Oakford, and do it on a flat surface - assembly on grass or gravel is a reliable way to end up with a crooked cart. Plan for the space too. Pellet grills need several inches of clearance behind the hopper for the lid to swing and for heat to escape, plus headroom if you are under an overhang. A pellet unit produces visible smoke and a steady updraft; tucking it tight against a wall or under a low wooden structure traps heat and discolours surfaces. Step-by-Step: Getting Your Oakford Pellet Grill Running Whether you are working from an official Oakford manual or from the process below, the order matters more than most owners expect: Assemble the cart, legs, and side shelf first, then attach the hopper and chamber. Tighten hardware only after everything is aligned. Install the heat baffle, drip tray, and grates, then confirm the fire pot is seated correctly and free of packing material. Load pellets - fill the hopper no more than about three quarters full for the first run, since you need room to see how the auger feeds. Prime the auger. Run the controller in its feed or prime mode until you hear pellets dropping into the fire pot, which typically takes 60 to 120 seconds on an empty auger tube. Run the burn-off. Set the controller to roughly 350 to 400°F with the lid closed for 30 to 45 minutes to cook off manufacturing oils and protective coatings. Cool down, wipe the grates, and only then cook food. Prime the auger with the lid closed and the fire pot empty. Priming into an already-lit fire pot is the single most common cause of a dangerous flare-up during a first cook. Where New Owners Usually Go Wrong These failures are predictable and almost entirely preventable: Mistake What Happens Correct Approach Skipping the burn-off Oily taste, discoloured food, lingering odour Run 350-400°F for 30-45 minutes before any food Overfilling the hopper Pellet bridging, inconsistent feed, auger strain Fill to about three quarters on first runs Wrong pellet type or size Auger jam, crumbled pellets, blocked fire pot Use standard food-grade hardwood pellets only Lid open during startup Slow ignition, temperature overshoot, smoke surge Keep the lid closed through the entire startup cycle Cutting power mid-cycle Pellets smoulder in the fire pot, next start flares Always complete the shutdown cycle One more that catches people out: gas grill habits do not transfer. BTU ratings and burner counts tell you very little about pellet grill performance, because pellet cooking is about airflow, fuel feed rate, and controller logic. Judging a pellet grill by a BTU number is like judging an oven by its wattage. Try Comparing Two Products Side by Side Below If you are still deciding whether your situation calls for a pellet smoker, a flat-top griddle, or a traditional gas grill, the specifications only tell half the story. Try comparing two products side by side below to see which fits best:

Oct 15, 202611 min read
Read more
Nexgrill Oakford 1125 Pro Pellet Smoker GrillPellet Grills

Nexgrill Oakford 1400 Review: How to Evaluate a Large Oakford Pro Pellet Smoker Before You Buy

How to Review a Large Oakford Pro Pellet Smoker Before You Buy Oakford model labels shift between retail listings, seasonal bundles, and cooking-area numbers, so a search for 'Oakford 1400' can return product pages that do not match each other on specs. This guide shows you how to review any large Oakford Pro on real, checkable numbers so that whether the unit in front of you is an 875, an 1125, or a larger-capacity tier, you know exactly what you are buying. Nexgrill has been building outdoor cooking equipment since 1993 and is headquartered in California, with strong distribution through US retail partners. Pellet units depend on augers, fans, controllers, RTD probes, and a steady supply of replacement parts, so a brand with broad US retail reach and a merged parent (Nexgrill combined with Megamaster to form Global Leisure) is generally easier to get parts from than a specialty importer. Verify the exact model number and spec sheet before you buy. Oakford naming varies across listings. Treat any '1400' figure as a capacity or bundle designation you must confirm in writing on the product page you are actually purchasing from. First, Confirm Which Oakford Pro Model You're Actually Looking At Before reading a single review comment, open the product page and write down four things: the full model name, the primary cooking area in square inches, the hopper capacity in pounds, and the listed temperature range. If a retailer's page does not state all four, ask the seller or check the Nexgrill listing for the closest matching model. Third-party reviews frequently blend specs from two different Oakford SKUs, which is how myths about a model's real capacity or heat ceiling start. Build a small spec card for every candidate. Compare two verified reference points side by side using Oakford 875 Pro and Oakford 1125 Pro pages, then match the larger-tier unit you are shopping against those numbers rather than against a model number that may not exist on Nexgrill's own catalogue. What the Oakford Pro Pellet Platform Delivers (Using the 875 and 1125 as Reference Points) Pellet grills in this class are typically marketed as 8-in-1: smoke, grill, bake, roast, braise, BBQ, char, and warm. The 875 and 1125 names track the primary cooking area in square inches, which is why a '1400' style label almost certainly refers to a larger cooking surface rather than a different mechanism. The platform is consistent across the tier: a hopper-fed auger pushing hardwood pellets into a fire pot, a combustion fan, an RTD temperature sensor, and a digital controller managing pellet feed to hold a set point. Fuel: food-grade hardwood pellets (hickory, apple, cherry, competition blends). Heat source: fire pot with an igniter rod, variable-speed auger, and combustion fan. Control: digital set-point controller with an RTD probe; some models add a meat probe. Cooking modes: low-and-slow smoke through high-heat searing, plus indirect roast and bake. The larger tier adds cooking real estate and, in most listings, a taller lid and additional upper rack. What it generally does not change is the controller logic, so temperature behaviour on a large Oakford Pro should be evaluated the same way you would evaluate a mid-size unit. How to Evaluate Cooking Capacity: Square Inches, Rack Levels, and Real Feeds Advertised square inches are almost always the sum of the main grate plus any upper rack, and sometimes the warming rack too. Ask two questions: how many square inches are on the main grate alone, and how many usable rack levels exist? A three-rack configuration lets you smoke a brisket on the main grate, chicken on the middle, and sides on top during the same cook. 225°F Typical low-and-slow set point for pork butt and brisket; check a unit's ability to hold this within roughly ±15-25°F, per most reviewers. A full packer brisket can run 12-18 lb and needs 18-24 in of flat grate length. Two full racks of St. Louis ribs need roughly 24 in of width if laid flat. If a large Oakford Pro claims roughly 1,400 in across all racks, expect the main grate to be in the 700-900 in range - enough for a brisket plus sides, but not for three briskets at once. Temperature Range, Control, and Heat-Up Time: What to Test and What to Expect Pellet grills in this class generally advertise a range from about 180°F for smoke up to 450-500°F for grilling and searing. A standard set-point PID-style controller holds temperature better in cold or windy conditions than a simple timed-feed controller. In practice, a well-tuned large pellet grill reaches 225°F from cold in roughly 12-20 minutes, depending on ambient temperature and pellet quality. Judge a unit on three repeatable measurements: Overshoot: does the grill sail past the set point after ignition, then settle? Recovery: how fast does it return to set point after you open the lid for 30 seconds? Spread: is the left-to-right variance across the grate within 25°F at 250°F? If a review does not report at least overshoot and spread, treat the temperature discussion as marketing rather than data. Build Quality and Materials: What to Inspect on the Unit Walk the floor model, or examine high-resolution photos before ordering online, and check five points. First, lid weight and seal: a heavy lid with a tight gasket holds heat and reduces pellet burn. Second, fire pot and auger access: you should be able to reach the fire pot for cleaning without disassembling the hopper. Third, steel gauge on the cook chamber and cart: thicker gauge resists warping at high heat. Fourth, powder-coat versus stainless exterior: powder-coat is fine for most US climates if you cover the grill; stainless resists coastal salt air better. Fifth, wheels and cart rigidity: a large-capacity grill with a full hopper can exceed 150 lb, so locking casters and a braced cart are not luxuries. Warranty and Parts Support: A Real Differentiator in This Price Class Pellet grills are mechanical: augers jam, igniters fail, controllers drift. Warranty length and coverage vary by component, and Nexgrill's warranty terms should be read on the specific product page rather than assumed. Before purchasing, confirm which parts are covered, for how long, and whether shipping is included on replacements. Nexgrill's US retail footprint and its company background are a reasonable proxy for parts availability, but the specific terms are what protect you. Do not assume a warranty length from a review. Warranty terms are stated per model and can change by season. Read the current terms on the exact product page you are buying from. What to Look For: A 5-Point Review Checklist for Any Large Oakford Pro Criterion What to Confirm Why It Matters Main grate area Square inches on the primary grate alone, and number of rack levels Determines whether a brisket plus sides fits on one cook Hopper capacity Pounds of pellets, and expected burn time at 225°F A long cook should not require a mid-cook refill Controller and probes Controller type, probe count, calibration method Temperature control is the biggest performance differentiator Build materials Steel gauge, lid seal, fire pot access, cart rigidity Drives lifespan, heat retention, and clean-out ease Warranty and parts Covered components, duration, shipping policy Protects you against auger, igniter, and controller failures Try comparing two products side by side below to see which fits best:

Oct 14, 202612 min read
Read more
Nexgrill Oakford 1125 Pro Pellet Smoker GrillPellet Grills

Comprehensive Guide to Troubleshooting Pellet Grill Issues

Introduction: Understanding Pellet Grill Challenges Pellet grills are prized because they automate a lot of the work that older wood-fired cookers demand, but that convenience depends on a chain of parts all doing their jobs at the same time. Pellets need to stay dry and free-flowing, the auger has to move fuel at the right pace, the fire pot has to ignite cleanly, the fan has to feed oxygen, and the controller has to interpret temperature accurately. When one of those links slips, the grill usually tells you long before it stops working completely: the startup cycle runs longer than usual, the temperature drifts up and down, smoke turns dirty or thin, or pellets simply stop feeding. This guide takes a troubleshooting-first approach rather than a feature-first one. Instead of explaining why pellet grilling is popular, it focuses on what actually goes wrong in day-to-day use and how to isolate the cause without replacing parts at random. That distinction matters. A hopper full of pellets does not mean the fuel system is healthy, just as a lit fire pot does not mean the grill will hold 225°F for an hour. Real troubleshooting starts by separating symptoms that look similar but come from different failures. A grill that will not ignite, for example, can be suffering from a failed hot rod, a weak power source, excess ash in the fire pot, wet pellets, or a controller issue. A grill that overshoots temperature may have a draft problem, a probe issue, or a lid leak that keeps the control system chasing the set point. Nexgrill’s broader outdoor cooking perspective is useful here because pellet grills sit at the intersection of fuel handling, heat control, and easy backyard use. That means the best fix is often not the most complicated one. In many cases, careful cleaning, correct startup procedure, and a basic inspection sequence solve the problem faster than swapping electronics. For users who cook on weekends, those small habits make a noticeable difference in how dependable the grill feels from one cook to the next. It also helps explain why pellet grill problems often show up after storage, after a long rainstorm, or after a few messy high-heat cooks rather than during the first few uses. Most pellet grill failures are symptom clusters, not single-part failures. Start with fuel, airflow, and ash buildup before assuming the controller is the problem. One useful way to think about troubleshooting is to work from the grill’s “ecosystem.” Pellets must flow from the hopper, through the auger, into the fire pot, where the ignition rod and combustion fan create a stable burn. Heat then reaches the cooking chamber, where the temperature probe relays information back to the controller. If you know which part of that chain is breaking down, the repair becomes much more manageable. For example, a grill that lights but never climbs much above warm usually points to fuel delivery or airflow. A grill that climbs too fast and then shuts down can point to an overfed fire pot, blocked airflow, or a probe reading that is too low. Another reason to treat pellet grill issues carefully is safety. If the grill has repeatedly failed to ignite, the fire pot may contain unburned pellets. If the grill has temperature swings caused by an overloaded fire pot or a jammed auger, restarting it without checking the chamber can create flareups or a flash of hot embers. Good troubleshooting always begins with powering down, letting the unit cool, and clearing out the combustion area before making the next test. That approach protects both the equipment and the cook. The good news is that pellet grills are usually predictable once you learn their patterns. Moisture affects pellets in a recognizable way. Ash buildup creates a recognizable restriction. A failing probe creates a recognizable mismatch between displayed and actual temperature. Once you start matching symptoms to causes, you can move from frustrated guesswork to a practical repair plan that keeps the grill usable through the season. Common Pellet Grill Issues and Their Causes The most common pellet grill issues generally fall into four categories: ignition failure, temperature instability, poor pellet feed, and uneven or dirty combustion. Each one can have more than one root cause, which is why a symptom-by-symptom approach works better than a single fix-all checklist. Ignition problems are often caused by a burned-out hot rod, but they can also stem from excessive ash in the fire pot, a tripped power connection, or damp pellets that refuse to catch. Temperature instability often looks like a controller problem, but it may actually start with air leaks, a dirty temperature probe, or pellets that vary too much in size and moisture content. Pellet feed problems deserve special attention because they can masquerade as other issues. If the auger is turning slowly or stopping intermittently, the grill may start normally and then fade as the fire starves. But the same symptom can happen if pellets have swelled from moisture, if a pellet bridge formed in the hopper, or if the hopper contains a mix of fine dust and broken pellets that compacts around the feed opening. In other words, a feed problem may not be mechanical at all; it may be a storage problem that shows up only when the grill is under load. Grease and ash accumulation also create problems that are easy to misread. Ash inside the fire pot can restrict airflow enough to weaken ignition and reduce heat output. Grease buildup around the drip path can create smoking that seems “off” or make the cooker harder to clean, which in turn discourages owners from performing the regular maintenance the grill needs. The result is a cycle: the grill gets dirtier, performs worse, and becomes harder to trust. Breaking that cycle starts with identifying where residue is interfering with air, fuel, or sensing. Symptom Likely cause First check Won't ignite Hot rod, ash buildup, wet pellets, power interruption Inspect fire pot and confirm pellets are dry Temperature swings Probe drift, lid leaks, airflow problems, inconsistent pellets Clean probe and check lid seal Pellets not feeding Auger jam, bridge in hopper, damp fuel, motor issue Empty hopper throat and test auger movement Dirty smoke Weak ignition, smoldering fuel, poor airflow Check combustion fan and ash level A key thing to remember is that not all pellets are equally stable in storage. If a bag has been opened and stored near a garage door, basement wall, or patio area with humidity swings, the fuel can absorb enough moisture to cause feeding and ignition problems. Even when pellets look normal, they may break down into dust or swell slightly, which can change how they move through the auger. If you are troubleshooting a recurring issue, always ask when the pellets were purchased, how they were stored, and whether the problem appeared after a rainy stretch or a long period of nonuse. Step-by-Step Troubleshooting Techniques A reliable troubleshooting routine should always follow the same order: power, fuel, combustion chamber, airflow, and sensing. Begin by confirming the grill is receiving stable power and that the outlet or extension cord is rated appropriately for the unit. Then check the hopper for dry pellets and look for a bridge where pellets have formed a tunnel above the auger opening. If the hopper looks full but the feed throat is empty, the issue may be the shape of the fuel mass rather than the amount of fuel available. Next, inspect the fire pot. A small amount of ash after normal use is expected, but a packed layer can smother ignition and reduce airflow. Clear ash, remove any unburned pellets, and look for signs that the hot rod is glowing during startup. If the grill fails to light and the hot rod does not appear to heat, the ignition assembly may need service. If the rod heats but the pellets only char instead of catching, that points more strongly to airflow, pellet quality, or excessive residue inside the burn chamber. After ignition, move to temperature behavior. Let the grill stabilize before making any judgment. Pellet grills naturally cycle a bit as they feed fuel in bursts, but the displayed temperature should settle into a narrow band after the initial warmup. If the numbers are consistently low, the issue may be a probe coated in grease or soot. If the grill overshoots and then drops sharply, the controller may be reacting to a delayed signal because the probe is insulated by residue or because the lid is being opened too often during startup. Check for fitment issues around doors, lids, or hopper seals that may allow drafts to disrupt the burn. Never keep relaunching ignition attempts without clearing unburned pellets first. Repeated startup cycles can leave too much fuel in the fire pot and make the next ignition more aggressive than expected. If pellet feed is inconsistent, listen to the auger motor. A healthy system usually produces a steady mechanical sound during feed intervals. Grinding, stalling, or silence can indicate a jam, stripped gear, or an electrical issue. Unplug the grill before removing any covers, then inspect for compacted pellets, sawdust, or foreign debris in the hopper throat. On many grills, a simple empty-and-clean cycle resolves the issue when the problem is caused by swollen pellets or dust buildup. If the auger remains stuck after the chamber is cleared, the motor or shaft may require professional attention. One of the most practical tests for temperature issues is comparison cooking. If the controller says the chamber is at 325°F but food is cooking as if it were much hotter or cooler, the display may be drifting. Use an independent thermometer at grate level to confirm the actual environment. That does not solve the issue by itself, but it helps you determine whether the problem is sensing, airflow, or heat distribution. The more precise your diagnosis, the less likely you are to replace the wrong part. Finally, document what happened. Note the outside temperature, pellet brand or batch, how long the grill had been idle, and whether the issue appeared during startup, mid-cook, or shutdown. Small details create patterns. For example, if the grill always struggles after rain but works normally on dry days, the likely culprit is moisture exposure rather than electrical failure. If the grill performs badly only when the hopper is nearly empty, the issue may be pellet bridging or feed angle rather than a controller defect. Preventative Maintenance Tips for Pellet Grills Preventative maintenance is the easiest way to avoid the most frustrating pellet grill failures. The goal is not to deep-clean every time you cook; it is to keep the critical pathways clear enough that ignition, feed, and sensing remain predictable. Start with ash management. After several cooks, even a well-running grill will accumulate fine ash in the fire pot and surrounding cavity. Clearing that ash on a regular schedule improves ignition reliability and reduces the chance of partial combustion that can create dirty smoke or weak heat output. Pellet storage matters just as much as cleanup. Keep bags sealed, off the floor, and away from moisture sources. If pellets have been opened for a while, move them into a dry container with a tight lid. This is especially important in humid climates or garages that experience temperature swings. Good pellets should feed smoothly, break cleanly rather than crumble into dust, and burn with a consistent flame. If the fuel looks fluffy, swollen, or dusty, do not assume the grill itself is failing until you test with a fresh batch. The temperature probe deserves attention because it is the grill’s eyes. Wipe it regularly so it is not insulated by grease. A sensor covered in residue may report cooler-than-actual temperatures, causing the controller to overfeed pellets and chase the wrong target. Likewise, check the grill lid and any access seals for buildup that might prevent a clean closure. Small leaks can create enough draft to distort the burn profile, especially in colder weather. Another useful habit is to run a short post-cook inspection after every few uses. Confirm that the fire pot is not overflowing with ash, that the hopper throat is clear, that the auger area has not accumulated fine debris, and that the grease management path is flowing as intended. These checks take only a few minutes and can prevent the kind of accumulated mess that causes a weekend cook to fail at the worst possible time. If you cook often, build a simple maintenance rhythm around use frequency rather than the calendar alone. A clean probe, dry pellets, and an unclogged fire pot solve more pellet grill problems than most replacement parts do. For offseason storage, clean the interior thoroughly, empty the hopper if the grill will sit unused for a long time, and protect the cooker from moisture and pests. Pellets left in the hopper through a wet season are a common source of trouble because they can expand, bind, and create feed issues before the next cook even starts. If you use the grill year-round, inspect it more frequently during high-humidity months and after storms. Maintenance also includes control of your cooking habits. Extremely greasy cooks without cleanup afterward create residue that changes how the grill behaves over time. By staying ahead of ash and grease, you reduce the chance that the grill will drift away from the temperature pattern you expect. That steadiness is what makes pellet grilling rewarding in the first place. When to Seek Professional Assistance Some pellet grill problems are best left to a qualified technician or the brand’s support channel, especially when the issue involves electrical components, persistent auger jams, or repeated ignition failures after basic cleanup. If the grill trips power repeatedly, emits a burning smell from the control box, or refuses to power on after you have verified the outlet and cord, that is not a normal maintenance issue. Stop using the grill and have it inspected before trying again. You should also consider outside help if the auger motor runs but the shaft does not move, if the hot rod never heats despite correct power input, or if the controller display behaves erratically after a known-good reset. These are the kinds of failures that can involve wiring, motor replacement, or board-level issues, and guessing can make matters worse. Likewise, if the grill has repeated flareups from a badly overflowing fire pot or if smoke is escaping from areas that should stay sealed, the cooker may need a more thorough evaluation than a routine owner repair can provide. Professional assistance is also smart when the grill is still under warranty terms or when a component failure may affect more than one part of the system. For example, an intermittent controller can appear to be a probe issue, while a worn probe can look like a controller issue. A trained technician can separate those causes faster and often preserve the life of the grill by correcting the root problem before a secondary failure develops. If you are unsure whether a symptom is electrical, mechanical, or combustion-related, the safest choice is to stop, document the behavior, and seek qualified support rather than forcing another cook. Try comparing two products side by side below to see which fits best:

Aug 18, 202623 min read
Read more
Nexgrill Oakford 1125 Pro Pellet Smoker GrillPellet Grills

Easiest Pellet Grills to Clean: Top Models and Maintenance Tips

Introduction: The Importance of Easy-to-Clean Pellet Grills If you are shopping for the easiest pellet grill to clean, you are probably trying to solve a real problem, not chase a shiny feature list. Pellet grilling is popular because it gives you wood-fired flavor with less hands-on fire management than charcoal, but cleanup can still become the part that keeps the grill in the garage instead of on the patio. Ash in the fire pot, greasy drip trays, and grates that collect baked-on residue are the three areas that usually decide whether cleanup feels like a quick reset or a weekend chore. The easiest pellet grills to clean are the ones that reduce ash buildup, let you reach critical parts without a full teardown, and use surfaces that resist sticking and wipe down quickly. Nexgrill’s brand approach emphasizes approachable outdoor cooking that brings people together without making the experience feel overly technical or intimidating, and that idea matters when you are comparing pellet grills. Around a grill, the best cleanup system is not the one with the most moving parts; it is the one that lets you spend less time scraping and more time cooking. That is why cleaning-friendly design should be treated as a core buying criterion, right alongside temperature range and hopper size. In practical U.S. backyard use, that means thinking about how the grill performs after ribs, chicken thighs, burgers, or a greasy holiday cookout, not just how it looks on day one. The easiest pellet grill to clean is usually the one that solves ash removal first, because ash accumulation is the cleanup step most owners repeat after nearly every cook. 3 cleanup zones Ash, grease, and cooking surfaces are the places that matter most when judging pellet grill convenience. For many buyers, a pellet grill that is easy to clean also tends to be easier to trust for weeknight cooking. If it takes only a few minutes to empty ash, wipe the grates, and clear the grease path, you are much more likely to use it after work or on short notice. That convenience is especially valuable for families who want a steady rotation of smoked chicken, vegetables, or reheated leftovers without turning the after-dinner cleanup into a second project. Top Pellet Grills with Simplified Cleaning Features When people compare easy-clean pellet grills, they often focus on brand names first. But the better way to judge them is by the cleaning system each model uses. Some grills emphasize ash cleanout, some use coated grates and smooth interiors that resist buildup, and some add automated or assisted cleaning cycles that cut down on manual scrubbing. The three models highlighted for this article each approach cleanup in a different way, which is helpful because the easiest option for one household may not be the easiest for another. Model Cleaning advantage Best cleaning scenario Traeger Woodridge Pro WiFIRE app control and a built-in cleanup-friendly feature set centered on modern convenience Users who want less hands-on management and a more connected ownership experience Camp Chef Woodwind 36 Patented Ash Cleanout system Owners who want fast ash disposal after frequent cooks Weber SmokeFire EX6 Self-cleaning cycle and porcelain-coated grates Buyers who value simple wipe-down maintenance and less residue on cooking surfaces The Traeger Woodridge Pro appeals to cooks who like a connected grill experience. Its WiFIRE app support and Super Smoke mode make it feel like a modern outdoor cooking station rather than a purely mechanical appliance. From a cleanup perspective, the value is that you are less likely to feel tied to the grill during the cook, which helps keep the experience organized and controlled. When a grill is easier to monitor, it is also easier to finish a session cleanly: shut it down properly, let it cool, and clear the remaining ash or residue before it hardens into a stubborn layer. The Camp Chef Woodwind 36 is the clearest example of a cleaning-first pellet grill because its patented Ash Cleanout system directly addresses one of the most annoying parts of pellet ownership. Ash that falls into the fire pot after a cook can be emptied quickly, which reduces the need to vacuum every time. For many homeowners, that is the difference between a grill that gets used weekly and one that only comes out for special occasions. If you cook often, that ash management advantage compounds over time and can save a meaningful amount of effort over a full season of grilling. The Weber SmokeFire EX6 stands out for a different reason. A self-cleaning cycle is valuable because it supports a low-friction reset after cooking, and porcelain-coated grates are easier to wipe down than bare surfaces that hold onto residue. That combination is especially attractive to users who cook saucier foods, use marinades regularly, or want to avoid aggressive scraping after every meal. In a real backyard setting, the benefit is not perfection; it is making cleanup predictable enough that you do not postpone it. If ash removal is your biggest frustration, prioritize a grill with a dedicated ash cleanout design before comparing extras like app control or side shelves. Maintenance Tips for Keeping Your Pellet Grill Clean Even the easiest pellet grill to clean still needs a maintenance routine. The good news is that pellet grills reward consistent, light care far more than heavy occasional scrubbing. A simple rhythm works best: clear ash regularly, clean the grates while they are warm, inspect grease paths before they clog, and protect the grill from weather so grime does not bake on between uses. That approach keeps the cleanup manageable and helps preserve heat consistency, which is often overlooked until a grill starts performing unevenly. A practical weekly routine for most U.S. backyard cooks looks like this: after the grill cools enough to handle safely, empty the ash system or fire pot, remove grates for a wipe-down if needed, and scrape the drip tray or heat shield before residue hardens. If you cook sweet glazes, barbecue sauce, or fattier cuts like thighs and sausages, grease management becomes even more important because those sugars and fats turn sticky once they cool. That does not mean deep cleaning after every meal; it means stopping buildup before it becomes labor-intensive. Cleaning task How often Why it matters Empty ash from the fire pot After every few cooks, or more often if you grill frequently Prevents airflow problems and keeps ignition reliable Scrape grates while warm After most cooks Stops residue from hardening Check grease tray and drip channel Weekly during active use Reduces flare-up risk and keeps cleanup manageable Wipe exterior surfaces As needed Prevents weather grime and pollen buildup One of the easiest mistakes to avoid is waiting until the end of a long cooking season to do a full reset. Pellet ash mixes with grease, humidity, and dust, and that combination is what turns a straightforward cleanup into a deep scrub. If your grill sits outdoors through humid summers or wet winters, a fitted cover and a dry storage spot for accessories can save a surprising amount of time later. Just as important, keep the hopper sealed and use pellets that are stored dry. Damp pellets can break down into dust and make the fire system messier than it needs to be. The best cleaning routine is the one you will actually follow. A five-minute post-cook habit beats a long, exhausting monthly session every time. If you want to make pellet ownership feel lighter, keep a soft brush, scraper, disposable gloves, and a small ash container near the grill so the reset process feels automatic instead of improvised. Conclusion: Choosing the Right Pellet Grill for Effortless Cleanup Choosing the easiest pellet grill to clean comes down to matching the cleaning system to your cooking style. If you value the fastest ash removal, the Camp Chef Woodwind 36 is the most obvious fit because the Ash Cleanout system directly targets the mess that bothers most pellet grill owners. If you want a smoother, more guided ownership experience with connected control, the Traeger Woodridge Pro offers a modern convenience-first approach. If you care most about simple surface cleanup and a self-cleaning cycle, the Weber SmokeFire EX6 brings a strong maintenance story through its porcelain-coated grates and automated cleaning support. For a casual weekend griller, the best choice may be the model that makes the very first cleanup feel easy enough to repeat. For frequent cooks, the right grill is the one that keeps ash and grease from piling up across the month. And for buyers who want a better balance of value and usability, the smartest move is to compare how each grill handles the three cleanup zones that matter most: ash, grease, and the cooking surface. Try comparing two products side by side below to see which fits best:

Aug 16, 202615 min read
Read more
Nexgrill Oakford 1125 Pro Pellet Smoker GrillPellet Grills

Enhancing Grilling Precision with PID Controllers

Introduction to PID Controllers in Grilling A PID controller on a grill is designed to do one job exceptionally well: keep cooking temperature steady enough that your food behaves predictably from start to finish. For pellet grill owners, that matters more than it sounds. Once you move beyond simple weeknight burgers and into ribs, pork shoulder, brisket, turkey breast, or even delicate baked dishes, a few degrees of drift can change how fat renders, how bark sets, and how evenly smoke adheres. PID stands for proportional, integral, and derivative, and those three pieces work together to reduce the temperature swings that can happen when a grill reacts too slowly or too aggressively to changing conditions. Nexgrill’s brand approach emphasizes dependable, approachable outdoor cooking that welcomes both newcomers and experienced grillers, and that makes PID technology a natural fit for this conversation. A stable temperature system supports the kind of confident, shared cooking experience Nexgrill describes in its brand guidance: outdoors, around good food, with less guesswork and more consistency . In practical terms, a PID controller helps a pellet grill behave less like a blunt on-off appliance and more like a precise cooking partner. If your biggest frustration is seeing a pellet grill overshoot the target temperature or swing too widely during long cooks, PID control is usually the feature worth understanding first. This article takes a practical angle: not just what PID means, but how the controller affects real grilling decisions, how it changes the day-to-day cooking experience, and what to look for if you are considering a pellet grill or thinking about upgrading what you already own. That is especially useful because many grill shoppers focus on headline specs like hopper size or cooking area, when temperature control is often what determines whether dinner feels easy or fussy. How PID Controllers Work in Pellet Grills A PID controller constantly measures the gap between the grill’s current temperature and the target set by the user, then adjusts fuel and airflow to close that gap. The proportional part responds to the size of the error: if the grill is far from the target, it corrects more aggressively. The integral part looks at error over time and helps eliminate long, slow drift. The derivative part watches how quickly the temperature is changing so the controller can avoid overshooting the set point. In a pellet grill, those decisions typically translate into auger feed timing and fan behavior. The result is a steadier chamber temperature than you would get from a simple thermostat that only turns heat up or down in broad strokes. A good way to picture it is as a conversation between sensors and fuel delivery. The temperature probe reads the cooking chamber. The controller interprets the change. The auger meters pellets into the firepot. The fan helps maintain combustion. When the system is tuned well, the grill does not wait for a dramatic swing before reacting; it nudges heat output in small, frequent adjustments. That is why PID-equipped grills often feel calmer in use. They are not necessarily hotter or more powerful in a raw sense. They are simply more controlled. 3 Core signals work together: proportional, integral, and derivative. The main thing to understand is that PID does not mean the grill never moves a degree or two from your target. Outdoor conditions still matter. Wind, cold weather, lid openings, pellet quality, and grease buildup all affect performance. But PID reduces the size and duration of those changes. For the user, that means less babysitting and a smoother path from preheat to plate. BBQGuys explains pellet grills as a category built around convenience and temperature control, while Pit Boss describes PID basics as a tighter method of regulating heat on a pellet grill; both point to the same central idea: better feedback leads to steadier cooking behavior . Advantages of Using PID Controllers for Grilling The first advantage is consistency. If you are smoking at 225°F, consistency helps food move through the cook at a more predictable pace. That is useful for brisket point and flat tenderness, for pork shoulder bark development, and for ribs that you want to finish with the same texture across multiple racks. The second advantage is convenience. With tighter control, you spend less time compensating for temperature swings and more time focusing on seasoning, timing, and rest. The third advantage is better repeatability. If you cook the same chicken thighs every Sunday or run the same rib recipe for a family gathering, PID control makes it easier to reproduce your results. There is also a quality-of-life benefit that experienced grillers appreciate immediately: less drama. Grill temperature spikes can dry out thinner cuts, darken rubs too quickly, or create an uneven smoke profile. When the controller keeps heat steadier, your recipes become easier to trust. That does not replace technique, but it reduces the amount of technique required just to keep the grill in range. For newer grillers, that lowers the learning curve. For advanced users, it improves control and frees attention for airflow, resting, bark, and finishing sauce timing. PID is especially valuable for long cooks, overnight smokes, and recipes that depend on stable low-and-slow heat rather than fast searing. Another practical advantage is fuel management. A controller that reacts more precisely can help avoid excessive pellet feeding caused by large oscillations. Savings are not always dramatic enough to measure from one cook to the next, but over many sessions, smoother control often means less wasted fuel from repeated overshooting and recovery. For U.S. buyers comparing pellet grills , that can influence total cost of ownership as much as the purchase price itself. Top Pellet Grills with PID Controllers Because model features can vary by year and configuration, the safest way to think about PID-equipped pellet grills is by the kind of user they serve. BBQGuys’ pellet grill guide highlights the broader category benefits, while Pit Boss’ controller overview shows why the controller itself can be a differentiator when comparing pellet smokers . The table below shows the kinds of grills shoppers usually associate with PID-style precision, along with the use case that makes them compelling. Grill type Why PID matters Best use case Mid-size backyard pellet grill Keeps weekday cooks steady without constant adjustment Families who smoke chicken, ribs, and pork shoulder Large-capacity pellet smoker Helps stabilize heat across longer cooks and heavier loads Brisket, multiple pork butts, or entertaining Controller-upgradeable smoker Adds precision to older equipment if hardware supports it Owners who want better control without replacing the whole grill If you are shopping specifically for a PID-capable pellet grill, focus less on flashy wording and more on controller behavior, chamber recovery after lid openings, and whether the grill maintains temperature in real outdoor conditions. The most useful models are the ones that hold their target well during wind, cool weather, and long smokes, because that is when temperature control earns its keep. A strong controller should feel invisible most of the time. When it works, you simply notice that the grill stays where you set it. Implementing PID Controllers in Your Existing Grill Retrofitting an existing pellet grill with PID control can be a smart move, but only if the platform is compatible. Some controller swaps are straightforward, while others are limited by wiring layout, probe placement, or auger and fan integration. Before buying parts, identify the exact grill model, check whether the manufacturer or a trusted parts supplier supports a controller replacement, and confirm that the new unit matches your existing electrical connections and sensor setup. Outlaw Smokers offers a dedicated controller product as an example of how aftermarket control systems can be designed for specific smoker hardware rather than treated as one-size-fits-all parts . If you are planning a retrofit, the most important question is not whether the new controller is powerful, but whether it is tuned for your grill’s airflow and fuel delivery pattern. A mismatched controller can create new problems instead of solving old ones. For that reason, experienced installers usually verify probe location, auger cycle behavior, fan operation, and the controller’s temperature range before making changes. It is also worth checking whether the grill already has a reasonable control board that may only need a replacement sensor or updated firmware rather than a full controller overhaul. A retrofit only makes sense when the controller, sensor, auger, and fan all work as a matched system. Buying the wrong board can make temperature swings worse. For many owners, the best retrofit path is incremental. Start with accurate temperature probes, clean the firepot and grease path, inspect the pellets you are using, and then decide whether a controller upgrade is still needed. A dirty burn path or poor-quality pellets can mask the benefits of a PID system. In other words, PID is not a substitute for good airflow or clean hardware; it is a refinement on top of them. Troubleshooting PID Controllers in Grilling When a PID-controlled grill behaves oddly, the first step is to separate controller issues from fuel, airflow, and sensor problems. If the temperature is oscillating more than expected, check the probe for grease buildup or physical damage. If the grill struggles to reach target temperature, confirm pellet quality, inspect the firepot for ash accumulation, and make sure the lid seals properly. If the grill overshoots and then settles slowly, look at startup settings, calibration, and whether the controller has been set for the correct cooking mode. A few troubleshooting habits make a big difference. Keep a simple log of outdoor temperature, pellet type, set temperature, and observed chamber behavior. Patterns show up quickly. A grill that performs well in summer but swings in winter may simply need more warmup time or wind protection. A grill that overshoots after every lid opening may need a calmer recovery setting or better loading habits. If the controller display gives error codes, use the manufacturer’s manual first rather than guessing, because the same symptom can mean different things on different platforms. Before replacing a controller, rule out the simple causes first: dirty probes, ash in the firepot, poor pellets, and lid leaks. Another overlooked issue is expectations. PID improves control, but it does not make a pellet grill immune to physics. A cold windy day will still challenge recovery. A fully packed chamber will still absorb heat differently than a lightly loaded one. The controller’s job is to minimize disruption, not eliminate every environmental variable. Conclusion A PID controller on a grill is best understood as a precision tool for consistency. It helps pellet grills maintain steadier chamber temperatures, reduces unnecessary swings, and makes long cooks easier to manage. For everyday griller and serious pitmaster alike, that translates into more repeatable results and less time spent chasing heat. If you are evaluating a new pellet grill or thinking about upgrading an existing one, PID control is one of the clearest signs that the grill is built with careful temperature management in mind. Try comparing two products side by side below to see which fits best:

Aug 14, 202615 min read
Read more
Nexgrill Oakford 1125 Pro Pellet Smoker GrillPellet Grills

Mastering Pellet Smoking: A Beginner's Guide to Perfecting Your BBQ

Introduction to Pellet Smokers A pellet smoker is built for cooks who want steady, hands-off heat with real wood flavor, not guesswork. Instead of managing charcoal beds or constantly adjusting vents, you load food-grade wood pellets into a hopper, set your target temperature, and let the cooker automate the fuel feed and airflow. That combination makes pellet smoking one of the most approachable ways to cook brisket, pork shoulder, ribs, chicken, salmon, and vegetables at home. It is also the reason many first-time owners feel more confident with a pellet smoker than with a traditional offset pit: the machine does much of the temperature management for you, while still giving you the flavor of wood-fired cooking. From a practical standpoint, the biggest advantage is consistency. If you are cooking in a backyard in the United States where the weather can change quickly, a pellet smoker helps reduce the swings that come from wind, cool evenings, or an impatient lid-opening habit. You still need to learn how your cooker breathes, how quickly it recovers after the lid opens, and how different foods react to smoke, but the learning curve is gentler than many people expect. That is why this guide focuses on real use: how to set up the smoker, how to choose pellets, how to prep meat, and how to troubleshoot the most common problems before they ruin dinner. 1 system, 3 jobs A pellet smoker burns, controls, and circulates heat in one automated cooking path. Tip: Think of pellet smoking as a balance of temperature control and smoke management. The best results come from treating the cooker like a precision oven with wood flavor, not like a fireplace you constantly feed. Nexgrill’s outdoor cooking philosophy fits that approach well: approachable gear, practical features, and food that brings people together. That matters because pellet smokers are often bought by a mixed crowd. Some buyers want weeknight convenience. Others want to experiment with low-and-slow barbecue without committing to the steep learning curve of stick-burning pits. A pellet smoker works for both, as long as you understand what it does well and where it needs help. It excels at even cooking, predictable temperatures, and repeatable results. It is less about raw fire management and more about planning the cook correctly from the start. Before you cook anything, it helps to understand the basics of the fuel system. Pellets are compressed hardwood sawdust made for grilling and smoking. They are not all the same. Some blends are designed for general purpose use, while others lean into stronger smoke flavor or fruitwood sweetness. Since the cooker feeds pellets in controlled bursts, pellet quality affects burn consistency, ash production, and flavor clarity. That is why the first decision you make is not just what to cook, but what fuel to run through the smoker. Setting Up Your Pellet Smoker Good setup is the difference between a clean first smoke and a frustrating afternoon of chasing temperature swings. Start by placing the smoker on a level, non-combustible surface with enough clearance around the body for airflow and safe movement. Make sure the hopper is empty before the first fill if the unit has been stored for a while, and check the burn pot, grease tray, and drip path for leftover ash or packing materials. New owners often rush straight to the meat, but a cleaner cooker starts easier, recovers faster, and produces better smoke. Next, verify the assembly details that actually affect cooking. The heat diffuser should sit correctly, the grease management components should be aligned, and the lid should close without obvious gaps. If your model includes a digital controller, learn the interface before you light it. Set the temperature, read the probe input if applicable, and understand how the cooker indicates startup, ignition, and shutdown. This is not just convenience; it is how you avoid throwing a brisket onto a pit that has not fully stabilized yet. Warning: Never assume a new pellet smoker is ready to cook immediately after assembly. Run a burn-in cycle first to remove manufacturing oils, verify airflow, and confirm that ignition and pellet feed are working correctly. A proper burn-in cycle should be done with the cooker empty. Follow the manufacturer’s startup steps, set the unit to a moderate-to-high temperature, and let it run long enough to heat the chamber thoroughly. This initial run helps season internal surfaces and exposes any setup issues before food is involved. If you notice heavy smoke, a failure to ignite, or an unusual smell that does not fade, stop and inspect the system. Pellet smokers are forgiving when used correctly, but they are much less forgiving when ash clogs the fire pot or the auger does not deliver fuel smoothly. Temperature placement matters too. Built-in controllers read air in one area, but the cooking chamber may run hotter or cooler in other spots depending on your pellet smoker design. If you plan to cook multiple racks of ribs, a turkey, or a large pork shoulder, learn which part of the grate runs closest to the heat source. That awareness helps you rotate food at the right time instead of guessing after the damage is done. Choosing the Right Pellets Pellets are not a background detail. They are the fuel and the flavor. In the United States market, most home cooks choose from hardwood blends such as oak, hickory, apple, cherry, mesquite, and maple. Oak is often a reliable base because it burns steadily and produces a balanced profile. Hickory brings a stronger, classic barbecue taste. Fruitwoods like apple and cherry are milder and work especially well for poultry, pork loin, and fish. Mesquite is bolder and can become overpowering if used carelessly, which makes it better for shorter cooks or blended use. A smart pellet choice depends on both the food and the goal of the cook. If you want a deep bark on brisket, use a stronger wood profile or a blend that supports longer exposure. If you are smoking salmon or chicken thighs, a lighter fruitwood often gives a cleaner finish. Many cooks eventually settle on a two-pellet strategy: one dependable all-purpose pellet for most sessions, and one flavor-specific pellet for special cooks. That approach gives you consistency without locking you into a single taste profile. Pellet type Flavor profile Best use Oak blend Balanced, steady smoke Everyday smoking and long cooks Hickory Bold, traditional barbecue Brisket, ribs, pork shoulder Apple or cherry Sweet, lighter smoke Chicken, turkey, pork, fish Mesquite Sharp, intense smoke Quick high-flavor cooks and blends The most overlooked factor is pellet storage. Pellets absorb moisture easily, and damp pellets can swell, crumble, or feed inconsistently. Store bags sealed and off the ground, especially in humid garages or sheds. If the pellets are dusty or soft, expect more ash and a less stable fire. That small issue can become a big one during a long cook, when inconsistent fuel feed leads to a fluctuating chamber temperature and uneven doneness. Preparing Your Meat for Smoking Pellet smokers reward preparation. Because the cooker is designed for controlled heat, the real work happens before the meat ever goes onto the grate. Start with dry surface seasoning, trimming excess fat where it will not render usefully, and making sure the cut is sized for even exposure to smoke and heat. For a pork shoulder, you want enough fat and connective tissue to break down over time. For a chicken, you want the skin to dry well so it can cook more evenly. For brisket, you want a clean trim that leaves enough fat cap to protect the meat without preventing rub from working into the surface. Seasoning should be purposeful, not busy. Many beginner cooks overload the meat with too many spices and lose the clean smoke character that a pellet smoker can provide. A good rub often starts with salt, pepper, and a few supporting spices, then improves with time in the refrigerator so the meat’s surface becomes tacky. That tacky surface helps smoke particles adhere better and improves bark formation on longer cooks. If you are cooking poultry, a brine or dry brine can make a bigger difference than adding more seasoning layers. Food safety still comes first. Keep raw meat chilled before the cook, avoid cross-contamination with prep boards and utensils, and use a reliable probe thermometer for doneness. The smoker can give you excellent texture and flavor, but only a thermometer can confirm whether the food is safely cooked. For big cuts, temperature planning is more useful than time planning because pellet smokers cook at different rates depending on outdoor conditions, meat thickness, and how often the lid is opened. Smoking Techniques and Tips The simplest way to use a pellet smoker is to think in three phases: preheat, smoke, and finish. Preheat the cooker until the chamber is stable, place the meat on the grate with room around it for airflow, and let the smoker work before you keep checking it. Every lid lift costs heat and smoke, so patience matters more than most beginners expect. If you need a crisper skin or a more developed bark, start the cook at a lower temperature and finish hotter. If you need to get dinner on the table with less fuss, a moderate temperature with a shorter smoke window can still produce excellent results. One of the most useful skills is learning when not to over-smoke. A pellet smoker gives a cleaner, lighter smoke profile than some traditional pits, which is often a benefit. It means food can taste balanced instead of ashy. If you want stronger smoke character, use a stronger pellet blend, begin the cook at a lower setting, or leave the meat exposed to smoke during the early part of the session before wrapping. Wrapping brisket or pork shoulder in butcher paper or foil later in the cook can help control dryness while preserving enough bark and smoke flavor. Tip: If your food tastes under-smoked, do not automatically add more smoke pellets later. Often the better fix is improving airflow, checking pellet freshness, and making sure the cooker had enough time to stabilize before the meat went on. For practical timing, chicken pieces may be done in under two hours, ribs commonly take several hours depending on style and temperature, and large shoulders or briskets can take much of a day. Use those ranges as planning tools, not hard rules. What matters is internal temperature, texture, and probe feel. Pellet smokers are especially good for batch cooking, which means you can smoke a main protein while finishing sides separately. That makes them ideal for backyard gatherings where dinner is more than a single dish. Troubleshooting Common Pellet Smoking Issues If the smoker will not ignite, check the obvious first: power, pellet supply, burn pot cleanliness, and whether the startup sequence was followed correctly. Many ignition problems come from ash buildup or pellets that have absorbed moisture. If the temperature will not rise, inspect for airflow restriction, a weak fire, or a lid that is not sealing as expected. If temperatures swing widely, the cause may be low-quality pellets, too much grease buildup, an overfilled hopper feed issue, or simply opening the lid too often in cold or windy conditions. Another common frustration is pale smoke flavor. That is not always a defect. Pellet smokers are often designed for cleaner combustion, so they produce less heavy smoke than a stick burner. If the result feels too mild, try stronger pellets, a longer preheat, or a more smoke-friendly temperature range during the start of the cook. On the other hand, if the food develops a bitter taste, too much smoldering may be happening because of poor airflow or pellets that are not burning cleanly. Grease flare-ups and shutdown issues usually point to maintenance lapses. Clean the drip path, empty ash regularly, and keep the fire pot clear so the pellet feed can do its job. If the auger sounds strained or the grill behaves unpredictably after storage, inspect for pellet compaction or moisture damage. Troubleshooting is easier when you treat the pellet smoker like a system: fuel, air, heat, and cleanliness all affect the final result. If one part is off, the cook usually tells you before it completely fails. Try comparing two products side by side below to see which fits best: Exploring the Latest Innovations in Pellet Grilling

Aug 7, 202618 min read
Read more

Browse by Category

Pellet Grills

Pellet Grills

Discover tips, recipes, and expert advice for wood pellet grilling, smoking, and low-and-slow cooking with Nexgrill pellet grills.

Gas Grills

Gas Grills

Explore grilling guides, recipes, maintenance tips, and outdoor cooking inspiration for Nexgrill gas grills.

Why Choose Us

Premium grilling experience at accessible pricing

We position ourselves as delivering high-end outdoor cooking features and performance without premium-brand pricing, emphasizing “Quality Grills. Unbelievable Value.”

Wide range of outdoor cooking products for every use case

We offer gas grills, pellet grills, griddles, smokers, pizza ovens, portable/tabletop grills, electric grills, accessories, and replacement parts — allowing customers to stay within one ecosystem for all outdoor cooking needs.

Innovation-focused outdoor cooking with smart technology

We differentiate ourselves through smart grilling products like the Oakford smart pellet grill, including app-connected cooking controls and modern outdoor cooking technology.

What Our Clients Say

Hear from businesses we have helped succeed

“I’ve been using the Nexgrill Daytona 4-Burner Gas Griddle for a while now, and I’ve been really happy with it. First off, it’s super sturdy and feels really well-made, like it’s going to last me a long time. The cooking space is awesome—plenty of room for making big meals. So far I’ve cooked pancakes, burgers, bacon and some veggies. The 4 burners make it easy to control the heat in different areas. I love that I can keep one side hotter for searing and leave the other side cooler for things that don’t need as much heat. Plus, it heats evenly, which I was really glad to see. The shelves underneath and on its sides are a nice bonus. I’ve used them to keep things like plates, tools, and ingredients handy while I’m cooking, it’s very convenient. Cleaning it is super simple too. Once it cools down, I just wipe off the cooking surface and let the grease funnel into the trap. It’s quick and easy, and honestly, it barely looks like I even used it. If I had to nitpick, the grease trap can fill up kind of quickly during bigger cooking sessions, but as long as you keep an eye on it, it’s not a big deal. Overall, this griddle has been great. It’s sturdy, easy to use, and makes cooking outside a lot of fun. If you’re into grilling or want something versatile, I think this is a solid choice. Originally posted on influenster.com”

M
martind23_2941
Sturdy, easy to use, and perfect for cooking big m

“took about 2-3 hrs for complete assembly. took about 15-20 minutes to fully heat to 700. used a pan liner and a drip cup liner due to previous issues with those rusting away. this is about the 3-4 grill i have assembled. dont try to do it alone or ask the wife for help with the firebox its awkward. always check the directions 2-3 times before tightening down and dont over tighten the screws. hopeing for 5 years of grilling on this but i havent checked the warrenty yet.”

DT
Dave the Griller
finally got around to building this.bought in 2025

“We just bought this guy and I recommend always buy it assembled, we just use the grill 2 times and really works good; is perfect size and the side burn is very useful plus the caddy attach for spices; the material quality is in medium rate; no too cheap no too expensive I'll be glad if it works for minimum 5 years. Nexgrill could improve with the way, and cleaners to not damage the grates and the burners. I protect the removable pan with heavy duty aluminum foil, when the grease drop I only change the foil. Well I am enjoying my new Nexgrill !!! P.s. always clean the grill after use it....ALWAYS :-)”

KA
Karl A
Nice Grill

“Thank you to Influencer and Nexgrill for sending this to me for free, in exchange for my honest opinion. My 17 year old son put this together for me. It was easy but time consuming, it took about 2 hours. This is great for families, because you can cook a good amount of food in a short time. We did tacos, but it’s also great for breakfast, pancakes, eggs, breakfast burritos. It’s easy to clean if you have the right tools, you’ll need a scraper and metal spatula. Overall I would recommend this flat grill, it’s a great addition to our household. Originally posted on influenster.com”

K
KellyL
Quick and easy cooking

“My old Nexgrill is 25 years old and still looking and performing well! This new one is going on our back patio to partner with the old one in our courtyard. Obviously quality products to last that long. I hope the new one does as well. The only concern I have is that the sides are painted metal rather than stainless like the old one. I hope it doesn’t rust over time. But, We are very happy grillers!”

JS
Judy S
New grill to partner with my old one

“Bought grill 3 years ago stainless grates rusted out had to order new ones to replace Yes, I recommend this product.”

G
GaryS329
Stainless

“I’ve always been a smoker, fryer kind of guy. But recently with my new job keeping me super busy I’ve been cooking on my father in-laws 2 burner grill and it takes so long to cook ribs and chicken. I love just lighting the burners and cooking so I decided to upgrade by buying my own and I got this 5 burner with side burner for veggies , took me maybe 20 minutes to get all the dinner done tonight after I seasoned the grill with an onion. Love it so far, I hope it lasts a long time! It’s beautiful!”

JB
Jason B
Love it so far! My first propane grill I’ve ever bought myself!

“I love your grills. This is a replacement grill for a fully stainless steel one (was suppose to be). We originally bought it for our daughter's new townhouse, but her patio was not "ready" for it. We have kept it for 5 years now. My husband passed, I sold the house and move it, in the original box, with me and just put it together. The”

LG
Lisa G
Replacement

“Purchased a 5 burner with side burner grill probably 7-8 years ago. You can only replace things for so long. Opted on a smaller 4 burner grill this time. Hoping to get lots of use for many years to come.”

BS
Brian S
2nd grill with out

“Easy grill to use & grills well. Last grill lasted a little over 6 years. Had to replace burners twice (just worn out - lots of use). Here is old grill & new grill.”

RE
Russell E
2nd Nexgrill

“I had either recieved or bought a grill from either webber or Charbroil. Both had lasted roughly 5 years each before rusting out. For the price point and the way this grill feels I think this one should last longer. Looks awsome new so hopes are high.”

VA
Victor A
3rd grill so far...

“I’m just setting up my second 5 burner nexgrill!!! My first one was purchased in 2015!! I live in New England and the grill lived outside for 7 1/2 years!! That is an impressive lifespan for a grill in my area! I’ll be a loyal Nexgrill customer for life. Thanks very much. Yes, I recommend this product.”

L
Litch
Robust grill with Longevity to boot

“This grill is good for an economy grill. My 10 year old assembled most of it. I knew that I was getting a budget grill and didn't expect a Cadillac. I bought it mainly because the burners have flame on the left and right, instead of one row on the top. I checked the temperature gauge vs my digital and it runs 50° high, didn't expect it to be right on. The burner tents are higher in the front, making it hotter in the front. I have snips so I'll cut the front to set level. I seasoned the grill with bacon, it leaked from the screw to the drip pan, which was tight. The corners are sharp. I had corner protectors for my smoker and put some on the Nexgrill, hoping to get more life from the cover. Overall it's pretty good for the price.”

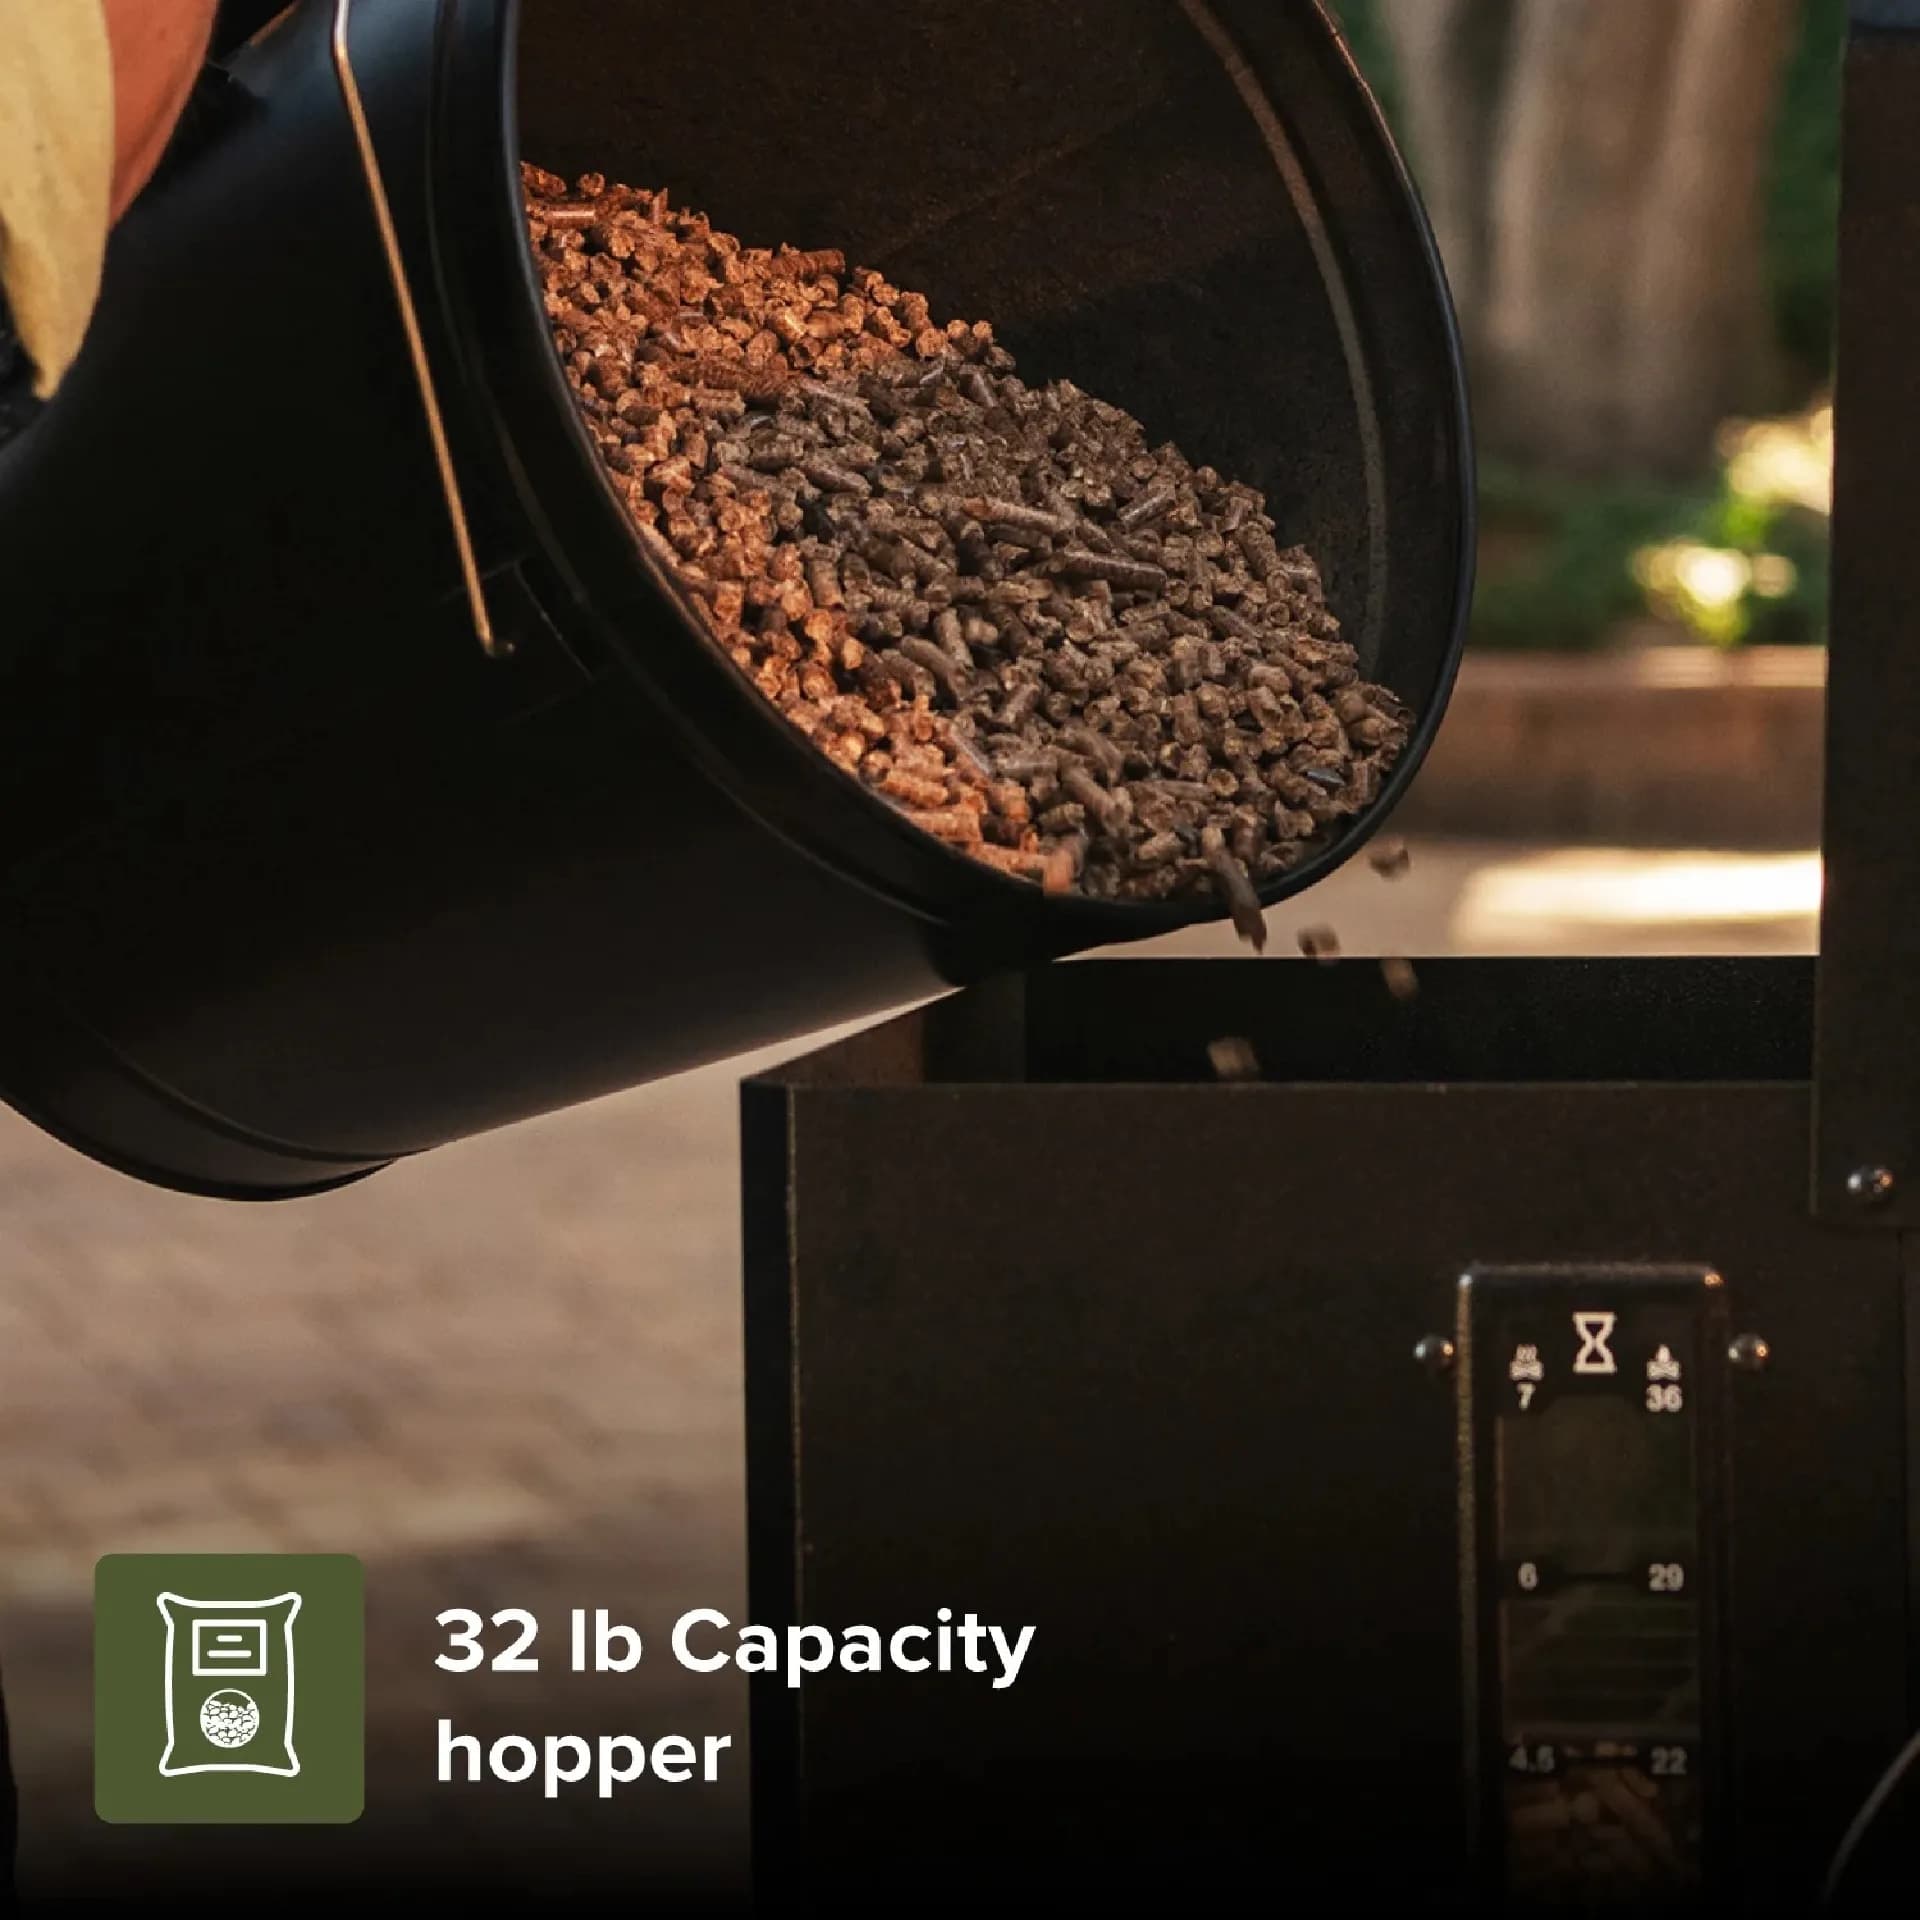
DK
Daniel K
Easy to assemble
4.7/ 5
·13 reviews