Nexgrill
Gas Grills

Gas Grills Articles

News, advice and articles about Gas Grills

Latest Gas Grills Articles

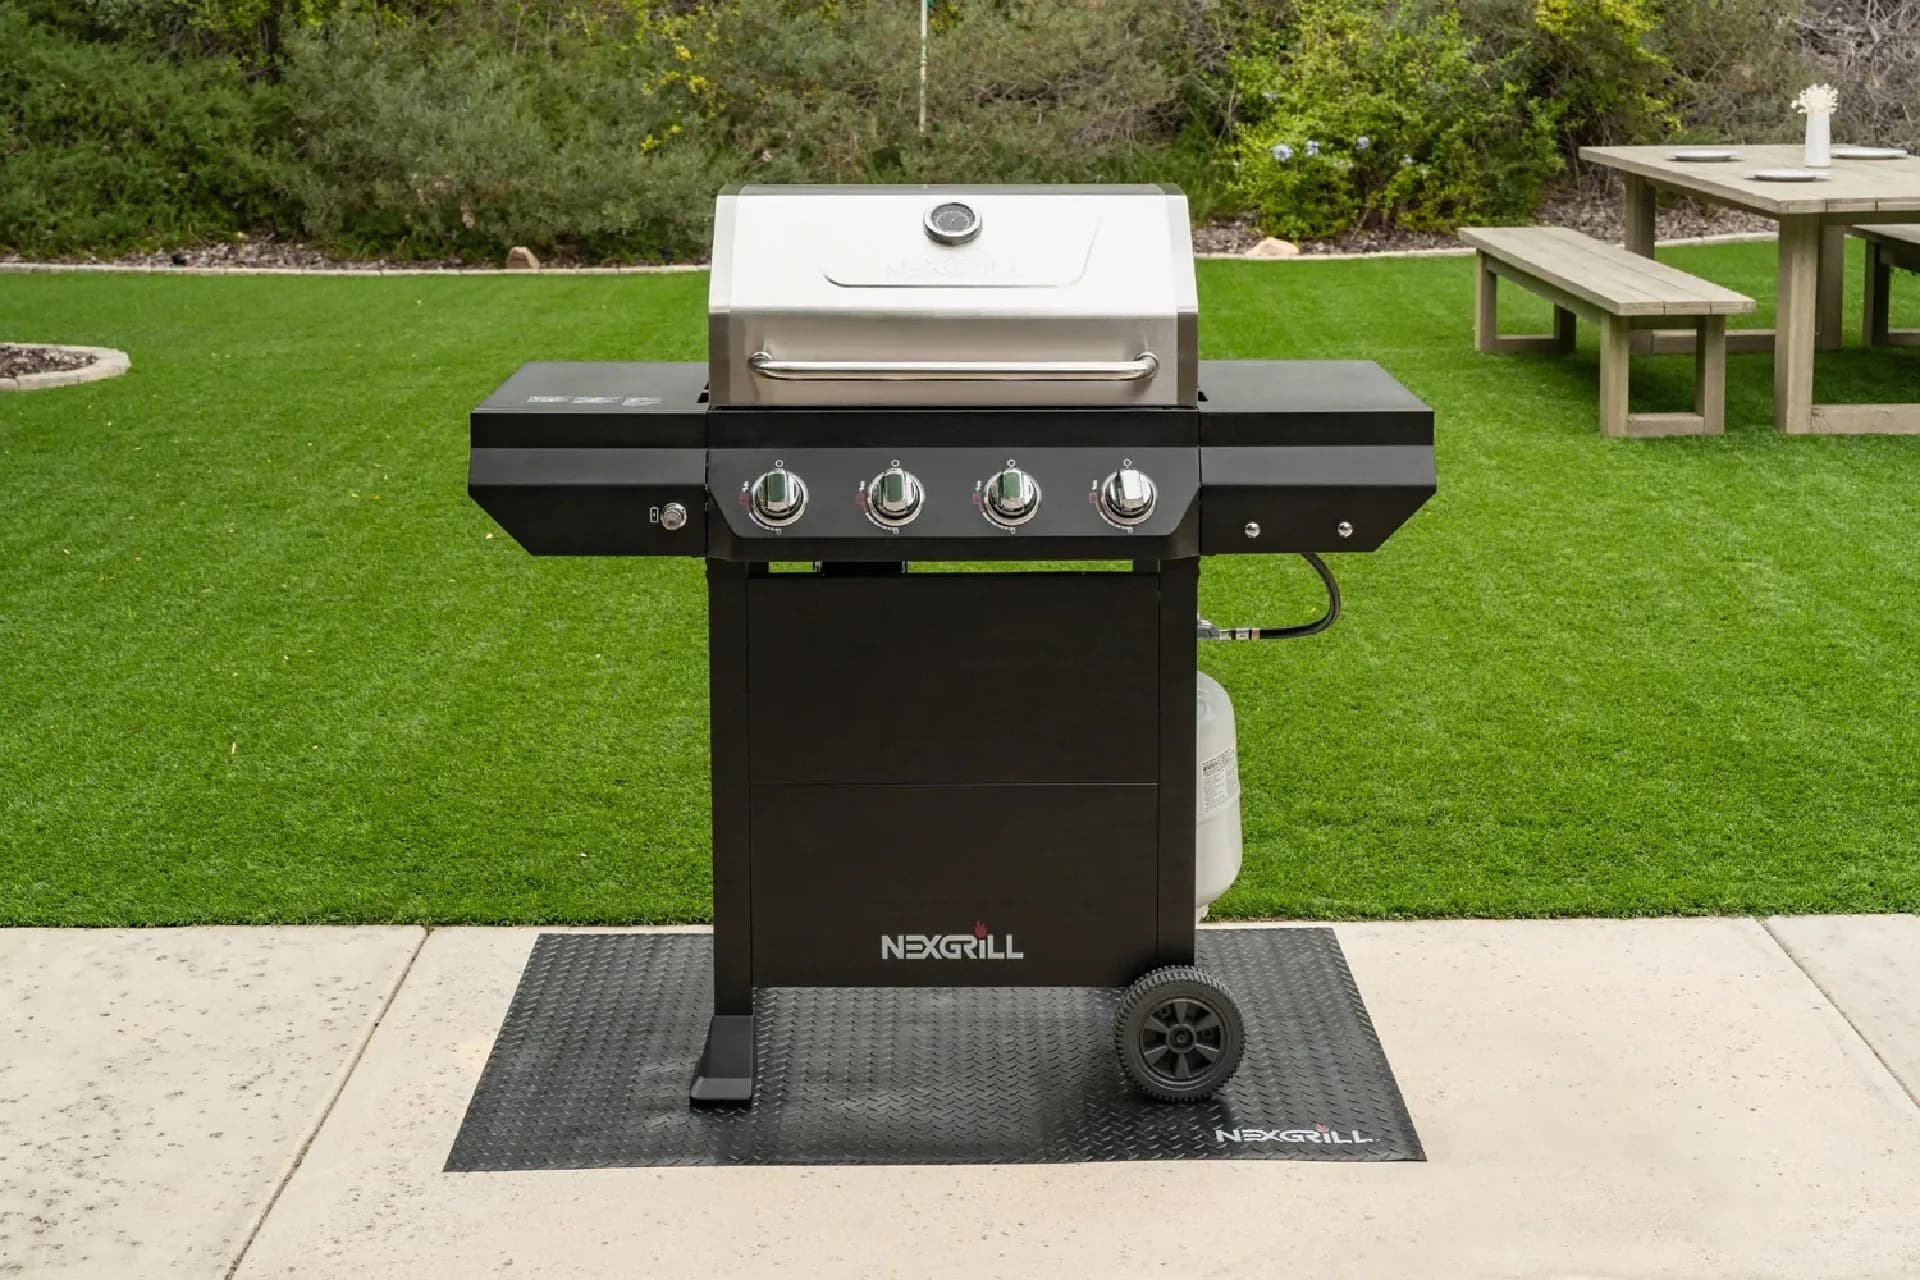
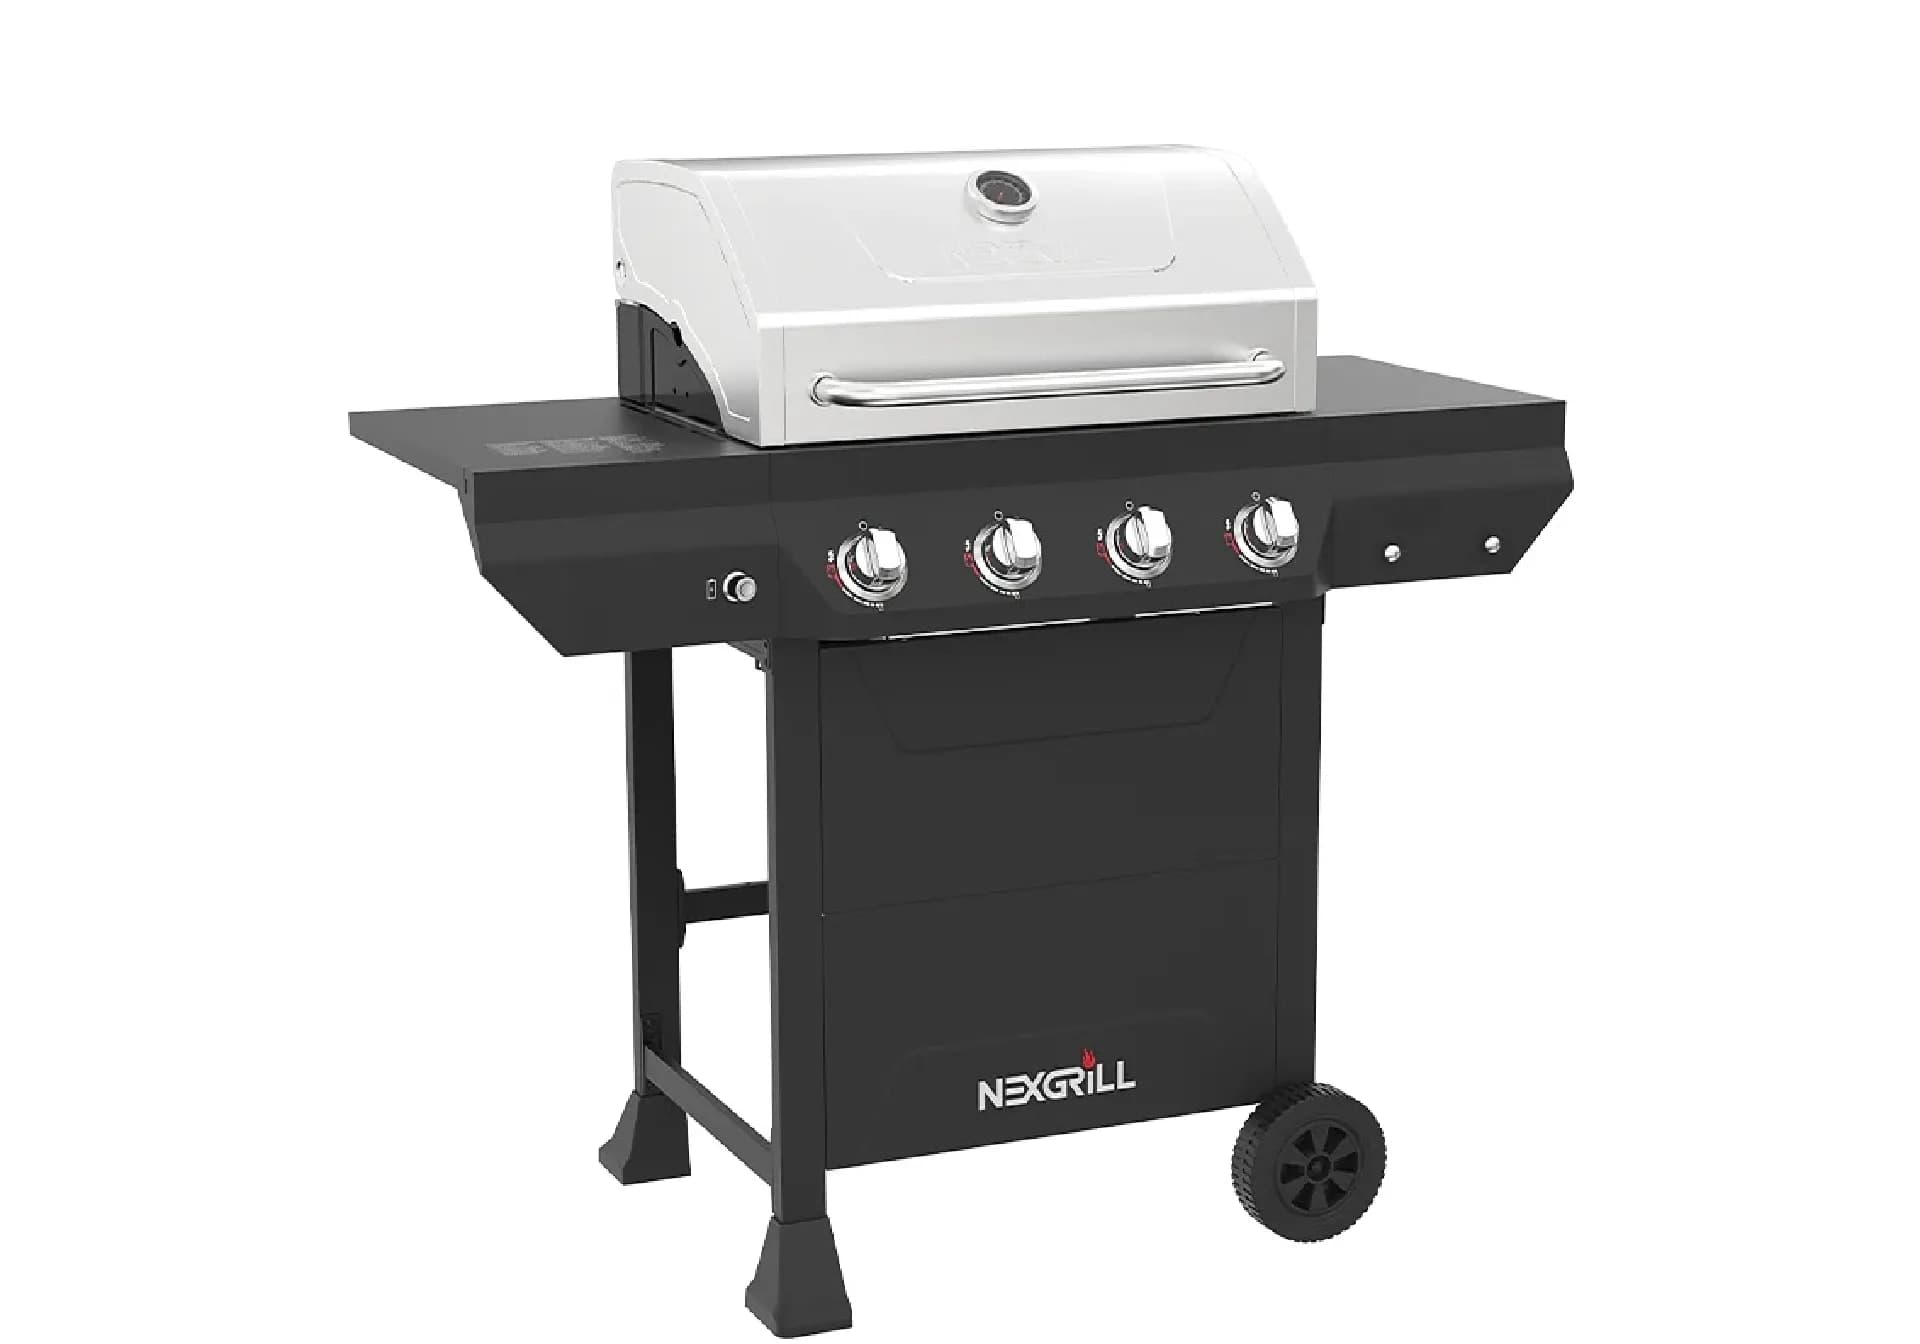
Nexgrill 4-Burner Gas Grill with Side Burner in BlackGas Grills

Nexgrill Gourmet Pro 6-Burner Manual: A How-To Guide for Owners Who Already Built the Grill

Your Gourmet Pro 6-Burner Is Built - Now Make the Manual Work for You Most owners read the booklet once, during assembly, then file it in a drawer. That is a waste. The manual that shipped with your six-burner gas grill is the only document that describes the operating sequence, leak-test procedure, and troubleshooting matrix for the exact unit sitting on your patio. Once the frame is bolted together, the useful half of that booklet begins: how to light it in the correct burner order, how to configure a two-zone cook on three burners per side, and what to check when a burner stops lighting. This guide treats the manual as a field reference for an already-built grill. It walks through six practical steps - confirming your revision, running the leak test at the start of the season, following the lighting order, setting up zones, inspecting burner tubes and heat tents, and working the troubleshooting matrix - then covers the maintenance cadence and part-sourcing path that keep a six-burner running for years. If your grill is still in pieces, this is not the article for you; go back to the assembly section. The manual is written around a fuel system under pressure. Every step below assumes the gas supply is off and the lid is open before you begin. The CPSC's grilling safety guidance treats LP gas handling as the single most important thing a backyard cook controls. What the Manual Actually Covers (It's More Than Assembly) A typical Nexgrill gas grill manual runs 20 to 40 pages, and assembly generally occupies the middle third. The sections owners skip are the ones that matter after the frame is standing: Safety and leak-test pages near the front, including the soapy-water method and the warning against testing with a flame. Lighting instructions with a stated burner order and a match-lighting fallback for ignition failure. Cooking guidance covering preheat time, direct versus indirect zones, and lid position. Care and maintenance with a cleaning schedule and storage guidance for the LP cylinder. A troubleshooting matrix at the back, indexed by symptom - low flame, flashback, popping, no ignition. An exploded parts diagram with part numbers for burners, heat tents, igniters, and regulators. That parts diagram is worth dog-earing now. In two or three seasons, when a heat tent rusts through or an electrode cracks, the diagram is far faster than a support call. Prerequisites: Five Things to Gather Before You Open the Book Set these out before you start, so you are not hunting mid-procedure: the manual itself, a spray bottle of soapy water (one part dish soap to three parts water), a flashlight for inspecting burner tubes, a screwdriver for removing heat tents, and a photo of your data plate. The data plate is typically on the inside of the cabinet door or the back panel, and it carries the model number (often a 720-xxxx or 810-xxxx string) plus the serial number. Write both down; every support interaction starts there. Step 1: Confirm Which Manual Revision You Own - Once

Oct 21, 20266 min read
Read more
Nexgrill 4-Burner Propane Gas Grill in Black with Stainless Steal main lidGas Grills

Nexgrill 720-1046A Review: How to Evaluate a 4-Burner Grill in 20 Minutes

What a '720-1046A Review' Really Means (It Starts With Identification) Searching for a “Nexgrill 720-1046A review” usually means one of three things: you’re eyeing a used unit on Facebook Marketplace, you need a part and want to match the SKU exactly, or you’re cross-checking a retailer listing that uses a marketing name instead of the model number. The 720-1046A is not a grill family - it’s a specific SKU printed on the rating label. Retail listings often sell the same grill as the “4-Burner Gas Grill with Side Burner in Black,” so the label is your only reliable identifier. This guide gives you a 20-minute inspection protocol you can run on any 720-1046A before you buy, sell, or fire it up for the season. No spec-sheet guessing - just observable tests. The 720-1046A label is usually inside the cabinet door or on the back panel. Photograph it before you commit to a used grill - it’s your key to parts matching later. What You Need Before You Start (and What to Bring to a Used-Grill Meetup) For a thorough review, gather these items. Most fit in a small bag and cost under $20 total. A bright flashlight (phone light works but a focused beam is better) A spray bottle with soapy water (1 part dish soap to 3 parts water) A clean rag or paper towels A thermometer (instant-read or infrared) to verify hood temperature Your phone to photograph the label and any damage A notepad or notes app to record condition signals If you’re inspecting a used grill at a seller’s location, also bring a small adjustable wrench and a propane tank - you’ll need gas to run the leak and heat-up tests. Ask the seller beforehand if the tank is included; if not, bring your own. Plan for 20 minutes of hands-on time, plus setup. Step 1: Read the Rating Label - Where to Find 720-1046A and What Each Line Tells You Open the cabinet door and look for a silver or white sticker, typically on the inside left panel or the back of the firebox. You’re looking for the model number “720-1046A” and a serial number. The label also lists gas type (propane), manifold pressure, and clearance requirements. Photograph the entire label - you’ll need it for parts lookup. If the label is missing or unreadable, treat the grill as unidentified and walk away unless the price is negligible. Cross-check the label against any paperwork or the seller’s listing. The 720-1046A appears in Nexgrill’s catalogue under a descriptive name; you can confirm current listings on the All Products page . Don’t rely on BTU or cooking-area figures from memory - those vary by production year. The label is the authority. Step 2: Inspect the Burner Tubes and Heat Tents With a Flashlight Remove the cooking grates and set them aside. Shine your flashlight down each burner tube. You’re checking for three things: blockages (spider webs, grease clogs), rust-through, and warping. A healthy burner tube is straight, with clean ports (the small holes) and no flaking metal. If you see heavy rust or holes, plan on replacing burners - a set typically costs $40-$80 USD, depending on the year. Next, lift out the heat tents (the V-shaped metal shields above the burners). They should be intact, not rusted through, and sit flat. Warped or heavily corroded tents cause uneven heating and flare-ups. Replacement tents run about $25-$50 USD for a set. If both burners and tents are shot, factor that into your offer. Step 3: Run a Soapy-Water Leak Test on Every Connection Safety first: never test for leaks with a flame. Connect a propane tank (if available) and turn the tank valve on slowly. Brush or spray soapy water on the tank-to-regulator connection, the regulator-to-manifold hose, and the manifold-to-burner connections if accessible. Watch for bubbles - growing bubbles mean a leak. If you see bubbling, turn off the tank and tighten the connection; if it persists, the hose or regulator needs replacement. NFPA and USFA both recommend a soapy-water leak test before first use each season and after any gas component change. Never use a match or lighter to check for leaks. Step 4: Test the Igniter and Check Burner-to-Burner Continuity With the lid open and gas off, press the igniter button. You should hear a sharp click and see a spark at each burner’s electrode. If you don’t see a spark, check the battery (usually AA) and the wire connections. A weak or intermittent spark often means a corroded electrode or a failing igniter module - replacement parts are usually under $20. If the igniter works, turn the gas on and light one burner at a time, starting from the left. As each burner lights, the flame should carry over to the next through the crossover tube. If a burner fails to light, turn everything off and investigate that burner’s tube for blockages. A burner that lights but has a lazy, yellow flame indicates a spider egg sac or grease clog in the tube. Step 5: Examine the Grease Tray, Cart, and Lid for Corrosion Slide out the grease tray. It should be intact, with no holes or heavy rust. A tray that’s rusted through will drip grease onto your patio and is a fire hazard. Replacement trays are often available for $20-$40 USD. Check the cart legs and bottom panel for rust - surface rust is common and manageable, but flaking metal or holes indicate structural decay. Open and close the lid. It should move smoothly without binding. Inspect the lid interior for peeling enamel or heavy grease buildup (a sign of neglected cleaning). The lid’s exterior should be free of deep scratches or dents that could compromise the metal. Step 6: Time the Heat-Up - A 10-Minute Proxy for Burner Health Light all burners on high, close the lid, and start a timer. A healthy 4-burner grill should reach 400-450°F within 10-12 minutes on a moderate day (70°F). If it takes longer than 15 minutes, or if the hood temperature plateaus below 400°F, you likely have clogged burner tubes, a weak regulator, or low gas flow. Record the time and temperature - this baseline helps you track performance after cleaning or part replacements. Once you’ve completed these steps, you have a clear picture of the grill’s condition and the likely cost to bring it to top shape. Try comparing two products side by side below to see which fits best - for example, a used 720-1046A versus a new 4-burner model from Nexgrill’s current line.

Oct 19, 20269 min read
Read more
Nexgrill 4-Burner Propane Gas Grill in Black with Stainless Steal main lidGas Grills

Nexgrill 720-0925PG Review: How to Inspect, Run & Keep a Used 4-Burner Alive

Why the 720-0925PG Model Number Gets Searched So Often Most grill searches are aspirational. This one usually isn't. If you typed 720-0925PG into a search bar, you are probably standing next to a grill you already own, or looking at a used listing you are about to drive across town to see. Four distinct readers land on this page: the owner who pulled the number off the badge behind the lid, the secondhand buyer who pasted it from a Marketplace photo, the parts hunter whose heat tents have rusted through, and the comparison shopper wondering whether a four-burner Nexgrill is worth it at all. That fragmented intent is exactly why a straight spec recital is useless. Nexgrill does not surface a dedicated 720-0925PG product page today; searching the full catalogue returns the brand's current four-burner gas listings, and the closest present-day match in layout and packaging is the 4-Burner Gas Grill in Black with Stainless Steel Main Lid . BTU figures, grate dimensions, and warranty terms varied across production runs, so treat anything you read online as a starting point and confirm against the manual that shipped with your unit. If you need the exact manual or a part number, the fastest route is a direct request through Nexgrill's contact page with your model number and serial ready. Step 1: Decode the Badge - What '720-0925PG' Tells You Before You Lift the Lid The number is not random. Read it in two halves. The leading 720 is the family prefix Nexgrill uses across a large block of its propane grills. The 0925 cluster identifies the specific configuration. And the PG suffix is the part most people miss: it denotes propane gas, not natural gas. That single detail decides which regulator, hose, and orifice set the grill needs - and it's the most common source of confusion when someone buys a used unit that was previously converted or partially rebuilt. The 4 in the badge family points to a four-burner main cooking array, typically paired with a side burner on this class of cart grill. Before you lift the lid on any used unit, find the rating plate - usually a silver sticker on the back panel or inside the cabinet door - and photograph it. A plate that disagrees with the listing photos is your first red flag. Where the 720-0925PG Actually Sits in Nexgrill's Line-Up Nexgrill has been building outdoor cooking equipment since 1993 and now sells under both Nexgrill and KitchenAid badges, so the catalogue is wide. The 720-0925PG sits in the mainstream four-burner propane tier - the workhorse size for a household that grills two to three times a week and hosts a handful of larger cooks per season. Tier Typical buyer What matters most 2-burner cart Couples, balconies, weeknight cooks Footprint, fast heat-up 4-burner (720-0925PG class) Families, regular hosts Zone control, parts availability Pellet smoker Low-and-slow enthusiasts Temperature stability over hours If you are comparison shopping rather than repairing, the current four-burner gas line and the Oakford 875 Pro Pellet Smoker Grill represent the two most common upgrade paths from this class. Before You Fire It Up: The Three Things You Need in Place A spray bottle of soapy water - roughly one part dish soap to three parts water. This is your leak detector and it costs pennies. A known-good propane tank - not the one that came with a used grill unless you can see the date stamp and it is within certification. Twenty minutes of daylight - do not run these checks at dusk with a phone torch. You need to see bubbles and flame colour clearly. Never leak-test with a flame. The U.S. Consumer Product Safety Commission is explicit that soapy-water testing is the correct method - a lit match near a fitting is how garage fires start. Step 2: Run the Leak Test Before Anything Else Connect the tank, then brush soapy water on every joint in the gas path: the tank valve thread, the regulator-to-hose connection, the hose-to-manifold fitting, and each burner tube inlet. Open the tank valve slowly - a quarter turn, then full. Watch for expanding bubbles. Slow, steady bubbling at the regulator means the diaphragm is tired; bubbling at a threaded joint usually means a missing or hardened O-ring. This step matters more on a used grill than a new one because regulators and hoses age in the weather. A grill that sat uncovered for two winters in a Florida backyard and one stored in a California garage present very different risk profiles, and neither seller is going to mention it in the listing. Step 3: Check the Igniter Spark and Burner Continuity With the lid open and the gas off, press the ignition button and listen for a crisp tick at each collector box. Weak or silent clicks point to a corroded electrode or a cracked ceramic insulator - both replaceable. Then light the burners one at a time and read the flame. You want a blue body with a small orange tip and flame carrying evenly down the length of each tube. Yellow, lazy flames or a burner that lights and then lifts off the ports signals a blocked orifice or a spider nest in the venturi - common on grills stored outdoors. 1 in 4 Roughly one in four used gas grills inspected by experienced buyers needs an igniter or burner tube replaced before the first cook (owner-reported, varies by storage history) Step 4: Inspect Grease Management and Heat Tents Pull the cooking grates and look at the heat tents (the angled metal shields above each burner). Surface rust is normal; rust-through holes are not, because dripping fat will hit the burner directly and flare. Then slide out the grease tray. A tray caked with a season of hardened fat tells you the previous owner never cleaned it, which usually means the cabinet floor has been damp and the cart is softer than it looks. Step 5: The First Cook - What to Watch For in the First 20 Minutes Preheat on high with the lid closed for ten to fifteen minutes, then drop to medium. Watch for a burner that won't hold a low setting, hot spots larger than a burger patty, or a temperature that climbs despite the knob being turned down - all signs of a worn valve. Start with something cheap and forgiving, like chicken thighs, before you commit a $40 ribeye to an untested grill. Which Readers Should Compare Two Grills Side by Side If you are repairing an existing 720-0925PG, run the steps above and you'll know within an hour whether it's worth saving. If you're the secondhand buyer, you're deciding between this grill and something else on the market. And if you're the comparison shopper, you're weighing a four-burner gas cart against a pellet smoker or a griddle entirely. All three of you can put two models head to head below to see which fits your cooking reality:

Oct 18, 202610 min read
Read more
Nexgrill 4-Burner Propane Gas Grill in Black with Stainless Steal main lidGas Grills

Nexgrill 720-0830H Assembly Instructions: Build Order, Tools, and Pitfalls

Before You Open the Box: Space, Helper, and Tools to Line Up The single biggest mistake people make with the 720-0830H is starting the build on a hard driveway with a single screwdriver and a bad attitude. The grill arrives as a flat-pack of steel panels, burner tubes, and several small hardware bags, and the cart frame alone needs room to lay flat while you square it up. Give yourself a 10-foot by 10-foot patch of level ground - a garage floor or a covered patio is ideal - and lay down a moving blanket or a flattened appliance carton. Cardboard protects both your finish and your knees, and it makes dropped screws visible instead of invisible against dark concrete. Line up a Phillips screwdriver, a socket set with an adjustable wrench as backup, a flashlight or headlamp for the cart's interior corners, and a small cup or muffin tin for sorting hardware. If you can recruit a second person for 15 minutes of the build, do it - the firebox lift over the cart rails is the physical failure point of this assembly, and one person balancing a firebox while threading a bolt is how brackets get bent. Plan for a second set of hands even if that person only shows up for that one phase. Tip: Before touching a single bolt, pull the owner's manual and any assembly PDF from the Nexgrill support pages. Models in this long-running 4-burner LP family have shipped in more than one variation, so confirm the cover of your manual matches your carton before you assume a side burner or a specific hardware count. Inventory the Hardware Bags Against Your Manual's Callouts The most reported friction in this build is not difficulty - it's labeling. Manual step callouts might say "use bolt (34)," while the actual bag is printed "34A," and a second bag holds a near-identical bolt one millimeter shorter. If you dump all hardware into one pile, you will guess, and guessing on thin sheet steel is how you cross-thread a weld nut. So do an audit first. Open every bag, empty it into its own labeled cup, and count against the manual's parts list. This typically takes 10 to 15 minutes and routinely saves more than that. Note anything short or damaged immediately - replacement hardware through the Nexgrill contact page is straightforward, but only if you catch it before Step 8. Group by the step number that first calls for that bolt, not by size. Set aside the bolts used for the firebox-to-cart phase in a separate cup - those are the ones you'll reach for while supporting weight. Keep washers and lock washers in their own dishes; mixing them up is a classic mid-build stall. Photograph the sorted layout on your phone so a dropped bag can be re-identified later. The Build Order That Saves an Hour: Cart, Firebox, Then Trim Follow the manual's order, but understand why it's ordered that way so you don't "optimize" yourself into re-work. The practical sequence is: build and square the cart, mount the firebox to the cart rails, then attach the lid, side burner, and shelves. Attaching shelves early looks productive and then makes the cart frame wider and harder to flip or shift while you square it. Phase What you're doing Helper needed? 1. Cart frame Assemble legs, panels, and wheels; keep bolts finger-tight Solo is fine 2. Square and tighten Check diagonals, then final-tighten the frame Solo is fine 3. Firebox lift Set firebox on cart rails and start mounting bolts Two people strongly advised 4. Side burner and lid Bolt burner body and valve, then lid and handle Helper helps with lid 5. Shelves and trim Side shelves, front panel, grease tray, warming rack Solo is fine Warning: Do not flip, tilt, or roll an assembled firebox-to-cart unit by yourself. Weight shifts suddenly once the lid and side burner are on, and the cart legs are the wrong thing to grab when it does. Mounting the Firebox to the Cart Without Scratching the Finish This is the step that separates a clean build from one with two scratches on the front panel. Set the firebox on the cart rails with the control panel facing forward and the valve stems lined up with their cart openings, then get one bolt started on each side before tightening either. Starting all bolts loose and tightening in a cross pattern keeps the firebox from shifting a few millimeters and misaligning the last hole. If the manual calls for spacers or heat shields between the firebox and cart, install them before the bolts - they are nearly impossible to slide in afterward. Check your manual for exact placement. And resist the urge to torque the firebox bolts down hard: steel bolts threaded into thin formed sheet can deform the metal around the hole. Snug, then a quarter turn, is enough. Lid, Side Burner, and Shelves: What Bolts On Before What Counterintuitively, the side burner body and its valve assembly typically bolt to the firebox or cart before the lid goes on - and per your manual, you should validate this against your specific illustrations before proceeding. The reason is access: the lid is heavy, it blocks light and working room over the firebox, and the hinge pins are easier to seat when you can see the back of the hinge bracket. Sequence that works: side burner body, side burner valve and gas line connection, then lid and handle. Hinge pins often need a helper to hold the lid at roughly 45 degrees while you push the pin through. Once the lid is on, check that it closes evenly against the firebox before attaching shelves - a misaligned lid traced back to a loose hinge is a five-minute fix, but only if you catch it before shelving obstructs access. Side shelves go last, and their brackets usually share bolts with the front panel, so finger-tight everything until both are seated. Ready to weigh two builds against each other? If you're deciding between this 4-burner cart grill and a flat-top or pellet alternative, try comparing two products side by side below to see which fits your patio and cooking style.

Oct 18, 20269 min read
Read more
Nexgrill 4-Burner Gas Grill with Side Burner in BlackGas Grills

Nexgrill Gourmet Pro 4-Burner Review: Validate the Specs, Then Master the Grill

Before You Buy: Confirm the Model and the Spec Sheet Most disappointing grill purchases start with a label, not a burner. If you are searching for a Nexgrill Gourmet Pro 4-burner review because you saw that name in a store aisle, an online listing, or a marketplace ad, the first useful thing this guide can do is help you confirm what you are actually looking at. In Nexgrill's publicly listed catalogue, product families are named things like Oakford, Daytona, and Deluxe - a specific "Gourmet Pro" line does not appear as a clearly documented collection on the brand's own product pages. That does not mean a grill bearing the label is fake. It usually means "Gourmet Pro" is a trim or marketing descriptor attached to a four-burner gas grill, possibly a retailer-specific bundle. Treat it as a starting question, not a settled fact. That framing matters for a first-time four-burner buyer upgrading from a two-burner. You are about to spend in the estimated $300-$700 USD band that most Nexgrill four-burner gas models occupy, and you will host eight to twelve people a few times each summer. The difference between a well-matched grill and a frustrating one is rarely the nameplate - it is whether the cooking area, burner layout, and build match how you actually cook. Clarity note: this guide does not print BTU or square-inch figures for a "Gourmet Pro" as fact. Those numbers vary by SKU and retailer, so we present expected ranges and show you how to verify the real figures on your own unit. Step 1 - Decode the Rating Plate and Match It to the Listing Every gas grill carries a rating plate - a metal or sticker data tag, usually inside the cabinet door or on the back panel - listing the model number, serial number, gas type, and manifold pressure. Before you trust any online review, photograph that plate and match its model number against the retailer listing and Nexgrill's own catalogue. A listing that says "Gourmet Pro" but ships a carton whose plate reads a different SKU tells you the marketing name and the manufactured model are two different things. Record the number; it is what you will need for parts, burner tubes, and ignition modules two seasons from now. While the plate is in front of you, cross-check four things against the listing: total burner count (main burners plus any side burner), primary cooking area, whether a side burner or sear zone is included, and the fuel type. A standard Nexgrill four-burner with a side burner in black and a four-burner with a stainless main lid can look nearly identical in photos yet differ in lid material, shelf configuration, and included accessories. If the listing and the plate disagree on any of these, ask the seller before assembly day, not after. What 'Gourmet Pro' Likely Signals - and What It Doesn't A "Gourmet"-style trim usually points to convenience extras rather than a fundamentally different firebox: added side shelves, a warming rack, a side burner, maybe a slightly upgraded lid finish or a bundled cover. What it does not reliably signal is a higher-grade burner, thicker gauge steel, or a different heat output. Those are the specs that determine cooking behaviour, and they are printed on the plate and the manual - not in the product name. Spec Typical range (verify at purchase) Where to confirm Main burners 4 + optional side burner Rating plate / listing Primary cooking area Roughly 400-550 sq in Manual spec table Total BTU output Roughly 40,000-60,000 Manual / data tag Fuel Propane (some natural gas) Rating plate Source for the range column: manufacturer and retailer listings - confirm the exact figures for your SKU before buying. Estimated retail for four-burner Nexgrill gas models sits in the $300-$700 USD band; watch Memorial Day, July 4, and Labor Day promotions at Home Depot and on Nexgrill's product catalogue for the widest spreads. Step 2 - Burn-In and First-Heat Procedure A new grill needs a burn-in before food touches the grates. Factory oils and residues need to cook off, and you need to learn how your particular unit heats. Budget roughly 35 minutes and never leave a lighting grill unattended. Open the lid, confirm all knobs are off, then connect and leak-test the propane connection with soapy water. Light per the manual and run all burners on high with the lid open for 10-15 minutes to burn off manufacturing residue. Close the lid and hold roughly 400-450°F for another 20-25 minutes. Let it cool slightly, brush the grates, then wipe or spray a thin coat of high-smoke-point oil to season them. Never light a gas grill with the lid closed and never walk away during the first light. If it does not ignite within a few seconds, turn all knobs off and wait five minutes before retrying. Step 3 - Build a 4-Zone Heat Map on Four Burners Four burners are only useful if you assign them jobs. Before your first cookout, run a simple test: heat the grill to medium, then lay out a two-zone plan and verify it with cheap, visible food. A practical four-burner map is left burner high for searing, the two middle burners on medium for the main cook, and the right burner off or low for resting and indirect finishing. Test it with a 2-inch ribeye seared on the left and finished on the right, and a batch of burgers across the middle two. If the front edge runs hotter than the back on your unit - a commonly reported trait on value four-burners - rotate food a half turn midway and note it on a sticky inside the cabinet door. Which Buyer Does This 4-Burner Actually Suit? Be decisive here. If you routinely cook for eight to twelve people, a four-burner with roughly 400-550 sq in of primary space earns its place: it gives you a sear zone, a cook zone, and a rest zone at once. If you mostly grill for two or three and host twice a year, a two-burner is cheaper to run and easier to store, and this grill is more capacity than you need. If you want flat-top cooking for smash burgers and breakfasts as well as grates, a griddle such as the Daytona 4-burner griddle serves that crowd better than a conventional four-burner. Try comparing two products side by side below to see which fits best.

Oct 17, 20269 min read
Read more
Nexgrill 4-Burner Propane Gas Grill in Black with Stainless Steal main lidGas Grills

Nexgrill Fuse 225 Manual: Get Your 2-Burner Grill Running Today

You Just Got a Fuse 225 Home - Here's How to Get It Running This Afternoon A compact two-burner like the Nexgrill Fuse 225 should be cooking by dinner, not sitting in the garage. Whether it came out of a box, off a Home Depot pallet, or from a previous tenant, the path from parts to first burger stays short only if you do assembly and safety steps in the right order. This walkthrough follows the manual's sequence, flags the mistakes that most often stop a Fuse 225 from lighting, and gives you a pre-light checklist to keep by the tank. Treat the manual as your map. A propane appliance has a gas train - tank valve, QCC-1 regulator, hose, manifold, venturi tubes, orifices - and every joint is a potential leak point. Skipping a page is not the same risk as skipping an IKEA step. The One Number You Need Before You Download Anything Find the rating plate - a silver or white label riveted to the firebox or leg crossbar. It lists the model number and often a serial number. That model number is your lookup key. 'Fuse 225' is a family name; the plate gives the actual SKU variant, which matters because Nexgrill sells similar two-burner carts (Deluxe, Daytona, Fuse) with different burner layouts, regulators, and fastener packs. Snap a photo of the rating plate before assembly. If a part is missing or you need support later, that photo gets you the right component the first time. Where to Find the Real Nexgrill Fuse 225 Manual (and the PDF You Actually Need) Nexgrill hosts assembly and use-and-care documents on its support pages, and product-specific PDFs also appear on retailer listings. Both work, with one key difference. Nexgrill's Manual Hub vs. the Home Depot Product Page Nexgrill's manuals and assembly support page is a lookup: enter or select your model and the matching PDF is served. It is the better route for older, secondhand, or missing-manual grills. The Home Depot product page usually hosts the manual that shipped with that listing - convenient if you bought new and the SKU still matches, but it can change or disappear when the listing is updated. For anything but a brand-new purchase, start with Nexgrill's hub using the rating-plate number. Do not trust a random third-party PDF with no Nexgrill branding or revision date. A manual that predates a regulator change or burner redesign can give you the wrong torque or clearance. Use the version that matches your plate. Step-by-Step: Assembling Your Fuse 225 in the Manual's Order The manual front-loads the frame before the gas train so you are not wrestling a finished firebox while the legs are loose. Follow these five stages. Step 1 - Unbox and Inventory the Fasteners Match every bolt, washer, and pin to the parts diagram before touching the grill body. Compact carts use a few distinct fastener sizes, so cross-contamination is easy. A muffin tin or labeled cups keeps M6 bolts from ending up where M5s belong. If a bag is short, contact support rather than substituting hardware-store bolts - mismatched thread pitch can damage the firebox. Step 2 - Attach Legs and Side Shelves Without Fully Tightening Thread leg and shelf bolts finger-tight only. A two-burner cart is light and twists out of square easily, so loose joints let the frame settle into alignment. Rushing this step causes the 'one leg is short' problem later. Step 3 - Seat the Burner Tubes Over the Orifices This is the most important mechanical step on a gas grill. Each burner's venturi tube must slide fully over the brass orifice at the manifold. If a tube is cocked, gas escapes at the orifice instead of flowing into the burner - you get a weak flame, a flame at the wrong end, or fire outside the firebox. Slide each tube on, confirm it seats squarely, then secure the burner with its retaining pin or screw. Before connecting gas, reach under the firebox and physically confirm both venturi tubes are seated over their orifices. A visual check from above does not show a misaligned tube. Step 4 - Connect the Regulator and Perform the Soapy-Water Leak Test Connect the regulator to a standard 20 lb OPD tank, hand-tight only - no wrench on the plastic QCC-1 nut. Mix 50/50 dish soap and water and brush every joint: tank valve, regulator coupling, full hose length, and manifold connection. Open the tank valve slowly and watch. Bubbles mean a leak - close the valve, fix the joint, re-test. Never use a flame to check for leaks. Step 5 - First Burn-Off and Individual Burner Lighting Once the leak test passes, light each burner individually with the lid open, following the manual's ignition sequence (typically: open lid, turn a burner to high, push the igniter). A 10-15 minute burn-off with the lid closed clears manufacturing oils. Let the grill cool fully, then re-tighten all frame bolts now that the cart is square. The Five Mistakes That Keep a Fuse 225 From Lighting (or Make It Unsafe) Mistake 1 - Skipping the Leak Test Because 'It's Just a Small Grill' A small grill still holds a full 20 lb tank. The leak test takes three minutes and is the cheapest safety step you will ever take. Mistake 2 - Cross-Threading the Regulator at the Tank The QCC-1 nut threads on by hand. Forcing it or using pliers strips threads and creates a leak you cannot seal. If it will not go on smoothly, back it off and start again. Mistake 3 - Tightening Every Bolt Before the Frame Is Square Cranking bolts down early locks in a twist, showing up as a wobbly cart or a lid that will not close flush. Tighten last. Mistake 4 - Lighting With the Lid Closed Gas can pool under a closed lid and ignite suddenly. Always light with the lid open and wait a few seconds for gas to clear before retrying. Mistake 5 - Storing the Tank Under the Grill Without a Cover An uncovered tank and regulator degrade faster in weather. Use a grill cover and keep the tank valve closed when not cooking. Quick Pre-Light Checklist for Your First Cook Rating-plate model number photographed and matched to a Nexgrill PDF Both venturi tubes seated squarely over the orifices Frame bolts fully tightened after burn-off Soapy-water leak test passed on valve, regulator, hose, and manifold Tank valve closed when idle; regulator hand-tight Igniter battery installed and lid open for every light Once assembled and leak-tested, the next question is whether the Fuse 225 is the right two-burner for your patio - or whether a different compact cart or a bigger four-burner fits better. Compare two products side by side below to see which fits best.

Oct 17, 202611 min read
Read more
Nexgrill 4-Burner Gas Grill with Side Burner in BlackGas Grills

Nexgrill Gourmet Pro 6-Burner Review: How to Inspect, Test, and Revive a Legacy Gas Grill

Why a Gourmet Pro 6-Burner Review Starts With the Model Plate, Not the Spec Sheet If you just towed home a used Nexgrill Gourmet Pro 6-burner for two or three hundred dollars off a Marketplace listing, the useful question is not "is this a good grill in 2024?" It is "can this specific unit be made to run safely and evenly for one more summer, and at what cost?" That question is answered by stamped metal and a sticker, not by a spec sheet. The Gourmet Pro is a legacy retail nameplate that Nexgrill built for big-box channels-historically Home Depot-and it does not appear as a current, orderable model on Nexgrill's own product collection. That absence matters: it means there is no live product page to copy specifications from, and any review you read that quotes a precise BTU number for "the Gourmet Pro" is guessing or describing a different year. So treat this as a how-to, not a verdict. You will confirm what you actually own, run a pass/fail inspection, decide repair versus walk-away, and only then talk about money. Everything below is written for the second-hand buyer and the long-time owner reviving a dormant unit. Do not trust the seller's stated model year, BTU rating, or "barely used" claim. The rating plate and a flashlight settle every one of those in under ten minutes. What the Gourmet Pro Nameplate Actually Is (and Where It Sits vs. Today's Daytona and Oakford Lines) Nexgrill has run several retail names over three decades-Gourmet, Deluxe, Daytona, and Oakford among them-and the Gourmet Pro 6-burner belongs to the older, conventionally styled gas family: a cart-mounted cabinet grill with six main burners, usually a side burner, and a stainless or powder-coated lid depending on the year. It is not a flat-top griddle and not a pellet smoker. Today's lineup has moved in two directions this grill predates: the Daytona griddle line (flat-top cooking) and the Oakford pellet and charcoal family (smoke-forward cooking). A working Gourmet Pro still does the job those gas grills always did-direct and indirect heat across a wide surface-so its age is not disqualifying. What is disqualifying is rust you cannot stop. Before You Start: Tools, a Propane Tank, and the 720-Series Number You Need Gather these before you touch the grill, because a cold inspection misses half the problems: A full or half-full propane tank, plus a spray bottle of soapy water Flashlight or headlamp for cabinet interiors Phillips and flathead screwdrivers, adjustable wrench, wire brush Phone camera to photograph the rating plate and any damage A notepad to log pass/fail results The number that matters is a 720-series model code-Nexgrill's legacy grills use the format 720-XXXX. You will need it for every parts search later. Write it down before you do anything else. Step 1 - Locate and Photograph the Rating Plate Inside the Cabinet Open the cabinet doors and look on the inside of the right or left door, the rear panel, or the underside of the side shelf. The plate is usually a silver or white sticker listing the 720 model number, serial, fuel type, and manifold pressure. Photograph it at an angle where the digits are legible. If the sticker is gone or unreadable, you are inspecting blind-negotiate accordingly, because you cannot order correct parts without it. Step 2 - Confirm Burner Count, Side Burner, and Fuel Type Against Your Plate Count the control knobs on the front panel. Six main burners means six primary knobs; a seventh knob usually indicates a side burner, and an eighth may be a rotisserie or sear burner on some years. Confirm the plate says LP (propane) or NG (natural gas). This is not trivia-a natural-gas manifold will not run correctly on a propane tank, and swapping requires a different orifice set. If the seller converted it, ask for documentation; if there is none, assume the conversion was not done and price in a correction. Step 3 - Sanity-Check BTU and Cooking Area Against the 6-Burner Class Range Nexgrill does not publish a current spec page for this legacy model, so compare what is stamped on the plate to the typical range for a mid-size six-burner cart grill: roughly 60,000-72,000 BTU total output and about 700-800 square inches of primary cooking area, with warming racks adding more. A quick sanity check is the BTU-to-area ratio: divide total BTU by primary square inches. Healthy six-burner gas grills generally land in the roughly 80-100 BTU per square inch band. Much lower and the grill will struggle to sear; much higher often signals an overstated figure. 80-100 BTU/sq in Typical healthy ratio for a six-burner gas grill primary cooking area (verify against your own plate) Step 4 - The Five-Minute Pass/Fail Inspection: Burner Tubes, Crossover Channels, and Firebox Seams Three failure points decide most legacy gas grill outcomes. Inspect each one deliberately: Component What to Look For Pass Fail Burner tubes Rust, holes, blocked ports Uniform ports, surface-only rust Perforated or flaking metal Crossover channels Metal bridging burners Intact, lights neighbour Cracked or missing Igniter electrode Ceramic and tip condition Clean gap, strong spark Cracked ceramic or dead spark Firebox seams Bottom and side welds Surface rust only Deep pitting or perforation Cabinet base Lower frame and legs Solid, no flex Soft metal or holes Remove each burner tube by lifting it off the valve orifice-do not force it. Shake it. If rust flakes rain out and you can see daylight through pinholes, that burner is a fail, not a maybe. Crossover channels are the small bridges between burners; if one is cracked, one burner will not light the next. Reading a Used Listing: What 'Works Great' Usually Hides "Works great" is a statement about whether the seller lit it once, not about whether all six burners produce even flame. Expect the listing to omit the 720 number, to disguise firebox rust under a freshly scrubbed grate, and to skip any mention of the side burner's condition. Ask for a photo of the rating plate and a photo of the flames with all six running before you drive anywhere. Try Comparing Two Products Side by Side Below to See Which Fits Best A legacy Gourmet Pro and a current Nexgrill gas grill can do similar cooking work but differ sharply in parts availability and inspection risk. Use the comparison tool below to line up two candidates-the used six-burner you found and a new model-before you commit money to either.

Oct 17, 20269 min read
Read more
Nexgrill 4-Burner Gas Grill with Side Burner in BlackGas Grills

Nexgrill Gourmet Pro 5-Burner Manual: Find It, Read It, Use It

How to Find the Correct Nexgrill Manual for Your 5-Burner Grill If you own a five-burner Nexgrill and the paperwork is long gone, you need the manual written for your exact unit - not one for a similar-looking model. Nexgrill has sold gas grills since its 1993 founding in California, now across gas, charcoal, pellet, and griddle lines through retail partners that include Home Depot. That long product history is why so many owners end up searching for a manual: the grill on your patio may be several seasons old. Treat the manual as a document tied to a model number, not a product name. Locate the rating plate on the grill, confirm the model against Nexgrill's current product listings at nexgrill.com/collections/all , then request or download the matching document through Nexgrill's contact and product support page . Nexgrill does not use model names alone as identifiers. Two grills can share a marketing name across model years and still use different burners, regulators, or orifice sizes. The model and serial number on the rating plate are the only reliable match. Find Your Model Number and Serial Number on the Rating Plate On most Nexgrill gas grills, the rating plate is a silver or white label fixed to the back of the firebox, the inside of the cart door, or the rear of the cart panel. It lists the model number, serial number, gas type (propane or natural gas), and often the manifold pressure and BTU rating. Photograph it with your phone before you go inside to search. Write down the full model number, including any letter suffixes or revision codes. Record the serial number; support teams use it to trace the production run and the correct parts diagram. Note the fuel type printed on the plate, because a propane manual and a natural-gas manual differ in the regulator and orifice sections. When you contact support, provide the model number, serial number, and a photo of the plate so the team pulls the correct document rather than the closest match. Why "Gourmet Pro" May Not Match a Current SKU (and What to Do About It) Retailer-exclusive names and legacy lines are a real complication. A name printed on a box or shelf tag does not always appear as a live SKU on the manufacturer's site. If a search for "Nexgrill Gourmet Pro 5-burner" returns no current listing, the manual is not necessarily unavailable - you just need to identify the grill by its physical characteristics instead of its promotional name. Count the main burner control knobs on the front panel. Five knobs usually indicates five main burners; a sixth knob may be a side burner or a sear burner. Note whether the side burner is present and whether it has its own lid. Check the cart configuration: open cart with legs, enclosed cabinet, or a cabinet with doors. Match these features against the current catalog and images on the Nexgrill site to narrow down the family. If the name does not resolve, describe the grill in those terms when you request support. Physical description plus rating plate data is what actually identifies the unit. What Every Nexgrill 5-Burner Manual Contains: Parts List to Care Schedule Once you have the right PDF, the structure will look familiar regardless of model. A typical five-burner Nexgrill manual moves through a predictable spine: Manual Section What It Covers Why It Matters Parts list and hardware diagram Every bolt, washer, caster, and grate, with quantities Prevents wrong-fastener assembly and missing parts claims Assembly steps Cart, firebox, burners, heat tents, grates, side shelves Sequencing errors are the most common build mistake Leak test procedure Soapy-water test at every gas joint Required before first lighting Lighting and shutdown Ignition sequence, lid position, tank valve order Directly affects safety and burner life Care and maintenance Burn-off, grate brushing, burner tube inspection Extends service life between seasons Troubleshooting Ignition faults, flame quality, regulator flow limits Solves most owner complaints without a service call Before You Start Assembly: Tools, Space, and the Leak-Test Solution Assembly is easier than most owners expect if you set up correctly. The manual specifies a two-person lift for the lid and firebox sections - boxed weights for a five-burner gas grill commonly fall in the 90-130 lb range. Clear a flat, hard surface such as a driveway or patio slab; working on grass or a sloped deck makes cart alignment difficult and increases tipping risk. A Phillips-head screwdriver and an adjustable wrench cover most fasteners. A small bowl or cup keeps loose hardware from disappearing into the yard. Mix a leak-test solution of one part liquid dish soap to two or three parts water. Have a full propane tank on hand, or the natural-gas hose kit if your grill is set up for household gas. Never skip the leak test because the grill looks intact out of the box. Factory fittings can loosen in transit, and the manual treats the test as a prerequisite to the first lighting - not an optional step. Step-by-Step: Assembling a 5-Burner Gas Grill in the Manual's Order Follow the manual's numbered order rather than improvising. A typical sequence for a five-burner Nexgrill looks like this: Inventory the hardware. Lay out all fasteners and compare against the parts list before starting. Build the cart. Attach legs and casters, then lock the casters so the cart does not roll mid-assembly. Install side shelves and the side burner (if equipped) to the cart frame. Lift the firebox onto the cart with a second person, then secure it per the manual's torque guidance - firm, not overtightened. Seat the burners so each tube sits properly over its valve orifice and the venturi openings align with the control valves. Place heat tents and cooking grates in their specified positions; heat tents are directional on many models. Connect the regulator to the tank and hand-tighten only, then run the leak test. Perform the first burn-off before cooking any food. Connecting the Regulator and Running the Soapy-Water Leak Test Brush or spray the soapy solution onto every gas connection: the regulator-to-tank coupling, the regulator-to-manifold joint, and each burner valve connection. Open the tank valve slowly - about a quarter turn, then full. Growing bubbles mean a leak. Close the tank valve, tighten the joint, and retest. If bubbles persist, stop and contact support before lighting anything. First Burn-Off: What the Manual Means by Curing the Cooking Grates The first burn-off removes manufacturing oils from the grates and burner components. The manual directs you to light the grill with the lid open, run all burners on high for roughly 10 to 15 minutes with the lid closed, and let the grill cool before wiping the grates. Expect some odor and light smoke - that is normal and exactly why the manual tells you not to cook food until it is done. A light coat of cooking oil on the grates after cooling helps protect them and improves release on the first cook. Which Second Product Should You Compare Before You Buy Parts? If your manual reading turns into a parts hunt - a replacement burner, a regulator, a set of heat tents - compare the exact part and its alternative side by side before ordering. One model's regulator or burner may fit your grill, and another may look identical but use a different orifice size or mounting pattern. Try comparing two products side by side below to see which fits best:

Oct 16, 202612 min read
Read more
Nexgrill 4-Burner Gas Grill with Side Burner in BlackGas Grills

Nexgrill Gourmet Pro 5-Burner Review: Is This Mid-Priced Gas Grill Worth It?

Nexgrill Gourmet Pro 5-Burner Review: What This Grill Actually Is (And How to Confirm Yours) Nexgrill has marketed Gourmet Pro configurations through retail channels rather than as a single fixed catalog item, so burner output, grate material, cart style, and side-burner layout can shift between the box at a warehouse club and the one on a Home Depot floor at the same time. A review that quotes one BTU figure as if it applies to every Gourmet Pro 5-burner will mislead you about half the units actually on sale. This review is an evaluator's guide: what the grill is in its typical five-burner form, how to confirm which version you are looking at, how to assemble and first-fire it safely, and where the design tends to frustrate owners after the first season. Nexgrill has built outdoor cooking equipment since 1993, grew out of furniture manufacturing in California, and now operates under Global Leisure following a merger with Megamaster. Its primary U.S. retail anchor remains Home Depot, which is why channel-specific SKUs are common. A five-burner Gourmet Pro in this class typically lands in the 45,000 to 60,000 BTU range with 550 to 700 square inches of primary cooking surface. Treat those as category ranges until you read the rating plate on the actual unit. Why the 'Gourmet Pro' Name Needs a Model Check Before You Buy Retail-exclusive lines let a retailer offer a differentiated package without competing with identical stock next door. Two boxes both labeled Gourmet Pro 5-burner can differ in whether the fifth burner is a main burner or a side burner, whether the lid is stainless or painted steel, whether the cart is open-shelf or closed-cabinet, and whether the warranty runs three years or five on specific components. A spec sheet pulled from a forum post is close to worthless. The only authoritative source is the model number printed on the carton and repeated on the rating plate riveted to the firebox or rear cart panel. Before You Buy or Unbox: Four Prerequisites to Nail Down Fuel, Footprint, Ignition, and the Rating Plate First, fuel: most five-burner grills at this price run on a standard 20 lb propane cylinder, and some models are convertible to natural gas - confirm which, because a natural gas unit needs a fixed supply line and a licensed connection. Second, footprint: a five-burner with side shelves commonly measures around 55 to 65 inches wide with the lid closed and shelves deployed, so measure your patio slab or deck rail before delivery day. Third, ignition: battery-powered push-button ignition is the norm; some units carry a second or third igniter, and knowing how many ship in the box tells you how many points of failure you will eventually service. Fourth, get the model number before you buy if you can. Ordering online? Screenshot the listing including the model number field. Buying in store? Photograph the carton label and the floor display's rating plate. That single photo becomes your reference for assembly guidance, parts orders, and any warranty conversation for years. Step-by-Step: How to Assemble and First-Fire a Gourmet Pro 5-Burner Step 1 - Identify the Model Number on the Carton and Rating Plate Before opening anything, find the model number on the carton's end panel and match it to the rating plate on the grill itself. Write it down. Assembly manuals are model-specific, and a mismatched manual is the most common reason people install a heat shield backwards or route the manifold incorrectly. Step 2 - Read the Spec Label Before You Build Anything The spec label gives you rated BTU per burner, total output, minimum clearance to combustibles, and the gas type the unit is set for at the factory. Clearance matters more than most buyers expect: overhead and side clearance to siding, railings, and vinyl fencing is specified for a reason, and ignoring it is a genuine fire risk. Step 3 - Assemble in Load-Bearing Order (Cart, Lid, Manifold, Burners, Grates) Build in the order the manual specifies: cart and legs first, then the firebox and lid, then the manifold and burner tubes, then heat distribution bars, then cooking grates and side shelves last. Two adults and a folding table make this dramatically faster. Expect 60 to 120 minutes for a five-burner depending on whether the cart arrives pre-fitted. Step 4 - Leak-Test Every Connection With Soapy Water Mix a 50/50 solution of liquid dish soap and water, brush it onto the cylinder-to-regulator connection, the regulator-to-manifold hose, and any threaded joint, then open the cylinder valve with the burner knobs off. Bubbles that grow mean a leak. Tighten, re-test, and if it persists, stop and contact the retailer or Nexgrill support before lighting anything. Propane handling guidance from the U.S. Consumer Product Safety Commission treats this as baseline practice. Never leak-test with a flame. Soapy water or a commercial leak detector solution only, and always outdoors in a ventilated area away from ignition sources. Step 5 - Burn Off and Season for 15 Minutes, Then Probe the Ambient Temp Close the lid, light all burners on high, and let the grill run 15 minutes to burn off manufacturing oils. After it cools slightly, place an oven thermometer or a probe with an ambient clip at grate level over the center and both ends. Note the spread. A five-burner with an even spread of 15 to 25 degrees across zones is doing well; wider spreads tell you where your hot and cool zones live. The Five Mistakes That Ruin a 5-Burner Gas Grill's First Season Mistake 1 - Buying on BTU Alone Headline BTU tells you fuel consumption potential, not searing power. Divide total rated BTU by usable square inches to get heat density, and weigh that against the mass of the cooking grates. Cast iron and heavy stainless grates hold heat and recover faster under a cold steak; thin wire grates at the same BTU will sag under load. Mistake 2 - Skipping the Leak Test Because 'It Came Pre-Assembled' Pre-assembled means someone tightened the cart and lid. It does not mean the regulator connection survived shipping vibration. Two minutes with soapy water is the cheapest insurance in grilling. Mistake 3 - Over-Tightening the Regulator The QCC-1 coupling on a 20 lb cylinder is designed to seal by hand - roughly a quarter turn past contact. Using a wrench to force it can distort the seal and create the exact leak you were trying to avoid. Mistake 4 - Assembling on Grass or Soft Ground A five-burner firebox is heavy. Building on soft ground means the legs sink unevenly, bolts cross-thread, and the finished grill sits out of level, which affects grease drainage and burner alignment. Mistake 5 - Never Registering the Product or Buying a Cover Registration is how a manufacturer can reach you about parts and service, and it streamlines any warranty claim. A fitted cover is the single highest-return accessory you can buy in a humid or coastal climate - moisture and UV are what kill cart finishes, igniters, and thermometers long before burners wear out. How a 5-Burner Compares to a 4-Burner (And Which One You Actually Need) Two-Zone Searing, Indirect Cooking, and the Side Burner Question The practical argument for five burners is zone control, not raw size. With five tubes you can run two high for searing, two low or off for indirect, and one for a warming or finish zone - simultaneously. A four-burner forces you to compromise when cooking a large meal. If your typical cook is burgers and chicken for four people, a four-burner such as the 4-Burner Propane Gas Grill in Black will do the job, and the 4-Burner with Side Burner adds a separate burner for sauces and sides without stepping up to a full five-burner footprint. Nexgrill vs. Weber and Char-Broil at This Price Tier: An Honest Read Weber's Spirit and Genesis lines are the benchmark many shoppers compare against, and Char-Broil competes hard at the same price points. The fair comparison is not brand prestige but what your dollar buys in burner count, cooking area, and included features. At a given price, Nexgrill and Char-Broil typically deliver more burners and more square inches than a comparably priced Weber, while Weber tends to win on fit, finish consistency, and long-term parts availability through its own dealer network. If you want maximum cooking capacity per dollar, the value tier wins. If you want the least chance of a frustrating assembly experience, the premium tier earns its premium. Quick Pre-Purchase Checklist Model number photographed from the carton and rating plate Gas type confirmed: propane cylinder or natural gas line Total and per-burner BTU read from the spec label, not a listing Usable square inches of primary cooking surface at grate level Grate material and thickness assessed in person if possible Side burner present or absent - decide whether you will actually use it Cart style: open shelf for airflow, closed cabinet for concealed storage Warranty length per component, read for the specific model Cover and griddle insert availability confirmed before purchase Patio clearance measured against the spec label minimums Try Comparing Two Products Side by Side Below to See Which Fits Best:

Oct 16, 202616 min read
Read more
Nexgrill 4-Burner Gas Grill with Side Burner in BlackGas Grills

Nexgrill Gourmet Pro 4-Burner Manual: Identify, Assemble, Leak-Test

Why a 'Gourmet Pro' Search Usually Returns the Wrong Manual Picture the exact situation: a four-burner gas grill arrived from a big-box store - or from a neighbour's driveway with a price tag taped to the lid - and the carton copy reads Gourmet Pro . The paper manual went into a drawer that no longer exists. Every search for a 'Gourmet Pro 4-burner manual' returns griddle guides, pellet-smoker videos, or PDFs for grills that look nothing like yours. That dead end is not your fault, and it is not a sign the grill is counterfeit. It is a naming mismatch, and it is fixable in about twenty minutes with the right sequence. Nexgrill has used retail-facing trade names - including Gourmet Pro - that are not always published as catalogue families on nexgrill.com. The currently surfaced families are Oakford (charcoal and pellet), Daytona (gas griddles and grills), and legacy numbered series such as 720-, 810-, and 820-. Do not assume a specific 'Gourmet Pro' PDF exists. The practical answer: stop searching the badge and start searching the plate. Every gas grill sold in the United States carries a rating plate with the real model number, and that string is what unlocks assembly diagrams, parts lists, and regulator specifications. This guide walks from the stuck state to a working, leak-tested, burn-off-complete grill. What the Badge Says vs. What the Rating Plate Says Retailers and manufacturers frequently use two vocabularies. Marketing copy on the box, the lid badge, and the store's website might say 'Gourmet Pro 4-Burner.' Engineering and after-sales documentation use a coded identifier like 720-0925, 820-0063, or a two-letter legacy code. The two identifiers describe the same physical object, but only one of them will resolve to documentation. Treat the badge as a shopping label and the plate as the serial-numbered legal identity of your specific unit. If you bought second-hand, the badge may even have been swapped or repainted - the plate has not. Prerequisites: Three Things in Hand Before You Search Rating-Plate Photo, Tools Inventory, and a Second Person Before opening a browser tab, gather three things. First, a clear, well-lit photo of the rating plate - not a note jotted on a receipt. Second, a tools inventory: a 10mm and 13mm combination wrench or socket set, a Phillips screwdriver, a basin or bucket for the soap solution, and a brass-bristle grill brush. Third, a second person for the ten minutes when the firebox has to be lifted onto the cart. A 4-burner firebox with grates installed weighs roughly 60-90 lb depending on model, and holding it steady while starting bolts alone is how porcelain lids get chipped. A pad or blanket to set the lid on during assembly Old towels for soapy water drips around the regulator A headlamp or phone torch - the plate on many units sits inside the cart door in permanent shadow Step 1 - Read the Rating Plate and Record Six Data Points Rating plates on Nexgrill-style gas grills typically live in one of three places: the rear face of the firebox, inside the left cart door, or tucked under a side shelf next to the burner valves. Once you have located it, transcribe six points exactly as printed, including hyphens. Field on the Plate Why it matters for the manual Model number The only string that reliably resolves to a document Serial number Needed when a support agent pulls the exact parts diagram BTU rating Confirms you are looking at the correct burner configuration Gas / fuel type Propane vs. natural gas; the two take different orifices and hoses Burner count Distinguishes a 4-burner from a 5-burner sibling in the same family Manufacture date / cert body Narrows mid-run revisions and safety certification era Step 2 - Resolve Your Unit to a Real Nexgrill Family Oakford, Daytona, and the Numbered 720-/810-/820- Series Once you have the code, match it against the families Nexgrill actually publishes. Oakford covers charcoal and pellet platforms such as the Oakford 875 and Oakford 1125 Pro pellet smokers . Daytona covers gas griddles and grills, from the 2-burner cart model to the 5-burner Nitroguard propane griddle. The numbered legacy series (720-, 810-, 820-) covers a large installed base of gas and charcoal units, some still sold through retail partners. A 'Gourmet Pro' 4-burner gas grill with a 720- or 820- prefix is far more likely to be documented under that numbered code than under a Gourmet Pro name. Write the number on a strip of masking tape and stick it inside a cart door before you start any work. You will need it again in eighteen months when a burner tube needs replacing. Step 3 - Where the Manual Actually Comes From Nexgrill Support, Retailer Document Tabs, and Parts Diagrams There are three legitimate, verifiable routes. First, Nexgrill's contact page , where you can send the exact model and serial number and request the correct assembly and parts documentation. Second, the retailer's product page: Home Depot is Nexgrill's principal US retail partner, and product pages often host a 'Documents' or 'Info & Guides' tab with the assembly PDF attached. Third, the parts diagram, which is often more useful than the manual once assembly is done, because it names every replaceable component by index number and lets you order the exact burner, igniter electrode, or regulator. Note that as of this writing no general public manual-download directory at nexgrill.com has been verified, so route through support or the retailer rather than guessing at a URL. Step 4 - If Nothing Matches by Name, Match by Physical Features Burner Count, Lid Shape, Shelf Configuration, Side Burner Present? Some trade-name runs are short enough that their documentation is effectively pooled with a sibling SKU. Two grills may share the same firebox, cart, and burner layout while differing only in lid finish or shelf material. In that case the assembly sequence, torque values, and regulator specification apply to both. To find the sibling, match on visible features: exact burner count, cast vs. stamped lid with or without a temperature gauge, side shelves (one or two, folding or fixed), presence of a side burner, and the shape of the control panel. Tip: A clear side-on photo with a tape measure along the firebox gives a support agent three cross-references on one image - width, lid profile, and shelf configuration. What a 4-Burner Gas Manual Covers, Section by Section Understanding the manual's internal logic makes the missing page count far less of a problem. A typical 4-burner gas grill manual is organised in four functional blocks, and each has a specific job. Cart and casters: leg pairing, caster placement (locking units on the front-left and rear-left by convention), bottom shelf and any cabinet doors. Clearance guidance usually specifies a minimum of roughly 36 inches from combustible walls and never indoors or under a roof overhang. Firebox and lid: mounting the firebox to the cart, hinge alignment, and lid-stop hardware so the lid rests rather than slams. Burner tubes and collector box: seating the tube burner necks over the valve orifices, then installing the carry-over or collector box and the igniter electrodes with their specified gap. Regulator, hose, and gas system: the hose and regulator assembly (Type 1 / QCC1 for a standard 20 lb refillable cylinder), the leak-test procedure, and the lighting sequence. Cooking grates, warming rack, and side shelves: drop-in placement, plus the accessory hookup for any rotisserie or side burner plumbing. Quick Checklist Before You Pick Up a Wrench Confirm all six rating-plate data points are written down, all packing foam and protective film are removed, casters and hardware are counted against the parts diagram (a missing M6 bolt on the last step wastes another day), your propane cylinder is a standard 20 lb / roughly 4.7 US gallon refillable with a QCC1 valve, and your work area is on a hard, level surface with the lid propped away from wind. Once those five things are true, the assembly goes in one uninterrupted sitting. If you are choosing between two possible sibling models before you commit to a documentation route, differences in burner layout and cart geometry decide which manual set applies. Try comparing two products side by side below to see which fits best:

Oct 16, 202613 min read
Read more
Nexgrill 4-Burner Propane Gas Grill in Black with Stainless Steal main lidGas Grills

Nexgrill Evolution Review: A Practical Owner's Guide to Specs, Setup, and Performance

The Nexgrill Evolution is a model line, not a single grill. Burner count, fuel type, cooking area, and price all change by SKU - so confirm your exact configuration before comparing specs. What the Nexgrill Evolution Actually Is (and Why the Specs Keep Changing) Search for a Nexgrill Evolution review and you will hit a wall fast: half the results describe a 2-burner cart grill, half describe a 6-burner with an infrared sear zone, and the BTU numbers rarely match. That is not sloppy reporting - the Evolution name covers a family of propane gas grills sold primarily through Home Depot, and each size tier is effectively its own product with its own spec sheet, price, and sometimes its own cooking surface technology. Nexgrill has built outdoor cooking equipment since 1993, starting in furniture before moving heavily into grills. Today the company is headquartered in California, merged with Megamaster to form Global Leisure, and also engineers the KitchenAid-branded grill line. That matters when you evaluate the Evolution: you are looking at a value-engineered mid-tier product from a company that makes its money on volume through big-box retail, not a boutique builder charging premium margins for hand-finished stainless. Evolution 2-Burner vs 4-Burner vs 6-Burner: What Changes With Each Step Up Every step up in burner count changes four things at once: total heat output, usable cooking area, cart footprint, and cost. Based on published specs across the line and typical retail listings, here is the approximate picture - treat these as ranges to verify against your specific SKU. Configuration Main Burners Approx. BTU Range Approx. Total Cooking Area Typical Household 2-burner 2 ~20,000-26,000 ~300-400 sq in Couples, 1-2 people 4-burner 4 (+ side burner on some SKUs) ~48,000-60,000 ~600-700 sq in Families of 3-5 6-burner 6 (+ side burner on some SKUs) ~60,000-72,000 ~700-800+ sq in Entertainers, 5+ people Note what the table does not show: cabinet versus open cart, side burner presence, and whether the lid is stainless or black-enameled steel all vary within the same burner count. Two 4-burner Evolutions from different model years can differ by a side burner and $80 in price with identical cooking area. Infrared and Griddle Variants: Same Name, Different Cooking Surface Some Evolution SKUs include an infrared side burner or a dedicated sear zone, while others ship as straight open-grate grills. Infrared burners push heat through a ceramic or metal emitter, which raises surface temperature fast and produces aggressive sear marks - useful for steak, less useful for delicate fish. A standard open burner gives you more gradual, controllable heat. How to Evaluate a Nexgrill Evolution Before You Buy It Prerequisites: Burner Count, Fuel Type, Patio Footprint, Household Size Before you read a single BTU number, answer four questions. How many people are you cooking for on a normal weeknight? How wide is the space where the grill will live, measured in inches? Is natural gas available at that spot, or will you run propane tanks? And do you want a flat-top griddle experience, or grates and direct-flame char? Write those answers down - they will eliminate half the Evolution lineup immediately. Step 1 - Confirm the Exact SKU and Published Specs Do not buy based on a photo. Find the model number on the retailer's product page and check the spec block for: total BTU, total cooking area, number of main burners, side burner yes/no, primary grate material, ignition type, and cart configuration. If a listing does not publish those numbers clearly, that is a signal in itself. Step 2 - Compare Grate Material, Ignition Type, and Grease Management Cast iron and heavier stainless grates hold and radiate heat better than thin porcelain-coated steel, which is why they sear better and last longer if you keep them dry. Push-button piezoelectric ignition is simple and replaceable; electronic ignition is convenient but introduces a component that can fail. Grease management is the most overlooked: a full-width, slide-out tray with a removable cup beats a small angled drain into a shallow pan that overflows on a long cook. Step 3 - Check Warranty Terms and Replacement-Part Availability Read the actual warranty document for the SKU you are considering - coverage differs by component and by model year. Typically the firebox and lid carry a longer term than burners, and burners longer than ignition and cosmetic parts. Confirm what is covered, for how long, and whether replacement burners, grates, and ignition modules are orderable for your model. A grill you cannot get parts for has a hard end date. Knowing the average lifespan of a gas grill helps you judge whether those parts are worth ordering at all. What to Look For: Five Buyer Criteria That Actually Matter Usable Cooking Area vs Advertised Total Advertised square inches almost always include the warming rack, which sits high and gets indirect heat only. A "700 sq in" 4-burner may only have about 450-480 sq in of actual main grate. Cook on the main grate number, not the headline total. BTU Reality Check: Why Higher Numbers Don't Guarantee Better Cooking BTU is a fuel-burn rate, not a temperature guarantee. A 72,000 BTU six-burner with thin metal and poor heat retention can lose heat the moment you open the lid. What determines results is grate mass, firebox thickness, and how well the hood holds heat with the lid closed. Use BTU to compare grills of the same size and construction class - nothing more. Check the price of your exact Evolution SKU against the published spec sheet - the same burner count can vary significantly in price depending on grate material, ignition type, and whether a side burner is included. Evolution vs Comparable Mid-Tier Gas Grills Where the Value Shows Up - and Where It Doesn't The Evolution line competes on cooking area and feature count per dollar. A 6-burner Evolution with a side burner can undercut a comparable Weber Genesis or Napoleon by a meaningful margin while offering similar headline square inches. Where the gap shows: heavier cast stainless fireboxes, thicker rod grates, tighter lid tolerances, and longer warranty terms on premium competitors. If you grill once a week and store the grill covered, that gap rarely matters. If you cook year-round through coastal humidity or hard winters, premium construction earns its price. Evolution Gas Grill vs a Nexgrill Daytona Griddle: Grates or Flat-Top? If half your cooking is smash burgers, breakfast, stir-fry, and seafood, a flat-top like a Daytona 4-burner griddle may deliver more usable output than an open-grate Evolution. If you want char marks on steak and chicken, stick with grates. If you can only own one, decide by what you actually cooked last month, not what you imagine cooking. Weighing Two Evolution Configurations Side by Side Once you have narrowed to two candidates - say a 4-burner with a side burner versus a 6-burner without - the difference comes down to whether you need more total grate area or more flexibility. A side burner lets you boil, sauté, or keep sauce warm outside, freeing the main grate entirely for food. A sixth main burner gives you more simultaneous direct heat. Put your two finalists into the comparison tool below and compare cooking area, BTU, warranty, and price before you commit.

Oct 14, 202612 min read
Read more
Nexgrill 4-Burner Propane Gas Grill in Black with Stainless Steal main lidGas Grills

Nexgrill 820-0061 Manual: A Second-Hand Owner's Guide to Identification, Assembly, and Safe First Fire-Up

You Inherited a Nexgrill 820-0061 With No Paperwork - Start Here Maybe a neighbour rolled it to the curb, a relative downsized, or you found it on a marketplace listing for $40 with a tank that still has propane in it. Either way, you now own a second-hand Nexgrill 820-0061 and you don’t have the manual. That’s normal - printed manuals get tossed, rained on, or lost in a move. The good news is that the 820-0061 is a straightforward propane cart grill, and almost everything you need to know is either stamped on the grill itself or downloadable from Nexgrill’s support channel. This guide is written specifically for the used-grill owner, not the person pulling a new unit out of a box. We’ll cover how to confirm the model without guessing, where to get the correct PDF, how to assemble or re-assemble the cart safely, how to run a proper leak test on a propane system of unknown age, and the mistakes that turn a cheap used grill into a rusted paperweight within one season. A used gas grill is an unknown quantity. Treat the first fire-up as a commissioning procedure, not a casual cookout. Never skip the leak test on a grill whose history you can’t verify. What to Have Ready Before You Touch a Single Bolt Before you start disassembling or tightening anything, gather a small kit. You’ll save yourself multiple trips to the garage and avoid losing small parts in the grass. Here’s what actually gets used on a used 820-0061: A 7/16-inch and 1/2-inch wrench or socket set (most Nexgrill cart hardware is SAE) A Phillips #2 screwdriver Spray bottle with soapy water (one teaspoon of dish soap per cup of water) A clean paint brush or small wire brush for burner tubes Work gloves and a headlamp or flashlight A flat, paved work area - not grass, not gravel Your phone, to photograph the rating plate and any part numbers before you disturb them If the grill is still assembled, don’t tear it down completely unless something is visibly loose or bent. A used 820-0061 that rolls straight and has tight leg bolts usually only needs cleaning, a new burner tube or two, and a leak test. Full disassembly is for grills that arrived in pieces or have obvious frame damage. Identify Before You Download: Reading the Rating Plate on a Used 820-0061 The single most important thing you can do is confirm the model number from the grill itself. Nexgrill’s 820-series includes several lookalike cart grills that share knobs, legs, and lid profiles. A manual for the wrong 820 model will give you the wrong burner part numbers, the wrong regulator specification, and the wrong fastener list. That’s how used-grill projects stall. On most Nexgrill cart grills, the rating plate - sometimes called the data label or CSA label - is a silver or white sticker fixed to the back panel of the cart, inside the cabinet door, or on the inside of the left side panel. It will show the model number (something like 820-0061), a serial number, the fuel type (LP gas), and often a manufacturing date. Photograph it in good light before you clean anything; grease and UV fade can make these labels unreadable after a scrub. 820-0061 Confirm this exact number on the rating plate before downloading any PDF - manuals are model-specific. If the label is gone, look for stamped numbers on the firebox or compare the burner configuration against Nexgrill’s product listings. When in doubt, contact Nexgrill support with photos of the grill and any numbers you can find rather than assuming the model. Where the Real Manual Lives (and Why Model-Specific PDFs Matter) Nexgrill maintains product documentation through its own support channel. The most reliable route is to visit the Nexgrill contact and support page and request the manual for your specific model number. Support can also confirm whether a given part is still stocked. Third-party manual sites sometimes host scanned Nexgrill PDFs, but quality varies. A blurry scan of a 2013-era manual may omit the parts diagram entirely, which is the one page you actually need for ordering replacements. If you download from a third party, cross-check the cover page against your rating plate and verify that the parts diagram shows the same burner layout, regulator type, and cart design as your grill. The manual for the 820-0061 should include: a parts list with part numbers, an exploded diagram, assembly steps, a leak-test procedure, lighting instructions, and a maintenance schedule. If a PDF lacks the parts diagram, keep looking - that’s the page that makes the manual useful for a used grill. Step-by-Step: Assembling a Used 820-0061 From the Cart Up If your grill arrived in pieces, or you’ve partially disassembled it for transport, reassemble in this order. Working from the ground up prevents the classic mistake of building the firebox first and then trying to bolt legs to a heavy, unstable assembly. Lay out all hardware and identify missing bolts. Sort by size. A used grill almost always has a few missing screws; replace them with stainless steel hardware of the same diameter and pitch from a hardware store. Attach the legs or side panels to the bottom shelf. Leave every bolt hand-tight until the frame is square. Tighten diagonally, like you would a wheel. Mount the casters or wheels. Locking casters go on the front. If a caster stem is bent, replace it rather than forcing it - a wobbly grill is a tip-over risk. Set the firebox onto the cart frame. Two people make this safer. Do not rest the firebox on the burner tubes during this step. Install the burner tubes and heat shields. Feed burner tubes through the front control panel openings, then seat them over the valve orifices. Never force a burner over an orifice - misalignment causes dangerous gas leaks and uneven flames. Attach the control panel and knobs. Verify each knob turns freely and that the valve stems are not bent. Install the cooking grates and warming rack. Check that grates sit level and do not rock. Attach the side shelves and any handle or lid hardware. Tighten the lid hinge bolts last so the lid closes squarely. Final torque pass. Go around the entire grill and snug every bolt. Do not over-tighten burner screws or valve-mount screws - stripping these threads on a used grill is a common and annoying failure. Assemble on concrete or a paved patio. Grass and gravel hide dropped hardware and create an uneven surface that stresses the cart frame as you tighten it. Connecting Propane and Running a Proper Leak Test This is the step that separates a safe used grill from a dangerous one. Propane connections on a grill of unknown age should be treated as suspect until proven tight. The U.S. Consumer Product Safety Commission and NFPA 58 both treat outdoor LP gas connections as a routine inspection point, and for good reason: a small leak at the regulator or manifold can pool gas under the firebox. Before connecting, inspect the regulator hose for cracks, stiffness, or chew marks. A stiff or cracked hose must be replaced - do not tape it. Confirm the tank is an LP cylinder with a current date stamp and an OPD (overfill protection device) valve, which has been required on new consumer cylinders in the U.S. for years. Connect the regulator to the tank by hand until snug. Do not use a wrench on the plastic regulator nut. Turn the tank valve on slowly, about a quarter turn. Brush or spray soapy water on every connection: tank-to-regulator, regulator-to-hose, hose-to-manifold, and each valve-to-burner joint if accessible. Watch for 30-60 seconds. Bubbles mean a leak. No bubbles means the joint is holding. If you see bubbles, turn off the tank, tighten the fitting a quarter turn, and re-test. If bubbles persist at a hose or regulator crimp, replace the part. Never use a flame to check for leaks. Soapy water only. Store propane cylinders outdoors, upright, and never indoors or in a garage. A leaking cylinder in an enclosed space is a serious hazard. Burn-Off, First Cook, and What Used-Grill Smoke Is Telling You After the leak test passes, run a 15-20 minute burn-off on high with the lid closed. This burns off residue from the previous owner, grease in the firebox, and any manufacturing oils still on the grates. Expect smoke and a smell on the first burn-off - that’s normal. What isn’t normal is yellow, lazy flames or a roaring sound at the burner. Yellow flames usually mean a spider nest, rust flakes, or debris inside the burner tube. Turn the grill off, let it cool, and clear the tube with a brush or a stiff wire before trying again. Once the burn-off is done, scrub the grates with a brush, wipe them with a lightly oiled paper towel, and cook something simple - burgers or chicken thighs - before you trust the grill with a long cook. If temperatures hold steady and the flames stay blue with slight orange tips, the grill is ready. If one burner runs hotter or cooler than the others, you likely have a partially blocked burner tube or a misaligned orifice, and it’s worth pulling that burner before the next cook. When you’re ready to compare two specific used-grill candidates - or two replacement parts - try comparing two products side by side below to see which fits best.

Oct 13, 202613 min read
Read more

Browse by Category

Pellet Grills

Pellet Grills

Discover tips, recipes, and expert advice for wood pellet grilling, smoking, and low-and-slow cooking with Nexgrill pellet grills.

Gas Grills

Gas Grills

Explore grilling guides, recipes, maintenance tips, and outdoor cooking inspiration for Nexgrill gas grills.

Why Choose Us

Premium grilling experience at accessible pricing

We position ourselves as delivering high-end outdoor cooking features and performance without premium-brand pricing, emphasizing “Quality Grills. Unbelievable Value.”

Wide range of outdoor cooking products for every use case

We offer gas grills, pellet grills, griddles, smokers, pizza ovens, portable/tabletop grills, electric grills, accessories, and replacement parts — allowing customers to stay within one ecosystem for all outdoor cooking needs.

Innovation-focused outdoor cooking with smart technology

We differentiate ourselves through smart grilling products like the Oakford smart pellet grill, including app-connected cooking controls and modern outdoor cooking technology.

What Our Clients Say

Hear from businesses we have helped succeed

“I’ve been using the Nexgrill Daytona 4-Burner Gas Griddle for a while now, and I’ve been really happy with it. First off, it’s super sturdy and feels really well-made, like it’s going to last me a long time. The cooking space is awesome—plenty of room for making big meals. So far I’ve cooked pancakes, burgers, bacon and some veggies. The 4 burners make it easy to control the heat in different areas. I love that I can keep one side hotter for searing and leave the other side cooler for things that don’t need as much heat. Plus, it heats evenly, which I was really glad to see. The shelves underneath and on its sides are a nice bonus. I’ve used them to keep things like plates, tools, and ingredients handy while I’m cooking, it’s very convenient. Cleaning it is super simple too. Once it cools down, I just wipe off the cooking surface and let the grease funnel into the trap. It’s quick and easy, and honestly, it barely looks like I even used it. If I had to nitpick, the grease trap can fill up kind of quickly during bigger cooking sessions, but as long as you keep an eye on it, it’s not a big deal. Overall, this griddle has been great. It’s sturdy, easy to use, and makes cooking outside a lot of fun. If you’re into grilling or want something versatile, I think this is a solid choice. Originally posted on influenster.com”

M
martind23_2941
Sturdy, easy to use, and perfect for cooking big m

“took about 2-3 hrs for complete assembly. took about 15-20 minutes to fully heat to 700. used a pan liner and a drip cup liner due to previous issues with those rusting away. this is about the 3-4 grill i have assembled. dont try to do it alone or ask the wife for help with the firebox its awkward. always check the directions 2-3 times before tightening down and dont over tighten the screws. hopeing for 5 years of grilling on this but i havent checked the warrenty yet.”

DT
Dave the Griller
finally got around to building this.bought in 2025

“We just bought this guy and I recommend always buy it assembled, we just use the grill 2 times and really works good; is perfect size and the side burn is very useful plus the caddy attach for spices; the material quality is in medium rate; no too cheap no too expensive I'll be glad if it works for minimum 5 years. Nexgrill could improve with the way, and cleaners to not damage the grates and the burners. I protect the removable pan with heavy duty aluminum foil, when the grease drop I only change the foil. Well I am enjoying my new Nexgrill !!! P.s. always clean the grill after use it....ALWAYS :-)”

KA
Karl A
Nice Grill

“Thank you to Influencer and Nexgrill for sending this to me for free, in exchange for my honest opinion. My 17 year old son put this together for me. It was easy but time consuming, it took about 2 hours. This is great for families, because you can cook a good amount of food in a short time. We did tacos, but it’s also great for breakfast, pancakes, eggs, breakfast burritos. It’s easy to clean if you have the right tools, you’ll need a scraper and metal spatula. Overall I would recommend this flat grill, it’s a great addition to our household. Originally posted on influenster.com”

K
KellyL
Quick and easy cooking

“My old Nexgrill is 25 years old and still looking and performing well! This new one is going on our back patio to partner with the old one in our courtyard. Obviously quality products to last that long. I hope the new one does as well. The only concern I have is that the sides are painted metal rather than stainless like the old one. I hope it doesn’t rust over time. But, We are very happy grillers!”

JS
Judy S
New grill to partner with my old one

“Bought grill 3 years ago stainless grates rusted out had to order new ones to replace Yes, I recommend this product.”

G
GaryS329
Stainless

“I’ve always been a smoker, fryer kind of guy. But recently with my new job keeping me super busy I’ve been cooking on my father in-laws 2 burner grill and it takes so long to cook ribs and chicken. I love just lighting the burners and cooking so I decided to upgrade by buying my own and I got this 5 burner with side burner for veggies , took me maybe 20 minutes to get all the dinner done tonight after I seasoned the grill with an onion. Love it so far, I hope it lasts a long time! It’s beautiful!”

JB
Jason B
Love it so far! My first propane grill I’ve ever bought myself!

“I love your grills. This is a replacement grill for a fully stainless steel one (was suppose to be). We originally bought it for our daughter's new townhouse, but her patio was not "ready" for it. We have kept it for 5 years now. My husband passed, I sold the house and move it, in the original box, with me and just put it together. The”

LG
Lisa G
Replacement

“Purchased a 5 burner with side burner grill probably 7-8 years ago. You can only replace things for so long. Opted on a smaller 4 burner grill this time. Hoping to get lots of use for many years to come.”

BS
Brian S
2nd grill with out

“Easy grill to use & grills well. Last grill lasted a little over 6 years. Had to replace burners twice (just worn out - lots of use). Here is old grill & new grill.”

RE
Russell E
2nd Nexgrill

“I had either recieved or bought a grill from either webber or Charbroil. Both had lasted roughly 5 years each before rusting out. For the price point and the way this grill feels I think this one should last longer. Looks awsome new so hopes are high.”

VA
Victor A
3rd grill so far...

“I’m just setting up my second 5 burner nexgrill!!! My first one was purchased in 2015!! I live in New England and the grill lived outside for 7 1/2 years!! That is an impressive lifespan for a grill in my area! I’ll be a loyal Nexgrill customer for life. Thanks very much. Yes, I recommend this product.”

L
Litch
Robust grill with Longevity to boot

“This grill is good for an economy grill. My 10 year old assembled most of it. I knew that I was getting a budget grill and didn't expect a Cadillac. I bought it mainly because the burners have flame on the left and right, instead of one row on the top. I checked the temperature gauge vs my digital and it runs 50° high, didn't expect it to be right on. The burner tents are higher in the front, making it hotter in the front. I have snips so I'll cut the front to set level. I seasoned the grill with bacon, it leaked from the screw to the drip pan, which was tight. The corners are sharp. I had corner protectors for my smoker and put some on the Nexgrill, hoping to get more life from the cover. Overall it's pretty good for the price.”

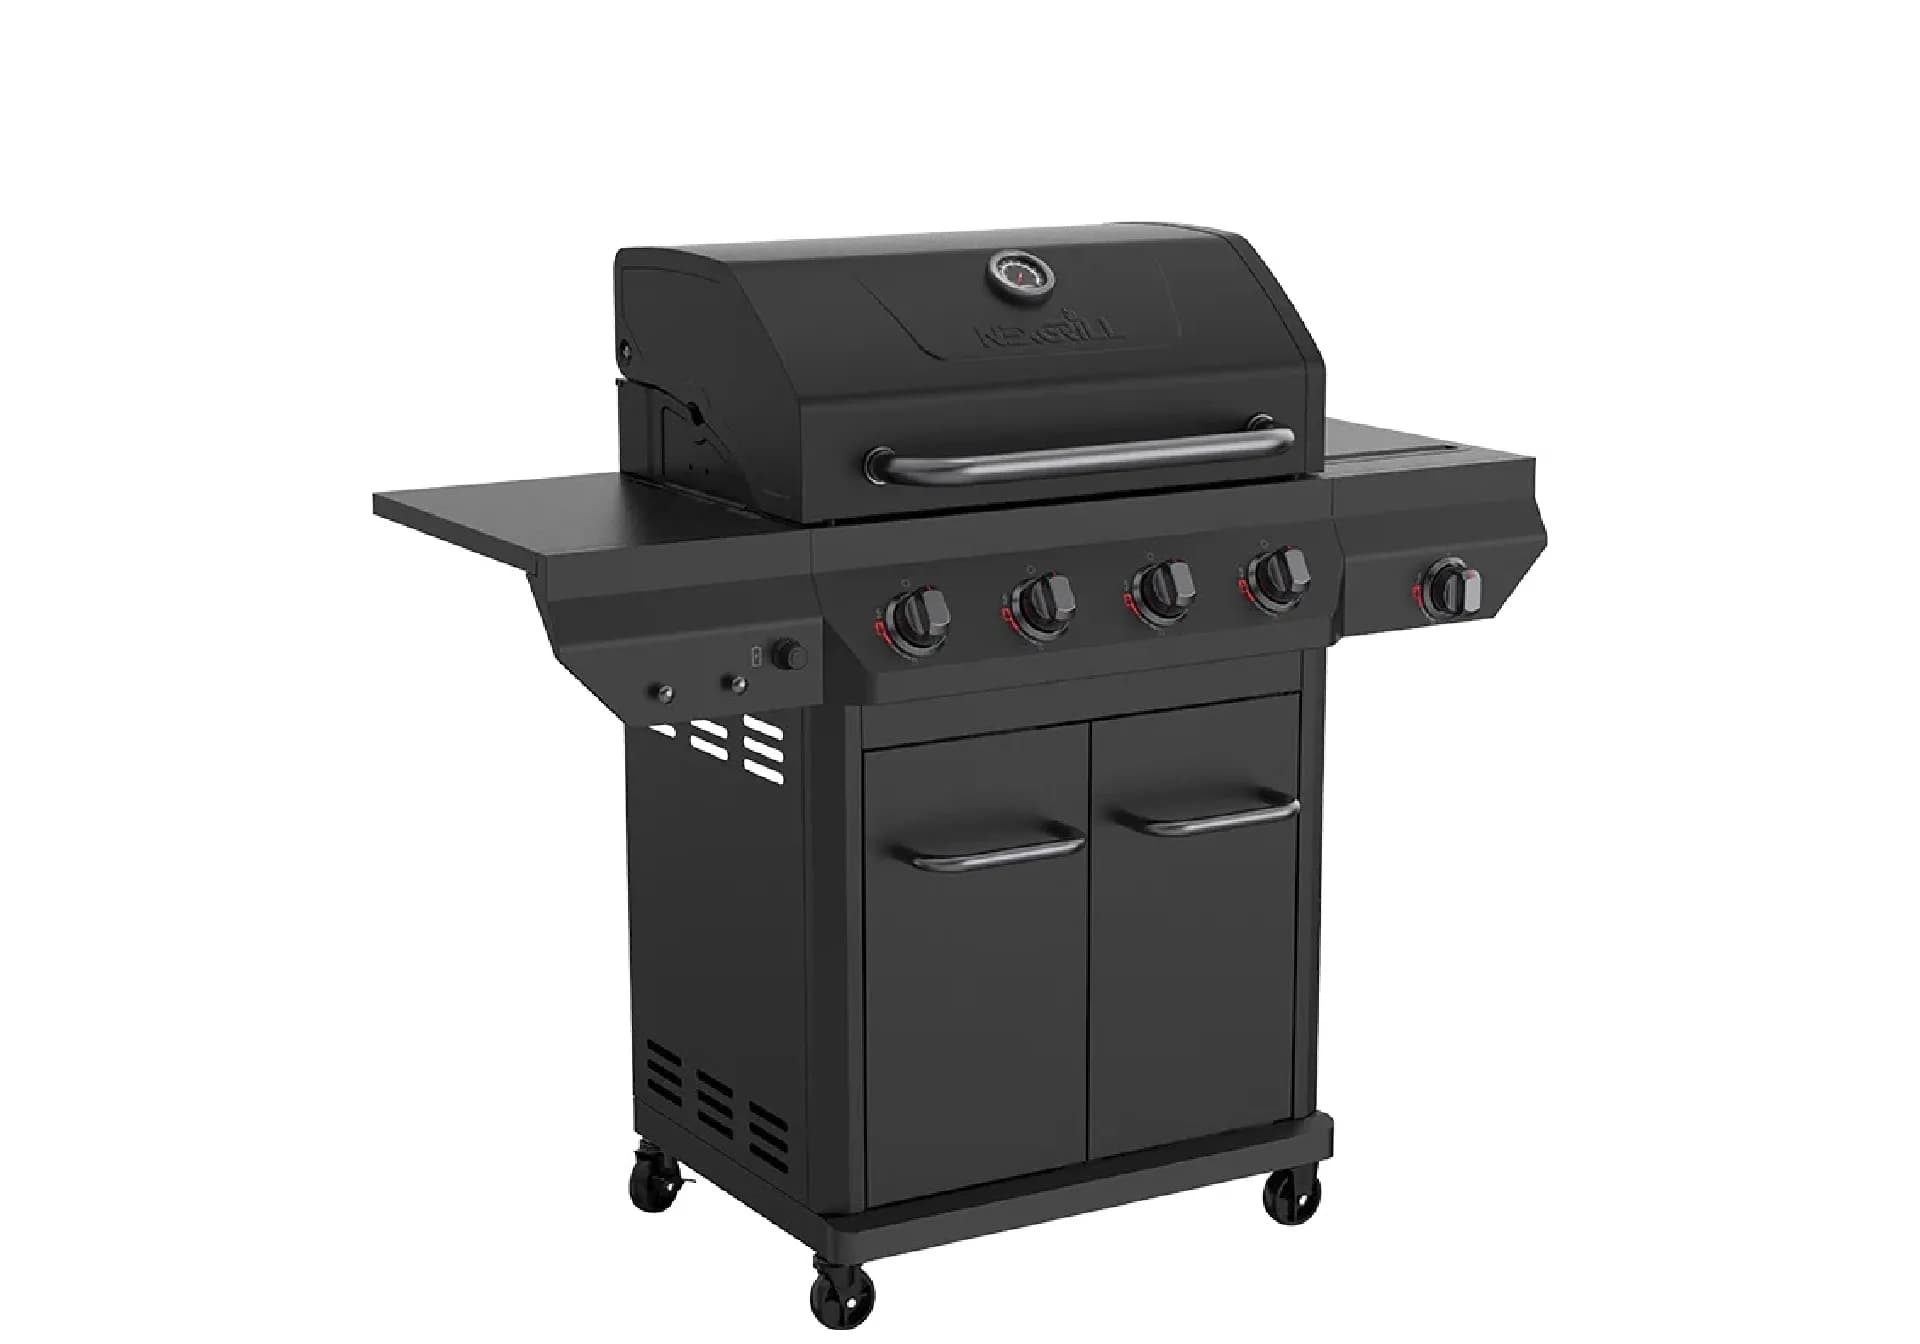
DK
Daniel K
Easy to assemble
4.7/ 5
·13 reviews