Nexgrill
Recipes

Recipes Articles

News, advice and articles about Recipes

Latest Recipes Articles

Bacon-Wrapped Sausage and Smoky Chicken Drumstick Grill FeastRecipes

Exploring International Grill Dishes: A Global Culinary Journey

Introduction to Global Grilling Traditions International grill dishes are one of the best ways to understand how communities cook, celebrate, and share food. A grill is never just a heat source; it is a cultural tool that reflects local ingredients, climate, and social habits. In some places, grilling is quick and social, built around open flames and fast-cooked skewers. In others, it is slow, layered, and built around marinades, spice pastes, and carefully managed embers. That variety is what makes global grilling so rewarding for home cooks: you are not simply following a recipe, you are learning a cooking language. Nexgrill’s brand philosophy fits this kind of cooking especially well because it treats grilling as a shared experience rather than a solitary task. The brand’s messaging emphasizes togetherness, inclusivity, and the idea that everyone has a place at the table, which aligns naturally with cuisines that were built for gathering and passing plates around. That spirit matters when you explore international grill dishes, because many of the most memorable recipes were designed for family meals, street food stalls, neighborhood celebrations, or weekend cookouts where sharing is part of the ritual. 1 fire Can express dozens of regional grilling traditions when you match technique to ingredients. What sets international grill dishes apart from standard backyard barbecue is the balance between technique and seasoning. A Korean-style grilled meat dish may depend on sweet-salty marinade and high-heat searing. A Mediterranean skewer may use olive oil, herbs, citrus, and brief cooking over flame. A South Asian tandoor-inspired dish often emphasizes yogurt, spice blends, and char as part of the flavor profile. These are not interchangeable styles, and that is exactly why they are so useful to study. Each one teaches a different way to handle heat, moisture, and browning. For home grillers in the United States, global grilling also solves a practical problem: variety. When you want to move beyond burgers and standard barbecue rubs, international recipes give you a broader toolkit without requiring complicated equipment. The right marinade can transform chicken thighs, shrimp, tofu, steak, or vegetables into something distinctly regional. The trick is to preserve the logic of the original dish instead of stripping it down to a generic “fusion” version. That means paying attention to acid levels, salt balance, cooking time, and garnish, not just the headline flavors. Regional Grilling Techniques and Signature Dishes The most useful way to approach world grilling is by technique, because technique tells you how a dish is meant to cook and why it tastes the way it does. In Latin American grilling traditions, open-fire cooking often centers on direct heat, bold seasoning, and meats that can handle a strong sear. In East Asia, grilling may lean on glaze, repeated basting, and quick cooking over intense heat. In the Mediterranean, fish, lamb, and vegetables often rely on simple seasoning and clean smoke rather than heavy sauce. Understanding the method prevents the common mistake of treating every international recipe like a generic marinated meat dish. A good example is yakitori from Japan. The appeal is not only the chicken itself, but the discipline of small skewers, minimal ingredients, and careful control over doneness. By contrast, a Mexican-style carne asada approach usually celebrates a larger cut, char, and finishing with bright condiments. In India, kebab traditions can range from minced and shaped mixtures to deeply spiced chunks of meat, and the cooking method may require resting the meat after marination so the seasoning penetrates evenly. These differences matter because they tell you whether your goal is tenderness, char, smoke, glaze, or freshness. Region Typical Technique Signature Flavor Cue Japan Small skewers, quick high heat, repeated glazing Sweet-salty tare, light char Mexico Direct grilling over hot fire Lime, chili, cumin, cilantro Middle East Skewers and charcoal heat Garlic, yogurt, spice, herbs Korea Tabletop or open grill, fast searing Soy, pear, sesame, sesame oil Mediterranean Simple grilling of fish, lamb, vegetables Olive oil, lemon, oregano, rosemary Nexgrill’s product range is especially useful for this style of cooking because different international dishes benefit from different cooking surfaces. The company offers gas grills, griddles, pellet grills, and charcoal options, which gives home cooks room to match the method to the dish rather than forcing every recipe onto one surface. For example, a flat griddle is helpful when a recipe needs even contact heat for vegetables, chopped meats, or breakfast-style street food. A pellet smoker grill is more appropriate when you want layered smoke on a larger cut. A charcoal grill is ideal when a cuisine values flame character and charcoal aroma. That kind of flexibility helps the cook stay closer to the original dish’s intent. Authentic Recipes from Around the World If you want international grill dishes to feel authentic, start by choosing recipes that respect the structure of the original cuisine. One practical path is to begin with a small set of recipes that teach different flavor systems. A Korean bulgogi-style beef skewer teaches sweet-savory balance and fast cooking. A Greek-style chicken souvlaki teaches how to keep a marinade bright and not too oily. A Lebanese chicken kebab teaches the value of yogurt, lemon, garlic, and spice in a marinade that tenderizes while flavoring. A Thai-style grilled chicken dish teaches the role of sugar, fish sauce, and aromatics in browning and caramelization. Each recipe is a lesson in how food cultures build flavor before the food ever hits the grill. The key to authenticity is not just the ingredient list; it is also the rhythm of the preparation. For instance, many global grilling recipes rely on an overnight or multi-hour marinade because the meat is expected to absorb seasoning gradually. Others depend on a very fast cook because the sauce or garnish is added after grilling. When you rush those steps, the dish can taste flat even if the ingredients are correct. Use that as your guide: if the recipe uses citrus, yogurt, or vinegar, pay attention to marination time so the acid enhances instead of toughening the protein. If the recipe uses sugar or honey, keep a closer eye on the fire to prevent scorching. Vegetables deserve a place here too. International grilling traditions often use eggplant, peppers, mushrooms, corn, onions, and even leafy greens in ways that are far more specific than a generic side dish. Mediterranean grilled vegetables may be dressed with olive oil and herbs. Southeast Asian versions may be finished with a sweet-sour glaze or chile sauce. In the Americas, grilled corn can be transformed with citrus, cheese, or spice. These dishes matter because they expand the grill beyond the main protein and help build a complete meal. Tip: When you are trying a recipe from another cuisine, keep the cooking method intact first, then adjust the seasoning to your pantry. That preserves the dish’s identity. Tips for Incorporating International Flavors into Your Grilling The easiest way to bring international flavors into your grilling is to think in layers: marinade, finishing sauce, garnish, and serving style. A lot of home cooks stop at the marinade, but many global dishes rely on a final acidic or herbal finish that wakes up the grilled surface. A lime squeeze over charred meat, a scattering of fresh herbs, a drizzle of chili oil, or a spoonful of yogurt sauce can be the difference between a dish that feels inspired and one that feels complete. Another important habit is to build a flavor map before turning on the grill. Ask three questions: what is the dish’s anchor seasoning, what creates browning, and what provides freshness at the end? For example, a dish might use soy sauce as the anchor, brown sugar as the caramelizing agent, and scallions as the fresh finish. Or it may use garlic and rosemary as the anchor, olive oil as the browning medium, and lemon zest as the finish. Once you identify those roles, it becomes much easier to improvise without losing the recipe’s character. Warning: Strong spices and sugary glazes can burn quickly on high heat. Keep part of the grill cooler so you can move food if the surface chars too fast. The right equipment can also make international cooking easier at home. A gas grill gives fast temperature control for dishes that need quick searing and lower-risk basting. A griddle helps with minced meat, flatbreads, onions, and vegetables that should stay in close contact with the surface. A pellet grill is valuable when you want steady heat and subtle smoke for dishes inspired by longer barbecue traditions. A charcoal grill is best when smoke and flame are central to the final flavor. Because Nexgrill offers multiple fuel types and formats, you can choose equipment that matches the tradition you want to cook instead of adapting the tradition to an awkward setup. It also helps to plan your menu as a conversation between dishes rather than a pile of unrelated flavors. For example, if your main dish is a spicy Korean-style grilled chicken, your side dish might be cucumber salad, sesame rice, or grilled scallions rather than another heavily seasoned item. If you are making a Middle Eastern kebab, pair it with flatbread, yogurt sauce, and charred tomatoes. That approach makes the meal feel intentional and keeps the table balanced. It is also very much in line with Nexgrill’s inclusive approach to outdoor cooking, where the goal is to bring different tastes together around the fire. Conclusion International grill dishes are worth learning because they teach you more than recipes; they teach you methods, flavor logic, and cultural context. Once you start seeing grilling as a global craft, you can move more confidently between cuisines and create meals that feel both exciting and respectful. The payoff is bigger than novelty. You gain a more adaptable grilling style, a stronger sense of timing, and a better understanding of how heat transforms food in different parts of the world. For Nexgrill readers, that global perspective pairs naturally with the brand’s focus on gathering and shared meals. Whether you are cooking for a family dinner, a weekend crowd, or a small group of friends, international grilling gives you a reason to experiment and a structure that keeps the results grounded. Try comparing two products side by side below to see which fits best:

Aug 20, 202616 min read
Read more
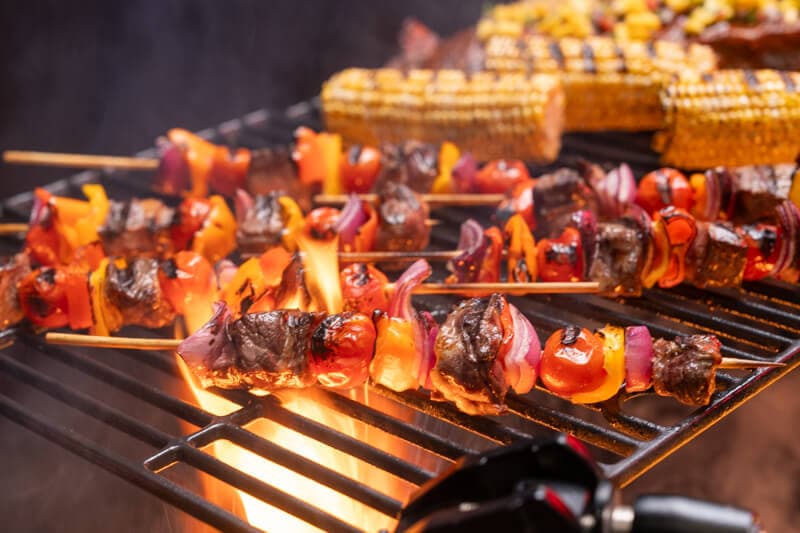
Flame-Grilled Steak Kabobs with Sweet Corn and PeppersRecipes

Grilled Spring Fruits Recipes

Introduction: Embracing Spring with Grilled Fruits Spring is the season when fruit starts to feel especially vivid: strawberries turn fragrant, stone fruits begin showing up with better texture, and tropical options like pineapple or mango bring a bright counterpoint to the first warm evenings of the year. Grilling gives those fruits a new personality. Instead of serving them simply chilled or sliced into a bowl, a hot grate deepens their sweetness, softens the edges, and adds the kind of caramelized finish that makes a dessert feel a little more memorable and a side dish feel a little more intentional. For Nexgrill readers, grilled fruit recipes fit naturally into backyard cooking because they are approachable, fast, and flexible. A fruit dessert can be prepared while the main course rests, or a fruit side can be built around whatever else is already on the grill. That makes this a useful spring topic for cooks who want something fresh without adding a lot of complexity. It also opens the door to flavors that are not overly common in neighboring grilling guides: fruit can be sweet, but it can also be savory, spiced, lightly smoky, and even paired with herbs, cheese, or pepper. A hot grill does more than mark fruit with grill lines. It changes the aroma and texture, which is why the best spring fruit recipes usually rely on firm fruit and short cook times rather than heavy sauces. One useful way to think about grilled spring fruits is that they sit between dessert and side dish. A platter of charred peaches with yogurt can anchor brunch. Pineapple with lime and chili can sit beside grilled chicken or pork. Strawberries skewered briefly over medium heat can become a warm topping for shortcakes, pound cake, or vanilla ice cream. In that sense, grilled fruit recipes are less about following a rigid formula and more about understanding what each fruit needs to hold up on the grill and what kind of finish brings out its best flavor. Spring also encourages lighter, more colorful cooking. That makes grilled fruit especially appealing because the method preserves the bright identity of the fruit while adding enough depth to make it feel seasonal and special. If you are planning a cookout, a simple breakfast, or a relaxed patio dessert, these recipes let you use the grill in a way that feels fresh rather than repetitive. Benefits of Grilling Fruits The first benefit is flavor concentration. Heat evaporates some of the fruit’s water content, which makes natural sugars taste stronger. That is why a grilled nectarine often seems richer than a raw one, even when no added sugar is used. A few minutes over the fire can create a sweet edge that tastes almost like jam, but without turning the fruit into something heavy. This is especially helpful in spring when people often want desserts and sides that feel lighter than winter baking. The second benefit is texture contrast. Grilled fruit can develop a lightly softened interior with a firmer, caramelized surface. That contrast is what makes the fruit work so well with creamy accompaniments like mascarpone, whipped ricotta, yogurt, or ice cream. It also explains why grilled fruit can be more satisfying than simply serving fruit cold: you get both warmth and structure in the same bite. A third benefit is versatility. Fruit can move in several directions depending on seasoning. A dusting of cinnamon and sugar creates a dessert profile. A pinch of cumin or chili powder pushes fruit into savory territory. A brush of honey and citrus keeps the flavor bright and polished. Because the base ingredient is already sweet, it tends to tolerate creative combinations better than more delicate foods. 3-7 min Typical grill time for most sliced fruits when cooked over medium heat There is also a practical benefit for home cooks: grilled fruit recipes are efficient. Many varieties cook quickly enough to fit into the final minutes of a meal, which means you can add a seasonal element without expanding your prep too much. That can matter for spring gatherings where the grill is already in use for vegetables, fish, or chicken. Grilled fruit also offers flexibility for small and large crowds because the same fruit can be served as a side, a garnish, or the base of a dessert bar. Finally, grilling fruit can reduce waste when the fruit is ripe but not pristine. Slightly soft peaches, nectarines, or plums are often perfect once halved and placed cut-side down over heat. The grill can help rescue fruit that might otherwise be eaten quickly or discarded, turning it into something worth serving with confidence. Selecting the Right Fruits for Grilling Not every fruit behaves well on a grill. The best candidates are firm enough to withstand heat, juicy enough to caramelize, and structured enough to hold their shape. Stone fruits are especially reliable because their flesh softens in a controlled way while the natural sugars brown nicely. Peaches, nectarines, and plums are all excellent spring choices. Choose fruit that yields slightly to pressure but is not overly soft. If the fruit is already mushy, it is more likely to collapse before it develops useful grill marks. Tropical fruits are another strong category. Pineapple is a classic because it is dense, sweet, and easy to cut into rings or planks. Mango can also work beautifully if it is ripe but still firm; it is best sliced into larger slabs rather than small cubes so it does not fall through the grates. Apricots are another smart option if you can find good spring fruit at the market. Their size makes them ideal for halving and grilling whole-side down for a quick, elegant presentation. Berries require a different approach. They are too small to place directly on the grill in most cases, so they work best in skewered clusters, grill baskets, or wrapped packets. Strawberries are the easiest to handle because they are sturdy enough to hold shape if threaded carefully. Blueberries are more of a supporting fruit; they shine when combined in foil packets with strawberries or served as a warm compote after brief grill exposure. Very soft fruit can stick, collapse, or leak too much juice. If it feels fragile before it reaches the grill, it will usually need a basket, packet, or a different treatment. When shopping, look for fruit that has intact skin and an even shape. Uneven fruit cooks unevenly, and cracks in the skin can let juices escape too quickly. For stone fruits, halving and pitting should happen right before grilling if possible, especially if you want the cut surface to remain fresh. For pineapple, remove the core if you want softer eating slices, or leave some structure if you need sturdier planks for serving with savory dishes. The goal is not to find the ripest fruit possible; it is to find fruit with enough integrity to take heat without losing its identity. A final selection tip: think about the rest of the plate. If the fruit will be served with cheese or yogurt, choose fruit that leans aromatic and sweet. If it will sit next to savory proteins, fruit with acidity and a little firmness will usually perform better. Matching fruit texture to the final dish is one of the simplest ways to improve the recipe before the grill is even lit. Essential Grilling Techniques for Fruits Fruit grilling is less about intensity and more about control. Medium heat is the sweet spot for most recipes because it allows the surface to caramelize before the flesh turns too soft. High heat can work for dense pineapple planks or very firm stone fruit, but most spring fruit recipes benefit from a gentler approach. Clean grates are important, and so is a lightly oiled surface. A thin coat of neutral oil on the fruit itself is usually enough; too much oil can cause flare-ups or make the exterior slippery rather than browned. For stone fruits, halve and pit them, then place them cut-side down first. That position helps the cut surface sear and creates defined grill marks. After a few minutes, turn them briefly to warm the skin side if needed. With pineapple, use rings or long slices, and grill each side until the surface shows caramelization. Mango should be cut into large cheeks or slabs and handled gently with a wide spatula. Strawberries are best threaded onto skewers or set into a grill basket so they do not slip between grates. A light glaze can help, but it should be applied carefully. Honey, maple syrup, or orange juice reductions can be brushed on during the last minute of cooking rather than at the start, because sugary coatings burn quickly. Spices are best kept dry or mixed into a light brush-on oil. Cinnamon, cardamom, chile powder, ginger, and cumin all work in small amounts. The key is restraint. Fruit should still taste like itself after grilling; seasoning should add definition, not disguise the fruit. For better color and less sticking, wait until the grate is fully preheated before placing fruit on it. A hot grate gives you quicker searing and cleaner release. Another useful technique is finishing off the heat. If you want a fruit compote or topping, grill the fruit just enough to mark it, then let it rest in a bowl where the residual warmth can deepen the juices. This works especially well with berries, sliced peaches, or plums that you want to spoon over pancakes or pound cake. If you are serving fruit as a standalone dessert, that resting period helps the natural juices redistribute so the fruit tastes fuller and less rushed. For cooks who like a little structure, think in three layers: heat, seasoning, and finish. Heat gives texture, seasoning sets the flavor direction, and finish adds freshness. A squeeze of lime, a sprinkle of flaky salt, chopped mint, basil, or a dollop of cream can change the same grilled fruit from breakfast to dessert to side dish. That flexibility is one of the reasons fruit deserves a place on the grill during spring, especially for readers who like to experiment without needing a complicated prep list. Delicious Grilled Fruit Recipes A standout spring recipe is grilled peaches with honeyed mascarpone and black pepper. Cut ripe but firm peaches in half, brush them lightly with oil, and grill cut-side down until the surface browns. Whisk mascarpone with a little honey and a pinch of salt, then spoon it into the peach cavity and finish with cracked black pepper. The result is sweet, creamy, and just a little unexpected, which makes it feel more polished than a standard fruit-and-cream dessert. For something more savory, try grilled plums with cumin, olive oil, and labneh. Halved plums pair beautifully with a very light brushing of olive oil and a dusting of cumin before grilling. Serve them with chilled labneh and mint. The smoky sweetness of the plum and the tang of the yogurt create a balanced side dish that works well beside grilled halloumi, chicken skewers, or flatbread. Pineapple is excellent in a warmer-weather salsa-style recipe. Grill thick slices of pineapple, then chop them and mix with diced cucumber, jalapeño, lime zest, cilantro, and a small pinch of salt. This can serve as a topping for tacos, grilled shrimp, or crispy tortillas. It is a good example of how grilled fruit can be used beyond dessert and into the rest of the meal. For a simple sweet option, grilled strawberries with balsamic glaze and basil make a fast finish. Thread strawberries on skewers, grill briefly until the skins soften, then drizzle with reduced balsamic vinegar and garnish with torn basil. That recipe is particularly useful when you want a lighter after-dinner plate without baking anything. Blueberries can join the same theme in a foil packet with a touch of orange zest and maple syrup, then spooned over vanilla yogurt or shortcake. Mango can be turned into a bright spring salad ingredient. Grill thick mango slabs, slice them into strips, and toss with avocado, arugula, toasted pumpkin seeds, and a lime vinaigrette. The grilled mango adds depth and sweetness, while the peppery greens keep the dish from feeling too dessert-like. That mix of temperatures and textures is exactly what makes grilled fruit so useful in spring cooking. If you want one recipe to carry across breakfast, lunch, and dessert, grilled stone fruit is the most adaptable place to start. It pairs easily with both sweet and savory toppings. Conclusion: Savoring the Flavors of Spring Grilled spring fruits recipes are a simple way to turn the grill into a creative tool for the season. They bring sweetness, smoke, and texture together without requiring long cooking times or complicated techniques. More importantly, they let you cook in a way that feels seasonal and generous: the same grill used for dinner can also produce a dessert, a brunch element, or a bright side dish that surprises people in the best way. The best approach is to start with fruit that is firm enough to hold together, choose a heat level that protects the fruit’s shape, and season with restraint. Once you understand that basic framework, you can move easily between sweet and savory directions, use whatever spring fruit looks best at the market, and create combinations that fit the meal in front of you. That versatility is what makes grilled fruit worth learning well. It is colorful, fast, forgiving, and just unusual enough to feel like a real upgrade to spring cooking. Try comparing two products side by side below to see which fits best:

Aug 18, 202620 min read
Read more
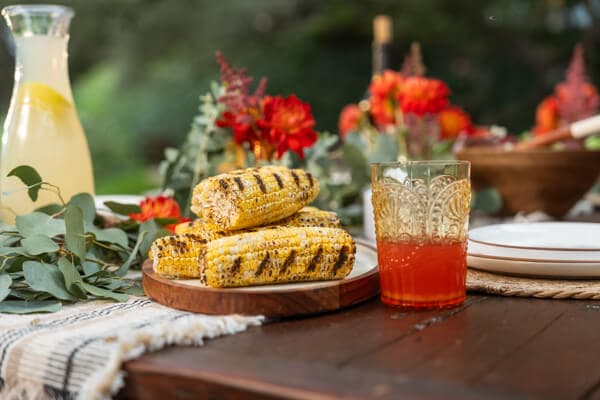
Charred Sweet Corn with Backyard Summer LemonadeRecipes

Mastering Summer Grilling: A Comprehensive Guide to Vegetables

Introduction: The Art of Grilling Vegetables Grilling vegetables is one of the simplest ways to make summer cooking feel more intentional. Heat concentrates sweetness, softens bitterness, and adds the kind of char that makes even familiar produce taste brand-new. The key is not to treat vegetables like a side note. They deserve their own timing, their own heat strategy, and their own seasoning approach. When you do that well, grilled vegetables can move from supporting role to the part of the plate people talk about after dinner. What makes vegetable grilling especially satisfying is how flexible it is. You can cook a basket of zucchini and bell peppers alongside a steak, or build an entire meal around corn, mushrooms, eggplant, onions, and asparagus. That flexibility fits Nexgrill’s approach to outdoor cooking: practical, approachable, and designed for real gatherings, whether the group is two people on a weeknight or a full backyard table. The best summer meals often happen when the grill is doing more than one job at once, and vegetables are ideal for that kind of cooking. 3 core things determine great grilled vegetables: cut size, heat control, and finishing seasoning. Info: Most vegetables are better when cooked over medium-high heat, but the exact setting depends on moisture content and thickness. Delicate items like asparagus need faster attention, while dense vegetables like potatoes or carrots benefit from pre-cooking before they hit the grate. If you are new to grilling vegetables, start by thinking in categories rather than individual produce. Tender vegetables such as zucchini, squash, peppers, onions, mushrooms, and tomatoes usually cook quickly and reward direct heat. Denser vegetables such as corn, carrots, potatoes, and cauliflower need a longer path to tenderness. That difference matters because the goal is not simply to mark the outside; it is to get the inside to the right texture before the exterior dries out. A useful summer grilling vegetables guide mindset is to match the vegetable to the method, not the other way around. Nexgrill’s lineup makes that easier in real life because broader cooking surfaces, griddles, and multi-burner setups give you zones to work with. For example, a 4-burner gas grill lets you keep one side hotter for quick-searing peppers and onions while another side runs a little cooler for thicker vegetables. A flat-top griddle can be just as useful when you want smaller pieces, slices, or mixed vegetable medleys that would otherwise fall through a grate. That kind of setup is practical for home cooks who want consistency without overcomplicating dinner. Essential Grilling Techniques for Vegetables The best vegetable grilling technique starts before the food reaches the grate. Preheat the grill for 10 to 15 minutes so the cooking surface is hot enough to sear instead of steam. A clean, well-oiled grate also reduces sticking, which is especially important for softer vegetables like eggplant or sliced onions. If you are using a gas grill, create one hot zone and one moderate zone so you can move vegetables as needed. That simple setup gives you more control than trying to force every ingredient to cook in the same spot. Direct grilling works best for vegetables that are already tender or cut into pieces that will cook quickly. Skewering peppers, mushrooms, and onions can make them easier to turn, but a grill basket is often better for smaller cut pieces because it keeps them in contact with heat while preventing loss through the grates. For thicker items, use indirect heat first to soften the interior, then move them over the flame to finish with color. This two-stage method is particularly effective for corn, carrots, and cauliflower steaks. Vegetable Best Heat Approx. Time Notes Asparagus Medium-high direct 4 to 7 minutes Turn once; pull when lightly blistered. Zucchini slices Medium-high direct 3 to 5 minutes Slice lengthwise for fewer fall-throughs. Corn on the cob Medium indirect to direct finish 12 to 18 minutes Rotate often for even color. Bell peppers Medium-high direct 6 to 10 minutes Use whole halves or wide strips. Warning: Wet vegetables and sugary glazes can burn quickly. Pat produce dry before oiling, and add sweet sauces near the end of cooking instead of at the start. A practical detail that many cooks miss is carryover heat. Vegetables keep softening after they come off the grill, especially if they were cooked on a very hot surface. That means you should remove them just before they seem fully done. A slightly firm center in zucchini or a touch of crunch in peppers can be exactly right by the time they reach the table. If you wait until they look completely finished on the grill, they may become mushy during plating. Top Vegetables to Grill and How to Prepare Them The vegetables that grill best are usually the ones with enough structure to hold shape under heat. Corn, mushrooms, peppers, onions, zucchini, eggplant, asparagus, and portobello mushrooms all perform well because they can take on char without collapsing. That said, the preparation is what makes the difference between decent results and memorable ones. Thick slices create better contact with the grate, while uniform cuts help everything finish at the same time. If one piece is much thicker than the others, the thinner piece will dry out before the thicker one is ready. Corn benefits from the most planning. You can grill it in the husk for a steamed, lightly smoky result, or shuck it first for stronger caramelization. On a Nexgrill gas grill or griddle, shucked corn brushed with oil and cooked over medium heat gives you the fastest path to color. Asparagus needs very little work beyond trimming the woody ends and applying a light coating of oil. Zucchini and yellow squash should be cut lengthwise into slabs rather than tiny rounds, because larger pieces are easier to handle and less likely to overcook. Bell peppers are best when cut into wide strips or left in large halves so they can blister on the outside while staying juicy inside. More structured vegetables need a slightly different plan. Cauliflower florets can be threaded onto skewers, parboiled briefly, or roasted indirectly before grilling. Carrots can be blanched first if you want tenderness with visible grill marks. Potatoes are best when partially cooked before they hit the grill, otherwise the exterior can overbrown before the center is ready. This is one reason griddles are so useful: a flat cooking surface lets you manage a wider variety of sizes without losing pieces through the grate. For cooks who like mixed vegetable platters, a Daytona-style griddle or a flat-top surface gives you room to work in batches and keep vegetables separated by doneness level. Vegetable Prep Method Grill Time Best Use Eggplant Slice 1/2-inch rounds, salt lightly 4 to 6 minutes per side Great for layered sandwiches or salads. Mushrooms Brush clean, keep whole or halved 5 to 8 minutes Ideal for skewers or topping burgers. Tomatoes Use firm, halved tomatoes 2 to 4 minutes Best as a quick finishing element. Cauliflower Steak slices or blanched florets 8 to 12 minutes Works well with smoky spice rubs. Flavorful Marinades and Seasonings for Grilled Vegetables Vegetables need less seasoning than meat, but that does not mean seasoning is an afterthought. In summer, the best flavor often comes from a light oil base, a little acid, and enough salt to wake up the natural sweetness of the produce. Olive oil helps with heat transfer and browning. Lemon juice, vinegar, or citrus zest can brighten richer vegetables like eggplant and mushrooms. Garlic, herbs, smoked paprika, and chile flakes add depth without overwhelming delicate vegetables. For a simple everyday blend, mix olive oil, kosher salt, black pepper, minced garlic, and chopped parsley or oregano. For a stronger profile, try olive oil with balsamic vinegar, Dijon mustard, and thyme for mushrooms and onions. If you are grilling corn, a chili-lime butter brushed on after cooking creates a restaurant-style finish without heavy sauce. In a Nexgrill outdoor cookout, these finishes work well because they can be added table-side, keeping the grill itself focused on clean heat and color. Tip: If you want deeper browning, season vegetables 10 to 20 minutes before grilling so the salt has time to draw out a little surface moisture. Marinades should be brief. Unlike meat, vegetables can become waterlogged if they sit too long in a wet mixture. Ten to thirty minutes is usually enough for sliced vegetables, while firmer vegetables can handle a little longer. If the marinade contains sugar, apply it near the end of the cook or use it as a finishing glaze. A soy-ginger marinade works beautifully on mushrooms and peppers, while a lemon-herb marinade suits zucchini and asparagus. For a smoky summer profile, use olive oil, smoked paprika, cumin, garlic powder, and a small splash of lime juice. Grilling Tips and Tricks for Perfect Results The difference between good and great grilled vegetables is usually in the handling. Do not overcrowd the surface, because too many pieces trap steam and prevent browning. Use tongs instead of a fork so you do not lose moisture. Keep a small tray nearby for vegetables that finish at different times; asparagus will be ready long before thick carrot planks, and that is normal. If you are cooking on a Nexgrill gas grill with multiple burners, reserve one cooler zone where finished vegetables can rest without overcooking while the rest catch up. A useful rule is to grill vegetables in order of density. Start with anything that needs the longest time, then add quicker-cooking produce as you go. For example, begin with blanched carrots or cauliflower, then move to corn and onions, then finish with zucchini, asparagus, and tomatoes. This sequence helps you serve a mixed platter at the same time instead of plating each ingredient separately. If you want more char without overcooking, close the lid for part of the cook so heat circulates, then open it at the end for visible grill marks. That technique works especially well on thicker vegetables where the interior needs time to soften. Vegetables also make excellent building blocks for meals beyond the obvious side dish. Grilled zucchini can be chopped into pasta, layered into wraps, or folded into grain bowls. Charred peppers and onions become taco fillings or pizza toppings. Grilled corn can be cut off the cob and mixed into salsa, pasta salad, or avocado toast. These are not just leftovers; they are high-value ingredients with a stronger flavor profile than raw produce. In other words, grilling vegetables once can create several meals, which is exactly why this method feels so efficient in summer. If you like equipment that makes these jobs easier, a 2-burner grill is ideal for smaller households, while a 4-burner or griddle setup gives you more control when you want to cook vegetables alongside proteins. Nexgrill’s product range includes both compact and larger-format outdoor cooking options, which matters because the right surface often matters more than brute heat. Try comparing two products side by side below to see which fits best: Conclusion: Elevate Your Summer Grilling with Vegetables Grilled vegetables are at their best when they are treated with the same care you would give any main dish. Once you learn how to match vegetable type to heat, prep, and seasoning, the results become easy to repeat. You can build a summer menu around a mix of charred corn, peppers, zucchini, and mushrooms, or use vegetables to add color and balance to a broader cookout spread. Either way, the payoff is a table that feels abundant without requiring complicated steps. Nexgrill’s open, practical approach to outdoor cooking fits this style of food especially well. Whether you are using a griddle for smaller pieces, a multi-burner gas grill for heat zones, or a larger backyard setup for a full spread, the goal is the same: make the grill work harder for more kinds of food. Summer vegetables are one of the easiest places to start because they respond so well to straightforward technique, and they reward you with flavor that feels fresh, smoky, and built for sharing.

Aug 16, 202620 min read
Read more
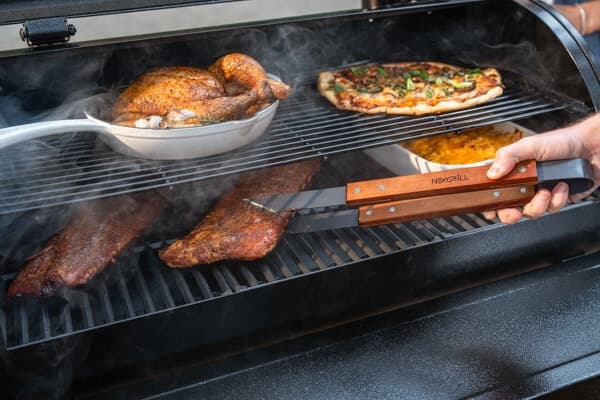
Smoked BBQ Chicken and Grillhouse Pizza PlatterRecipes

Mastering Grilled Pizza: Techniques and Tips

Introduction: The Appeal of Grilled Pizza Grilled pizza solves a problem that oven-baked pizza can’t always fix: it gives the crust direct contact with intense heat, which creates a crisp, lightly charred exterior while keeping the center tender enough to eat with your hands. That contrast is what makes pizza cooked on the grill feel special. It is not just pizza taken outside. It is a different cooking method with its own rhythm, timing, and flavor payoff. The best results come when you treat it more like a live-fire flatbread than a conventional oven pie. This guide focuses on practical pizza-cooking tips on the grill for home cooks who want dependable results without turning pizza night into a complicated project. That means dialing in the dough, setting up the grill correctly, and learning how to move quickly once the crust is on the grate. It also means understanding that pizza on the grill rewards preparation more than improvisation. Have your toppings prepped, your sauce ready, and your tools nearby before the first piece of dough touches the heat. Grilled pizza works best when every step is staged in advance. Once the dough hits the grill, the process moves fast. Nexgrill’s approach to outdoor cooking has always been about making backyard meals feel approachable and rewarding, and pizza is a perfect example. Whether you are using a gas grill for steady heat or a charcoal setup for a slightly smokier finish, the goal is the same: create a crust that develops structure quickly, then finish the toppings without burning the base. In practice, that usually means choosing a dough that is easy to stretch, controlling flare-ups, and resisting the urge to overload the pizza with sauce or wet ingredients. The biggest advantage of grilling pizza is flexibility. You can make weeknight flatbreads, classic Margherita pies, or a simple roasted-vegetable pizza with ingredients you already have in the refrigerator. And because the grill behaves differently than an indoor oven, even a modest backyard setup can produce results that feel restaurant-worthy if you respect the heat. That is especially useful when cooking for a mixed group of guests, because one grill can turn out multiple pizzas with different toppings in quick succession. Before you start, think of the grill as both the oven and the baking stone. The grate is doing the work of direct heat transfer, while the closed lid helps create the surrounding radiant heat that finishes the top. If you understand that balance, the rest of the process becomes easier to control and repeat. Choosing the Right Dough for Grilling The best dough for the grill is one that stretches easily, holds together when moved, and bakes quickly without becoming gummy in the center. Standard pizza dough works well, but not every dough is equally forgiving. A dough that is too wet can cling to the grates and tear during transfer, while an overly dry dough can crack before it reaches the grill. For most home cooks, a medium-hydration dough with good gluten development is the sweet spot because it gives you enough elasticity to stretch thin but enough structure to survive the move from counter to grate. If you are using store-bought dough, let it warm up to room temperature before stretching. Cold dough fights back and springs into a smaller shape than you want. A rested dough relaxes, which means fewer tears and less shrinkage. If you are making dough from scratch, aim for a smooth, elastic texture rather than an ultra-soft one. A slightly firmer dough is often easier to handle on the grill because it is less likely to slump when topped. Dough Style Why It Works on the Grill Best Use Classic pizza dough Balanced elasticity and browning Everyday grilled pizza Store-bought dough Convenient and easy to portion Quick weeknight pizza Whole wheat blend Adds flavor, but can be less elastic Heartier crusts with careful handling A useful practical rule: keep the dough thinner than you would for a deep-pan pizza, but not so thin that you can see light through it. For most backyard grills, that means a crust that is around 1/4 inch thick at the center and slightly thicker at the edge. Dust the work surface lightly with flour or fine semolina so the dough can move without sticking, but avoid over-flouring; too much flour can scorch on the grill and leave a bitter taste. If the dough snaps back while stretching, let it rest for 10 to 15 minutes before trying again. Rushing this step leads to tearing later. Preparing Your Grill for Pizza A clean, hot grill makes the difference between a crust that lifts cleanly and one that sticks or burns. Before preheating, brush away old debris from the grates and clear out excess grease. For gas grills, preheat with the lid closed so the entire cooking chamber heats evenly. For charcoal grills, arrange the coals so you have a stable heat zone instead of scattered hot spots that can blacken one side of the crust before the other side has time to set. The target is a hot surface, but not a chaotic one. You want the grate hot enough to create grill marks quickly, yet controlled enough that you can turn the pizza if one edge darkens faster than the rest. If your grill has multiple burners, creating a two-zone setup can help you move the pizza away from direct flare-ups once the crust has firmed up. That flexibility matters because toppings such as cheese, sausage, and vegetables all finish at slightly different speeds. Hot grill, clean grates, low clutter Those three basics prevent most sticking and burning problems. If you are using a pizza stone or a grill-safe baking surface, preheat it slowly with the grill so it can absorb heat evenly. A cold stone placed on a blazing hot grill may crack. A warmed stone, by contrast, helps brown the bottom more gently and reduces the chance of scorching. Many grillers find that stones are most helpful when making thicker doughs or when they want a softer underside with less direct grate branding. But a direct-to-grate method can also be excellent if the dough is well oiled and easy to move. For gas grilling, medium-high heat often works best once the grill is fully preheated. On a charcoal grill, wait until the coals are covered with a gray ash and the heat is even across the cooking area. If the grill is too cool, the dough can dry out before it browns. If it is too hot, the crust may char before the cheese melts. The best setup is one that gives you control, not just intensity. Grilling Techniques: Direct vs. Indirect Heat There are two dependable ways to grill pizza: direct heat and indirect heat. Direct heat means the dough cooks right over the flame or coals. This method creates fast browning and dramatic grill marks, but it demands attention because the crust can go from golden to burned in a matter of seconds. It works best for thin pizzas and experienced grillers who are comfortable moving quickly. Indirect heat is slower and more forgiving. Here, the pizza is placed away from the main heat source, which lets the toppings melt while the crust finishes without severe scorching. This is the method many home cooks prefer when making pizza on the grill for the first time because it gives them more time to adjust the pie, close the lid, and control the finish. It is especially useful for pizzas with heavier toppings or thicker dough. Method Strength Trade-off Direct heat Fast char and strong grill flavor Higher risk of scorching Indirect heat More control and even topping melt Slightly slower finish For many backyard cooks, the smartest approach is a hybrid method. Start with direct heat to firm the dough and get marks, then move the pizza to indirect heat to finish the toppings with the lid closed. That sequence gives you the best of both worlds: texture on the bottom and melted cheese on top. It also helps when a grill has one side hotter than the other, because you can use that hot side to start the crust and the cooler side to finish it. Remember that pizza on the grill is more forgiving when you think in stages. First set the dough. Then build the topping structure. Then finish the pie. Trying to do all of that in one hot spot is how many pizzas get overdone before the cheese has time to melt. Selecting and Preparing Toppings Toppings should be flavorful, but they also need to be grill-smart. Ingredients with too much moisture can make the crust soggy, while oversized topping piles make it harder for the pizza to cook evenly. The best grilled pizzas tend to use fewer toppings than overloaded delivery pies. Think of each topping as part of a balanced structure rather than a layer cake. Cheese selection matters more than many home cooks expect. Low-moisture mozzarella melts beautifully and gives you a familiar stretch without flooding the crust. Fresh mozzarella can be delicious, but it carries more moisture, so it should be used sparingly or patted dry first. Pre-cooked vegetables such as mushrooms, peppers, onions, and zucchini work well because they have already released some of their water. Meats should be fully cooked before topping the pizza unless the ingredient is designed to finish quickly on the grill, such as thin-sliced pepperoni. Dry your toppings before they go on the dough. Even a small amount of extra moisture can soften the crust and slow browning. Fresh herbs, arugula, basil, and a drizzle of olive oil are often better added after grilling than before. High heat can turn delicate greens bitter or wilted. Likewise, finishing ingredients like balsamic glaze, hot honey, or shaved cheese can be added once the pizza comes off the grill so they stay bright and aromatic. This creates a more layered flavor profile than simply loading everything onto the dough at the start. Assembling and Grilling Your Pizza Assembly should be quick and deliberate. Once the dough is shaped, place it on a lightly floured peel, inverted sheet pan, or tray that lets you move it smoothly. Add sauce sparingly, leaving a border for the crust. Over-saucing is one of the most common mistakes because it makes the center heavy and can prevent the dough from setting properly. A thin, even layer is enough to carry flavor across the whole pie. If you are grilling the dough first and topping it later, slide the plain dough onto the grill and let it cook until one side has firmed up and developed structure. Then flip it, add the toppings to the cooked side, and close the lid until the cheese melts. That method is especially reliable for beginners because it reduces sticking and makes the transfer easier. If you prefer topping first, work quickly and keep the pizza moving from prep area to grill in one smooth motion. Thin sauce, moderate toppings, fast transfer That formula keeps the crust crisp and the center balanced. Watch the pizza closely once it is on the grill. Even a well-preheated surface can create hot spots, so rotate the pizza if one side colors faster. The lid is your friend here because it traps heat around the toppings and helps melt the cheese without requiring the bottom to stay over direct flame the entire time. Most grilled pizzas are done when the cheese is fully melted, the edges are browned, and the underside releases easily from the grates. Troubleshooting Common Grilling Issues If the dough sticks, the grill probably was not hot enough, the grates were not clean enough, or the dough was moved before the surface had time to set. Let it cook a little longer and it often releases on its own. If it still sticks, use a thin spatula to gently loosen it rather than forcing it off in one motion. A small tear is easier to repair than a fully folded crust. If the bottom burns before the top melts, the heat is too aggressive. Move the pizza to a cooler zone, close the lid, and let ambient heat finish the cheese. If the top is browned but the crust feels limp, the dough may have been too thick or the grill not hot enough to begin with. In that case, preheating longer next time or rolling the dough a little thinner will help. A charred spot is not always a failure. Small dark blisters can add flavor, but widespread blackening means the pizza spent too long in direct heat. If toppings slide off, the pizza probably has too much sauce or too many wet ingredients. Simplify the topping stack and choose better-drained ingredients next time. If the crust tastes dry, the dough may have been stretched too thin or cooked too long without enough topping moisture. Each of these issues is fixable once you understand that grilled pizza is a timing game, not a set-it-and-forget-it meal. Try comparing two products side by side below to see which fits best: one grill or another can completely change how easy your next pizza night feels.

Aug 16, 202618 min read
Read more
Charred Sweet Corn with Backyard Summer LemonadeRecipes

Seasonal Grilling Ideas

Spring Grilling: Embracing Freshness Spring is the ideal season to embrace the freshness of new produce and lighter dishes. As the weather warms, it's time to fire up the grill for vibrant and refreshing meals. One popular choice is grilled asparagus, which pairs perfectly with a simple olive oil and lemon dressing. This dish not only highlights the natural flavors of asparagus but also complements a variety of main courses. Imagine a fresh spring salad with mixed greens, cherry tomatoes, and a sprinkle of feta cheese alongside your grilled asparagus. The combination is not only visually appealing but also a delightful mix of textures and flavors. Another springtime favorite is strawberry-glazed chicken. The sweetness of strawberries combined with a hint of balsamic vinegar creates a glaze that adds a delightful twist to traditional grilled chicken. By marinating chicken breasts in this mixture, you achieve a balance of flavors that's perfect for any outdoor gathering. Serve it with a side of quinoa salad mixed with fresh herbs and lemon zest to enhance the meal's freshness. Tip: Use seasonal herbs like mint and basil to enhance the freshness of your spring grilling recipes. Spring is also the time to experiment with grilled pizzas. Using fresh dough and seasonal toppings like artichokes, goat cheese, and prosciutto can transform a simple pizza into a gourmet delight. Grilling pizzas adds a smoky flavor and crispy texture that oven-baked versions often lack. Try adding a drizzle of truffle oil or a sprinkle of arugula just before serving to elevate the dish even further. For those who enjoy seafood, spring is a great time to grill fresh fish like salmon or trout. Pair them with a citrusy salsa made from oranges and cilantro, providing a refreshing contrast to the rich flavors of the fish. The grilling process enhances the fish's natural oils, resulting in a tender and flavorful dish. Lastly, consider incorporating grilled fruits into your spring grilling repertoire. Grilled peaches or pineapples can serve as a sweet dessert or a unique addition to salads. The caramelization that occurs during grilling brings out the natural sugars, creating a deliciously sweet and smoky flavor.

Aug 5, 20265 min read
Read more
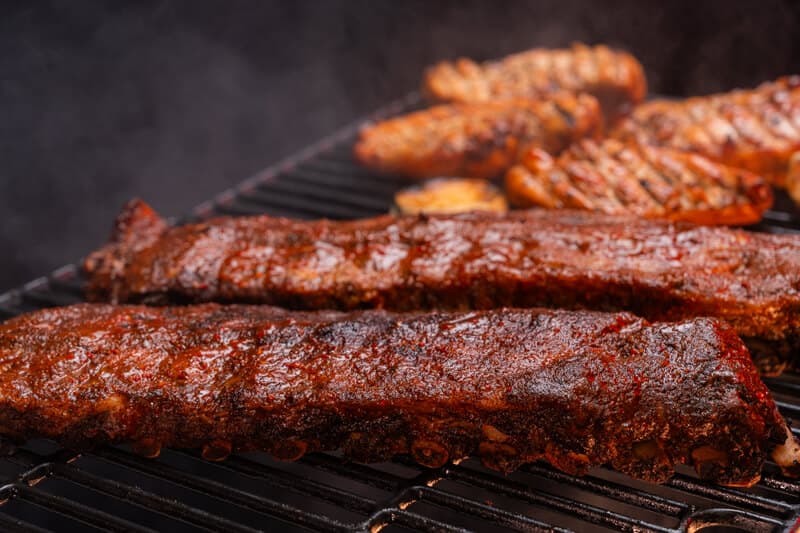
Slow-Smoked Dry Rub BBQ Baby Back RibsRecipes

Smoking Meat for BBQ Beginners: A Step-by-Step Guide

Quick-Start Summary: Gear and First Meat If you are new to smoking meat, the easiest path is to start with one forgiving cut, one steady smoker, and one simple temperature target. For most beginners, that means a pork butt in the 225-275°F range, a digital probe thermometer, a water pan, and enough fuel to hold a clean fire for several hours. Nexgrill’s brand approach emphasizes practical, approachable outdoor cooking for every skill level, which is exactly the right mindset for smoking: you do not need a chef’s setup to get excellent results, but you do need patience and repeatable steps. Begin with a meat that has fat and connective tissue. Those cuts forgive small mistakes and reward low-and-slow cooking. $200-$600 A realistic beginner smoker budget in the United States, depending on fuel type and size For a first cook, skip the idea that smoking is about chasing perfect smoke rings or running an overly complicated fire. Your job is to hold temperature, add the right amount of smoke, and wait until the meat is tender enough to rest properly. Pork butt is the classic first smoke because the fat and collagen help protect it from drying out. If you want something smaller and faster, ribs are a good next step, but they are less forgiving than pork shoulder. Chicken is easy to buy but less forgiving to smoke because it can dry out before the smoke flavor builds. The other early decision is the smoker itself. Pellet smokers are the most beginner-friendly for temperature control, electric smokers are simple and steady, charcoal bullet smokers reward attention with strong flavor, kettle grills can absolutely smoke meat with indirect heat, and offset smokers are the most hands-on option. If your main goal is fewer surprises, choose the style that matches how much time you want to spend watching the fire. Choosing the Right Smoker: Options and Budget The best smoker for a beginner is not the one with the most chrome or the biggest cooking chamber. It is the one you can run consistently on a weeknight or a Saturday morning without fighting temperature swings. In the U.S. market, a sensible starter budget usually lands between $200 and $600, though simple charcoal rigs can cost less and larger pellet models can cost more. That range is enough to get a dependable setup without jumping straight into a premium offset pit. Smoker type Beginner effort Typical budget Best use Pellet smoker Low $400-$900+ Set-it-and-monitor convenience Electric smoker Low $200-$500 Simple temperature control Weber Smokey Mountain style charcoal smoker Medium $300-$500 Classic smoke flavor with learning curve Kettle grill with indirect setup Medium $100-$300 Budget-friendly entry into smoking Offset smoker High $300-$1,000+ Hands-on fire management and larger cooks Pellet smokers are the easiest starting point if you want to focus on meat instead of managing a fire. They use compressed wood pellets and a controller to hold a target temperature, which makes them appealing for first-time smokers. Electric smokers work similarly in spirit, but they lean even more toward convenience and are especially useful when you want a compact, low-drama setup. Charcoal bullet smokers, such as a Weber Smokey Mountain style cooker, are a sweet spot for beginners who want to learn real fire control without the complexity of an offset. A kettle grill can also smoke beautifully, especially if you already own one and want to test the waters before buying a dedicated unit. An offset smoker can make outstanding barbecue, but it is not the easiest first purchase if you are still learning how long a fire should last. Best Meats for Beginners: Flavor and Ease The easiest meats to smoke are the ones that are naturally forgiving. Look for cuts with marbling, connective tissue, or enough thickness to stay juicy during a long cook. Pork butt is the number one beginner choice because collagen slowly breaks down into a silky texture, and the cut stays moist even if your pit runs a little hotter than planned. That is why pulled pork is so often recommended as a first project: it teaches bark, stall, rest, and shredding in one cook. Pork butt: best all-around beginner choice, very forgiving, excellent for leftovers. Ribs: shorter cook, more surface area for seasoning, but easier to overdo. Chuck roast: good practice for beef flavor and slice-or-shred versatility. Chicken: quick and affordable, but demands better timing and moisture control. Ribs are a useful second cook because they teach you how bark develops and how smoke behaves over a shorter timeline. A chuck roast is another smart option when you want beef without committing to brisket-level time and cost. Chicken can be a fun practice meat, but it should not be your very first smoke if you are nervous; poultry cooks through quickly, and the skin can turn rubbery if you push smoke too long. The common thread is collagen and fat: the more of both a cut has, the more room you have to learn without ruining dinner. Step-by-Step Guide to Your First Smoke Your first smoke should be simple enough that you can repeat it. Start by trimming a pork butt only enough to remove loose edges and any hard, thick fat caps that will not render well. Leave enough fat to protect the meat. Pat it dry, apply a straightforward rub with salt, pepper, garlic, and paprika, then let it sit while you preheat the smoker. The goal is not a complicated flavor formula; it is even seasoning and a stable cook. Preheat the smoker to 250°F and stabilize it before adding meat. Fill the water pan if your cooker uses one, then add your wood or pellets. Place the pork butt fat cap in the direction of the heat source. Insert a probe into the thickest part of the meat, not touching bone. Smoke until the bark is set and the internal temperature climbs into the stall range. Wrap in foil or butcher paper only after the bark looks the way you want it. Finish until the meat is probe-tender, then rest it before pulling or slicing. For a first smoke, use mild woods such as apple, cherry, or oak. Stronger woods like hickory can be excellent, but too much can overwhelm a beginner’s first cook. If you are using a kettle grill, bank the coals to one side and keep the meat on the cool side. If you are using a pellet or electric smoker, trust the controller but still verify with a separate thermometer. That habit alone prevents a lot of bad guesses. A stable 250°F cook is easier to manage than trying to force a hotter pit on your first attempt. Understanding Times and Temperatures Smoking is slow by design, so the most useful skill is learning how to think in ranges rather than exact minutes. In general, pork butt often takes 1.5 to 2 hours per pound at 225-275°F, ribs may finish in 4 to 6 hours, chuck roast often lands in the 6 to 8 hour range, and chicken can be done in about 2 to 4 hours depending on size and temperature. These are estimates, not promises, because weather, meat thickness, and smoker style all matter. Meat Typical smoker temp Target internal temp Beginner note Pork butt 225-275°F 195-205°F Best first long cook Ribs 225-275°F Tenderness-based Watch bark and bend, not just temp Chuck roast 225-275°F 195-205°F Great for learning beef smoke Chicken 250-300°F 165°F breast, 175-185°F thigh Do not over-smoke for too long The stall is the part that frustrates beginners most. Around the middle of the cook, evaporative cooling can make the meat’s temperature plateau for a while even though the smoker is steady. That pause is normal. Keep your pit consistent, wait it out, and wrap only when the bark is set enough for the texture you want. Resting matters just as much as the cook itself, because sliced or pulled meat needs time for juices to redistribute. Once you have the basics down, try comparing two products side by side below to see which fits best:

Jul 12, 202611 min read
Read more
Charred Sweet Corn with Backyard Summer LemonadeRecipes

Mastering the Art of Enhancing Meat Flavor

Understanding Meat Flavor Profiles Enhancing meat flavor starts with understanding what contributes to taste. The primary flavors in meat come from fats, proteins, and the Maillard reaction-a chemical reaction that occurs when heat transforms the amino acids and sugars in meat, creating a complex flavor profile. Different meats have distinct flavor profiles. For instance, beef is rich and robust, while chicken is milder and absorbs marinades well. Recognizing these differences is crucial for flavor enhancement. To enhance the natural flavors of meat, you need to consider the cut, cooking method, and seasoning. Each cut of meat offers different characteristics that can be highlighted through proper preparation and cooking techniques . Dry Aging: A Time-Honored Technique Dry aging is a technique used primarily for beef that deepens flavor by allowing enzymes to break down tissues slowly. This process not only tenderizes the meat but also intensifies its flavor. Typically, dry aging is done in controlled environments with specific temperature and humidity levels, making it a more advanced method used by enthusiasts and professionals. It's important to note that dry aging is not suitable for all meats. While beef benefits significantly from this process, poultry and pork do not gain the same flavor enhancements and may even spoil if aged under similar conditions. DIY Dry Aging at Home For the adventurous home cook, it is possible to dry age beef at home using a dedicated refrigerator or a specially designed dry-aging bag. Ensure that the environment is sanitary and temperature-controlled to prevent spoilage. Tip: Always start with high-quality beef cuts like ribeye or strip loin for the best dry-aging results. Marinades and Rubs: Flavor Infusion Techniques Marinades and rubs are essential tools for enhancing meat flavor. Marinades typically consist of acidic components, such as vinegar or citrus juice, combined with herbs and spices, which help tenderize the meat while infusing it with flavor. On the other hand, rubs are dry mixtures of spices and herbs applied to the meat's surface, creating a flavorful crust when grilled. Marinade Component Purpose Example Ingredients Acid Tenderizes meat Lemon juice, vinegar Oil Moisturizes and binds flavors Olive oil, sesame oil Herbs/Spices Adds flavor complexity Garlic, rosemary, cumin To maximize the effectiveness of a marinade, allow the meat to soak for at least 2-4 hours, or preferably overnight, in the refrigerator. Rubs can be applied shortly before cooking or left to rest on the meat to develop deeper flavors. Info: Avoid using too much salt in marinades as it can draw moisture out of the meat, leading to dryness. Smoking: The Art of Flavor Enhancement Smoking is an ancient technique that enhances meat flavor by exposing it to smoke from burning wood. Different wood types impart unique flavors; hickory provides a strong, bacon-like taste, while applewood offers a sweeter, milder flavor. When smoking, maintain a low and steady temperature to allow the smoke to penetrate the meat slowly. This method works well with larger cuts like briskets or pork shoulders, which benefit from prolonged cooking times to absorb maximum flavor. Warning: Ensure adequate ventilation when smoking to prevent buildup of potentially harmful gases. Experimenting with different wood chips and adjusting smoking times can yield a wide variety of flavors, allowing for a customized taste profile that suits your preferences.

Jul 12, 20265 min read
Read more
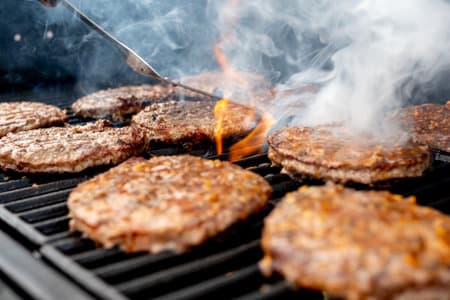
A closeup of the juicy burger meat being grilled on the grillRecipes

Mastering the Art of Grilling Carne Asada

Selecting the Perfect Cut of Meat When it comes to grilling carne asada, the cut of meat you choose can make a substantial difference in flavor and texture. Traditionally, carne asada is made using flank steak or skirt steak, both known for their rich, beefy taste and texture that holds up well to marinating and high heat grilling. While flank steak is slightly leaner, skirt steak offers a more intense flavor due to its higher fat content. Depending on your preference for tenderness and flavor intensity, either cut can be a great choice. Preparing the Marinade A well-crafted marinade is essential for elevating the flavors of your carne asada. The traditional Mexican marinade typically includes lime juice, garlic, cilantro, and spices like cumin and chili powder. The citrus not only adds flavor but also helps tenderize the meat. For an authentic taste, consider adding a splash of tequila or beer, which can enhance the depth of flavor. Let your steak marinate for at least two hours, but overnight marinating can yield even better results. Tip: Use a resealable plastic bag to marinate the steak, ensuring it is fully covered for even flavor absorption. Grilling Techniques for Carne Asada Grilling carne asada requires precision to achieve the desired char and juiciness. Preheat your grill to high heat, around 450°F to 500°F, to ensure a quick sear that locks in juices. Place the steak on the grill and let it cook for about 4-6 minutes per side, depending on thickness and desired doneness. It's important not to move the steak too frequently; this allows for proper searing and grill marks. For more tips on grilling, check out basic grilling techniques . Doneness Internal Temperature Rare 125°F Medium Rare 135°F Medium 145°F Warning: Avoid overcooking to maintain tenderness. Use a meat thermometer to check for accurate doneness. Resting and Serving After grilling, let the steak rest for about 5-10 minutes before slicing. This step allows the juices to redistribute throughout the meat, resulting in a more succulent bite. Slice the steak against the grain for maximum tenderness and serve with traditional accompaniments such as grilled vegetables, warm tortillas, and salsa. This not only enhances the flavor profile but also creates a complete and satisfying meal. For more insights on serving techniques, visit BBQ steak cooking tips . Info: For added authenticity, serve carne asada with a side of Mexican rice and refried beans. Try comparing two products side by side below to see which fits best.

Jul 12, 20265 min read
Read more
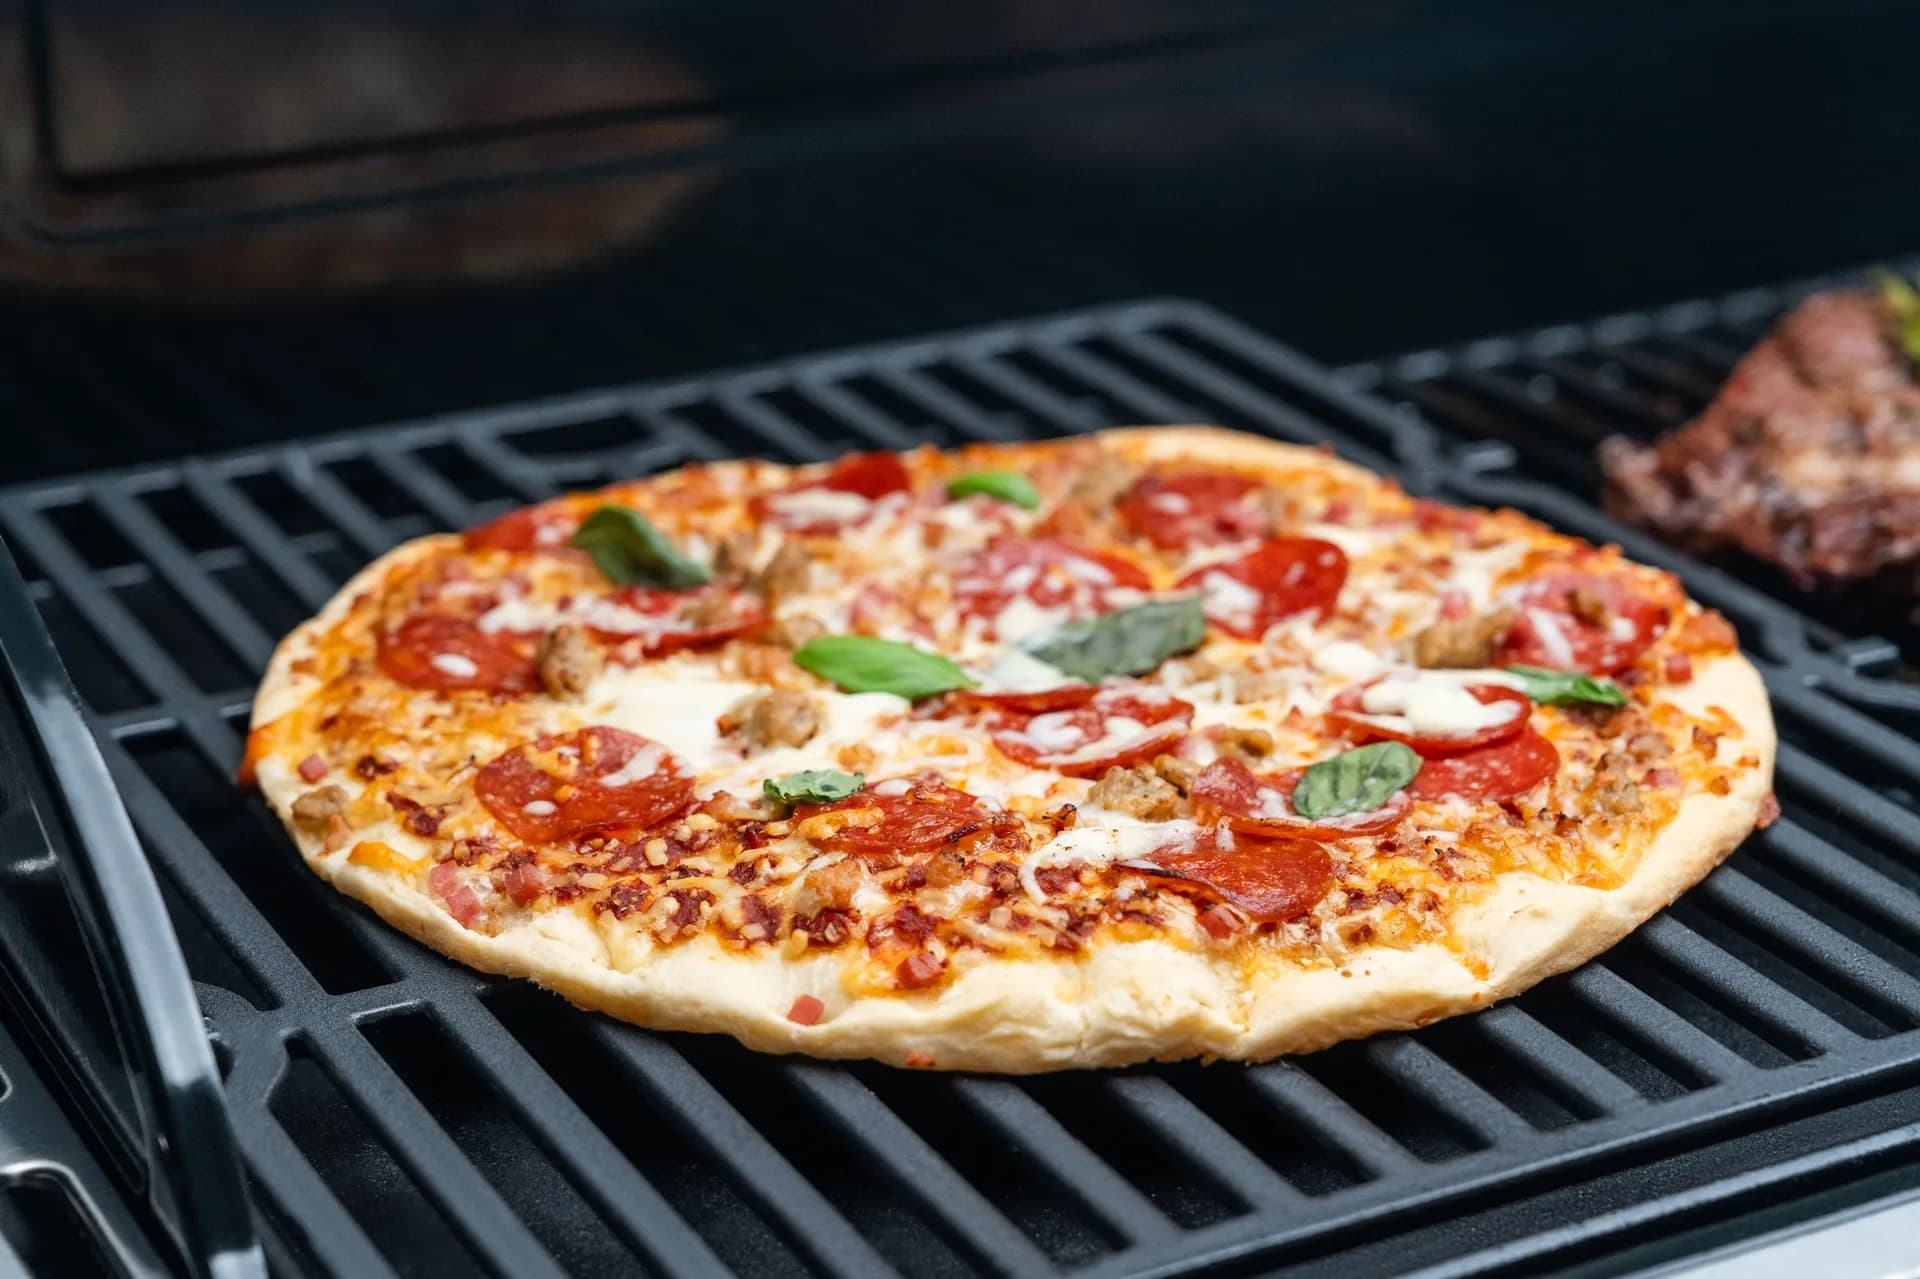
Wood-Fired Pepperoni and Sausage Grill PizzaRecipes

Mastering the Art of Grilling Vegetables in Foil

Why Grill Vegetables in Foil? Grilling vegetables in foil is a technique that enhances flavors while maintaining the nutritional value of the vegetables. This method is particularly popular because it allows for easy cleanup, prevents the vegetables from falling through the grates, and keeps them moist and tender. Cooking vegetables in foil also allows for a variety of seasoning options, making it versatile for different taste preferences. Tip: Use heavy-duty aluminum foil to prevent tearing and ensure even cooking. Health Benefits Vegetables grilled in foil are not only delicious but also healthy. The foil helps to lock in nutrients that might otherwise be lost during grilling. Additionally, this method requires minimal oil, reducing fat intake while enhancing natural flavors. You can learn more about the best vegetables to grill for optimal health benefits in this guide . Choosing the Right Vegetables Not all vegetables are created equal when it comes to grilling. Sturdy vegetables such as bell peppers, zucchini, squash, and asparagus are ideal for foil grilling. They hold up well to the heat and absorb flavors from herbs and spices effectively. You might also explore unique tips and tricks for ensuring successful grilling. Bell Peppers: Sweet and colorful, perfect for adding visual appeal. Zucchini: Absorbs flavors well and cooks quickly. Asparagus: Delicate yet flavorful, ideal for short grilling times. Preparing Vegetables for Grilling Wash and dry your vegetables thoroughly. Cut them into uniform pieces to ensure even cooking. Drizzle with olive oil and add your choice of herbs and spices for added flavor. Vegetable Grill Time (minutes) Notes Bell Peppers 10-12 Best when slightly charred Zucchini 8-10 Cut into thick slices Asparagus 6-8 Thin stalks cook faster

Jul 12, 20264 min read
Read more
Charred Sweet Corn with Backyard Summer LemonadeRecipes

Explore Unique Grilling Recipes for Every Occasion

Introduction to Unique Grilling Recipes Grilling is more than just a cooking method; it's a culinary adventure that brings people together. At Nexgrill, we believe in pushing the boundaries of traditional BBQ by introducing unique grilling recipes that not only satisfy taste buds but also inspire creativity. In this guide, we'll delve into innovative recipes that are perfect for any occasion, whether you're a novice griller or a seasoned pro. Why Choose Unique Grilling Recipes? Unique grilling recipes offer a chance to explore new flavors and techniques, transforming ordinary meals into extraordinary experiences. From exotic spices to unconventional ingredients, these recipes can elevate your BBQ game, impressing guests and family alike. Moreover, experimenting with diverse dishes can enrich your culinary skills and broaden your palate. Grilling vegetables is one excellent way to enhance this experience. Tip: Always start with fresh ingredients and high-quality grills for the best results. Incorporating Global Flavors Grilling offers an opportunity to explore global cuisines right from your backyard. Consider trying Mediterranean lamb skewers with a blend of herbs like rosemary and thyme, or delve into the rich spices of Indian tandoori chicken, marinated in yogurt and garam masala. The use of different cultural ingredients not only enhances the taste but also the grilling experience. For more on getting the best results, look into grilling tips for steak . Sweet Treats: Grilled Desserts Grilled desserts are often overlooked but can be the highlight of your BBQ menu. Try grilling pineapple slices with a sprinkle of cinnamon and brown sugar, or bananas with a touch of honey and crushed nuts. The heat caramelizes the sugars, creating a delectable treat that's sure to satisfy any sweet tooth. Dessert Ingredients Grill Time Grilled Pineapple Pineapple, cinnamon, brown sugar 5-7 mins Banana Boat Banana, honey, nuts 3-5 mins Info: Grilled fruits retain their nutrients while adding a smoky flavor. Sustainable Grilling Practices Sustainability is an important aspect of modern grilling. Opting for eco-friendly recipes that use organic produce and sustainable fish can make a significant impact. For instance, grilling wild-caught salmon or locally sourced vegetables not only supports the environment but also enhances the flavor profile of your dishes. Consider using reusable grilling tools and accessories to reduce waste. For more insights on grilling techniques, explore gas BBQ cooking tips . 30% Less carbon footprint with sustainable grilling choices

Jul 12, 20264 min read
Read more
Bacon-Wrapped Sausage and Smoky Chicken Drumstick Grill FeastRecipes

The Ultimate Guide to Grilling Vegetables: Enhance Your BBQ Experience

Why Grill Vegetables? Grilling vegetables transforms their natural flavors, adding a smoky depth that can elevate any meal. Whether you're a seasoned griller or a backyard enthusiast, adding vegetables to your grill can enhance your culinary repertoire. Not only do they complement the main dish, but they also provide a nutritious alternative to traditional side dishes. Top Vegetables to Grill Selecting the right vegetables for grilling is crucial to achieving the best flavor and texture. Here are some top choices: Bell Peppers: Their natural sweetness is intensified through grilling, making them a vibrant addition to any plate. Asparagus: Quick to grill and full of flavor, asparagus is ideal for those seeking a light side dish. Zucchini: Its mild taste absorbs marinades well, providing versatility in taste. Corn: Grilled corn on the cob is a classic favorite, offering a sweet and smoky taste. Eggplant: Known for its ability to absorb flavors, eggplant becomes tender and delicious on the grill. Preparing Vegetables for Grilling Proper preparation is key to perfect grilling results. For most vegetables, a light coating of olive oil and a sprinkling of salt and pepper are sufficient. This not only prevents sticking but also enhances the natural flavors. Cutting vegetables into uniform pieces ensures even cooking. For vegetables like corn, soaking in water before grilling can prevent the husks from burning. Tip: Use a grill basket for smaller vegetables to prevent them from falling through the grates. Grilling Techniques for Vegetables Mastering the art of grilling vegetables involves understanding the right techniques. Direct heat is perfect for vegetables that cook quickly, like bell peppers and zucchini. Use indirect heat for larger vegetables such as potatoes or whole corn cobs, allowing them to cook through without burning. A good rule of thumb is to grill vegetables over medium heat until they are tender and have noticeable grill marks. Vegetable Grill Time Heat Level Bell Peppers 6-8 minutes Medium Asparagus 5-7 minutes Medium Zucchini 5-7 minutes Medium Corn 10-15 minutes Medium Eggplant 8-10 minutes Medium Adding Flavor to Grilled Vegetables Enhancing the taste of grilled vegetables can be achieved through marinades, spices, and herbs. A simple marinade of olive oil, garlic, lemon juice, and herbs like thyme or rosemary can add depth to your vegetables. Additionally, sprinkling a bit of feta cheese or balsamic glaze before serving can create a delightful contrast in flavors. Grilled vegetables not only serve as a healthy side dish but also stand alone as a main course. By using these tips and techniques, you can perfect your vegetable grilling skills, making every BBQ a hit. Try a Variety of Options Experiment with different vegetables to discover new flavors and textures. Grilling offers an opportunity to explore and enjoy the bounty of the season. So fire up your Nexgrill and let the creativity flow.

Jul 12, 20265 min read
Read more
Bacon-Wrapped Sausage and Smoky Chicken Drumstick Grill FeastRecipes

Top 10 Things to Grill for an Unforgettable Cookout

Grilling Beyond the Basics: A Nexgrill Perspective Grilling is more than just cooking; it's a celebration of flavor and community. At Nexgrill, we believe in transforming the ordinary into the extraordinary. While burgers and hot dogs are staples, unlocking the potential of your grill can lead to delightful culinary discoveries. Whether you're a novice or a seasoned pro, expanding your repertoire with diverse ingredients can enhance your grilling adventures. Our brand ethos at Nexgrill is to inspire creativity and inclusivity at every cookout. With this guide, we aim to introduce you to ten exciting options that can redefine your grilling game. From fruits to seafood, each choice adds a unique twist to the traditional barbecue, ensuring your gatherings are memorable and satisfying. creative BBQ recipes 1. Grilled Pineapple Sweet, tangy, and slightly caramelized, grilled pineapple is a refreshing addition to any grill menu. Slice a fresh pineapple into rings, sprinkle with a bit of brown sugar, and grill until golden. The heat enhances its natural sweetness, making it a perfect side or dessert. easy summer grilling recipes 2. Portobello Mushrooms These meaty mushrooms are a fantastic vegetarian option. Marinate them in balsamic vinegar and olive oil, then grill until tender. Their robust flavor makes them a great burger substitute or a hearty side. 3. Grilled Oysters For seafood lovers, grilled oysters offer a smoky, briny taste. Place them on the grill until they open, then serve with lemon or a dash of hot sauce. It's a luxurious treat that adds elegance to any gathering. 4. Grilled Peaches Like pineapple, peaches become a juicy delight when grilled. Halve and pit them, grill until slightly charred, and pair with ice cream for a delightful dessert. 5. Chicken Skewers with Tzatziki Marinated in Mediterranean spices, chicken skewers are a versatile option. Serve with a cooling tzatziki sauce for a refreshing meal that's both flavorful and satisfying. 6. Grilled Corn on the Cob A summer classic, grilled corn is perfect with a smear of butter and a sprinkle of salt. Wrap in foil for tender kernels or grill directly for a smoky taste. 7. Lamb Chops Lamb chops are a gourmet option that grills beautifully. Season with rosemary and garlic for a rich, savory dish that's sure to impress. 8. Grilled Romaine Lettuce For a unique salad, try grilling romaine lettuce. The heat adds a delightful char and enhances the flavor, especially when topped with Caesar dressing and parmesan. 9. Grilled Shrimp Quick and easy, grilled shrimp is a crowd-pleaser. Season with lemon and herbs, skewer, and grill for a few minutes on each side. 10. Grilled Avocado Grilled avocado adds a smoky depth to its creamy texture. Simply halve, remove the pit, brush with olive oil, and grill until charred. Ideal for salads or as a side. EXPERIMENT WITH FLAVORS Each ingredient offers a unique palate experience.

Jul 10, 20264 min read
Read more

Browse by Category

Grills

Grills

Expert tips, buying guides, comparisons, and inspiration for choosing and getting the most out of your grill.

Troubleshooting

Troubleshooting

Practical guides for cleaning, maintenance, common grill issues, and performance optimization.

Recipes

Recipes

Step-by-step grilling recipes, cooking techniques, and meal ideas for every occasion and skill level.

Lifestyle

Lifestyle

Backyard entertaining ideas, seasonal grilling inspiration, and stories that celebrate outdoor cooking culture.

Accessories

Accessories

Helpful articles covering grilling tools, cookware, maintenance gear, and must-have accessories for outdoor cooking.

Griddles

Griddles

Find griddle recipes, cooking techniques, cleaning tips, and outdoor meal ideas designed for Nexgrill griddles.

Why Choose Us

Premium grilling experience at accessible pricing

We position ourselves as delivering high-end outdoor cooking features and performance without premium-brand pricing, emphasizing “Quality Grills. Unbelievable Value.”

Wide range of outdoor cooking products for every use case

We offer gas grills, pellet grills, griddles, smokers, pizza ovens, portable/tabletop grills, electric grills, accessories, and replacement parts — allowing customers to stay within one ecosystem for all outdoor cooking needs.

Innovation-focused outdoor cooking with smart technology

We differentiate ourselves through smart grilling products like the Oakford smart pellet grill, including app-connected cooking controls and modern outdoor cooking technology.

What Our Clients Say

Hear from businesses we have helped succeed

“I’ve been using the Nexgrill Daytona 4-Burner Gas Griddle for a while now, and I’ve been really happy with it. First off, it’s super sturdy and feels really well-made, like it’s going to last me a long time. The cooking space is awesome—plenty of room for making big meals. So far I’ve cooked pancakes, burgers, bacon and some veggies. The 4 burners make it easy to control the heat in different areas. I love that I can keep one side hotter for searing and leave the other side cooler for things that don’t need as much heat. Plus, it heats evenly, which I was really glad to see. The shelves underneath and on its sides are a nice bonus. I’ve used them to keep things like plates, tools, and ingredients handy while I’m cooking, it’s very convenient. Cleaning it is super simple too. Once it cools down, I just wipe off the cooking surface and let the grease funnel into the trap. It’s quick and easy, and honestly, it barely looks like I even used it. If I had to nitpick, the grease trap can fill up kind of quickly during bigger cooking sessions, but as long as you keep an eye on it, it’s not a big deal. Overall, this griddle has been great. It’s sturdy, easy to use, and makes cooking outside a lot of fun. If you’re into grilling or want something versatile, I think this is a solid choice. Originally posted on influenster.com”

M
martind23_2941
Sturdy, easy to use, and perfect for cooking big m

“took about 2-3 hrs for complete assembly. took about 15-20 minutes to fully heat to 700. used a pan liner and a drip cup liner due to previous issues with those rusting away. this is about the 3-4 grill i have assembled. dont try to do it alone or ask the wife for help with the firebox its awkward. always check the directions 2-3 times before tightening down and dont over tighten the screws. hopeing for 5 years of grilling on this but i havent checked the warrenty yet.”

DT
Dave the Griller
finally got around to building this.bought in 2025

“We just bought this guy and I recommend always buy it assembled, we just use the grill 2 times and really works good; is perfect size and the side burn is very useful plus the caddy attach for spices; the material quality is in medium rate; no too cheap no too expensive I'll be glad if it works for minimum 5 years. Nexgrill could improve with the way, and cleaners to not damage the grates and the burners. I protect the removable pan with heavy duty aluminum foil, when the grease drop I only change the foil. Well I am enjoying my new Nexgrill !!! P.s. always clean the grill after use it....ALWAYS :-)”

KA
Karl A
Nice Grill

“Thank you to Influencer and Nexgrill for sending this to me for free, in exchange for my honest opinion. My 17 year old son put this together for me. It was easy but time consuming, it took about 2 hours. This is great for families, because you can cook a good amount of food in a short time. We did tacos, but it’s also great for breakfast, pancakes, eggs, breakfast burritos. It’s easy to clean if you have the right tools, you’ll need a scraper and metal spatula. Overall I would recommend this flat grill, it’s a great addition to our household. Originally posted on influenster.com”

K
KellyL
Quick and easy cooking

“My old Nexgrill is 25 years old and still looking and performing well! This new one is going on our back patio to partner with the old one in our courtyard. Obviously quality products to last that long. I hope the new one does as well. The only concern I have is that the sides are painted metal rather than stainless like the old one. I hope it doesn’t rust over time. But, We are very happy grillers!”

JS
Judy S
New grill to partner with my old one

“Bought grill 3 years ago stainless grates rusted out had to order new ones to replace Yes, I recommend this product.”

G
GaryS329
Stainless

“I’ve always been a smoker, fryer kind of guy. But recently with my new job keeping me super busy I’ve been cooking on my father in-laws 2 burner grill and it takes so long to cook ribs and chicken. I love just lighting the burners and cooking so I decided to upgrade by buying my own and I got this 5 burner with side burner for veggies , took me maybe 20 minutes to get all the dinner done tonight after I seasoned the grill with an onion. Love it so far, I hope it lasts a long time! It’s beautiful!”

JB
Jason B
Love it so far! My first propane grill I’ve ever bought myself!

“I love your grills. This is a replacement grill for a fully stainless steel one (was suppose to be). We originally bought it for our daughter's new townhouse, but her patio was not "ready" for it. We have kept it for 5 years now. My husband passed, I sold the house and move it, in the original box, with me and just put it together. The”

LG
Lisa G
Replacement

“Purchased a 5 burner with side burner grill probably 7-8 years ago. You can only replace things for so long. Opted on a smaller 4 burner grill this time. Hoping to get lots of use for many years to come.”

BS
Brian S
2nd grill with out

“Easy grill to use & grills well. Last grill lasted a little over 6 years. Had to replace burners twice (just worn out - lots of use). Here is old grill & new grill.”

RE
Russell E
2nd Nexgrill

“I had either recieved or bought a grill from either webber or Charbroil. Both had lasted roughly 5 years each before rusting out. For the price point and the way this grill feels I think this one should last longer. Looks awsome new so hopes are high.”

VA
Victor A
3rd grill so far...

“I’m just setting up my second 5 burner nexgrill!!! My first one was purchased in 2015!! I live in New England and the grill lived outside for 7 1/2 years!! That is an impressive lifespan for a grill in my area! I’ll be a loyal Nexgrill customer for life. Thanks very much. Yes, I recommend this product.”

L
Litch
Robust grill with Longevity to boot

“This grill is good for an economy grill. My 10 year old assembled most of it. I knew that I was getting a budget grill and didn't expect a Cadillac. I bought it mainly because the burners have flame on the left and right, instead of one row on the top. I checked the temperature gauge vs my digital and it runs 50° high, didn't expect it to be right on. The burner tents are higher in the front, making it hotter in the front. I have snips so I'll cut the front to set level. I seasoned the grill with bacon, it leaked from the screw to the drip pan, which was tight. The corners are sharp. I had corner protectors for my smoker and put some on the Nexgrill, hoping to get more life from the cover. Overall it's pretty good for the price.”

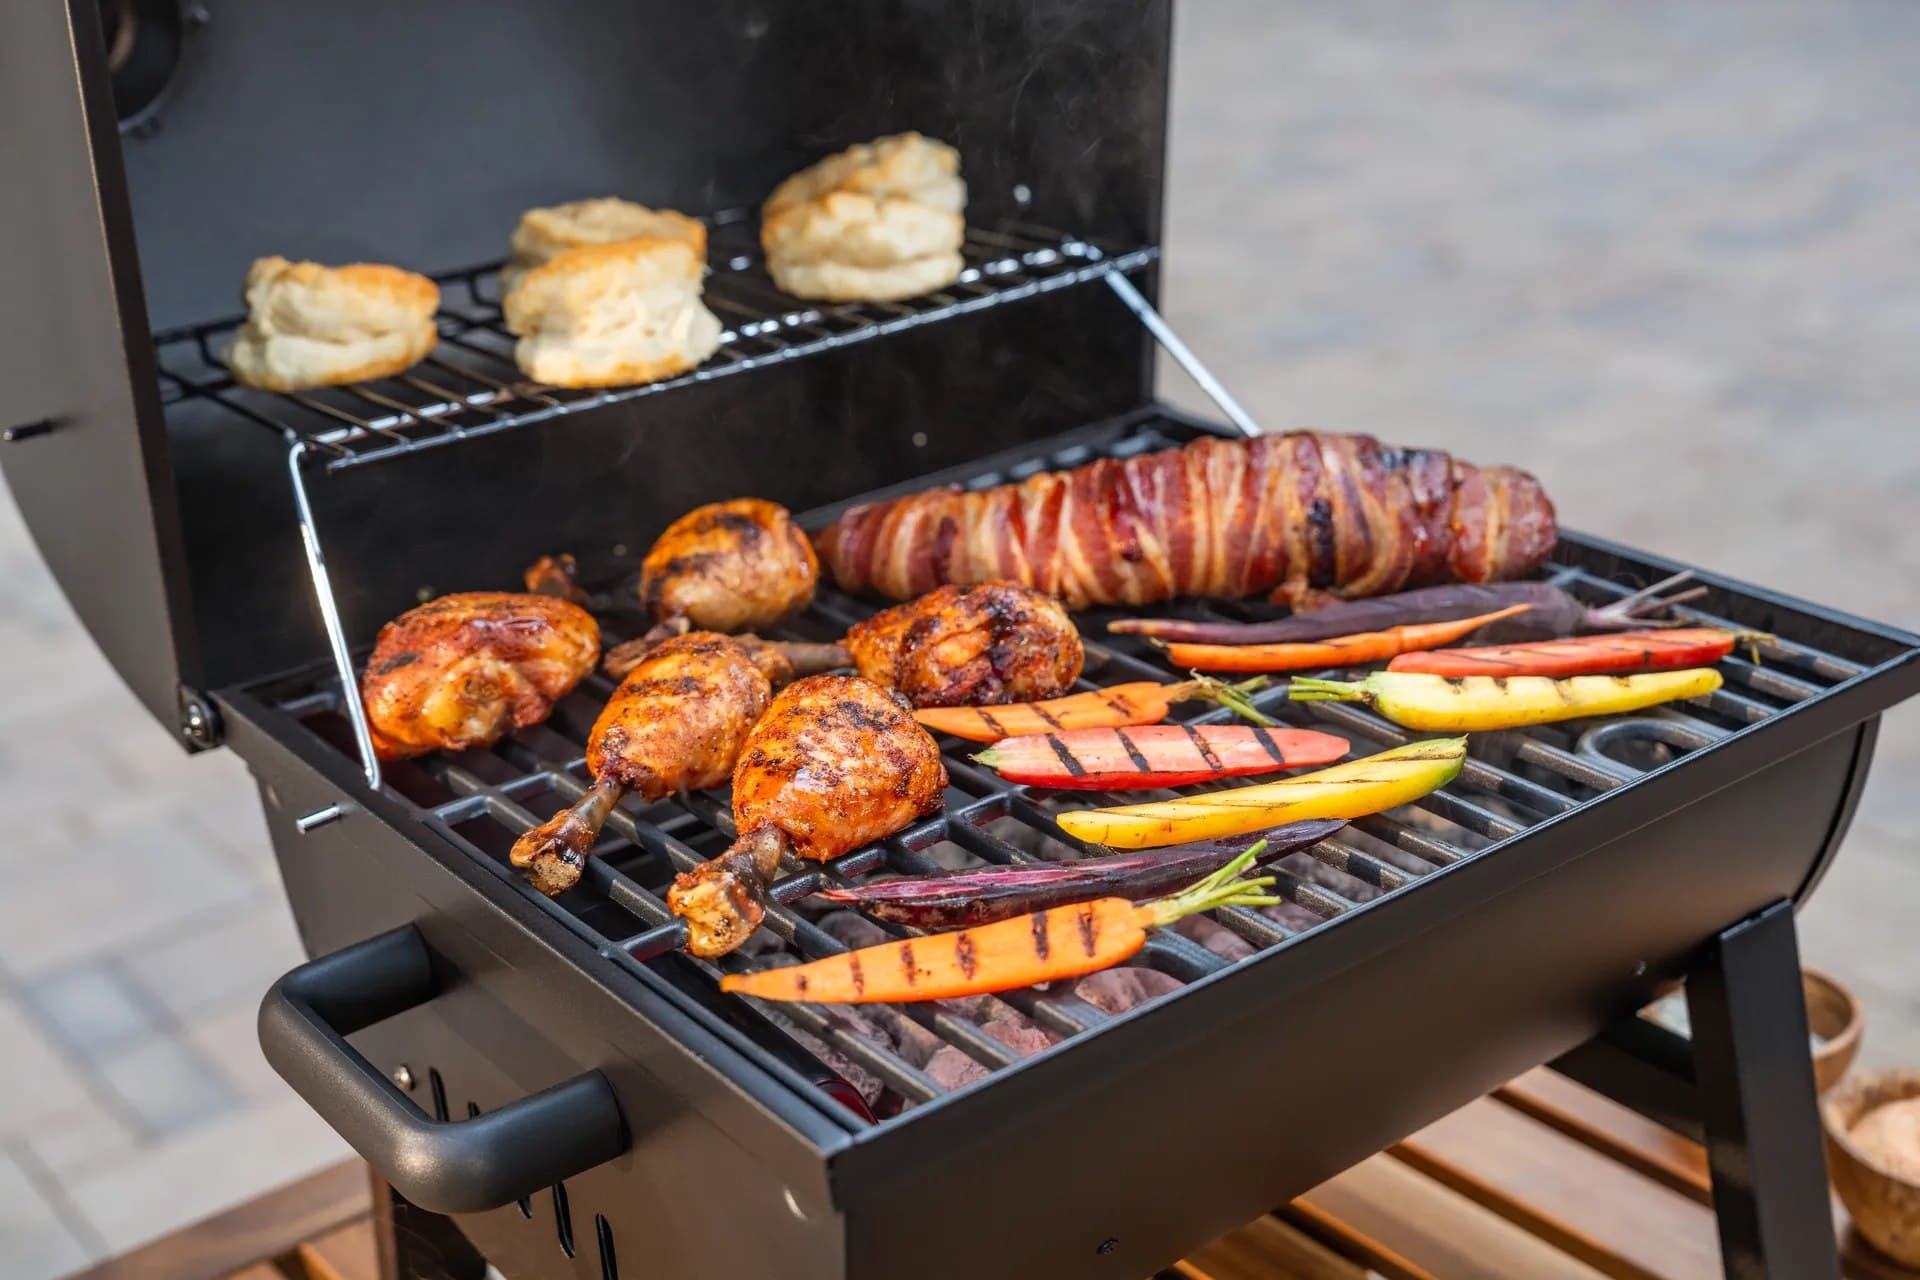
DK
Daniel K
Easy to assemble
4.7/ 5
·13 reviews