DIY Tips for Accurate Grill Temperature Calibration
Enhance your grilling precision with these expert calibration techniques.
In This Article
Understanding Grill Temperature Gauges
Step-by-Step Calibration Guide
Top Calibration Tools and Accessories
Introduction to Grill Temperature Calibration
A grill temperature gauge can be surprisingly persuasive. If the dial says 400°F, it feels like the grill is ready, the steaks are safe to sear, and the chicken should come out exactly on schedule. In practice, many grill dials are only giving you a rough estimate, not a precise reading. That gap between the number on the lid and the actual cooking temperature is why calibration matters. A grill-temperature-gauge-replacement-review is not just about whether to swap in a new dial; it is about figuring out whether your current gauge is telling the truth well enough to trust for weeknight burgers, low-and-slow ribs, or a holiday roast.
For Nexgrill owners, calibration is especially useful because different cooking styles demand different levels of temperature control. A quick sear on a gas grill can hide small temperature errors, but a long cook on a pellet smoker or a covered gas grill exposes them fast. If the lid thermometer is off by 25°F to 50°F, you may find yourself chasing the fire, opening the lid too often, or overcooking food because you believed a number that was never fully accurate. Temperature calibration gives you a better baseline, and once you know that baseline, you can decide whether the gauge still deserves a place on your grill or whether replacement is the smarter move.
A common range where a lid gauge can mislead cooks enough to affect doneness and timing
The goal is not perfection for its own sake. It is consistency. If you know your grill runs hotter at the back left, or that the lid gauge reads 30°F low after preheating, you can build reliable habits around that behavior. That means better searing, fewer dry chicken breasts, and less guesswork when you are cooking for friends and family. It also makes maintenance decisions easier: sometimes the fix is recalibration, sometimes it is a probe thermometer, and sometimes the gauge is corroded enough that replacement makes more sense than repeated adjustments.
One useful way to approach calibration is to treat it as a short diagnostic, not a one-time chore. Start by learning what the gauge is doing at a known temperature, then compare that reading with a trusted digital thermometer. If the difference is small and repeatable, you can simply compensate during cooking. If the reading jumps around or never stabilizes, the gauge may be damaged, blocked by grease, or worn from exposure to heat and weather. In that case, a replacement review becomes less about style and more about function.
Why Accurate Temperature Matters in Grilling
Temperature accuracy changes almost every part of the grilling process. It affects how quickly food browns, how well fat renders, how evenly smoke circulates, and how much carryover cooking happens after food comes off the grate. A lid reading that is too low can lead you to crank the burners higher than needed, which can dry out thinner cuts or produce flare-ups. A reading that is too high can make you hold back too much, leaving food pale, under-seared, or slow to finish. Accurate temperature is the foundation for repeatable results.
This matters most when you cook by time and temperature together. A pork loin, spatchcock chicken, or thick ribeye behaves very differently from a burger patty. If your grill is actually at 325°F while the dial says 375°F, your timing will drift. That is why serious grillers rely on more than one measurement point: the lid gauge for a broad reference, and a digital probe or instant-read thermometer for confirmation at grate level and in the food itself. The more the cooking method depends on gentle heat, the more a bad gauge can distort the result.
Warning: a lid thermometer measures air near the dome, not the exact temperature at every inch of the grate. Hot spots, wind, and fuel load can all shift the actual cooking zone.
In real-world backyard use, that difference shows up fast. A grill may be ideal for indirect cooking on one side and searing on the other, but the lid gauge usually cannot tell you how uneven those zones really are. If you are cooking for a crowd and one burner is hotter than the rest, a calibration check helps you identify whether the issue is the gauge, the burners, or the airflow. That saves time and reduces wasted food. It also helps you decide whether your grill needs a new temperature gauge, a burner tune-up, or simply a better preheat routine.
Types of Grill Temperature Gauges
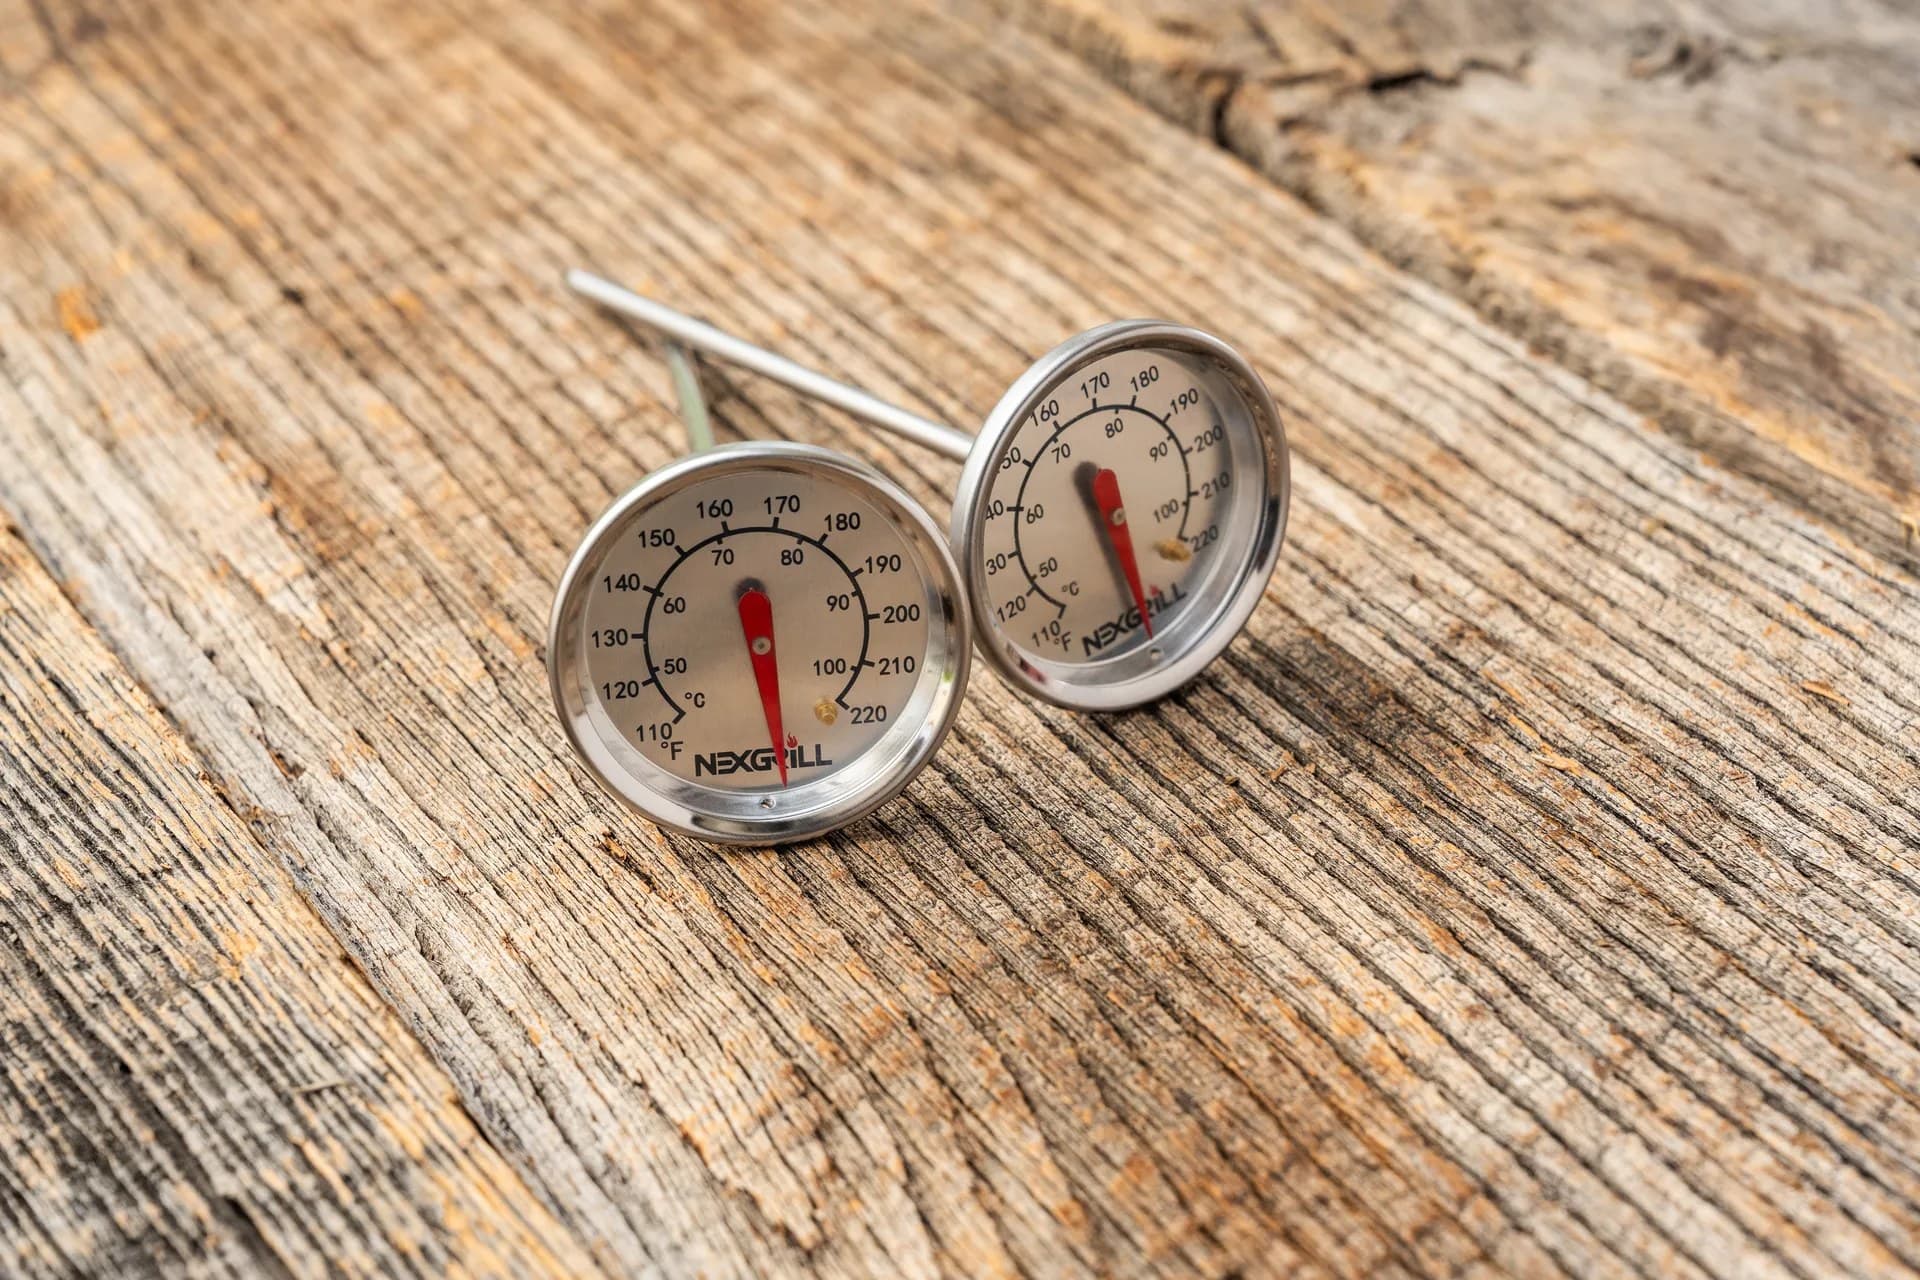
Not all grill temperature gauges behave the same way, and knowing the differences helps you decide whether to calibrate, replace, or supplement what you already have. The most common style is the analog lid thermometer, which uses a metal stem and dial face mounted in the hood. It is simple, affordable, and easy to read, but it can drift over time from heat exposure, grease buildup, and corrosion. Some analog gauges can be recalibrated with a small nut or adjustment method, while others are sealed and meant to be replaced when they no longer read correctly.
Digital thermometers are another category, though they often serve a different purpose. A digital thermometer may be clipped to the grate, inserted into food, or mounted as a remote probe system. These tools are usually more precise than a lid gauge because they measure a specific point instead of a general air space. However, they are not always built to stay on the grill permanently, and they may depend on batteries or sensors that need care. They are best used as reference instruments during calibration and cooking.
Then there are built-in gauge systems found on some grills and smokers that combine a large dial with heavier housings or multiple probes. These can be convenient, but convenience does not guarantee accuracy. A bigger dial may be easier to read from across the patio, yet it still needs to be checked against a trusted thermometer. For a homeowner choosing between calibration and replacement, the question is not just what type of gauge is installed, but how much trust it still deserves after exposure to weather, grease, and repeated heat cycles.
| Gauge type | Strength | Weakness |
|---|---|---|
| Analog lid thermometer | Simple, always visible, no power needed | Can drift, corrode, and read air unevenly |
| Digital probe thermometer | Usually more precise at a specific point | Needs batteries and placement management |
| Remote temperature system | Useful for long cooks and monitoring | More parts to maintain and position correctly |
Step-by-Step Guide to Calibrating Your Grill's Temperature Gauge
Before you start, let the grill settle into a stable operating state. That means clean grates, an empty cooking surface, closed lid, and enough preheat time for the metal to warm evenly. If you compare temperatures too early, you will be measuring a moving target. Use a known-good digital thermometer as your reference, preferably one with a probe that can sit at grate level near the center of the cooking area. If the grill has multiple heat zones, repeat the test in more than one location.
Here is a practical calibration sequence. First, preheat the grill on a moderate setting and wait until the burner output stabilizes. Second, place the digital probe near where food would normally cook, not directly above a flare-prone corner. Third, record the lid gauge reading after the temperatures stop climbing. Fourth, compare the two numbers. If the lid gauge is consistently off by a small amount, note the offset and use it as your cooking correction. If the gauge can be adjusted, follow the manufacturer’s calibration method carefully. If it cannot, replacement may be the better choice.
A simple formula can help you translate what you see on the dial into what the grill is really doing:
Actual grill temperature = digital thermometer readingGauge offset = lid gauge reading - digital thermometer readingExample:Lid gauge reads 375°FDigital probe reads 345°FGauge offset = 30°F highOnce you know the offset, you can cook more intelligently. If the gauge reads high by 30°F, then a target dial setting of 375°F really behaves closer to 345°F. That kind of knowledge is especially useful for baking, roasting, and smoking on a gas grill, where a little temperature drift can change the texture of the final dish. If your gauge is off enough that you are constantly compensating, the value of replacement rises quickly. But if the offset is steady and the gauge is otherwise clean and readable, calibration may be all you need.
Essential Tools for Accurate Calibration
The right tools make calibration faster and more trustworthy. At minimum, you need a reliable digital thermometer that has already been checked for accuracy. Many grillers prefer a probe-style thermometer because it can remain at grate level during the test, giving a more realistic picture of cooking conditions. An instant-read thermometer is also useful for checking food doneness, but it is not the best standalone tool for lid calibration because it captures a point-in-time reading instead of a stable reference.
A small screwdriver, wrench, or pliers may be necessary if your gauge includes an adjustment nut behind the dial. Keep a soft cloth or nylon brush nearby to remove grease and residue from the lens and stem before testing. A clean gauge is easier to read and less likely to be physically blocked by soot. If the grill is mounted outdoors year-round, a grill cover is worth using because moisture and debris can shorten the life of both the gauge and the surrounding metal housing.
Tip: check your digital reference thermometer in ice water or boiling water if the manufacturer allows it, so you are not calibrating one inaccurate tool against another.
It also helps to keep a small notebook or notes app with your grill’s behavior. Record the weather, the burner setting, the preheat time, and the difference between the lid gauge and the probe thermometer. Over several sessions, you will see whether the gauge drift is consistent or whether wind, ambient temperature, and fuel level are affecting your measurements. That record becomes especially useful if you are deciding between repair and replacement, because a gauge that changes behavior over time is usually less trustworthy than one with a stable offset.
Common Calibration Mistakes to Avoid
The most common mistake is calibrating too soon. If the grill has not fully warmed up, the reading you get will reflect startup behavior instead of steady-state cooking conditions. Another frequent error is placing the reference probe in a spot that does not match the actual cooking zone. A probe pushed too close to a burner will make the grill seem hotter than it is across the broader grate, while one placed near the edge may understate the real cooking surface temperature. Consistency in placement matters more than trying to find a perfect single point.
Another error is ignoring the difference between food temperature and grill air temperature. A lid gauge never tells you when chicken is safe or when a brisket has reached the right texture. That is why calibration should support, not replace, food-safe thermometer use. You also want to avoid trusting a gauge with obvious physical damage. If the lens is clouded, the needle sticks, or condensation appears inside the face, the dial may be beyond useful calibration. In that situation, replacement is often more practical than endless adjustment.
Finally, many grillers forget to recheck after cleaning or storage. A gauge can behave differently after a season of humidity, heavy grease exposure, or impact. If your grill spends winters covered on a patio in the United States, temperature changes and moisture can affect the mechanism. Rechecking a few times each year is a small task that prevents a lot of bad assumptions later.
Maintaining Your Grill's Temperature Gauge for Longevity
A temperature gauge lasts longer when it is treated as a working instrument rather than decoration. Wipe the face after use, especially if grease or smoke residue builds up. Keep water from pooling around the bezel, and avoid harsh scrubbing that can scratch the lens or loosen the mount. If the grill is exposed to rain or snow, a fitted cover helps reduce corrosion and helps the gauge stay readable longer. These steps do not make a worn gauge new again, but they do slow down the kind of damage that causes inaccurate readings.
It is also smart to inspect the gauge when you perform broader grill maintenance. Check whether the stem is secure, whether the dial rotates correctly if it is designed to calibrate, and whether grease has collected around the hood opening. If the gauge has become cloudy or the needle no longer returns smoothly, replacement may be the most economical path. A dependable gauge reduces mental friction every time you cook, and that confidence is part of why calibration matters in the first place.
Try comparing two options side by side below to see which fits best:
Advanced Calibration Techniques for Seasoned Grillers
Once you have a basic calibration routine, the next step is learning how to read temperature behavior instead of just a single number. Experienced grillers know that a lid thermometer is only one piece of the cooking picture. Wind direction, ambient air temperature, lid thickness, burner placement, and grate height all influence what happens inside the cook box. A useful advanced technique is to test the grill at several steady settings, such as low, medium, and high, and record whether the gauge offset stays constant. A constant offset is easy to work around; a changing offset tells you the gauge or the cooking environment needs more attention.
Another useful approach is zone mapping. Place a probe thermometer in the center, near the left side, and near the right side of the grate during a preheat and while the grill is holding temperature. If one side is consistently hotter, the lid gauge may still be accurate while the cooking zone is uneven. That distinction matters because replacement will not solve a burner imbalance. For pellet smokers and covered gas grills, this type of mapping can help you distinguish between gauge error and airflow issues. It is a practical way to avoid replacing a part that is not the real problem.
Tip: keep a temperature log for three cooks in a row. Patterns are more useful than one-off readings when deciding whether a gauge still earns your trust.
If you cook different proteins, use the same test setup to build confidence across categories. A roast may be forgiving, but fish and chicken can expose temperature mistakes immediately. Repeating calibration checks during a real cook can be more revealing than testing an empty grill alone, as long as you keep the reference probe out of direct contact with the food. That gives you a better picture of how the grill behaves under load, which is when many dials become less reliable.
Troubleshooting Calibration Issues
If the gauge will not line up with the reference thermometer, start by checking the obvious: is the probe at the same height, is the grill fully preheated, and is the lid fully closed during the test? Small setup errors can create big discrepancies. If the gauge is still way off, inspect the stem and mount for grease, rust, or warping. A gauge that is physically bound or contaminated may respond slowly or get stuck at one value. Cleaning the exterior can help, but a damaged internal mechanism usually cannot be fixed with surface cleaning alone.
When readings fluctuate from one cook to the next, the problem may be exposure rather than calibration. Moisture, heavy smoke, and repeated high-heat cycles can wear down the internal components. If your grill lives outdoors all year and the gauge has started to fog or behave unpredictably, replacement often becomes more reliable than adjustment. This is where a review mindset helps: compare the cost of a new gauge with the time you spend second-guessing every cook. If you are unsure whether the part is salvageable, a new digital reference probe can help confirm whether the issue is the gauge or the grill itself.
A common troubleshooting mistake is assuming the highest reading is the truest one. In reality, a thermometer can overreact to direct heat or placement near a hot spot. If the numbers keep changing, take three readings over a five-minute span and look for the average rather than the spike. That average is usually more helpful for real cooking decisions.
Upgrading Your Grill's Temperature Gauge: When and Why
Replacement becomes the right move when calibration no longer gives you a stable, usable result. That typically happens when the needle sticks, the face clouds over, the glass becomes hard to read, or the gauge is repeatedly off by a large margin even after careful testing. A gauge replacement is not just about fixing a broken part; it is about restoring confidence in the cooking process. If you are building a new outdoor cooking routine, trust is worth as much as the hardware itself.
A practical rule is to weigh three factors: accuracy, readability, and durability. If the current gauge is accurate but hard to read, an upgrade can still make sense. If it is readable but drifting, calibration may solve the issue. If it is both hard to read and inaccurate, replacement is usually the best path. For homeowners who grill often, the savings in reduced guesswork can easily outweigh the cost of a new gauge or digital system.
Warning: replacing a gauge will not fix hot spots, weak burners, or airflow problems. Confirm the root cause before buying a part.
Integrating Digital Thermometers for Enhanced Accuracy
A digital thermometer should be seen as a partner to your lid gauge, not a competitor. Use the digital tool to establish truth at grate level, then use the dial to understand the broader heat environment. Many grillers find that this two-instrument approach makes them faster, not slower, because they stop making repeated guesses. For low-and-slow cooks, a remote probe system is especially helpful because it reduces the need to open the lid and lets you observe trends over time.
If you are comparing replacement options, look for a digital thermometer with a probe wire that can tolerate grill heat, a clear display, and easy calibration features. The best setup is one you will actually use every time you cook. Even a well-calibrated lid gauge cannot replace the confidence you get from checking the food itself. That is especially true in the United States backyard grilling context, where weeknight cooking often shifts from burgers to thicker cuts, whole chickens, and seasonal roasts that benefit from more precise tracking.
Understanding Temperature Variations and Their Impact on Cooking
Temperature variation is normal, but ignoring it creates avoidable problems. A grill rarely holds one exact number across the whole surface. The back may run hotter than the front, one burner may create a stronger convective flow, and an open patio can push heat around with the wind. Once you understand those variations, you can use them instead of fighting them. For example, if one side of the grill runs hotter, you can sear on that side and finish on the cooler side without changing the lid gauge setting at all.
The impact on cooking is biggest with delicate foods and longer sessions. Thin vegetables can burn before the gauge seems to climb, while thicker cuts can appear stalled if the cooking zone is too cool. A calibrated gauge helps you spot those patterns earlier, but it should be paired with the food thermometer to confirm doneness. In other words, the lid gauge tells you how the grill is behaving; the food thermometer tells you when dinner is ready.
Expert Tips for Consistent Grilling Results
Consistency starts before the first flame. Clean burners, a clear gauge lens, and a repeatable preheat routine will do more for your results than constant lid lifting ever will. Keep the lid closed during calibration and during most of the cook so the grill reaches a stable operating state. Use the same thermometer placement each time you test, because changing positions makes your data harder to trust. If you host often, write down the settings that work best for your favorite dishes so you can repeat them later without guessing.
The most dependable cooks build habits around measurement. They know when to rely on the gauge, when to rely on a probe, and when to consider replacement because the hardware is no longer serving the meal. That mindset is what turns a grill-temperature-gauge-replacement-review into a useful decision tool. The gauge is there to support the cook, not to confuse it. When in doubt, choose the setup that helps you repeat good results with less effort and fewer surprises.