Best Grill Temperature Gauge Replacements
A comprehensive guide to selecting and installing the ideal temperature gauge for your grill.
In This Article
Top Replacement Options
Installation Tips
Troubleshooting
Introduction: Importance of Accurate Temperature Gauges
A grill temperature gauge is one of those parts that looks simple until it starts giving bad information. When the reading is off, every other decision becomes harder: when to preheat, when to sear, when to move food to indirect heat, and when to pull the lid and let the grill settle back into range. For backyard cooks who depend on repeatable results, a worn-out or fogged gauge can turn an otherwise dependable grill into a guessing game. That is why the best grill temperature gauge replacement is not just the one that fits the hole in the lid; it is the one that gives you a reading you can trust across burgers, ribs, chicken, and longer smoking sessions.
Nexgrill’s brand voice centers on being approachable, dependable, and built for real cooking moments, and that makes temperature accuracy especially important. If you are cooking for a weeknight family dinner, you do not want to be second-guessing whether the cabinet is hot enough for chicken thighs or too hot for delicate vegetables. If you are hosting a weekend gathering, you need a gauge that helps you manage temperature zones without constantly lifting the lid. A reliable replacement gauge is a small upgrade with a big impact because it restores the feedback loop between your fire and your food. That feedback loop is what lets you cook with confidence instead of relying on guesswork.
Tip: replace a faulty gauge before you chase other problems. A bad reading can look like weak burners, poor airflow, or bad fuel when the real issue is the dial on the lid.
This guide focuses on replacement temperature gauges as practical parts, not gimmicks. We will look at the most common gauge types, what makes one replacement better than another, how to install a new gauge cleanly, and how to troubleshoot the frustrating symptoms that show up when the old one is stuck, cloudy, or inconsistent. The goal is to help you pick a gauge that fits your grill style, your budget, and the way you actually cook in the United States, whether that means quick propane grilling in the suburbs or longer low-and-slow sessions on a backyard smoker.
Types of Grill Temperature Gauges
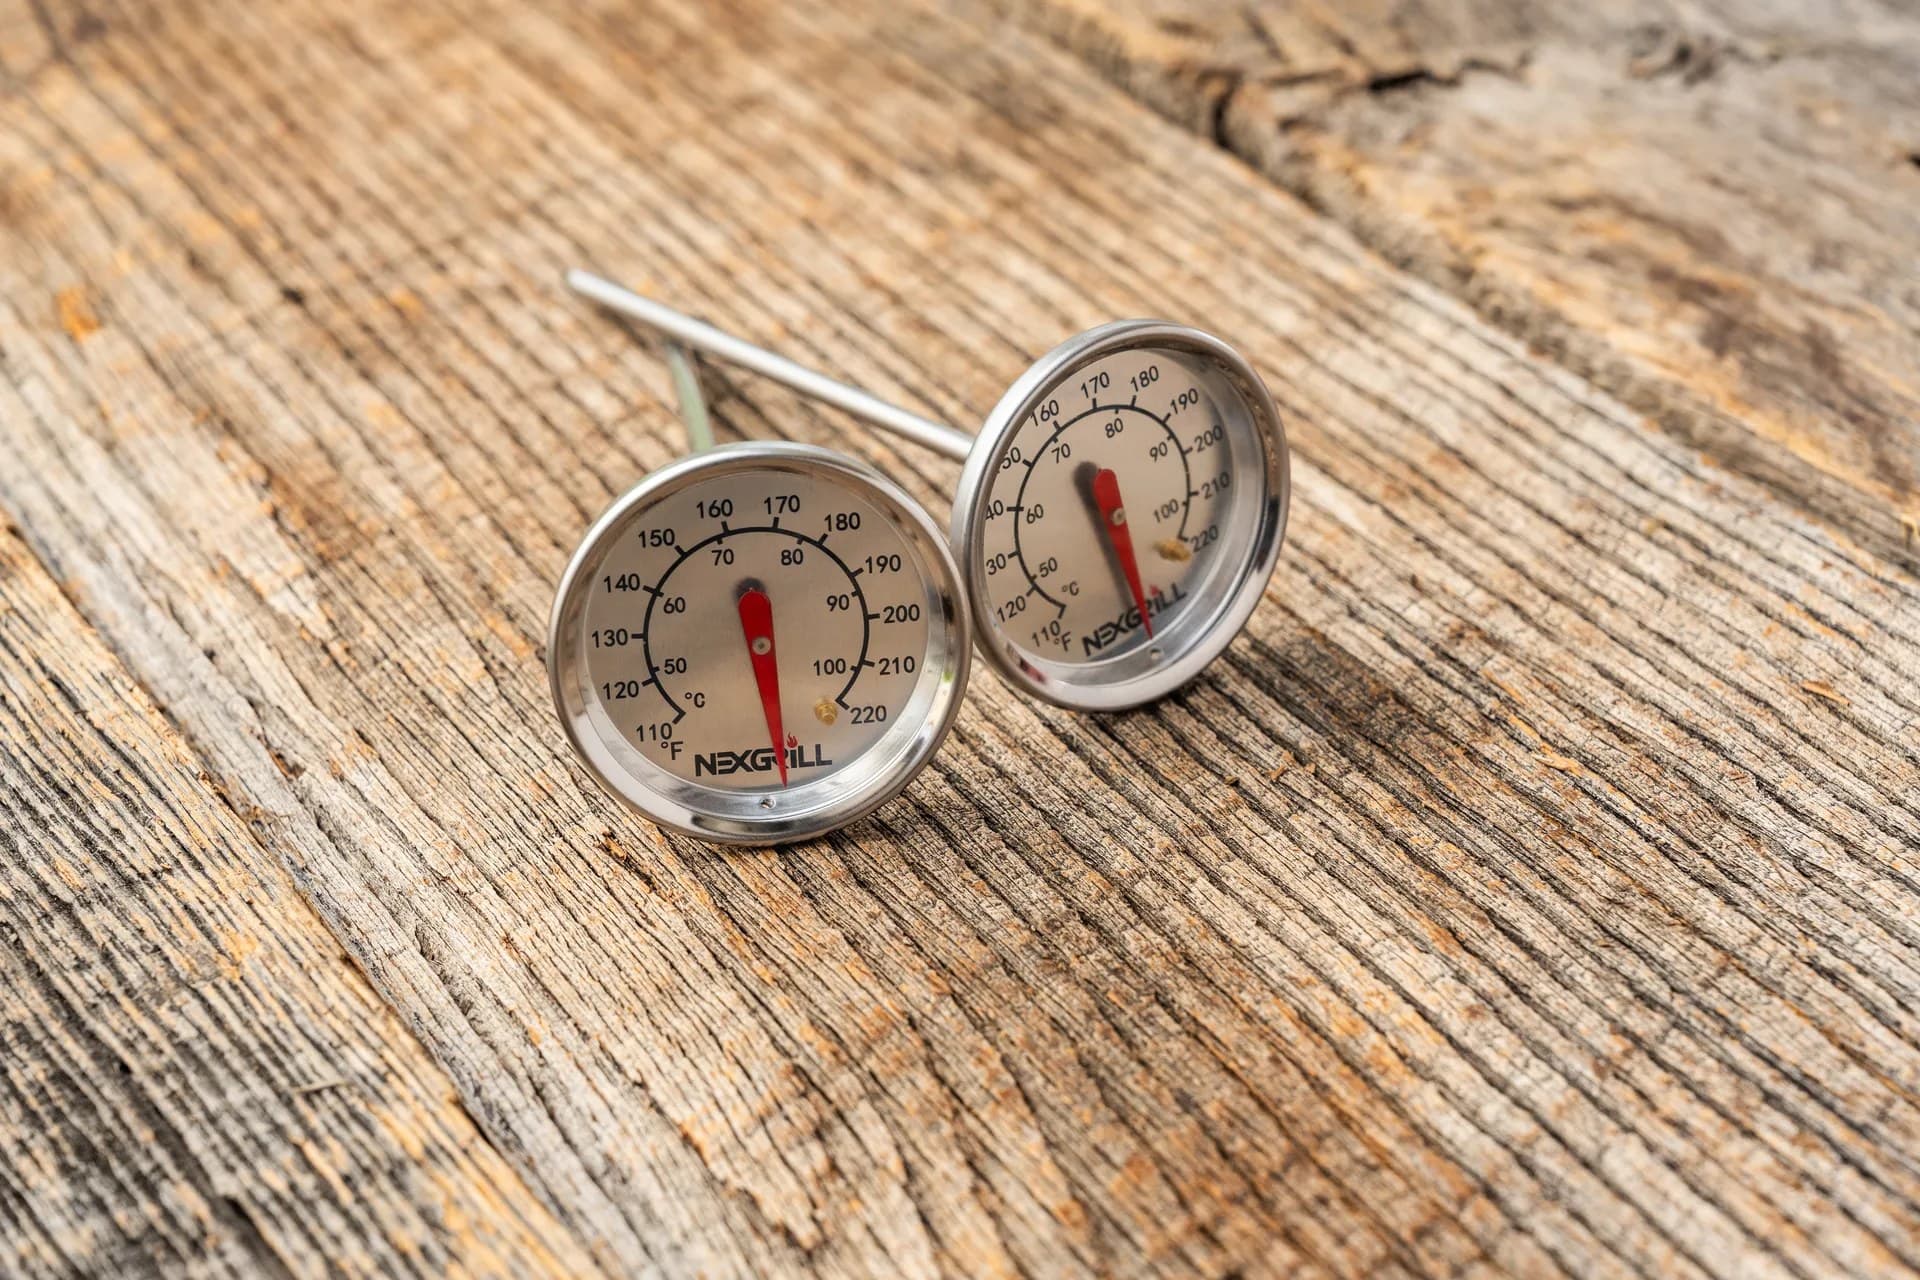
Most grill temperature gauges fall into two broad categories: analog and digital. Analog gauges are the traditional dial-style thermometers mounted in the lid or hood. They are easy to read from a distance, require no batteries, and suit cooks who want a simple visual check while staying focused on the food. Digital gauges, by contrast, use sensors and a screen, and they often provide faster readings, probe-based monitoring, or wireless alerts. Each style solves a different problem, and the best replacement depends on whether you want a quick lid reading or a more precise monitoring system.
| Gauge type | Strengths | Trade-offs |
|---|---|---|
| Analog lid gauge | No batteries, simple installation, quick glance reading | Can drift over time and is less precise than probe-based systems |
| Digital probe gauge | Better precision, food and grate monitoring, useful alarms | Needs power, probes, and more setup |
| Wireless smart gauge | Remote monitoring, app alerts, multi-probe convenience | Higher cost and more parts to manage |
Analog replacements are usually best when you want a one-for-one swap and a clean look on the lid. They are especially appealing for gas grills and charcoal grills that already have a built-in round thermometer port. A good analog gauge should have a clear face, a sturdy bezel, and a stem length that matches the grill lid thickness. Some budget parts are mechanically acceptable but hard to read in bright sun or after grease has clouded the lens. That is where build quality matters more than flashy features.
Digital systems are worth considering if the old gauge was never very useful in the first place or if you want to move beyond lid temperature entirely. For low-and-slow cooking, a grate-level or food-probe setup tells you more than the lid dial ever can. Brands such as ThermoPro, ThermoWorks, and FireBoard are often discussed because they emphasize accuracy and monitoring convenience, especially for cooks who smoke brisket, pork shoulder, or poultry over longer sessions. Those tools are not always direct replacements for an existing lid port, but they can be the smarter upgrade if you want a better picture of how heat is behaving inside the cooker.
Top Replacement Temperature Gauges
The best replacement depends on whether you want a direct hardware swap or a performance upgrade. If you want a lid-mounted analog replacement, the DCS/BH1-style grill temperature gauge and Weber-style thermometer replacements sold by specialty parts sellers are good examples of the category: simple, round, and built for exact openings rather than universal fit. Those products are useful because they remind buyers to match diameter, stem length, and mounting style before purchase. A good-looking gauge that does not fit the hood correctly is just an expensive ornament.
For cooks who are willing to step up into digital monitoring, ThermoPro is often the entry point because it balances price and useful features. Its digital thermometer systems are popular for home grillers who want faster readings without a steep learning curve. ThermoWorks is usually the premium benchmark in the consumer cooking-thermometer space, known for accuracy and consistent probe performance. FireBoard sits further up the scale and is attractive for users who want wireless monitoring, cloud-connected graphs, and multi-probe control for longer cooks. These three brands are not direct competitors to a standard lid gauge in the strictest sense, but they are among the most meaningful replacements when your goal is to stop relying on a sluggish or unreliable built-in dial.
| Brand / product style | Best use case | Why it stands out |
|---|---|---|
| ThermoPro digital thermometer | Everyday grilling and smoking | Usually affordable, easy to use, and practical for first-time digital buyers |
| ThermoWorks probe thermometer | Accuracy-focused cooking | Strong reputation for precise readings and durable probe systems |
| FireBoard wireless monitor | Long smokers and remote monitoring | Remote alerts, graphing, and multi-probe visibility |
| Direct-fit analog replacement | Matching existing lid hardware | Keeps the original grill look and restores basic lid temperature feedback |
If your current gauge is physically damaged, a direct-fit replacement is the most efficient path. If your current gauge still fits but you want a more meaningful reading, a digital system may give you better real-world results. That is the key distinction. A replacement gauge should not only restore functionality, it should improve the way you cook if your old dial was never especially accurate to begin with. Try comparing two products side by side below to see which fits best:
Installation Guide for Grill Temperature Gauges
Installing a replacement grill temperature gauge is usually straightforward, but the details matter. Start by measuring the original opening in the lid or hood. Most replacement gauges are designed around a specific diameter, and even a small mismatch can leave the gauge loose, crooked, or impossible to tighten. Before removing the old unit, take a photo of the nut, washer, and any gasket arrangement on the inside of the lid so you can rebuild the same stack in the correct order.
Warning: do not overtighten the mounting nut. Overcompression can crack a plastic lens, warp thin metal, or distort the gasket so the gauge loses its seal.
A clean installation typically follows a simple sequence. Remove the old gauge and clean the mounting hole with a soft cloth and a small amount of degreaser. Make sure the area is dry before the new part goes in. Insert the new gauge from the outside of the lid, align the dial straight, then install the washer and retaining nut from the inside. Tighten only until snug. If the gauge face is not oriented correctly, loosen it slightly and rotate it before finishing. If your replacement includes a probe, route the cable away from hot surfaces and moving hinges.
Basic installation order:1. Remove old gauge2. Clean the opening3. Insert new gauge from outside4. Add washer or gasket on inside5. Thread retaining nut by hand6. Align the face7. Tighten gently until secure8. Test with a known temperature sourceAfter installation, perform a quick sanity check. A lid gauge does not need to match a laboratory instrument exactly to be useful, but it should respond reasonably and consistently. If the gauge shows a temperature that seems wildly off, compare it with a separate thermometer placed near the cooking grate. For digital systems, confirm batteries are fresh, probes are fully seated, and the device has had enough time to stabilize before you trust the reading.
Troubleshooting Common Temperature Gauge Issues
Many gauge problems are not caused by the thermometer itself but by installation, contamination, or placement. A cloudy lens may be grease residue rather than a failed sensor. A needle that sticks can be caused by corrosion or by the grill lid being warped around the mounting point. If the reading is erratic, check whether the gauge is installed too close to the path of direct flame or a burner flare-up. That can make an otherwise decent dial look unreliable.
If an analog gauge reads consistently too high or too low, first inspect the stem for debris and confirm the gauge is not bent. Then compare it against a trusted thermometer in boiling water or ice water, following the manufacturer’s calibration guidance if available. Some gauges can be adjusted at the nut or via a calibration screw; others are sealed and should simply be replaced if they drift too far. If the lens is fogging repeatedly, moisture may be entering through a failed seal, which usually means the safest fix is replacement rather than another cleaning attempt.
Tip: if your readings swing sharply when you open and close the lid, the gauge may be fine. Temperature recovery is often about airflow, fuel, and preheat discipline, not the dial itself.
Digital gauges have their own set of common issues. Weak batteries can cause lag, missing signals, or low-contrast displays. Probes may fail if the cable is pinched in the lid or if grease enters the probe jack. Wireless devices can also lose connection if the grill body blocks signal strength or if the unit is too far from the receiver. In every case, it helps to isolate the variable: test the gauge by itself, try a fresh battery, and verify the probe on a known temperature source before assuming the grill is to blame. The fastest repairs are usually the simplest ones.
Maintenance Tips for Grill Temperature Gauges
Once you've compared two options and chosen the one that fits your grill, the real value comes from keeping the gauge readable and dependable. Temperature gauges live in a harsh environment: heat cycling, grease vapor, moisture, smoke, and outdoor weather. A gauge that starts accurate can drift in usefulness if it is left coated in residue or exposed to water intrusion. The good news is that basic care is simple and does not require special tools. Wipe the lens periodically with a soft microfiber cloth, avoid abrasive cleaners that can cloud the face, and inspect the mounting area every few cooks for looseness or corrosion. That routine alone can extend the useful life of a good replacement by a meaningful margin.
For analog lid thermometers, the biggest enemy is grime. A thin layer of grease can make the numbers hard to see and may conceal hairline cracks in the lens. If your gauge is removable, clean the outside surface with warm water and mild soap, then dry it fully before reinstalling. Do not soak the gauge or spray cleaner directly into the dial opening. On grills stored outdoors, a fitted cover helps reduce condensation and keeps the gauge face from baking in UV exposure every day. That matters in warm climates as much as in wet ones, because repeated sun exposure can fade the markings and weaken plastics over time.
Info: a lid thermometer tells you the temperature in the lid zone, not necessarily at the cooking grate. Use it as a guide, not the only truth source.
If your gauge is removable, check the retaining nut a few times each season. Vibration from opening and closing the lid can gradually loosen hardware, especially on older grills. On digital units, storage is just as important as cleaning. Remove batteries if the thermometer will sit unused for a long period, and keep probes coiled loosely rather than sharply folded. Sharp bends in probe cables can eventually create intermittent failures that look like random temperature spikes. A little care goes a long way, and it keeps the replacement part doing the job you bought it for: helping you cook with confidence.
Upgrading to Digital Temperature Gauges
Some grill owners replace a failed analog gauge with another analog part and move on. Others realize the broken gauge exposed a bigger issue: the built-in lid thermometer was never detailed enough for the style of cooking they do. If you smoke pork shoulder on weekends, cook brisket overnight, or want to monitor several zones at once, upgrading to a digital system can be a better long-term answer than reinstalling another basic dial. That is especially true when the cook wants feedback at grate level, where the real cooking happens.
ThermoPro is often the practical middle ground. It tends to appeal to users who want a straightforward digital experience without overcomplicating setup. ThermoWorks is the name many serious home cooks mention when they care most about accuracy, probe reliability, and a polished user experience. FireBoard is better suited to people who think in terms of sessions rather than quick meals, because its wireless and graph-based tools are designed for extended cooks. In plain terms: ThermoPro is usually about value and usability, ThermoWorks about precision, and FireBoard about remote control and deeper data. For many buyers, the right answer is not the brand with the most features, but the brand that matches how often they will actually use those features.
| Need | Best digital direction | Why |
|---|---|---|
| Budget-friendly everyday use | ThermoPro-style digital thermometer | Simple controls and lower entry cost for casual grilling |
| Precision-focused cooks | ThermoWorks-style probe system | Strong reputation for accurate, consistent readings |
| Long smoking sessions | FireBoard-style wireless monitor | Remote alerts and multi-probe visibility save time during long cooks |
The best upgrade also depends on your grill itself. A compact propane grill used mostly for weeknight dinners may only need a clean analog replacement and an added probe thermometer for food checks. A larger Nexgrill-style backyard setup used for entertaining can benefit from a digital monitor that tracks the pit temperature across a longer cook. If you already know your old lid dial was only giving you a rough estimate, digital is often the more honest investment. It removes the illusion that one number at the dome tells the whole story.
Comparing Analog vs. Digital Gauges
The analog-versus-digital decision comes down to what kind of feedback you want. Analog gauges are fast, durable, and unobtrusive. Digital gauges are more informative, but they ask for more attention and upkeep. If you prefer a no-nonsense part that looks like it belongs in the lid, analog remains the cleanest replacement. If you care about precision, multi-zone cooking, or remote monitoring, digital is the stronger tool.
| Category | Analog | Digital |
|---|---|---|
| Setup | Fast and simple | More steps, but more data |
| Power | No batteries | Requires batteries or charging |
| Accuracy potential | Adequate for lid reading | Typically better for grate and food monitoring |
| Best for | Quick checks and original-style restoration | Serious temperature tracking |
For many grillers, the choice is not exclusive. A good lid gauge provides a reference point, while a digital thermometer supplies the detail. That combination is useful because it keeps the cooking experience simple at a glance while still giving you a more accurate read when the food demands it. If you routinely cook both fast and slow, a hybrid approach often delivers the best value.
User Reviews and Recommendations
In product reviews and buyer discussions, a pattern shows up again and again: users are happiest when the gauge matches the job. People who buy a basic analog replacement for a grill lid often praise the ease of installation and the cleaner look. Their complaints usually appear when they expected it to solve every heat issue on the grill. By contrast, buyers who switch to ThermoPro, ThermoWorks, or FireBoard tend to value the improvement in confidence. They can watch temperature stabilize, spot flare-ups faster, and make better decisions during longer cooks.
A useful way to think about user feedback is by cooking style. Casual cooks tend to want a gauge that is easy to read, affordable, and sturdy enough for the season. Enthusiasts tend to prioritize accuracy, response time, and probe durability. Long-smoking users care about wireless range, alarms, and battery life. Those are real differences in satisfaction, and they explain why a single “best” replacement does not exist for every buyer. The right recommendation is the one that fits the size of the grill, the kind of food you cook, and how closely you want to track heat.
Tip: when reading reviews, look for comments about consistency over time, not just first impressions. A gauge that works on day one but drifts after a month is not a good value.
Conclusion: Choosing the Right Temperature Gauge
The best grill temperature gauge replacement is the one that solves the problem you actually have. If your goal is to restore a broken lid thermometer, a direct-fit analog replacement may be all you need. If your goal is better control over long cooks and more reliable readings, a digital upgrade from ThermoPro, ThermoWorks, or FireBoard may be the smarter move. In either case, the most important buying criteria are fit, readability, accuracy, and how well the gauge supports the way you cook in real life.
A thoughtful replacement restores confidence. It helps you preheat with intention, hold temperature more steadily, and stop treating every lid lift like a guess. That is especially valuable for backyard cooks who want dependable results without turning grilling into a technical project. Choose the gauge that matches your grill, install it carefully, and maintain it lightly but consistently. Then compare two models side by side below if you want to narrow the choice even further.