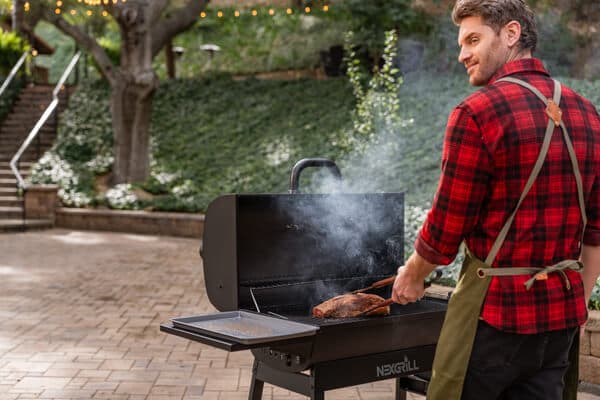
Step-by-step instructions, safety tips, and maintenance advice for a seamless setup.

Here's what sets us apart from the competition
We position ourselves as delivering high-end outdoor cooking features and performance without premium-brand pricing, emphasizing “Quality Grills. Unbelievable Value.”
We offer gas grills, pellet grills, griddles, smokers, pizza ovens, portable/tabletop grills, electric grills, accessories, and replacement parts — allowing customers to stay within one ecosystem for all outdoor cooking needs.
We differentiate ourselves through smart grilling products like the Oakford smart pellet grill, including app-connected cooking controls and modern outdoor cooking technology.

Expert tips, buying guides, comparisons, and inspiration for choosing and getting the most out of your grill.

Practical guides for cleaning, maintenance, common grill issues, and performance optimization.

Step-by-step grilling recipes, cooking techniques, and meal ideas for every occasion and skill level.

Backyard entertaining ideas, seasonal grilling inspiration, and stories that celebrate outdoor cooking culture.

Helpful articles covering grilling tools, cookware, maintenance gear, and must-have accessories for outdoor cooking.

Find griddle recipes, cooking techniques, cleaning tips, and outdoor meal ideas designed for Nexgrill griddles.
Find answers to common questions
Nexgrill offers a variety of grills including gas, charcoal, and pellet grills, catering to different cooking preferences and styles.
Nexgrill is headquartered in California and serves a global market, primarily through retail partnerships such as Home Depot.
Yes, replacement parts are available for various Nexgrill products, and you can find them on the Nexgrill website or through authorized retail partners.
You can reach out to Nexgrill for support through their contact page on the website, where you will find options for phone and email inquiries.
Nexgrill products come with specific warranty terms, which can vary by product; it is recommended to check the warranty details on the product page or in the user manual.
In This Article
Types of Patio Heaters
Essential Assembly Tools
Safety Precautions
Assembling a patio heater is less about “getting it done fast” and more about getting it done in the right order. A well-built heater should feel stable, ignite predictably, and operate safely the first time you use it. The assembly process is usually straightforward, but it rewards patience: most problems that show up later, such as wobbling, ignition trouble, or uneven heating, can be traced back to a loose fastener, a misrouted hose, or a skipped step during setup.
This guide is built for homeowners who want clear patio heater assembly instructions without unnecessary jargon. It focuses on practical setup for common freestanding propane heaters and, where relevant, electric models with fewer fuel-system steps. The goal is to help you move from unopened box to first test ignition with confidence, while also showing you what to check if the heater behaves unexpectedly after assembly.
Tip: Read the entire manual before you begin. Even similar patio heaters can differ in the placement of brackets, reflector panels, or ignition hardware.
Nexgrill’s brand approach emphasizes approachable, dependable outdoor living, and that mindset fits assembly well: use the right tools, follow the sequence, and verify stability before lighting anything. If you are setting up a heater for a deck, backyard seating area, or covered patio, assembly quality matters just as much as heat output because the finished product must stand firmly in an outdoor environment that can include wind, moisture, and uneven surfaces. The sections below walk through the major heater types, the tools you need, the actual assembly sequence, and the maintenance habits that help the heater last longer once it is in use.
Before you start, clear a large flat area, keep packaging off to one side, and separate hardware by size. That simple preparation makes the job noticeably easier and reduces the chance of confusing similar bolts or washers. If you are comparing two models afterward, try comparing two products side by side below to see which fits best:
The two most common patio heater categories are propane and electric, and they differ in assembly as much as they differ in everyday use. Propane patio heaters usually involve a base, pole sections, burner assembly, reflector, ignition parts, and a tank enclosure or access door. Electric heaters are generally simpler because they skip fuel cylinders and gas connections, but they may include wall-mount hardware, brackets, or extension-ready cord management instead.
Propane models are the better fit when you want portability and a strong free-standing heat source. They are often used in open-air seating spaces, backyard dining areas, and event setups where there is no convenient outlet nearby. During assembly, the most important detail is making sure the gas components are connected exactly as directed and that the hose is routed without kinks or pinches. A slight twist in the hose can become a recurring nuisance later because it may affect flow or make tank placement awkward.
Electric patio heaters are usually the better choice for users who want simpler setup and less fuel handling. They are often easier to assemble because the work focuses on structure and mounting rather than gas fittings. That said, electric units still need careful attention to spacing, mounting height, and outdoor-rated power access. A heater mounted too low, too high, or too close to overhead cover may not perform as expected and can create avoidable safety concerns.
| Heater type | Typical assembly focus | Best for |
|---|---|---|
| Propane freestanding | Base, pole, burner, reflector, tank connection | Portable outdoor heating |
| Electric freestanding | Stand, heating head, cord routing | Simpler setup with outlet access |
| Wall-mounted electric | Bracket placement, anchoring, cable management | Permanent or semi-permanent patios |
Most common heater families to compare before assembly: propane and electric.
If you are unsure which category you own, look at the fuel source and the parts list. A propane heater will always include gas-related components, while an electric heater will not. That distinction matters because it determines the order of assembly, the final inspection checklist, and the kind of troubleshooting you will need later if the unit does not power on or heat evenly.
Most patio heaters can be assembled with a small tool kit, but the exact tools depend on the model. In many cases, the box includes one or two basic wrenches, yet having your own tools nearby saves time and makes it easier to tighten fasteners correctly. The goal is not brute force; the goal is a snug, stable fit across all sections.
A good setup includes a Phillips screwdriver, an adjustable wrench or matching open-end wrench, work gloves, and a clean towel or cardboard sheet to protect the heater finish while parts are on the ground. For propane units, a soapy-water spray bottle is also useful for checking connections after assembly. It is a simple diagnostic tool and one of the most helpful habits you can build into your first startup routine.
| Tool | Why it matters |
|---|---|
| Phillips screwdriver | Secures panels, access doors, and smaller brackets |
| Adjustable wrench | Tightens bolts and fittings without stripping hardware |
| Work gloves | Improves grip and protects hands from sharp edges |
| Soap-and-water spray | Helps check propane connections for leaks |
| Soft cloth or cardboard | Protects painted or stainless surfaces during assembly |
Warning: Do not substitute oversized tools or overtighten hardware. Stripped bolts and cracked fittings are much harder to fix after the heater is fully assembled.
If your patio heater has preinstalled fasteners, do not assume they are fully tightened from the factory. Assembly still requires a final check of every accessible connection. That includes the base, the pole sections, the reflector support arms, and any tank bracket or door latch on propane models. A few extra minutes spent on hardware inspection can prevent a frustrating first use later.
Start by unpacking everything and laying the parts out in the order shown in the manual. Match each bag of hardware with its labeled step before touching a wrench. This is the easiest way to avoid mixing short screws with long bolts, which is one of the most common setup mistakes. If the heater uses a weighted base, assemble that first and make sure it sits flat before adding vertical sections.
Step 1: Assemble the base. Attach the base support pieces or wheel assembly, if included, and tighten the hardware evenly. Check that the base sits level on the floor or patio surface. If the surface is uneven, do not continue until you have relocated the heater to a flatter area, because a wobbling base can affect every later step.
Step 2: Build the pole section. Connect the lower and upper pole pieces in the exact sequence shown in the instructions. Align bolt holes carefully before tightening. If the pole includes internal wiring for ignition or controls, make sure the wire is not pinched between sections. The rule here is simple: if a part resists sliding into place, stop and recheck alignment rather than forcing it.
Step 3: Install the burner head or heating element. Lift this section with care because it is usually heavier and may contain sensitive components. On propane models, confirm that the gas line is threaded or seated exactly as directed. On electric models, make sure any connector is fully seated and any retaining hardware is snug. This is a good time to verify that the control knob or switch moves freely.
Step 4: Attach the reflector assembly. Many patio heaters use several curved panels or a one-piece reflector with a center cap. Tighten the support arms evenly in a crisscross pattern so the reflector stays centered. Uneven tightening can make the top look crooked and may reduce stability in windy conditions.
Step 5: Complete the fuel or power setup. For propane heaters, place the tank in the base compartment or secure it to the designated bracket, then connect the regulator according to the manual. For electric units, route the cord cleanly and keep it away from sharp edges or pinch points. Never improvise cord placement or tank support.
Step 6: Perform a final inspection. Walk around the heater and check every accessible screw, washer, and latch. Make sure the heater stands upright, the reflector is centered, and the control access door closes properly. If the manufacturer includes a diagram for part orientation, compare your assembled heater to that visual before lighting it.
Tip: Tighten hardware in stages. A light first pass helps every part align, and a final pass ensures the structure is secure without distorting the frame.
A realistic assembly time for a first-time user is often around 45 to 90 minutes, depending on the number of pieces and whether the heater has ignition wiring or a more complex reflector system. If you have a helper, the reflector and burner-head stages are easier, especially for taller freestanding units. The finished heater should feel solid before you move on to safety checks or test ignition.
When you are ready, keep the manual nearby and compare the assembled unit to the parts diagram. That habit helps catch small mistakes before they become bigger problems. If you want to evaluate a second heater design or compare a similar unit side by side, try comparing two products below to see which fits best:
Once you've weighed two options against each other, the last step is making sure the heater you assembled will stay stable, light properly, and remain easy to use over time. A patio heater is not just a box of parts you put together once; it is an outdoor appliance that needs a careful first setup and a little ongoing attention. If you took the time to align the base, secure the pole sections, center the reflector, and verify the fuel or power connection, you have already done most of the work that separates a smooth first season from a frustrating one.
Safety precautions do not stop once the final screw is tightened. Before the first ignition, place the heater in a clear outdoor area with adequate overhead space, keep it away from low branches or overhangs, and confirm that the surface beneath it is level. For propane models, make sure the tank is connected exactly as directed and that the area is free of gas odor before lighting. For electric models, confirm that the cord is routed where it cannot be stepped on, pinched, or exposed to standing water. Those simple checks make a meaningful difference in everyday use.
| Problem | Likely cause | What to do |
|---|---|---|
| Heater wobbles | Uneven surface or loose base hardware | Re-level the unit and retighten the base |
| Igniter clicks but no flame | Fuel issue or misaligned burner parts | Check fuel supply, seating, and manual steps |
| Uneven heat output | Reflector or burner alignment problem | Inspect centering and verify all fasteners |
Warning: If you smell gas, stop immediately, shut the heater off, and follow the manufacturer’s instructions before attempting another startup.
Routine maintenance helps your heater last longer and keeps the first assembly from going to waste. Wipe down the exterior after use, inspect fasteners at the start of each season, and store the heater under a cover when it is not in use. For propane models, check the tank area periodically for rust, loosened fittings, or debris that could affect airflow. For electric units, keep the heating element and cord clean and dry, and do not coil a hot cord immediately after operation. If you live in a region with frequent rain, humidity, or wind, giving the heater a dry storage location will help protect the finish and reduce wear.
If you are wondering how long assembly takes, the honest answer is that a careful first-time setup usually takes less time than most people expect once the hardware is organized. The better question is whether the result feels stable and ready for real use. That is the standard worth aiming for. A good patio heater should stand straight, heat evenly, and be easy to inspect every time you bring it back into service.
Here's what sets us apart
We position ourselves as delivering high-end outdoor cooking features and performance without premium-brand pricing, emphasizing “Quality Grills. Unbelievable Value.”
We offer gas grills, pellet grills, griddles, smokers, pizza ovens, portable/tabletop grills, electric grills, accessories, and replacement parts — allowing customers to stay within one ecosystem for all outdoor cooking needs.
We differentiate ourselves through smart grilling products like the Oakford smart pellet grill, including app-connected cooking controls and modern outdoor cooking technology.
Don't just take our word for it
Keep reading
From our catalog