Master the assembly process with ease and confidence.

Products you may like
From sizzling breakfasts to smash burgers and teppanyaki-style dinners, the Daytona Pro 5 Burner NitroGuard™ Griddle delivers powerful heat, fast cooking, and a durable cooking surface built for every backyard cookout. Watch how easy outdoor cooking can be.
Here's what sets us apart from the competition
We position ourselves as delivering high-end outdoor cooking features and performance without premium-brand pricing, emphasizing “Quality Grills. Unbelievable Value.”
We offer gas grills, pellet grills, griddles, smokers, pizza ovens, portable/tabletop grills, electric grills, accessories, and replacement parts — allowing customers to stay within one ecosystem for all outdoor cooking needs.
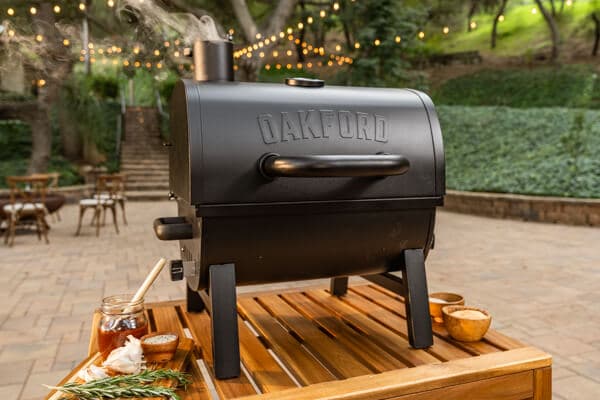
We differentiate ourselves through smart grilling products like the Oakford smart pellet grill, including app-connected cooking controls and modern outdoor cooking technology.

Expert tips, buying guides, comparisons, and inspiration for choosing and getting the most out of your grill.

Practical guides for cleaning, maintenance, common grill issues, and performance optimization.

Step-by-step grilling recipes, cooking techniques, and meal ideas for every occasion and skill level.

Backyard entertaining ideas, seasonal grilling inspiration, and stories that celebrate outdoor cooking culture.

Helpful articles covering grilling tools, cookware, maintenance gear, and must-have accessories for outdoor cooking.

Find griddle recipes, cooking techniques, cleaning tips, and outdoor meal ideas designed for Nexgrill griddles.
Find answers to common questions
Gas grills provide instant heat and precise temperature control, making them easier to use. Charcoal grills offer a smoky flavor and high heat for searing but require more time to heat up and manage.
Pellet grills combine the convenience of gas with the flavor of wood, allowing for smoking, baking, and grilling. Traditional gas grills, however, are quicker to start and often easier to clean.
Charcoal grills typically reach higher temperatures quicker than gas grills, making them better for searing meat. However, high-quality gas grills can also provide adequate heat for effective searing.
Nexgrill offers models designed specifically for gas, charcoal, and pellets, allowing users to choose based on their cooking style and flavor preferences. Each type is built to optimize the characteristics of its respective fuel.
Choosing between gas and charcoal grills depends on your cooking preferences and lifestyle. If you value convenience and quick cooking, a gas grill may suit you better; if you prefer the taste and experience of traditional grilling, a charcoal grill would be ideal.
In This Article
Prepare Components
Follow Manual
Prioritize Safety
Before you begin assembling your Nexgrill gas grill, it's crucial to familiarize yourself with the various components. Each part plays a significant role in ensuring that your grill operates efficiently and safely. Components typically include the main body, side shelves, cooking grates, flame tamers, burners, and the lid. Additionally, you will find smaller items like screws, bolts, and washers which are essential for assembly.
Nexgrill designs its grills for ease of assembly, but understanding what each part does and where it fits can streamline the process. The main body forms the grill's core, holding other components together. Side shelves provide additional workspace, while cooking grates hold your food. Flame tamers distribute heat evenly, and burners are the heart of the cooking system, providing the necessary heat. Lastly, the lid helps retain heat and achieve optimal cooking temperatures.
Tip: Lay out all components and ensure you have all parts listed in the manual before starting assembly.
To assemble your Nexgrill gas grill, you'll need a few basic tools. These usually include a Phillips screwdriver, an adjustable wrench, and sometimes a rubber mallet. Ensure that these tools are within reach to avoid interruptions during the assembly process.
| Tool | Purpose |
|---|---|
| Phillips Screwdriver | For fastening screws |
| Adjustable Wrench | For tightening bolts |
| Rubber Mallet | For gently tapping components into place without damage |
Assembling a Nexgrill gas grill involves several key steps. Begin by attaching the legs to the main body. Ensure all bolts are securely fastened, but take care not to overtighten as this can damage threads. Next, attach the side shelves. These usually require support brackets for stability. Once the shelves are secure, position the burners within the grill body. Ensure they align correctly with the gas valve openings.
Following the burners, install the flame tamers above them. These should sit securely and provide a level surface for the cooking grates. Place the cooking grates on top, ensuring they are stable and can support the weight of food. Finally, attach the lid by aligning it with the hinges. Secure it with the provided pins or bolts. Double-check all connections to ensure no parts are loose.
Tip: Use a level to ensure your grill is even, which helps with cooking consistency.
Even with a well-designed product like a Nexgrill, you may encounter challenges. A common issue is misalignment of components. If parts don't fit as expected, avoid forcing them. Instead, double-check the instruction manual to ensure correct placement. Another challenge is missing parts. If any components are missing, contact Nexgrill customer service promptly for replacements.
Finally, ensure all gas connections are secure and check for leaks using a soapy water solution. Bubbles indicate a leak, and connections should be adjusted accordingly.
Safety is paramount when assembling your Nexgrill gas grill. Ensure you work in a well-ventilated area to avoid inhaling any fumes. Keep flammable materials away from your workspace. Wearing safety gloves can prevent cuts from sharp edges, and safety glasses protect your eyes from debris.
Before connecting the gas supply, inspect the hose for any signs of wear or damage. If any defects are found, replace the hose to prevent gas leaks. Make sure all connections are tight and use a leak detection solution to check for leaks after assembly.
Warning: Never use a grill indoors or in a confined space as this can lead to carbon monoxide buildup.
To keep your Nexgrill functioning optimally, regular maintenance is critical. After each use, clean the cooking grates with a brush to remove food residues. This prevents buildup that can affect flavor and cooking efficiency. Periodically check the burners for blockages and clean them to ensure even heat distribution.
Stainless steel surfaces should be cleaned with a suitable cleaner to prevent corrosion. Additionally, cover your grill when not in use to protect it from the elements. Proper care extends the life of your grill and maintains its performance over time.
If you encounter issues during assembly, refer to the troubleshooting section of your manual. Common problems include difficulty aligning parts or issues with igniting the burners. For alignment issues, ensure that all bolts are loose enough to allow for adjustment before tightening completely.
If ignition fails, check the gas supply and ensure the burners are correctly positioned. Sometimes, cleaning the igniter tip can resolve ignition issues. For persistent problems, contacting Nexgrill support can provide additional guidance.
| Issue | Solution |
|---|---|
| Misaligned Parts | Loosen bolts and adjust components |
| Ignition Failure | Verify gas supply and clean igniter |
| Gas Leaks | Use soapy water to test connections |
Once assembled, it's time to test your grill. Open the lid and ignite the burners to ensure they light correctly. Allow the grill to heat for a few minutes and check for even heat distribution across the cooking surface. Adjust burners as needed to achieve consistent temperatures.
Testing your grill ensures everything is working correctly and prepares you for your first cooking session. Enjoy the satisfaction of a job well done and the promise of delicious meals to come.