A comprehensive guide to mastering the art of outdoor grilling.
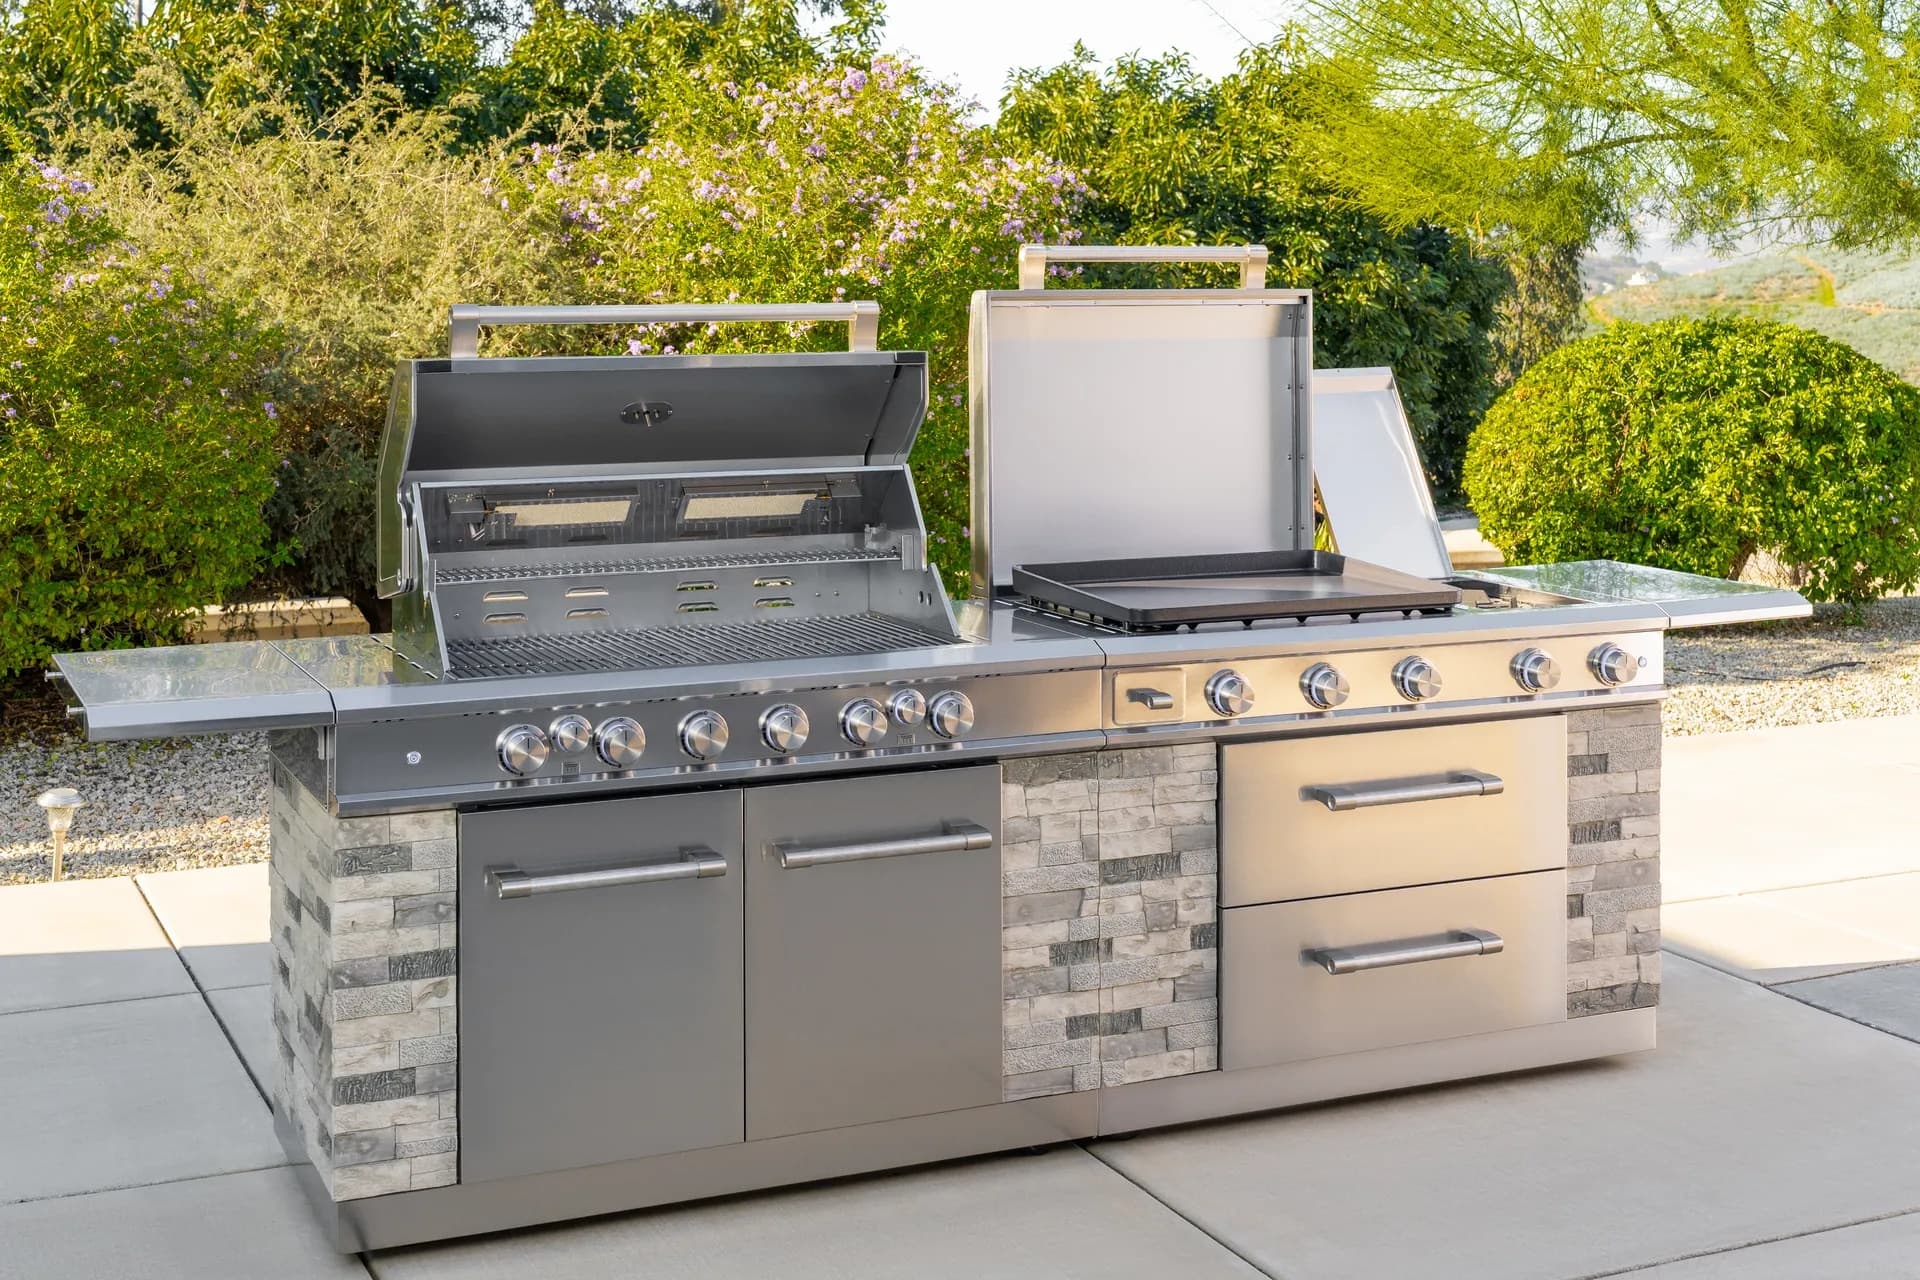
From sizzling breakfasts to smash burgers and teppanyaki-style dinners, the Daytona Pro 5 Burner NitroGuard™ Griddle delivers powerful heat, fast cooking, and a durable cooking surface built for every backyard cookout. Watch how easy outdoor cooking can be.
Here's what sets us apart from the competition
We position ourselves as delivering high-end outdoor cooking features and performance without premium-brand pricing, emphasizing “Quality Grills. Unbelievable Value.”
We offer gas grills, pellet grills, griddles, smokers, pizza ovens, portable/tabletop grills, electric grills, accessories, and replacement parts — allowing customers to stay within one ecosystem for all outdoor cooking needs.
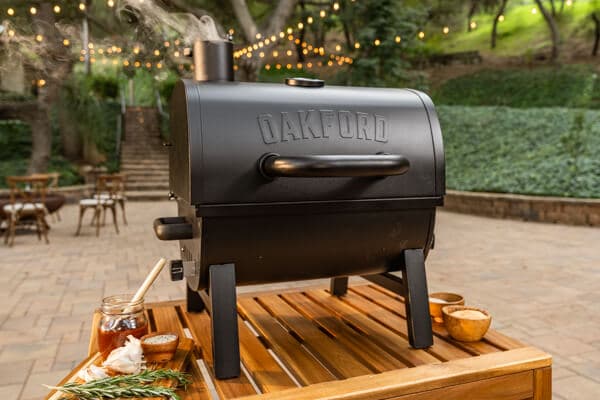
We differentiate ourselves through smart grilling products like the Oakford smart pellet grill, including app-connected cooking controls and modern outdoor cooking technology.

Expert tips, buying guides, comparisons, and inspiration for choosing and getting the most out of your grill.

Practical guides for cleaning, maintenance, common grill issues, and performance optimization.

Step-by-step grilling recipes, cooking techniques, and meal ideas for every occasion and skill level.

Backyard entertaining ideas, seasonal grilling inspiration, and stories that celebrate outdoor cooking culture.

Helpful articles covering grilling tools, cookware, maintenance gear, and must-have accessories for outdoor cooking.

Find griddle recipes, cooking techniques, cleaning tips, and outdoor meal ideas designed for Nexgrill griddles.
Find answers to common questions
Gas grills provide instant heat and precise temperature control, making them easier to use. Charcoal grills offer a smoky flavor and high heat for searing but require more time to heat up and manage.
Pellet grills combine the convenience of gas with the flavor of wood, allowing for smoking, baking, and grilling. Traditional gas grills, however, are quicker to start and often easier to clean.
Charcoal grills typically reach higher temperatures quicker than gas grills, making them better for searing meat. However, high-quality gas grills can also provide adequate heat for effective searing.
Nexgrill offers models designed specifically for gas, charcoal, and pellets, allowing users to choose based on their cooking style and flavor preferences. Each type is built to optimize the characteristics of its respective fuel.
Choosing between gas and charcoal grills depends on your cooking preferences and lifestyle. If you value convenience and quick cooking, a gas grill may suit you better; if you prefer the taste and experience of traditional grilling, a charcoal grill would be ideal.
In This Article
Grill Selection
Heat Management
Safety Practices
Starting with BBQ grilling can feel like learning a new language: vents, zones, flare-ups, carryover cooking, and all the rest. The good news is that beginners do not need to master everything at once. What matters most is building a simple, repeatable habit around setup, temperature control, and timing. That approach fits Nexgrill’s brand point of view well: grilling should feel welcoming, practical, and confidence-building, not intimidating or reserved for experts only .
A strong beginner’s setup is less about chasing advanced gear and more about creating a dependable workflow. You want a grill that heats consistently, tools that help you stay organized, and recipes that teach timing without overwhelming you. That is especially important in the United States, where backyard cooks often use propane gas grills for weekday convenience, then move to charcoal or pellet options as they gain confidence with flavor and technique. The fastest way to improve is to learn one grill well before trying to do everything at once.
Enough to build confidence, consistency, and timing before adding more complexity.
For beginners, the first goal is not to cook the most complicated food. It is to understand what heat does to food and how quickly small mistakes can change the result. Chicken thighs need more patience than burger patties; vegetables can overcook faster than steaks; and even a simple sausage can go from browned to split if the heat is too high. Once you start to notice those differences, grilling becomes much easier to control.
This guide is designed to help you build that foundation. You will learn how to choose a grill that matches your space and style, how to manage heat without guessing, what tools are actually worth buying, and how to cook a few first recipes that teach core skills instead of just filling a plate. The article also focuses on real beginner mistakes so you can avoid the ones that slow people down most: rushing preheat time, crowding the grate, and opening the lid too often.
The best beginner grill is the one that makes practice easy enough that you will actually use it. A two-burner gas grill is often the simplest starting point for a new griller because it offers fast ignition, straightforward heat adjustment, and the ability to create one hot side and one cooler side. That gives you room to learn direct and indirect cooking without managing a complicated fuel setup on day one. A flat-top griddle can also be a smart starter choice if you want easy handling for breakfast foods, burgers, chopped vegetables, and smash-style sandwiches, because the cooking surface is forgiving and visible.
If you prefer smoke flavor and are willing to spend more time learning temperature control, a pellet smoker grill can be a friendlier bridge into outdoor cooking than a traditional charcoal setup. Pellet grills automate fuel feeding, which removes some of the guesswork, while still giving you a real outdoor-cooking feel. Charcoal is rewarding, but it tends to demand more fire management skill, so many beginners find it better as a second step rather than the first.
| Grill type | Beginner advantage | Watch out for |
|---|---|---|
| Two-burner gas grill | Fast start-up and simple zone cooking | Hot spots if preheat is rushed |
| Flat-top griddle | Easy visibility and forgiving surface | Oil management and surface cleanup |
| Pellet smoker grill | Automated fuel feed and steady smoke | Slower learning curve for longer cooks |
| Charcoal grill | Strong flavor and high-heat potential | Managing airflow and startup time |
Begin with the grill you will use most often. A smaller, easier-to-manage grill used weekly will teach you more than a bigger one used twice a season.
For Nexgrill shoppers, the practical comparison often comes down to whether you want speed, flexibility, or smoke flavor. A compact gas model like the Deluxe 2-Burner Gas Grill is ideal for families who want simple weeknight meals and control. If you want to cook breakfast spreads or mixed menus, a Daytona griddle creates a wide, even surface that is especially beginner-friendly because it makes doneness easier to see. For cooks who are already interested in smoke and long-form barbecue, the Oakford pellet line provides an approachable path into more advanced cooking while still keeping the process organized and repeatable.
Space matters too. If you are grilling on a small patio, a large unit can make the whole process feel awkward. If your setup is too cramped, you will have trouble staging food, resting cooked items, and moving safely around the heat source. Beginners usually do better with a grill that leaves room for a tray, tongs, and a resting zone nearby.
Heat management is the skill that separates a frustrating cook from a calm one. You do not need to memorize dozens of temperature charts to get started, but you do need to understand the difference between direct heat and indirect heat. Direct heat means food sits over the flame or coals, which is ideal for searing, quick-cooking vegetables, and thinner cuts. Indirect heat means the food is beside the flame, not directly above it, which is better for thicker chicken pieces, bone-in cuts, and anything that needs time to cook through without burning on the outside.
A simple two-zone setup is the beginner’s best tool for avoiding overcooked or undercooked food. On a gas grill, turn one burner high and keep another lower or off. On charcoal, pile the coals to one side. This gives you a hot zone for browning and a cooler zone for finishing. If flare-ups start, you can move food away from the heat instead of panicking and lifting the lid repeatedly. That calm response is what builds confidence quickly.
Do not trust the burner knob alone. Give the grill time to preheat so the grates are hot enough to sear and reduce sticking.
For beginners, preheating is not optional. A grill that has been warming for 10 to 15 minutes behaves much more predictably than one that is barely warm. The grates get hot enough to leave clear marks, reduce adhesion, and stabilize the surface so food cooks more evenly. If you place food on a lukewarm grate, it is more likely to stick, tear, or cook unevenly because the surface temperature is still climbing while the food is already in contact with it.
Think about heat in layers, not just as a single number. The air temperature under the lid, the grate temperature, and the food temperature all affect the outcome. A steak can look browned outside before the center is ready; chicken can look done on the outside while still needing more time inside; and vegetables can char fast if cut too small. Learning to read those signs is part of what makes grilling fun, because you stop cooking by guesswork and start cooking by observation.
You do not need a drawer full of gadgets to start grilling well. In fact, beginners often do better with a small, reliable set of tools that reduces decision fatigue. A sturdy pair of tongs is the most important item because it gives you control without piercing food and losing juices. A wide spatula is useful for burgers, fish, and griddle cooking. A good instant-read thermometer removes the biggest source of stress for new grillers: wondering whether the center is done.
| Tool | Why it matters | Beginner tip |
|---|---|---|
| Long-handled tongs | Safer handling over hot surfaces | Choose a pair with a firm grip and lock |
| Instant-read thermometer | Takes the guesswork out of doneness | Check the thickest part of the food |
| Grill brush or scraper | Keeps grate contact clean | Clean while the grill is warm |
| Heat-resistant gloves | Protects hands during lid and grate handling | Use for adding fuel or adjusting pans |
A grill cover is also worth considering because weather exposure shortens the useful life of outdoor equipment. Grease, moisture, dust, and sun all wear on components over time, so even simple protection helps preserve performance. If your grill sits outside year-round, covering it after it cools becomes part of the routine, not an extra chore. That habit is especially valuable for beginners because a clean, ready grill is easier to start confidently on the next cook.
Keep your first tool kit small: tongs, thermometer, brush, and gloves. Master those before buying specialty accessories.
Safe grilling starts before the first flame. Place the grill on a stable, outdoor surface with enough clearance from siding, railings, deck furniture, and overhanging branches. Keep children and pets away from the cooking area, and never leave the grill unattended while it is lit. Beginners sometimes focus so much on the food that they overlook the setup, but a calm, uncluttered workspace is one of the easiest ways to prevent problems.
If you are using propane, check the connection before each session and make sure the tank is seated properly. If you smell gas, shut everything down immediately and do not attempt to light the grill until the issue is resolved. For charcoal, let coals burn out completely and cool before disposal. Ash can stay hot much longer than people expect, so use a metal container and place it somewhere nonflammable. Those habits are simple, but they matter every time you cook.
Food safety is part of grilling safety too. Keep raw and cooked foods separated, use a clean platter for finished food, and wash hands or tools after handling raw meat. Beginners often do the cooking well but cross-contaminate at the serving stage by reusing the same plate. A few extra seconds to keep things separate can prevent a lot of avoidable mistakes.
You should also remember that flare-ups are normal, but they should not be ignored. Small flare-ups can be controlled by moving food, lowering the heat, or closing the lid briefly to reduce oxygen. Large flare-ups usually mean there is too much grease or too much direct heat. Understanding the difference helps you respond quickly instead of reacting with panic.
Your first grilling recipes should teach skill, not test patience. Start with foods that are forgiving and easy to read: chicken thighs, bone-in drumsticks, sausages, shrimp skewers, vegetable packets, or burger patties. These choices help you practice timing, flipping, and temperature checks without the pressure of a high-cost cut of meat. If you want to build confidence quickly, repeat one recipe a few times before moving on. Consistency teaches more than variety in the beginning.
A smart starter technique is to season simply and cook in stages. Salt, pepper, and a light oil coating are enough for many beginner recipes because they let you focus on heat rather than a complex marinade. Once the basics feel comfortable, you can layer in more flavor with rubs, glazes, or sauces near the end of cooking. That timing matters because sugary sauces can burn if applied too early over high heat.
Another beginner-friendly habit is to rest food after grilling. Resting gives juices time to redistribute, which means better texture and less juice loss on the cutting board. For smaller foods, even a brief rest can make a noticeable difference. For larger cuts, the rest is part of the recipe, not an afterthought. Try comparing two products side by side below to see which fits best:
Once you have compared two options and have a clearer sense of your starting point, the next step is to make your cooking more deliberate. Advanced grilling does not mean fancy equipment or restaurant tricks. For beginners who are ready to level up, it means learning how to use the grill’s heat architecture instead of fighting it. That usually starts with managing flare-ups, controlling lid position, and choosing when to sear versus when to finish slowly.
One of the most useful skills is cooking in phases. For example, you can sear chicken pieces over a hot zone to build color, then shift them to a cooler zone to finish without charring the outside. The same idea works for steaks, pork chops, and thicker vegetables. With gas grills, this might mean running one side hotter than the other. With charcoal, it might mean banking coals to one side and using the opposite side as a finish zone. That pattern gives you more control than trying to cook everything at the same intensity.
When you start using two-zone cooking, keep the lid closed more often. Heat circulates better, and the grill behaves more like an oven with a searing surface.
A second advanced habit is learning carryover cooking. Food often keeps rising in temperature after it leaves the grill, especially thicker cuts. That means you should pull food a little before your target finish temperature rather than waiting until the very last second. Beginners who learn this early save themselves from overcooking expensive cuts, which is one of the easiest ways to improve results without changing anything else about the meal.
Advanced technique also includes knowing when not to interfere. New grillers tend to flip too often, press burgers with spatulas, or keep checking the lid because they are nervous. Better results usually come from fewer interruptions. Let the sear form, let the grill recover after opening, and let the internal temperature tell you when the food is done. That discipline is what turns basic grilling into more consistent cooking.
A well-maintained grill not only lasts longer, it also cooks more predictably. Grease buildup can change how flames move, residue can cause hotspots, and dirty grates can make food stick even when your timing is good. The easiest maintenance habit is to clean the cooking surface while it is still warm. A quick brush after cooking is faster than trying to scrape hardened residue later, and it helps preserve the grate surface over time.
For gas grills, check burners, ignition systems, and grease paths regularly. If a burner flame looks uneven or weak, the issue may be residue or blockage rather than a major mechanical problem. For charcoal grills, empty ash after it has fully cooled and keep airflow channels clear. Ash buildup can reduce oxygen flow and make temperature control less responsive. Pellet grill owners should keep the hopper area dry and clean the fire pot and grease management areas according to the manufacturer’s instructions.
| Maintenance task | How often | Why it matters |
|---|---|---|
| Brush grates after cooking | Every session | Reduces sticking and residue buildup |
| Inspect fuel connections | Before use | Supports safe startup and steady heat |
| Deep-clean grease tray | Monthly or as needed | Helps prevent smoke spikes and flare-ups |
| Use a grill cover | After each cool-down | Protects from rain, dust, and sun exposure |
The real beginner mistake is waiting until something feels wrong. Preventive maintenance is simpler than repair, and it keeps your grill ready for the next meal. A clean grill also gives you better feedback: if the heat is uneven, you can spot it more easily when the grates and burners are not already covered in residue. That clarity is especially valuable when you are still learning.
Different grilling styles reward different levels of patience, and the right style for a beginner depends on how much control you want. Gas grilling is the most direct path to consistency because it offers quick startup and easy heat adjustment. Charcoal grilling delivers a more traditional flavor profile and excellent high-heat performance, but it asks more of the cook. Pellet grilling sits in the middle, giving you more automation than charcoal and more smoke character than standard gas cooking. Flat-top cooking, meanwhile, is often the most forgiving because the surface is uniform and you can see how food is behaving at a glance.
If you are new, think less about which style is objectively best and more about which style fits your life. Weeknight cooks usually gravitate to gas because it is quick and predictable. Weekend cooks who want to experiment may enjoy charcoal or pellet options. Families who cook breakfast, vegetables, and mixed dishes together often prefer a griddle because it allows multiple food types at once without worrying about food falling through grates. The main point is to choose a style that helps you practice regularly.
This is also where Nexgrill’s lineup gives beginners useful options. A classic gas grill is a practical starting point, a Daytona griddle opens up approachable flat-top cooking, and an Oakford pellet smoker offers a step up into low-and-slow cooking when you are ready to explore more depth. That variety matters because beginners are not all learning the same way. Some want speed, some want flavor, and some want a platform for family meals. There is no single right path, but there is a right first step for your routine.
The most common beginner problem is not bad equipment; it is uncertainty about what the grill is telling you. If food sticks, the grate may not have been preheated long enough or the food may have been moved too early. If the outside is dark before the center is done, the heat is too aggressive or the food needs a two-zone approach. If flare-ups happen repeatedly, too much fat is dripping directly into the flame or the food is positioned over a hotter spot than needed.
Uneven cooking is another frequent issue. On gas grills, one side may run hotter because the burner setup or wind changes the heat pattern. On charcoal grills, coals may not be distributed evenly. The solution is not to overreact; it is to rotate food, use the cooler zone, and learn where the hotspots are on your specific grill. In that sense, every backyard grill is a little different, and the first few cooks are partly about calibration.
If a food item looks done on the outside but feels uncertain inside, use a thermometer instead of guessing. Beginners save time and money by checking early.
If smoke suddenly becomes bitter or excessive, the likely causes are grease buildup, burned sugar, or too much fat hitting the fire. If the flame is weak, check for blocked burners or fuel issues. If your cook time is much longer than expected, the grill may not have been fully preheated or the lid may have been opened too often. These issues are normal learning moments, not signs that you are failing at grilling.
Flavor building should support technique, not distract from it. That is why beginners do best with simple rubs and modest marinades first. A dry rub helps create a seasoned surface and is especially useful on chicken, pork, and vegetables. A marinade adds surface flavor and can help with tenderness, but it works best when you keep the mix balanced rather than overloaded with sugar or salt. The goal is to enhance the food you are already cooking well.
Sugar deserves special attention because it can burn quickly over direct heat. If you are using a sauce or glaze with honey, brown sugar, or syrup, add it near the end of cooking, not at the start. That timing keeps flavor from turning bitter. Spices like paprika, garlic powder, onion powder, black pepper, cumin, and chili powder are reliable starter choices because they add character without demanding complicated timing. Once you understand how heat behaves, you can get more adventurous.
The best beginner flavor strategy is to assign one purpose to each layer. Use salt to season, oil to help heat transfer, and spices or herbs to define the flavor profile. If you try to make every ingredient do everything at once, it becomes harder to tell what worked. Simplicity gives you a clearer path to improvement.
Special occasions are where beginner skills become memorable because you are cooking for people, not just for practice. The trick is to plan for success rather than trying to impress with complexity. For a small family gathering, choose one main item, one vegetable, and one easy side that can all be managed with the same heat strategy. For a holiday cookout or neighborhood get-together, prep more in advance so you are not stuck trimming, seasoning, and lighting the grill while guests are waiting.
In the United States, many backyard cooks use grilling as a social anchor for weekends, game days, Memorial Day, Fourth of July, Labor Day, and simple summer reunions. For those occasions, a beginner should aim for food that travels well from grill to table: chicken thighs, sausages, skewers, corn, griddled breakfast items, or sliced vegetables. These dishes let you serve a crowd without needing advanced timing on every single item.
The most useful special-occasion skill is sequencing. Know what goes on first, what can rest, and what can be held warm for a few minutes without losing quality. That plan reduces stress and makes the grill feel like a reliable part of the event instead of the thing everyone is nervously watching. If you can keep the flow calm, the food usually improves with it.
Here's what sets us apart
We position ourselves as delivering high-end outdoor cooking features and performance without premium-brand pricing, emphasizing “Quality Grills. Unbelievable Value.”
We offer gas grills, pellet grills, griddles, smokers, pizza ovens, portable/tabletop grills, electric grills, accessories, and replacement parts — allowing customers to stay within one ecosystem for all outdoor cooking needs.
We differentiate ourselves through smart grilling products like the Oakford smart pellet grill, including app-connected cooking controls and modern outdoor cooking technology.
Don't just take our word for it
Keep reading
From our catalog