
Nexgrill
Pellet Grills

Nexgrill Oakford Outpost 29 Review: How to Verify a Mystery Model Before You Buy

A field checklist for identifying an Oakford Outpost 29, confirming it's a real Nexgrill model, and deciding whether to pay, haggle, or walk away.
12 min read
Nexgrill Oakford 1125 Pro Pellet Smoker Grill

In This Article

Confirm the Model First

Photograph the data plate and cross-check the SKU before trusting any listing title.

Five Field Tests

Measure grates, check the controller or fire pot, and run a short heat-hold test.

Know When to Walk

A pass/fail checklist for parts availability, cover fitment, and hidden rust or feed problems.

Why an Oakford Outpost 29 Review Starts With an Identity Check

If you searched for a review of the Nexgrill Oakford Outpost 29, you are probably looking at a used listing, a floor model, or a marketplace post using that name. Before you pay, know that no product called the Oakford Outpost 29 was verifiable on nexgrill.com or in major US retail listings at the time of writing. That does not mean the grill is fake; it means the name on the listing may not match the name Nexgrill used. Your job is to verify the physical unit, not the headline of the ad.

The model name in a listing is marketing copy. The data plate on the grill is the legal and technical identifier. When the two disagree, the plate wins.

This is a pre-purchase verification sprint for a single unit, assuming you are standing in a driveway, garage, or store aisle with the grill within reach. You will not find a spec sheet here, because publishing BTU ratings or cooking area for an unconfirmed model would be inventing data. Instead, you get a repeatable process to confirm what the unit is, test whether it works, and decide whether parts and accessories are available before money changes hands.

What the Oakford Name Actually Covers at Nexgrill (and Where 'Outpost 29' Fits)

Nexgrill, founded in 1993 and headquartered in California, sells heavily through Home Depot and other US retail partners. The company merged with Megamaster to form Global Leisure, expanding its product development reach. Oakford is a confirmed Nexgrill sub-brand with at least three named products: the Oakford 875 Pro Pellet Smoker Grill (often marketed with a cover included), the larger Oakford 1125 Pro Pellet Smoker Grill, and the Oakford Homestead 24 Heavy Duty Charcoal Grill. The first two are pellet smokers; the Homestead 24 is charcoal. That distinction matters when inspecting a used unit, because a mislabelled listing can send you home with the wrong fuel type.

The terms Outpost and 29 do not appear in the verified Oakford lineup. That does not rule out a regional variant, discontinued model, club-store exclusive, or rebadged unit. But treat the listing title as unverified until you match the physical grill to a real Nexgrill identifier. If the seller cannot show a data plate or manual with the same name, assume the name is negotiable.

Pack These Five Things Before You Leave the House

A verification visit fails when you arrive unprepared. Bring these five items to gather evidence in one trip:

  • A smartphone with a camera and notes app.
  • A tape measure at least 24 inches long.
  • A small flashlight or headlamp for reading plates and peering into the cook chamber.
  • Nitrile gloves or a rag, because used grills are greasy.
  • A printed or downloaded copy of the relevant Nexgrill product page or manual, if you have a candidate model.

If the unit is a pellet grill, ask in advance whether you can power it on. If charcoal, ask whether the fire grate and ash pan are accessible. A seller who refuses a basic inspection is giving you information too.

Step 1 - Photograph the Data Plate and Copy Every Character Verbatim

The data plate is usually a metal or foil sticker on the back of the unit, inside the hopper lid, or on the leg support. Photograph it straight-on with the flashlight angled to cut glare, then type the model number, serial number, and any UPC or SKU into your notes exactly as printed. Do not correct typos or round numbers; a single transposed digit can send you to the wrong parts diagram later.

Compare that string to the seller's listing title and to the shelf tag if you are in a store. If the listing says Outpost 29 but the plate says 875 Pro or Homestead 24, you know which document is wrong. That is leverage in negotiation and protection against buying a unit you cannot source parts for.

Never buy a used grill with a missing or unreadable data plate unless the price reflects the risk. Without that plate, you cannot confirm the model, order the correct parts, or verify the fuel type from official documentation.

Step 2 - Measure the Grate Footprint and Count Rack Positions Yourself

Cooking area is the spec buyers quote most and sellers exaggerate most. Measure usable grate area in inches, not exterior dimensions. For a pellet smoker, measure the main lower grate width and depth, then count the rack positions the chamber actually has. For a charcoal grill, measure the charcoal grate and main cooking grate separately. Write the numbers down.

Cross-check those measurements against the official Nexgrill product pages for the 875 Pro, 1125 Pro, and Homestead 24 to see which family the unit belongs to, or whether it belongs to none. A unit measuring closer to the 875 Pro chamber than any charcoal model is probably a pellet smoker, even if the listing calls it charcoal. Measurements are harder to fake than names.

Step 3 - Match the Controller, Auger, and Fire Pot to the Manual's Parts Diagram

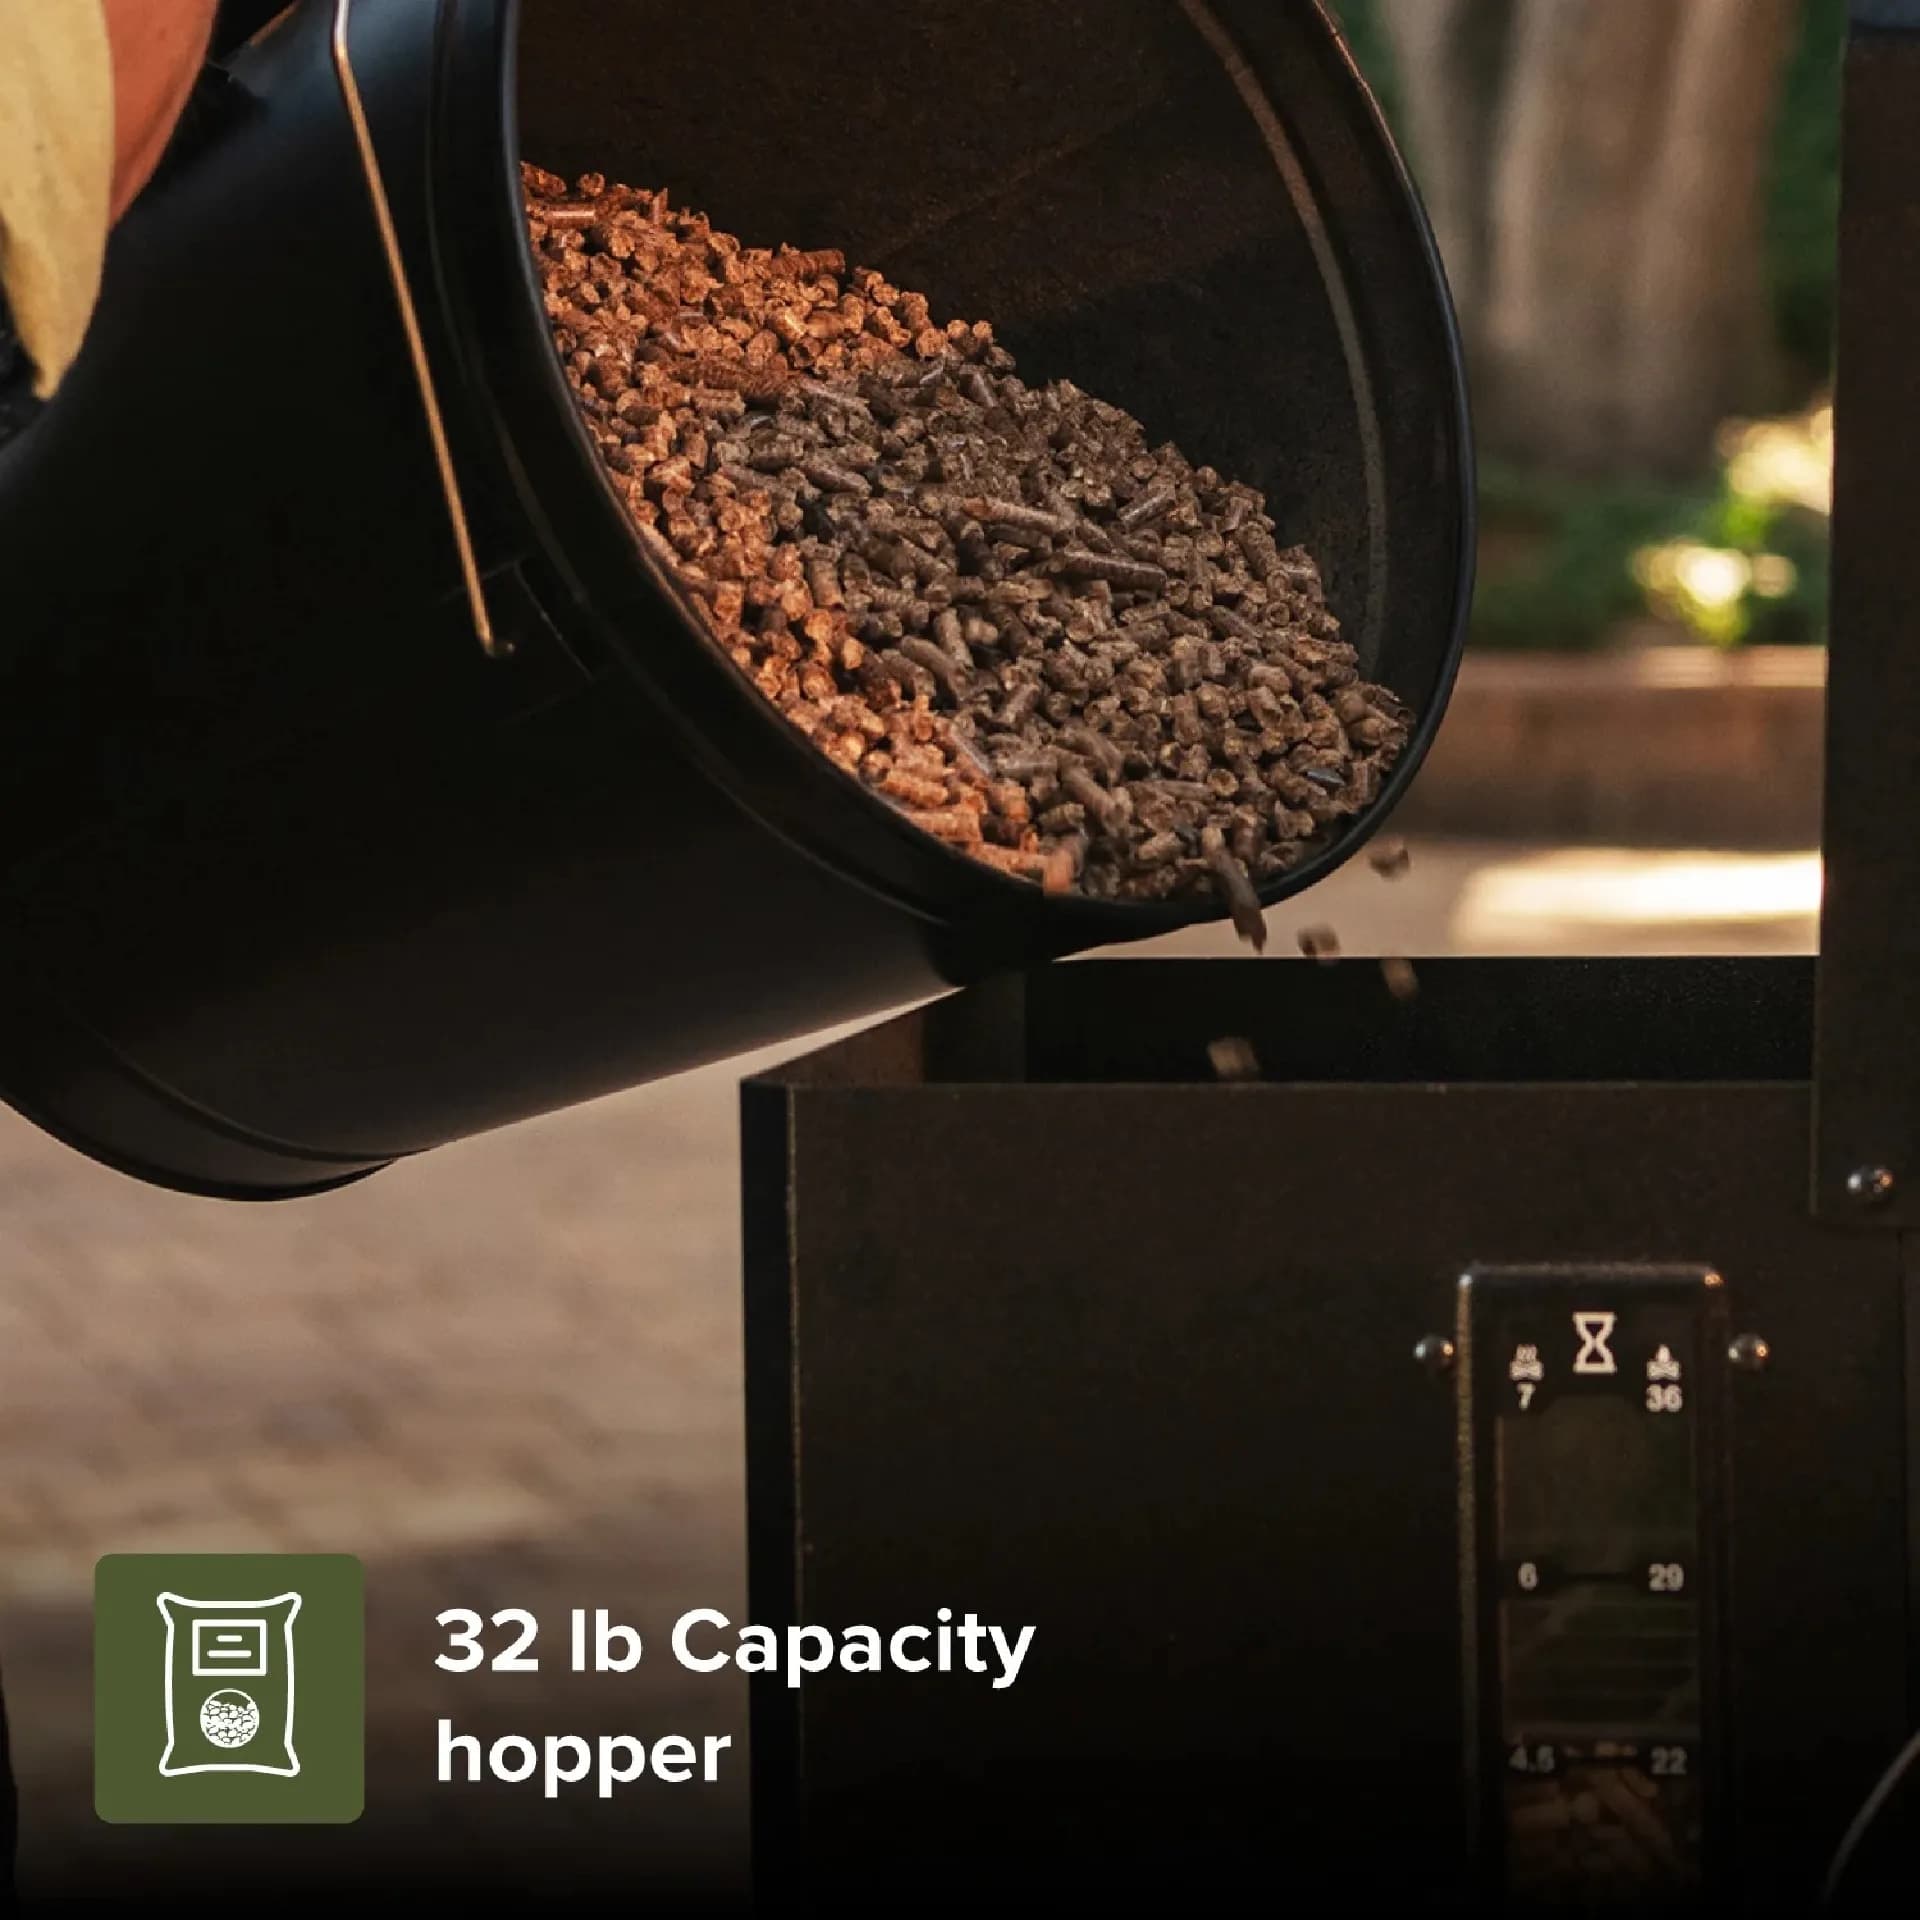
For a pellet unit, open the hopper lid and inspect the controller panel. Note the brand, button layout, and whether it has a digital readout or dial. Then look underneath the hopper for the auger motor and inside the cook chamber for the fire pot. Compare what you see to the parts diagram for the closest confirmed Oakford model. A generic aftermarket controller or an auger motor held on with mismatched screws signals a repair history you must price into your offer.

For a charcoal unit, confirm a fire grate, an ash pan or cleanout, and a lid that seats without gaps. The Homestead 24 is a heavy-duty charcoal grill, not a pellet smoker, so a listing showing a hopper and calling the unit a Homestead is mislabelled. Use physical features, not the name, to classify the unit.

Step 4 - Run a Short Temperature-Hold Check or a Charcoal Airflow Check

You do not need a 30-minute lab test, but you need evidence the fuel system works. For a pellet grill, fill the hopper with a few cups of pellets, start the controller, and watch the auger feed for two or three minutes. Let it run ten minutes and note whether the temperature climbs steadily and holds without wild swings. A controller that jumps or errors out is a replacement cost, not a dealbreaker, but know that before you pay.

For a charcoal grill, open the vents and check that air moves from the bottom intake through the fire grate and out the lid vent. Look for rust-through in the fire bowl and confirm the ash pan slides or lifts freely. A charcoal unit with blocked airflow will never hold temperature, no matter how good the exterior looks.

Safety first: never test a pellet grill with a full hopper indoors or in a garage. Empty and dispose of ash outdoors only after it has fully cooled, and never store a propane tank near a heat source.

Step 5 - Confirm Parts and Cover Fitment on Nexgrill's Product Pages Before You Pay

Before you commit, open the Nexgrill All Products page and search for the model family you identified in Steps 1 and 2. If it is an 875 Pro, confirm the product page lists a cover as included; if an 1125 Pro, check whether the cover is sold separately. Cover fitment is model-specific, and buying the wrong cover for a discontinued or rebadged unit can cost you $40 to $100 in avoidable spend.

If the model does not appear in the catalogue, use the Nexgrill Contact page to ask whether the data-plate model number is a known legacy or regional variant. Ask specifically for the parts diagram and cover SKU. A response from Nexgrill support is worth more than any forum post. If they cannot identify the model, treat parts availability as unknown and price the unit accordingly.

Common Mistakes That Turn a Good Deal Into a Bad Purchase

The most common error is trusting the listing title over the data plate. The second is buying on a clean exterior without checking the fire pot, auger, or fire bowl for corrosion and ash buildup. The third is assuming a cover is included because a photo shows one draped over the grill; on some models the cover is an add-on, and on used units it may be aftermarket. The fourth is paying a premium for a name that cannot be verified. A grill without a confirmed identity is a gamble, not a collectible.

Once You've Verified the Unit, Here's What Else Decides the Deal

You have the data plate photographed, the grate measured, and the fuel system tested. Now the question shifts from what the unit is to whether it is worth owning. That depends on your intended use, replacement-part availability, and the true condition of the components that fail first. The sections below walk through the practical trade-offs so you can make an offer with confidence or walk away without regret.

Two Buyer Scenarios: Used Marketplace Unit vs. Floor Model or Closeout

A used marketplace unit and a retail floor model present different risks. A used unit has a history: it may have been stored uncovered, run with the wrong pellets, or repaired with non-original parts. A floor model has been assembled and displayed, often without a box or manual, but may never have been fired. The table below summarizes what to prioritize in each scenario.

Risk FactorUsed Marketplace UnitFloor Model / Closeout
Missing data plateCommon; treat as high riskRare; ask the store to locate it
Interior corrosionCheck fire pot, auger tube, and fire bowlCheck for rust from humidity or cleaning
Controller and electronicsTest power-on; watch for error codesMay be untested; ask for a power-on
Included accessoriesCover may be aftermarket or missingCheck box contents or ask for a parts list
Price flexibilityUsually negotiableLimited; ask for clearance pricing

For a used unit, budget for at least one replacement part even if everything tests well. For a floor model, confirm the manual and any included cover are present, because sourcing a manual later is easy but sourcing a model-specific cover is not. In both cases, the price you pay should reflect the condition you measured, not the condition the seller described.

What Replacement Parts Cost and Why Availability Beats Cosmetic Condition

Cosmetic flaws are visible and easy to negotiate; parts availability is invisible and expensive. A controller for a pellet grill can run $80 to $200 depending on the model, an auger motor $40 to $120, and a cover $40 to $100. Those are estimated US ranges and vary by model and retailer. If the unit is a confirmed Oakford 875 Pro or 1125 Pro, check the official product pages for the correct parts and accessories. If it is an unconfirmed Outpost 29, you cannot price the risk until Nexgrill support confirms the model, and that uncertainty should lower your offer.

A clean exterior with a discontinued controller is a worse buy than a scuffed exterior with a documented, in-stock controller. Availability is the value.

Pellet vs. Charcoal: Reading the Listing Correctly

Some listings use the Oakford name loosely. The Homestead 24 is charcoal, and the 875 Pro and 1125 Pro are pellet smokers. If a listing shows a hopper and calls the unit a Homestead, the listing is wrong. Use the inspection points below to classify the unit before you negotiate.

Inspection PointPellet SmokerCharcoal Grill
Fuel systemHopper, auger, fire potFire grate, ash pan, vents
ControlsDigital controller, temperature probeManual vent adjustment
Power requirementYes, for controller and augerNone
Common failureAuger jam, controller errorRust-through in fire bowl

Cover Fitment: Included-in-Box vs. Sold Separately

The Oakford 875 Pro Pellet Smoker Grill is marketed with a cover included, while the 1125 Pro and other models may list the cover as a separate accessory. If you are buying used, the cover in the photo may be an aftermarket product that does not fit correctly. Check the Nexgrill product page for the model you identified and confirm whether a cover is included or sold separately, then factor that into your offer. A cover that does not fit is a slow way to let moisture into a pellet hopper.

Your Go / No-Go Checklist (and When to Walk Away)

Use this checklist as a final gate before you pay. A single no-go item is not always fatal, but two or more should push you to walk away or demand a significant price reduction.

  • Data plate is present and legible; model and serial are recorded.
  • Model number matches a known Nexgrill product or has been confirmed by Nexgrill support.
  • Fuel system matches the listing (pellet vs. charcoal).
  • Grate measurements are consistent with the model family.
  • Controller powers on and holds a stable reading, or charcoal airflow is unobstructed.
  • Fire pot or fire bowl is free of rust-through and heavy ash buildup.
  • Cover fitment is confirmed, and any missing cover is priced in.
  • Parts diagram is available, and at least one source for common replacement parts is confirmed.

Walk away if the seller cannot show a data plate, refuses a power-on test, or the unit's model number cannot be matched to any Nexgrill documentation. A grill with no verifiable identity is a parts gamble, not a bargain.
Sources

Why Choose Us

Here's what sets us apart

  • Premium grilling experience at accessible pricing

    We position ourselves as delivering high-end outdoor cooking features and performance without premium-brand pricing, emphasizing “Quality Grills. Unbelievable Value.”

  • Wide range of outdoor cooking products for every use case

    We offer gas grills, pellet grills, griddles, smokers, pizza ovens, portable/tabletop grills, electric grills, accessories, and replacement parts — allowing customers to stay within one ecosystem for all outdoor cooking needs.

  • Innovation-focused outdoor cooking with smart technology

    We differentiate ourselves through smart grilling products like the Oakford smart pellet grill, including app-connected cooking controls and modern outdoor cooking technology.

What Our Clients Say

Don't just take our word for it

“I’ve been using the Nexgrill Daytona 4-Burner Gas Griddle for a while now, and I’ve been really happy with it. First off, it’s super sturdy and feels really well-made, like it’s going to last me a long time. The cooking space is awesome—plenty of room for making big meals. So far I’ve cooked pancakes, burgers, bacon and some veggies. The 4 burners make it easy to control the heat in different areas. I love that I can keep one side hotter for searing and leave the other side cooler for things that don’t need as much heat. Plus, it heats evenly, which I was really glad to see. The shelves underneath and on its sides are a nice bonus. I’ve used them to keep things like plates, tools, and ingredients handy while I’m cooking, it’s very convenient. Cleaning it is super simple too. Once it cools down, I just wipe off the cooking surface and let the grease funnel into the trap. It’s quick and easy, and honestly, it barely looks like I even used it. If I had to nitpick, the grease trap can fill up kind of quickly during bigger cooking sessions, but as long as you keep an eye on it, it’s not a big deal. Overall, this griddle has been great. It’s sturdy, easy to use, and makes cooking outside a lot of fun. If you’re into grilling or want something versatile, I think this is a solid choice. Originally posted on influenster.com”

M
martind23_2941
Sturdy, easy to use, and perfect for cooking big m

“took about 2-3 hrs for complete assembly. took about 15-20 minutes to fully heat to 700. used a pan liner and a drip cup liner due to previous issues with those rusting away. this is about the 3-4 grill i have assembled. dont try to do it alone or ask the wife for help with the firebox its awkward. always check the directions 2-3 times before tightening down and dont over tighten the screws. hopeing for 5 years of grilling on this but i havent checked the warrenty yet.”

DT
Dave the Griller
finally got around to building this.bought in 2025

“We just bought this guy and I recommend always buy it assembled, we just use the grill 2 times and really works good; is perfect size and the side burn is very useful plus the caddy attach for spices; the material quality is in medium rate; no too cheap no too expensive I'll be glad if it works for minimum 5 years. Nexgrill could improve with the way, and cleaners to not damage the grates and the burners. I protect the removable pan with heavy duty aluminum foil, when the grease drop I only change the foil. Well I am enjoying my new Nexgrill !!! P.s. always clean the grill after use it....ALWAYS :-)”

KA
Karl A
Nice Grill

“Thank you to Influencer and Nexgrill for sending this to me for free, in exchange for my honest opinion. My 17 year old son put this together for me. It was easy but time consuming, it took about 2 hours. This is great for families, because you can cook a good amount of food in a short time. We did tacos, but it’s also great for breakfast, pancakes, eggs, breakfast burritos. It’s easy to clean if you have the right tools, you’ll need a scraper and metal spatula. Overall I would recommend this flat grill, it’s a great addition to our household. Originally posted on influenster.com”

K
KellyL
Quick and easy cooking

“My old Nexgrill is 25 years old and still looking and performing well! This new one is going on our back patio to partner with the old one in our courtyard. Obviously quality products to last that long. I hope the new one does as well. The only concern I have is that the sides are painted metal rather than stainless like the old one. I hope it doesn’t rust over time. But, We are very happy grillers!”

JS
Judy S
New grill to partner with my old one

“Bought grill 3 years ago stainless grates rusted out had to order new ones to replace Yes, I recommend this product.”

G
GaryS329
Stainless

“I’ve always been a smoker, fryer kind of guy. But recently with my new job keeping me super busy I’ve been cooking on my father in-laws 2 burner grill and it takes so long to cook ribs and chicken. I love just lighting the burners and cooking so I decided to upgrade by buying my own and I got this 5 burner with side burner for veggies , took me maybe 20 minutes to get all the dinner done tonight after I seasoned the grill with an onion. Love it so far, I hope it lasts a long time! It’s beautiful!”

JB
Jason B
Love it so far! My first propane grill I’ve ever bought myself!

“I love your grills. This is a replacement grill for a fully stainless steel one (was suppose to be). We originally bought it for our daughter's new townhouse, but her patio was not "ready" for it. We have kept it for 5 years now. My husband passed, I sold the house and move it, in the original box, with me and just put it together. The”

LG
Lisa G
Replacement

“Purchased a 5 burner with side burner grill probably 7-8 years ago. You can only replace things for so long. Opted on a smaller 4 burner grill this time. Hoping to get lots of use for many years to come.”

BS
Brian S
2nd grill with out

“Easy grill to use & grills well. Last grill lasted a little over 6 years. Had to replace burners twice (just worn out - lots of use). Here is old grill & new grill.”

RE
Russell E
2nd Nexgrill

“I had either recieved or bought a grill from either webber or Charbroil. Both had lasted roughly 5 years each before rusting out. For the price point and the way this grill feels I think this one should last longer. Looks awsome new so hopes are high.”

VA
Victor A
3rd grill so far...

“I’m just setting up my second 5 burner nexgrill!!! My first one was purchased in 2015!! I live in New England and the grill lived outside for 7 1/2 years!! That is an impressive lifespan for a grill in my area! I’ll be a loyal Nexgrill customer for life. Thanks very much. Yes, I recommend this product.”

L
Litch
Robust grill with Longevity to boot

“This grill is good for an economy grill. My 10 year old assembled most of it. I knew that I was getting a budget grill and didn't expect a Cadillac. I bought it mainly because the burners have flame on the left and right, instead of one row on the top. I checked the temperature gauge vs my digital and it runs 50° high, didn't expect it to be right on. The burner tents are higher in the front, making it hotter in the front. I have snips so I'll cut the front to set level. I seasoned the grill with bacon, it leaked from the screw to the drip pan, which was tight. The corners are sharp. I had corner protectors for my smoker and put some on the Nexgrill, hoping to get more life from the cover. Overall it's pretty good for the price.”

DK
Daniel K
Easy to assemble
4.7/ 5
13 reviews

Keep reading

Related Articles

Nexgrill Oakford 1125 Pro Pellet Smoker GrillPellet Grills

Nexgrill Oakford 1125 Pro Assembly Instructions: A Pellet Smoker Build Guide

Readiness Check Before the First Bolt: Outlet, Level Ground, Two People, Shop Vac A pellet cabinet grill is an appliance with a controller, auger motor, and burn pot, not just a bowl and legs. Before you cut tape on the Oakford 1125 Pro , clear four preconditions: a dedicated 15-amp circuit within cord reach (not shared with a cycling freezer or compressor), a level surface, two adults, and a shop vac to clear sawdust and loose pellets from the hopper and fire pot. Plan the lift before opening the carton. The chamber is the heaviest component - line up your second person before panels hit the floor. Tools are commonly a Phillips screwdriver, adjustable wrench or socket set, and sometimes an included hex key. Check your manual for the exact list. Unbox by Sub-Assembly: Sorting the 1125 Pro Hardware and Panels Do not empty the carton into one pile. Group hardware by sub-assembly and bag-and-label as you go - this is the difference between a 90-minute and a 150-minute build. Sub-assembly Typical hardware Common error Cart frame and wheels Hex bolts, locking casters Wheels fitted before frame is square Chamber to cart Long bolts, washers Lid tipped hinge-down on concrete Hopper and auger Small machine screws Hopper reversed; feed tube misaligned Controller and probe Self-tapping screws, lead clips Leads zip-tied before port check Cart First, Chamber Second: Planning the Heavy Lift Safely Build the cart complete - frame squared, casters on, shelves attached - then lock the wheels. Lift the chamber with one person at each end, hands under the frame rails, not on the lid handle. Never set the chamber lid-down on a hard surface: the hinge can bend and the lid will never seal flush. Lower it onto the cart mounts, start bolts by hand, and tighten only once all four are engaged. Hopper, Auger and Burn Pot: The Orientation Step That Decides Whether Pellets Feed Seat the hopper so the auger outlet points into the drop chute above the burn pot, and confirm the igniter sits in its sleeve beside the pot with air holes unobstructed. A reversed hopper or chute gap produces a full hopper and an empty fire pot on first start. Controller, RTD Probe and Igniter Wiring: Match Leads to Labeled Ports First Before any zip-tie goes on, match each lead to its labeled port: RTD probe, igniter, auger motor, fan. Push each connector fully until it seats, then tidy the loom away from the burn-pot heat. A half-seated controller plug is the most common cause of a dead panel on first power-up. Torque Order and Where Not to Overtighten Sheet-Metal Panels Hand-tighten every bolt, square the cabinet, then snug in a cross pattern. Sheet-metal screws into thin panels strip easily - snug is the target, not maximum force.

Nov 12, 20265 min read
Read more
Nexgrill Oakford 1125 Pro Pellet Smoker GrillPellet Grills

Nexgrill Oakford 930 Assembly Instructions: Verify Your Model on the Rating Plate, Then Build Without Guesswork

If Your Carton or Rating Plate Says 'Oakford 930', Read This First Before you open the carton, check the number on the box flap and on the rating plate riveted to the hopper or cart frame. If it reads 930, you have a plausible-looking model number and no obvious matching document. This guide is for that reader, not the person holding a crisp manual with a matching part list. The goal: confirm what you own before tightening a single bolt, then follow a step order that works across the Oakford pellet family so nothing has to come back apart. What Nexgrill's Oakford Pellet Line Actually Lists Today (875 and 1125) Nexgrill's Oakford pellet lineup centers on two models: the Oakford 875 Pro Pellet Smoker Grill and the larger Oakford 1125 Pro . A carton marked 930 deserves a second look: it may be a retailer-specific bundle, a regional SKU, or a plate misread at arm's length. Treat the rating plate on the unit as the authority, not the carton label. Cartons get swapped in warehouses; plates are riveted to the metal. The Decoding Test: Gas 720-Series vs. Oakford Name-Plus-Number Nexgrill's gas grills carry alphanumeric codes (the 720-series format), while the Oakford pellet line uses a name-plus-capacity pattern such as 875 or 1125. A code like 720-0896B means searching a manual repository by exact string; an Oakford number means searching a product name. If you have been hunting for a 930 in the gas-grill style, you are looking in the wrong drawer. What You Need on the Driveway Before You Cut Tape Tools, Surface, and the Two-Person Rule Pellet grills arrive heavy and awkward, and a dropped hopper on concrete can bend a leg channel. Clear a flat area of roughly 8 by 10 feet. Have ready: a box cutter with the blade extended shallowly, a #2 Phillips screwdriver, a 7/16-inch wrench, and a magnetic parts tray. Recruit a second person for the lid and hopper lift. Time-Boxing the Build Into Two Sittings Plan two sessions. Sitting one covers cart, legs, and body panels. Sitting two covers chimney, gasket, probes, controller, and trays. Rushing the second sitting is where most rework happens. First 20 Minutes After Opening: The Triage Checklist Match the Packing List to the Manual, Then to the Plate Set a 20-minute timer. Photograph the rating plate. Lay the packing list beside the manual you intend to use; confirm the manual's front-cover model matches the plate, not merely the carton. Count fasteners into a magnetic tray by zone - cart, lid, chimney, controller. When Nothing Matches: The Honest Fallback If the plate number does not correspond to any manual on Nexgrill's site, do not improvise from a neighbouring model. Reach out through the Nexgrill contact page with your plate photo and a parts request before assembly. The Step Order That Prevents Rework on Any Oakford Pellet Grill Step 1 - Lay Out and Identify Fasteners by Zone Group bolts by the assembly step that uses them. Mixing a lid hinge bolt into a chimney stack costs time once hardware is buried. Step 2 - Fit the Chimney and Seat the Lid Gasket Install the chimney before the lid is closed over the body; a gasket pinched during a later lift will silently leak smoke. Step 3 - Route the RTD Temperature Probe and Meat Probe Feed probe leads through the supplied grommet before the firepot and drip tray go in. Leads routed late will chafe on the auger housing. Step 4 - Connect the Controller Wiring Harness Seat each connector until it clicks, and keep the harness clear of the heat shield. Step 5 - Set the Drip Tray, Grease Tray, and Locking Casters Slide the grease tray in last, and lock the front casters before the first burn. Ready to Compare Two Oakford Options Side by Side? If your plate confirms you own a 875 or 1125, the next decision is whether that size fits your patio and cooks. Compare two products side by side below to see which fits best.

Nov 10, 20266 min read
Read more
Nexgrill Oakford 1125 Pro Pellet Smoker GrillPellet Grills

Nexgrill Oakford 1150 Assembly Instructions: Build a Pellet Grill in the Right Order So You Only Build It Once

Nexgrill Oakford 1150 Assembly Instructions: Build It in the Right Order and You Only Build It Once You have a Saturday morning, one adjustable wrench, a #2 Phillips, and a friend arriving in about an hour. This guide walks you through the Oakford pellet grill build in five zones so you never have to disassemble a finished section. The sequence applies to the Oakford 1150 and its stablemates-the 1125 Pro and 875 Pro-because the architecture is shared: cart, hopper and auger, fire pot, drip tray, grates, controller, then burn-in. Always work from the manual that shipped with your grill or the current version from Nexgrill support. Part numbers and torque specs vary by revision. Before You Open the First Box: Tools, Surface, and the Two-Person Rule You need a 7/16 in and 1/2 in wrench (or adjustable), a #2 Phillips screwdriver, needle-nose pliers, a box cutter, and a 4 mm hex key if your kit includes one. Work on a flat, hard, swept surface-not grass, where a dropped washer can vanish. Allow the grill footprint plus about 3 ft of clearance on each side. Photograph the exploded parts diagram before opening bags, sort hardware into a muffin tin by step number, and verify bag counts against the parts list. A second person helps when lifting the hopper and aligning the lid; if your helper is an hour away, start with the cart and legs solo. Which Oakford Did You Actually Buy? Confirm the Plate Before You Start Find the serial plate on the cart or firebox and note the model number. It may read 1150, 1125 Pro, 875 Pro, or a retailer-exclusive variant. Scan the QR code on the carton for the digital manual, then cross-check that the cover image matches your grill. A quick photo of the plate and the diagram saves a mid-build call to support. Stage the Build in Five Zones So Nothing Gets Reassembled Zone 1: cart and legs. Zone 2: hopper and auger. Zone 3: fire pot, hot rod, and flame plate. Zone 4: drip tray, grease bucket, and grates. Zone 5: controller, RTD probe, and wiring. Complete each zone fully before moving to the next. This order prevents the classic error of bolting the hopper before the legs are square. Step 1: Square the Cart and Legs Before Any Panel Goes On Assemble the cart frame and legs on your hard surface. Leave all bolts finger-tight until the frame is square-measure diagonally corner to corner; the two measurements should match within about 1/8 in. Only then snug the bolts. A twisted cart will cause the lid to bind later. Step 2: Hopper and Auger - the Assembly That Decides Whether the Grill Feeds Mount the hopper to the cart with the hardware provided. The auger motor typically attaches to the hopper base; make sure the motor leads are not reversed-consult your manual for the correct polarity. Spin the auger by hand (if accessible) to confirm it turns freely before adding pellets. This is your last easy chance to catch a jam. Step 3: Fire Pot, Hot Rod, and Flame Plate in the Correct Order Install the fire pot into the firebox opening, then the hot rod (igniter) in its bracket, then the flame plate over the pot. The hot rod must sit at the correct depth per your manual-too far in and it won't light the pellets; too far out and it burns out early. Route the hot rod wire away from the fire pot edge to avoid pinching. Step 4: Drip Tray, Grease Bucket, and Grates (In That Order, Not the Other Way Round) Slide the drip tray into its rails below the cooking chamber. Hang the grease bucket on its hook. Then set the cooking grates in place. Fitting grates first forces you to remove them to access the tray-a common time-waster. Step 5: Controller, RTD Probe, and the Wiring You Should Photograph Mount the controller in the cart panel. Feed the RTD probe wire through the firebox wall and clip the probe to its bracket inside the chamber. Photograph the wiring before you close any panels-this reference saves hours if a connection loosens later. Connect the controller leads per the manual; do not force connectors. The Four Fasteners You Should Not Fully Tighten Yet Leave the lid hinge bolts, the lid handle screws, the side shelf bolts, and the hopper-to-cart bolts loose until the lid is aligned and closes evenly. Once the lid sits flush, torque them in a cross pattern. Overtightening the handle can crack the lid steel. Compare Two Oakford Models Side by Side Before You Commit If you are still deciding between an Oakford 1150 and a 1125 Pro or 875 Pro, use the comparison tool below to see how their build sequences and features differ. Try comparing two products side by side below to see which fits best:

Nov 7, 20267 min read
Read more
Nexgrill Oakford 1125 Pro Pellet Smoker GrillPellet Grills

Nexgrill "Oakford 28A" Assembly Instructions: The No-Manual Build Path for Pellet and Charcoal Oakford Units

"Oakford 28A" Isn't in Nexgrill's Published Line-Up - Here's How to Read That If you're holding a carton or a marketplace listing that says "Oakford 28A," start here: that model number doesn't appear anywhere in Nexgrill's published range. The Oakford name is real and active - it covers the Oakford 875 Pro Pellet Smoker Grill , the Oakford 1125 Pro Pellet Smoker Grill , and the Oakford Homestead 24 Heavy Duty Charcoal Grill . The "28A" suffix is most likely a reseller SKU, bundle code, or typo - not a factory number you can search a manual against. So build from the unit itself: identify the sub-family physically, follow a stage-gate bolt order, and run the final checkpoints so your first cook isn't your first repair. A marketplace title is not a model number. Build from the carton parts callout and hardware bags, and use the physical diagnostic below as your primary cross-check. The Two-Minute Physical Check: Pellet Cabinet or Charcoal Barrel? Before opening a hardware bag, answer one question: is there a hopper? A pellet Oakford has a side-mounted pellet hopper, an auger tube feeding the fire pot, a digital controller, and a chimney with a damper. A charcoal Homestead 24 has none of that - instead a barrel or kettle body, hinged or vented lid, ash pan underneath, and a bottom vent stack with no electronics. Say it out loud: hopper, auger, controller, chimney - pellet. Ash pan, vent stack, no wiring - charcoal. That test routes you to the right build path in under two minutes and prevents the most common wrong turn: reading pellet controller hardware as charcoal vent hardware. The 10-Minute Driveway Setup Before the First Wrench Lay flattened cardboard on a flat, level surface - driveway or garage floor, not grass or gravel. Keep hardware bags separated by sub-assembly; mixing cart-stage washers into the hopper stage is how builds stall. Have on hand: a socket set (typically 10mm and 13mm, plus an adjustable wrench), a Phillips screwdriver, a utility knife, and a second pair of hands. Confirm doors and the lid open fully - assembling indoors and rolling the unit through a doorway is a frequent, avoidable failure. Why the Bolt Order Matters More Than the Bolt Count Run the entire build finger-tight. A cart frame tightened bolt-by-bolt as you go will rack out of square, and every later stage - firebox seat, lid alignment, shelf brackets - inherits that twist. Tighten only after the structure is square and the legs sit level. This one rule eliminates most teardowns. Step 1: Cart Base, Casters, and Getting the Frame Square Fit casters to the leg plates first (locking casters to the front where supplied), then join the legs to the base rails finger-tight. Stand the frame up, press down on opposite corners, and check for rock. Adjust, then snug the base bolts only. Step 2: Firebox or Barrel Seating (and the Lift Rule) Never lift a barrel or chamber by the chimney, hopper handle, or lid handle. Two people lift from the body edges and lower it straight onto the cart mounts. For the pellet family this is the heavy stage; for the Homestead 24 it's a quick seat onto the leg ring with the ash pan below. Step 3: Hopper, Controller and Chimney (Pellet) or Grate and Ash Pan (Charcoal) Pellet build: route controller wiring clear of metal edges before the hopper is seated, confirm nothing is pinched, then mount the hopper, connect the auger drive, and fit the chimney with its damper swinging freely. Charcoal build: drop the charcoal grate in level and set the ash pan so it slides without binding. Step 4: Lid, Handle and Shelf Alignment - the Stage That Fails Quietly Fit the lid and handle last, leaving hinge bolts loose until the lid closes flush on both sides, then torque. Attach side shelves only after the legs are level - a shelf on an unlevelled frame pulls the whole unit out of true. Compare two Oakford options side by side below to see which build path fits best:

Nov 7, 20266 min read
Read more

Featured products

From our catalog

Oakford™ 930 Pellet Smoker Grill
Pellet Grills

Nexgrill

Oakford™ 930 Pellet Smoker Grill

Oakford™ 715 Pellet Smoker Grill
Pellet Grills

Nexgrill

Oakford™ 715 Pellet Smoker Grill

Oakford™ 36A Pellet Grill Smoker in Black
Pellet Grills

Nexgrill

Oakford™ 36A Pellet Grill Smoker in Black

Oakford™ 1125 PRO Pellet Smoker Grill
Pellet Grills

Nexgrill

Oakford™ 1125 PRO Pellet Smoker Grill

Nexgrill Oakford Outpost 29 Offset Smoker Charcoal Grill in Black
Charcoal Grills & Smokers

Nexgrill

Nexgrill Oakford Outpost 29 Offset Smoker Charcoal Grill in Black

Oakford™ 875 PRO Pellet Smoker Grill
Pellet Grills

Nexgrill

Oakford™ 875 PRO Pellet Smoker Grill

Oakford™ 28A Pellet Grill Smoker in Black
Pellet Grills

Nexgrill

Oakford™ 28A Pellet Grill Smoker in Black

Oakford™ 875 Pro Pellet Smoker Grill with Cover
Pellet Grills

Nexgrill

Oakford™ 875 Pro Pellet Smoker Grill with Cover

Oakford 1400 Vertical Pellet Smoker
Pellet Grills

Nexgrill

Oakford 1400 Vertical Pellet Smoker

Oakford™ 580 Pellet Grill
Pellet Grills

Nexgrill

Oakford™ 580 Pellet Grill

Oakford™ 1000 Pellet Grill
Pellet Grills

Nexgrill

Oakford™ 1000 Pellet Grill

Nexgrill Oakford Outpost 18 Portable Charcoal Tabletop Grill in Black
Charcoal Grills & Smokers

Nexgrill

Nexgrill Oakford Outpost 18 Portable Charcoal Tabletop Grill in Black

Why Choose Us

Here's what sets us apart from the competition

Premium grilling experience at accessible pricing

We position ourselves as delivering high-end outdoor cooking features and performance without premium-brand pricing, emphasizing “Quality Grills. Unbelievable Value.”

Wide range of outdoor cooking products for every use case

We offer gas grills, pellet grills, griddles, smokers, pizza ovens, portable/tabletop grills, electric grills, accessories, and replacement parts — allowing customers to stay within one ecosystem for all outdoor cooking needs.

Innovation-focused outdoor cooking with smart technology

We differentiate ourselves through smart grilling products like the Oakford smart pellet grill, including app-connected cooking controls and modern outdoor cooking technology.

Browse by Category

Grills

Grills

Expert tips, buying guides, comparisons, and inspiration for choosing and getting the most out of your grill.

Troubleshooting

Troubleshooting

Practical guides for cleaning, maintenance, common grill issues, and performance optimization.

Recipes

Recipes

Step-by-step grilling recipes, cooking techniques, and meal ideas for every occasion and skill level.

Lifestyle

Lifestyle

Backyard entertaining ideas, seasonal grilling inspiration, and stories that celebrate outdoor cooking culture.

Accessories

Accessories

Helpful articles covering grilling tools, cookware, maintenance gear, and must-have accessories for outdoor cooking.

Griddles

Griddles

Find griddle recipes, cooking techniques, cleaning tips, and outdoor meal ideas designed for Nexgrill griddles.

Frequently Asked Questions

Find answers to common questions

Pellet grills offer versatility by allowing you to smoke, grill, and bake with precise temperature control. They use wood pellets as fuel, providing a unique flavor to your food that is difficult to achieve with other types of grills.

Consider factors such as cooking capacity, temperature range, and additional features like digital controls or Wi-Fi connectivity. Assessing your cooking habits and space availability can also help in selecting a suitable model.

You can use a variety of food-grade wood pellets, including oak, hickory, mesquite, cherry, and apple. Each type of wood imparts a different flavor to your food, allowing for a unique grilling experience.

Regular cleaning involves emptying the ash pan, cleaning the heat diffusers, and wiping down the exterior. It's also important to check for any pellet obstructions in the hopper and ensure the grill's components are in good working order.

Nexgrill pellet grills are designed to smoke effectively, offering low-temperature settings to infuse food with rich, smoky flavors. They also provide adjustable temperature controls to suit various cooking styles.





