How to Store Your Grill Safely: Essential Tips for Longevity
A comprehensive guide to properly storing your grill to ensure its durability and readiness for your next cookout.
In This Article
Deep Cleaning
Propane Tank Safety
Protective Covering
Introduction: The Importance of Proper Grill Storage
Storing a grill safely is not just about keeping it out of sight until the next cookout. It is about protecting the parts that make the grill work well, reducing avoidable wear, and preventing hazards that can show up when a grill is left exposed to weather, moisture, pests, or improper fuel handling. A well-stored grill is easier to restart, cleaner to use, and less likely to surprise you with rusted hardware, clogged burners, stale ash, or damaged ignition components when grilling season returns.
For many U.S. households, grill storage is seasonal. In colder states, a grill may sit idle for several months; in warmer climates, it may still need to be protected from heavy rain, humidity, dust, and sun exposure. That means the best storage plan depends on the grill type, where you keep it, and whether you use propane, charcoal, or a portable format. Nexgrill’s product mix spans gas grills, charcoal models, pellet smokers, griddles, and compact options, so the storage process should be practical rather than one-size-fits-all. The goal is simple: make sure the grill stays dry, stable, ventilated, and ready to return to service without unnecessary cleanup or repairs.
A safe storage plan starts before the cover goes on. The best time to protect a grill is right after the final cook of the season, while residue is still manageable and you can inspect every component.
This guide focuses on the steps that matter most in real homes and real backyards: cleaning, fuel safety, covering, location choice, seasonal adjustments, and the small check-ins that keep a grill from aging prematurely while it is not in use. If you have ever pulled a grill out of storage and found moisture under the lid, insect debris in the firebox, or a cover that trapped condensation instead of preventing it, you already know why storage details matter. The good news is that a few deliberate habits can prevent most of those problems.
Deep Cleaning Your Grill Before Storage
The most important rule of storage is that leftover grease, soot, food particles, and ash should never be left inside for months at a time. Residue attracts moisture, which can accelerate corrosion and create odors that are hard to remove later. It can also invite pests, especially if crumbs or grease are left in hidden corners, under burner shields, in drip trays, or around grates. A proper pre-storage cleaning does not have to be elaborate, but it should be thorough enough that the grill is going into storage in a neutral, dry state rather than an active mess.
For gas grills, start with the grates, flavorizer bars or heat tents, drip tray, and firebox. Scrape away cooked-on residue while the unit is still slightly warm if possible, then cool it fully and finish with a dry wipe. Empty and clean the grease tray so it is not carrying liquid residue into storage. Inspect burner ports and ignition areas for buildup, because grime in these areas can lead to uneven lighting later. If your model includes a side burner, pay attention to that area too, since it often collects grease and dust but is easy to overlook.
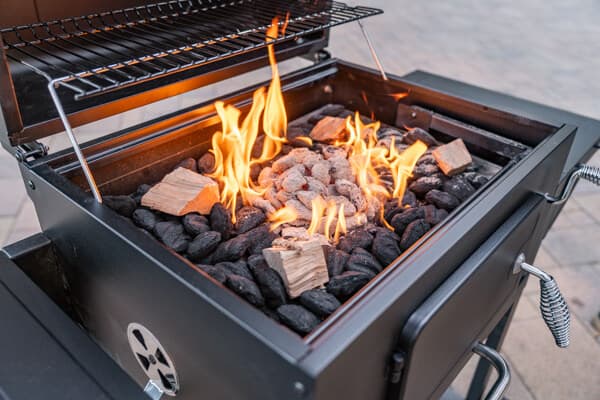
Charcoal grills need a different approach. Remove unused charcoal, then fully clear ash from the ash catcher or bowl. Ash can hold moisture and become corrosive when left sitting. Once the bowl is empty, brush out the interior and wipe away dust or residue from the lid, vents, and grates. If the grill has a damper system, make sure it moves freely before storage. Pellet smokers deserve special attention because pellets can swell or break down if moisture gets into the hopper or auger system. Remove stored pellets and vacuum out fine dust from accessible areas when the grill manual allows it.
Removing grease, ash, and pellets before storage lowers the chance of corrosion, pests, and odor buildup.
There is also a practical cleaning sequence that works well for most grills:
- Brush grates and scrape debris before disassembly.
- Remove and wash removable parts with warm, mild soapy water if the manufacturer allows it.
- Dry every component completely before reassembly.
- Wipe interior and exterior surfaces with a soft cloth to remove moisture and dust.
- Leave lids, drawers, or access doors open briefly in a dry space so trapped humidity can escape.
The key distinction is between clean and dry. A grill may look clean but still be holding moisture in seams, trays, or corners. Drying matters because a covered grill with lingering moisture can create the exact environment you were trying to avoid. If you live in a humid part of the United States, plan extra drying time before covering or relocating the unit. That small pause can make a major difference in how the grill looks and performs when you bring it back out.
Safely Handling and Storing Propane Tanks
If your grill uses propane, the tank deserves its own storage plan. A propane cylinder should not be treated like a casual accessory or left connected simply because it is convenient. Before storing the grill, turn off the tank valve, disconnect the regulator if your setup requires it, and inspect the hose and fittings for wear. Store the tank upright in a location that is cool, dry, and away from ignition sources. The tank should never be placed inside a sealed cabinet that could trap heat or fumes, and it should not be stored where it can tip, roll, or be struck by moving items.
For many homeowners, the safest approach is to store the propane cylinder outdoors in a shaded, protected spot that still allows for airflow. The exact storage method should always follow the cylinder instructions and the grill manufacturer’s guidance. What matters most is avoiding heat buildup, physical damage, and enclosed spaces where gas could accumulate. If you notice rust, damage, a dented cylinder, or a compromised valve, stop using that tank and follow local disposal or exchange procedures rather than assuming it is still fine.
Never store propane cylinders in basements, living areas, or enclosed indoor rooms. Even when a tank is closed, it should be handled as fuel equipment and kept in a ventilated, upright position.
If your grill is connected to natural gas, the fuel-storage issue is different because there is no removable tank. Even then, inspect the connector, confirm that the grill is fully shut down, and keep the area around the gas line clear during storage. In both propane and natural gas setups, the objective is to make the grill and fuel system inactive, stable, and easy to inspect when it is time to use it again.
Protecting Your Grill with Covers and Shelters
A cover is useful, but only if it is doing the right job. The best cover shields the grill from rain, snow, dust, UV exposure, and wind-blown debris while still allowing the unit to breathe enough to avoid condensation buildup. A cheap or poorly fitted cover can do the opposite by trapping moisture against the metal surface. For that reason, it is better to think of a cover as part of a system, not as the entire storage plan.
When choosing a cover, look for a snug fit that reaches the lower body of the grill without dragging excessively on the ground. Water that pools on the bottom edge can wick upward. A cover should be clean and dry before it goes on the grill, and it should be removed periodically during long storage periods so you can check for trapped humidity. If you store the grill on a patio, deck, or covered porch, the shelter helps, but it does not eliminate the need for a cover. Outdoor environments can still expose the grill to airborne dust, insects, and temperature swings.
A breathable, well-fitted cover is usually better than a heavy tarp tied tightly around the grill. Tight wrapping can hold in moisture and make it harder to notice problems early.
If your storage area is partially exposed, consider elevation as well as coverage. Even a covered grill benefits from being slightly off wet concrete or standing water. A simple mat, paver, or dry platform can reduce direct contact with moisture. Sheltered storage can also reduce UV damage to painted surfaces and help preserve knobs, igniters, and thermometer bezels that may fade or crack if left in constant sunlight.
Choosing the Right Storage Location
The best storage location keeps the grill away from standing water, extreme heat, and accidental bumps. A garage, shed, enclosed porch, or dry side yard may all work depending on the climate and the grill type. The important question is not just where the grill fits, but whether the location supports dryness, access, and safe fuel handling. A grill stored in a cluttered garage can be damaged by tools, bikes, or boxes being moved around it. A grill stored outside in a low area can collect water even if it is covered.
For homeowners with limited space, it helps to think about the grill’s footprint and its path in and out of storage. A portable grill or compact griddle may be easy to move into a shed, while a large cart-style gas grill may need to remain on a patio but protected with a durable cover. If you plan to store the grill near household items, make sure there is enough clearance around it for airflow and safe movement. Do not place storage bins, chemicals, or paint directly against the grill body. Those items can off-gas, spill, or create moisture problems of their own.
When weather gets cold, metal contracts and moisture behaves differently around seams and vents. In those conditions, a dry storage spot matters even more than in summer. If you are in a region with freeze-thaw cycles, try to keep the grill where snowmelt or condensation will not repeatedly wet the same surfaces. That is one reason why a sheltered but ventilated location often works better than a fully sealed corner.
Seasonal Considerations for Grill Storage
Seasonal storage is really about adapting to the climate rather than following one rigid routine. In the fall, you may be dealing with cooler nights, leaf debris, and more rain. In winter, snow and freezing temperatures become the main concerns. In spring, pollen and moisture can coat surfaces. In summer, heat and sunlight can break down covers and dry out rubber or plastic parts. Each season changes what the grill needs while it sits unused.
Before a long storage period, it helps to perform a quick seasonal reset. Check the exterior for chips in the finish, look at the knobs and hoses, clear spider webs or nests from openings, and make sure the hood closes properly. If the grill includes a thermometer, verify that the lens is readable and not fogged. If you are moving from frequent summer use to long-term winter storage, remove accessories that could hold moisture, including grill mats, drip pans, or unused tools left hanging on the unit.
For charcoal grills, seasonal prep also means discarding old fuel instead of saving partially used bags in a damp area. For pellet smokers, it means emptying pellets from the hopper before cold, damp weather can turn them unusable. For gas grills, it means ensuring the tank or line is properly disconnected and stored according to safe handling practices. Seasonal storage should make the grill simpler, not more complicated, to revive later.
Regular Maintenance During Storage Periods
A grill in storage still needs occasional attention. You do not have to service it constantly, but checking it every so often helps catch small issues before they become expensive ones. Every few weeks, remove the cover if conditions are dry and look for condensation, rust spots, nesting material, or signs of water intrusion. Check that the grill has not shifted, that the cover is still secure, and that nothing has pressed against knobs, doors, or side shelves.
This is also a good time to make sure the storage area itself remains suitable. A shed that was dry in October may become humid in January. A porch corner that seemed protected may collect melting snow or windblown rain. If you see moisture, address the cause rather than just wiping the surface. Sometimes the solution is as simple as improving airflow, moving the grill a few feet, or changing the way the cover sits at the bottom edge.
A short inspection during storage can reveal moisture, pests, or shifting before they affect the grill’s next season.
Regular maintenance during storage is especially valuable for households that do not grill every week. The less often a grill is used, the easier it is for small problems to hide. Treating storage as part of ownership rather than a pause in ownership is what keeps the equipment dependable.
Preparing Your Grill for the Next Grilling Season
When the season turns back toward grilling, do not rush the restart. Remove the cover and inspect the grill before lighting anything. Look for dust, moisture, insect nests, loose connections, damaged hoses, or corrosion on grate supports and fasteners. Reinstall clean, dry grates and any removable parts you took out earlier. If the grill uses propane, reconnect the tank only after you have confirmed that all controls are off and that the connection is secure. For charcoal grills, begin with fresh fuel and clean airflow paths rather than using material that sat open to humidity.
This is also the moment to evaluate what storage taught you. If the grill stayed dry and clean, the storage setup was probably sound. If it developed condensation or rust, the next season may call for a different cover, a better location, or a more frequent check-in routine. Good grill storage is not a single task; it is a set of habits that preserve readiness and reduce frustration later. Once the grill is clean, dry, and reassembled, it should be able to move from storage back to cooking with only a few minutes of setup.
Try comparing two products side by side below to see which fits best:
Common Mistakes to Avoid When Storing Your Grill
Once you've weighed two options against each other, the next step is avoiding the storage errors that quietly shorten a grill’s life. The most common mistake is covering a dirty grill and calling it done. Grease, ash, and food residue left inside can harden over time, attract pests, and hold moisture against metal surfaces. Another frequent mistake is storing a grill while it is still damp after washing or after a rainstorm. Even a small amount of hidden moisture can cause rust in seams, under the lid, or around hardware.
A second problem is using the wrong kind of cover. If a cover is too loose, wind can lift it and let in rain and debris. If it is too tight or non-breathable, it can trap humidity and create condensation. The goal is protection with airflow, not a sealed cocoon. People also forget to check the underside of the grill before storage. The wheels, lower shelf, cart frame, and tank ring often collect water and dirt. Those areas may not be obvious from a quick top-down inspection, but they are exactly where corrosion starts when a grill sits motionless for weeks or months.
Avoid stacking boxes, lawn tools, or holiday décor against the grill while it is covered. Pressure points can bend shelves, damage knobs, and create trapped moisture pockets.
There is also a fuel-related mistake that deserves special attention: leaving propane connected without confirming that the tank is secure and stored correctly. A closed valve is not the same as a thoughtful storage plan. If a tank is going to sit disconnected, it should be upright, protected from impact, and kept away from heat and enclosed living spaces. For charcoal grills, another common error is leaving leftover briquettes in a damp bag or leaving ash in the bowl. Both of those habits create cleanup headaches and can lead to corrosion or clogged airflow when you reopen the grill.
How to Store Charcoal and Other Grilling Accessories
Accessories are easy to overlook because they are small, but they can be the difference between a smooth spring startup and a frustrating afternoon of hunting for usable tools. Charcoal, wood chunks, pellets, gloves, thermometers, grill baskets, and drip pans each need a different storage approach. Start with fuel. Charcoal should be kept in its original bag only if that bag is dry and intact; otherwise, transfer it to a sealed, moisture-resistant container in a dry location. The objective is to keep fuel from absorbing humidity, clumping, or breaking down before you need it.
Wood chunks and smoking chips should also stay dry and elevated off concrete floors, where moisture can creep upward. Pellets are even more sensitive because they can swell and crumble when exposed to damp air. Any accessory made of fabric, paper, or absorbent material should be stored away from the grill body so that it does not become a hidden moisture source. Heat-resistant gloves, aprons, and covers should be fully dry before being folded and stored. If they are stored damp, they can develop odor or mildew.
Use separate bins for fuel, tools, and soft accessories. Keeping each category organized reduces clutter and makes the next cookout much faster to set up.
Thermometers, batteries, and electronic probes deserve dry storage as well. Remove batteries if a device will sit for months, and keep probes coiled loosely rather than sharply bent. Metal tools should be clean and dry before they go into a drawer, tote, or wall rack. The more you separate accessory categories now, the less likely you are to find rusted tongs or unusable fuel later.
Tips for Storing Portable Grills and Griddles
Portable grills and griddles usually face a different storage challenge than full-size cart models: they are moved more often, stored in tighter spaces, and sometimes packed into vehicles or garages between uses. That makes it especially important to protect handles, legs, locking mechanisms, and any foldable parts from impact. Before storing a portable unit, make sure it is completely cool, clean, and dry. If the legs fold or detach, confirm that the locking mechanism is not jammed with grease or grit.
For tabletop griddles, remove the cooking surface accessories and clean the grease management area carefully. Flat-top surfaces should be wiped dry rather than left with a thin layer of oil unless the manufacturer specifically recommends seasoning for storage. If you are storing a compact grill in a garage, stack nothing on top of it. Even a lightweight box can dent lids, crack knobs, or deform grates over time. Portable products are often easy to move, but they are also easier to damage because they are stored near other household items.
If your portable grill travels to tailgates, campsites, or vacation homes, storage should include a pre-trip inspection after each use. Check fasteners, latches, and burner openings before placing the unit away. The smaller the grill, the more important it is to keep every part accounted for. One missing clip or bent leg can turn a compact setup into an unstable one on the next outing.
Understanding the Impact of Weather on Grill Storage
Weather is the silent force that shapes how long a stored grill will stay in good condition. Rain, snow, humidity, UV exposure, wind, and even rapid temperature changes all influence how metal, paint, rubber, and fasteners age during storage. Rain and snow create direct moisture exposure, but humidity can be just as damaging because it sneaks into seams and under covers without leaving obvious puddles behind. That is why a grill stored in a damp coastal environment may show more wear than one kept in a dry inland climate, even if both are covered.
Sunlight is another factor. UV exposure can fade finishes, weaken certain plastics, and dry out soft components over time. Wind can lift covers, push dust into vents, and drive rain sideways into open areas. Freeze-thaw cycles are especially hard on grills because moisture expands as it freezes and contracts as it thaws, slowly working into joints and seams. If you live in a region with winter freeze and thaw patterns, inspect the grill after storms and make sure water is not pooling anywhere around the base.
A little trapped moisture, a loose cover, or repeated sun exposure can become visible wear by the next season.
The practical response is to reduce exposure as much as possible while keeping the grill accessible. That means choosing a dry location, using a properly fitted cover, and checking the grill after major weather events. If storms are common where you live, move loose accessories indoors and make sure the cover is secured so wind cannot turn it into a sail.
Ensuring Ventilation and Dryness in Storage Areas
Dryness is not achieved simply by putting a grill inside a building. Storage spaces still need airflow so moisture does not linger. A garage with poor ventilation can hold humidity after a storm. A shed with a dirt floor can absorb moisture from the ground. A covered patio can trap warm, damp air around the grill if the unit is wrapped too tightly. The best storage setup balances shelter and movement of air. That balance is what prevents the slow, almost invisible condensation that causes the most common off-season problems.
A useful habit is to keep the grill slightly separated from walls and other large objects so air can circulate around it. Avoid pushing the cover so tightly against the side shelves or lid that it cannot release moisture. If your storage area tends to feel damp, consider placing a moisture-absorbing product nearby if appropriate for the space, while still keeping all materials clear of heat sources and fuel equipment. The idea is to create a dry microclimate around the grill, not simply hide it behind other items.
Safety Precautions for Storing Grills Indoors
Indoor storage can be convenient, but it requires more discipline than outdoor storage because the grill is closer to living areas and household items. First, make sure the grill is fully cool, completely clean, and free of fuel residue before bringing it inside. Gas grills should have propane disconnected and stored separately according to safe handling guidance. Charcoal grills must be emptied of ash and fuel. The interior of the house, basement, or enclosed garage should never be treated as a place to stash a grill with an active fuel source or lingering heat.
When storing a grill indoors, keep it away from flammable materials such as cardboard, cleaning solvents, paint, and seasonal decorations. Use a stable surface and avoid placing heavy objects on top. If the grill is especially large, remove shelves or accessories that could snag on walls or doorframes as it is moved. In shared garages or utility spaces, also think about access. A stored grill should not block water heaters, fuse boxes, or emergency exits.
Before moving a grill indoors, confirm that the path is clear and that the unit is dry underneath as well as on top. Hidden moisture on wheels and frames can transfer to floors and storage mats.
How to Handle Grill Parts and Accessories During Storage
Grill parts last longer when they are stored in an organized way rather than tossed into a bin in no particular order. Remove parts that are easy to misplace, such as warming racks, grease trays, grates, side shelf accessories, batteries, probe wires, or detachable legs. Clean them, dry them, and store them together in labeled containers or bags if they are small enough to separate safely. This makes reassembly easier and reduces the chance of forcing a part into the wrong place later.
If you store hardware with the grill, keep bolts, screws, and clips in a sealed pouch so they do not disappear over the winter. For stainless steel or coated parts, avoid storing them while touching damp cloths or paper towels because that can create spotting or discoloration. It is better to dry parts fully, then pack them with enough airflow that lingering moisture does not get trapped around surfaces. This approach is especially useful for households with multiple outdoor cooking tools, since different grills and griddles may share similar parts and can easily be mixed up.
Grouped, labeled parts make spring setup faster and lower the risk of damaged or missing hardware.
The broader lesson is that safe storage is about preserving both the grill and the experience around it. When parts, fuel, covers, and accessories are stored thoughtfully, the first cook of the next season feels simple instead of stressful. That is the real payoff: less cleanup, fewer surprises, and a grill that is ready when your backyard table is.