Nexgrill "Evolution" Assembly Instructions: A Straight-Out-of-the-Box Build Guide for Any Nexgrill
No manual in the box and a name that won't search? Here's the tool list, the build order, the soapy-water gate, and the mistakes that turn a 90-minute assembly into a three-hour one.
In This Article
Step 0: Confirm the Manual
Build Order That Works
Leak Test Is the Gate
Before You Unbox: The Four-Minute Setup That Saves an Hour
The single biggest time-waster in grill assembly happens before you touch a bolt: opening the carton on grass, in a cramped garage, or on a slope. Clear a flat 10x10 ft area - a driveway or patio - and lay down a flattened cardboard box or an old blanket. This protects the finish and gives you a visual boundary for every part. Have a #2 Phillips screwdriver, a 7/16 in or 10 mm socket/ratchet (or nut driver), and a second person for the lid and firebox lift. Match fastener sizes to your manual's hardware callout; they vary by model. Also stage a propane tank (if gas) and a spray bottle of 50/50 dish soap and water for the leak test later. Do this four-minute setup and you avoid the classic mistake of chasing a missing washer across the lawn.
Pro tip: Keep the hardware bags sealed until you've laid out every part against the parts page. Ripping bags open early is the #1 cause of "missing" hardware.
Does a Nexgrill 'Evolution' Manual Actually Exist? How to Confirm What You Bought
Searches for a Nexgrill "Evolution" manual return nothing because that name is marketing language, not a model number. Nexgrill manuals are keyed to the 720-series number on the rating plate - a small sticker typically inside the cabinet door or on the back of the firebox. If your plate reads something like 720-0896B or 720-0830H, that's your manual. If a name like "Evolution" doesn't resolve to a 720-series number, don't panic: the assembly method is identical across Nexgrill gas grills. The shape of the build - cart, firebox, lid, trim, grates - matters more than the label. Nexgrill has been shipping grills from California since 1993 and now operates under the Global Leisure group after merging with Megamaster, so model names proliferate, but the hardware logic is consistent.
The Tools and Workspace Checklist Most Assembly Guides Skip
Beyond the screwdriver and socket, you'll want a magnetic parts tray or a few plastic cups to keep bolts sorted by callout letter. A pair of work gloves saves your knuckles when lifting the firebox. If your grill has a side burner, have a small adjustable wrench handy for the orifice nut. For the leak test, a spray bottle is non-negotiable - never use a flame to check for leaks. Also verify you have the propane tank filled before you start; a last-minute trip to the hardware store kills momentum.
- #2 Phillips screwdriver (magnetic tip preferred)
- 7/16 in or 10 mm socket/ratchet or nut driver
- Adjustable wrench (for side burner connections)
- Magnetic tray or cups for hardware
- Work gloves
- Propane tank (filled)
- Spray bottle with soapy water (50/50 dish soap and water)
- Flattened cardboard or blanket for parts
Build Order, Step by Step: Cart, Firebox, Lid, Trim, Then Grates
Follow this sequence to avoid rework. Start with the cart and legs, hand-tight only - do not torque yet. Attach the firebox to the cart, again hand-tight. Mount the lid and handle next; this is where a second person helps. Then add side shelves, side burner, and warming rack. Install heat tents (flame tamers) before the cooking grates - grates go on last. Finally, connect the regulator and hose, then run the leak test. This order keeps the frame square and prevents binding.
| Step | Task | Key Tip |
|---|---|---|
| 1 | Unbox and sort parts against parts page | Keep hardware bags sealed until sorted |
| 2 | Assemble cart/legs hand-tight | Don't torque yet; frame may need adjustment |
| 3 | Attach firebox to cart | Second person recommended |
| 4 | Mount lid and handle | Align hinge pins before tightening |
| 5 | Attach side shelves, side burner, warming rack | Use adjustable wrench for burner orifice |
| 6 | Install heat tents, then cooking grates | Grates last to avoid scratching |
| 7 | Connect regulator and hose; leak test | Soapy water on all connections |
| 8 | Burn-off | Run burners on high 15 min before first cook |
Where Buyers Get Stuck: Symptom, Cause, and Fix
Most assembly snags trace back to a handful of avoidable errors. The table below maps symptoms to causes and fixes, drawn from common owner reports.
| Symptom | Likely Cause | Fix |
|---|---|---|
| Frame seems wobbly or won't sit flat | Fasteners over-torqued during initial assembly | Back off all bolts, hand-snug, then final torque per manual |
| Legs sink into ground and bolts bind | Assembling on soft, uneven ground | Move to hard flat surface with cardboard underneath |
| Hardware bag missing or letters unclear | Bags opened before sorting against parts page | Match by callout letter; request replacements from Nexgrill support |
| Skipped leak test | "I'll do it later" | Test all three connection points now, before first light |
| Shipping straps or zip ties found inside firebox | Visually occluded during unboxing | Inspect firebox interior before installing grates |
| Grates installed before heat tents | Wrong order | Remove grates, seat heat tents, reinstall grates |
Warning: Over-torquing bolts can warp the frame and strip threads. Always start hand-tight and finish with a torque wrench if the manual specifies values.
Which Nexgrill Are You Actually Assembling? (And Which Option Suits You)
The assembly method is largely the same across Nexgrill's gas lineup, but a few model-specific details matter. Use this quick mapping to know what to expect.
- 4-burner gas grills (e.g., 4-Burner Propane Gas Grill in Black): Standard cart-to-firebox build. Good for families of 4-6; budget-friendly and straightforward.
- Daytona griddles (e.g., Daytona 4-Burner Propane Gas Griddle): Same core sequence plus flat-top seasoning. Ideal for breakfasts, smash burgers, and stir-fry. Assembly time slightly longer due to griddle plate.
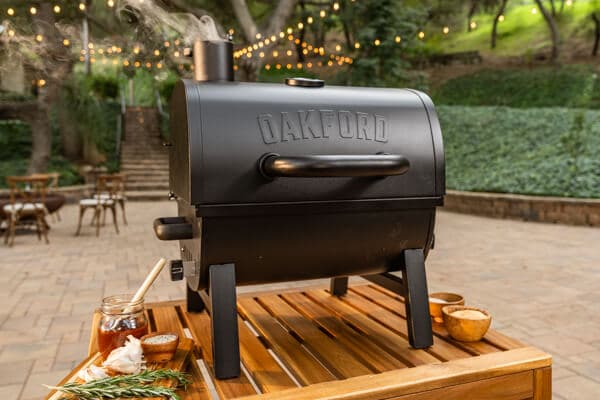
- Oakford pellet smokers (e.g., Oakford 875 Pro): Cart, hopper, auger, fire pot. Requires auger priming and burn-in. Best for low-and-slow enthusiasts.
If you're deciding between two models, try comparing two products side by side below to see which fits best - the assembly effort is similar, but the cooking style is not.
Typical assembly time for a mid-size Nexgrill gas grill with two people
Once You've Weighed Two Options, Here's What Else Changes on the Bench
Comparing two Nexgrill models side by side clarifies cooking style, but the assembly bench doesn't change much: every gas grill follows the cart → firebox → lid → trim → grates → leak test sequence. What differs is the extra steps for pellet and griddle models, and the post-assembly checklist that ensures safe first cooks. This section covers those differences, the critical leak test, and what to do if parts are missing or damaged.
The Soapy-Water Leak Test: Your Gate Before the First Light
The leak test is non-negotiable. Mix 50/50 dish soap and water in a spray bottle. With the propane tank valve closed, spray every connection point: regulator-to-tank, hose-to-manifold, and any side-burner connection. Open the tank valve slowly and watch for bubbles. Bubbles forming means a leak - close the tank valve immediately, retighten the connection, and retest. Never use a flame to check for leaks. Repeat until no bubbles appear. This step protects you from the most common cause of grill fires.
Tip: Perform the leak test every time you reconnect the tank, not just on first assembly. A 30-second check prevents dangerous surprises.
For safety clearances, always maintain at least 10 feet between the grill and any combustible materials (house, fence, tree branches). The NFPA and USFA both recommend this. Also check local codes for propane storage and grill use on balconies.
Pellet and Griddle Models: The Assembly Steps That Differ
Pellet grills like the Oakford 875 Pro add a hopper, auger, and fire pot. After assembling the cart and firebox, you'll need to prime the auger: fill the hopper with pellets, then run the grill in "prime" mode (or per manual) until pellets drop into the fire pot. This can take 2-3 minutes. Then light the grill and run a burn-in at 350°F for 30-45 minutes to burn off manufacturing oils. Griddles like the Daytona 4-Burner require seasoning the flat top: wash with soapy water, dry, then apply a thin layer of flaxseed or vegetable oil and heat until it smokes. Repeat 3-4 times. This creates a non-stick surface. Both pellet and griddle models still require the soapy-water leak test if they have a gas connection (some pellet grills do, for the igniter).
| Model Type | Extra Assembly Step | Post-Assembly |
|---|---|---|
| Gas grill (e.g., 4-Burner) | None beyond standard | Leak test, burn-off 15 min |
| Pellet smoker (e.g., Oakford 875) | Auger priming, fire pot placement | Burn-in 30-45 min at 350°F |
| Griddle (e.g., Daytona 4-Burner) | Flat-top seasoning | Oil and heat cycles (3-4x) |
Missing, Bent, or Wrong Parts: What to Do Before You Force a Bolt
If you discover a missing hardware bag letter, don't improvise with a substitute bolt - that can strip threads or compromise safety. Instead, match the callout letter from the parts page and contact Nexgrill support via Nexgrill's contact page. They can ship replacement parts, often within a week. For bent panels, photograph the damage and include it in your claim. Never force a bolt through a misaligned hole; loosen surrounding fasteners, realign, and retry. If a part is clearly defective, request a replacement rather than attempting a repair that could void the warranty.
Warning: Forcing a bolt can cross-thread the nut or crack the bracket. Always hand-thread first; if it binds, back off and check alignment.
Post-Assembly Checklist Before the First Cookout
Before you invite friends over, run through this checklist: all fasteners torqued per manual; lid opens and closes smoothly; side shelves secure; regulator hose free of kinks; leak test passed; burners light individually; flame is blue with slight yellow tips (if mostly yellow, check for spider webs in burner tubes). For pellet grills, verify auger feeds pellets and fire pot ignites. For griddles, confirm seasoning is even. Then run a burn-off: gas grills 15 minutes on high, pellet grills 30-45 minutes at 350°F, griddles 10 minutes on medium. This removes manufacturing residues. Finally, clean grates with a brush and you're ready to cook. For more detailed product specs and manuals, visit Nexgrill's product collection.
For safety guidance, refer to NFPA and USFA resources. Always grill outdoors in a well-ventilated area, never inside a garage or tent.