Nexgrill
Gas Grills

Understanding the Price Range of 5-Burner Gas Grills

A comprehensive guide to the costs, features, and value of 5-burner gas grills.

5 min read
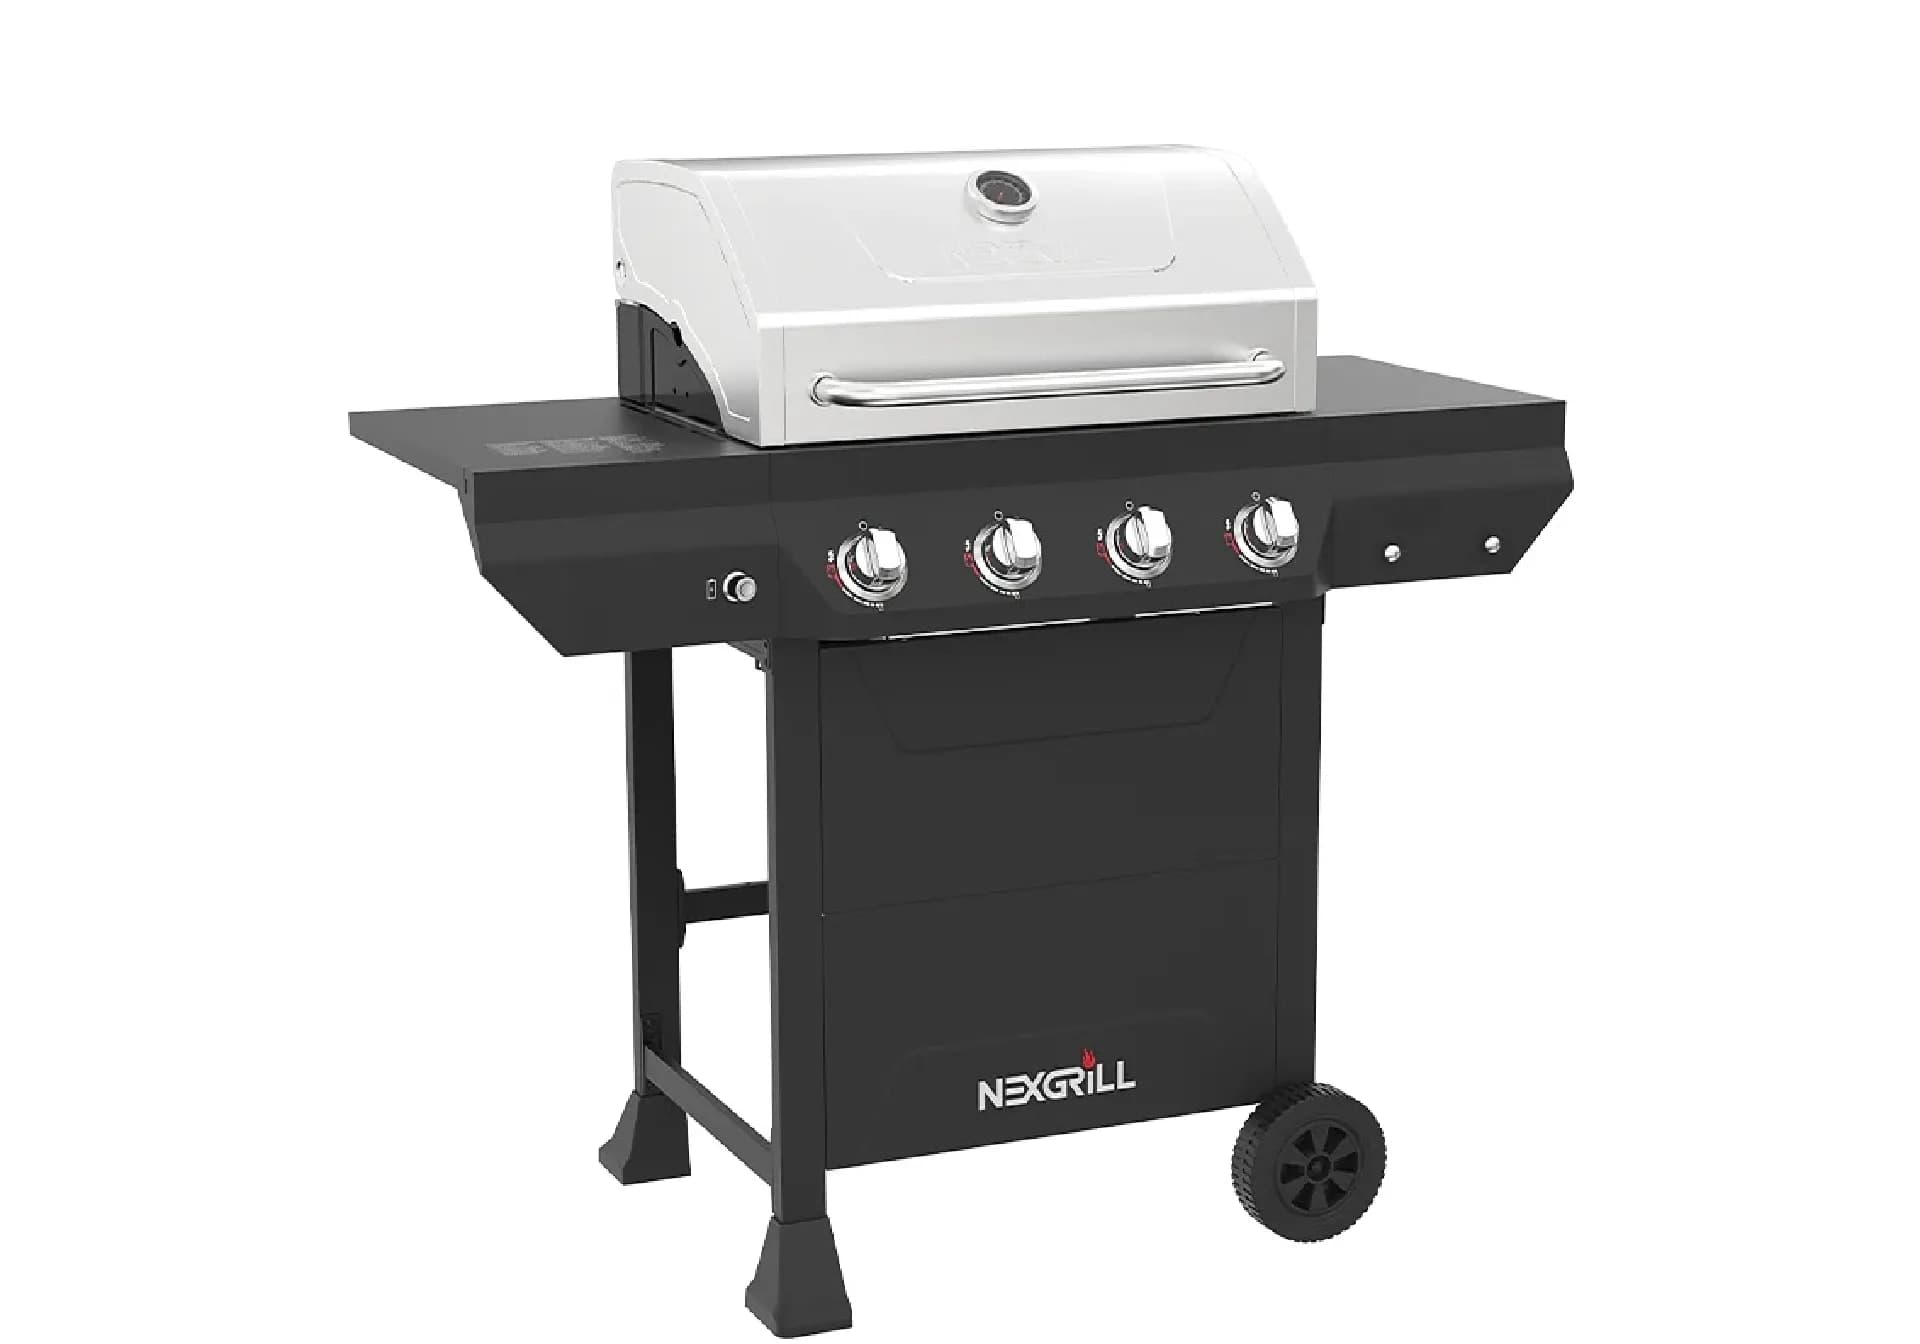
Nexgrill 4-Burner Gas Grill with Side Burner in Black

In This Article

Budget-Friendly Options

Affordable 5-burner gas grills under $500.

Mid-Range Selections

Quality grills priced between $500 and $1,000.

Premium Models

High-end grills exceeding $1,000.

Introduction to 5-Burner Gas Grills

5-burner gas grills are an ideal choice for those who love to host backyard barbecues and cook for larger groups. These grills offer a substantial cooking surface, making it easier to prepare multiple dishes simultaneously. Understanding the price range of these grills helps in making an informed decision based on your budget and cooking needs.

The market for 5-burner gas grills is diverse, ranging from budget-friendly models to high-end luxury grills. Each category offers various features and capabilities that cater to different grilling preferences and needs. This guide will explore the factors influencing the pricing of these grills, helping you understand the value propositions across different price segments.

Factors Influencing the Price of 5-Burner Gas Grills

Several key factors influence the pricing of 5-burner gas grills, including material quality, brand reputation, and additional features. Grills constructed from premium materials like stainless steel tend to be more expensive due to their durability and resistance to rust and corrosion. Additionally, grills from well-known brands often carry a higher price tag due to their established reputation and customer trust.

Feature-rich grills that offer advanced capabilities such as infrared burners, rotisserie kits, and smart technology integration also tend to be more expensive. Buyers should consider these factors carefully, as they impact not only the initial purchase price but also the long-term value and satisfaction derived from the grill.

Top Budget-Friendly 5-Burner Gas Grills

For those on a tight budget, there are several affordable 5-burner gas grills available under $500. These models typically offer basic functionality with fewer frills but can still provide a satisfying grilling experience. An example is the Nexgrill 5-Burner Propane Gas Grill in Stainless Steel with Side Burner, available at major retailers like Home Depot. It offers a solid cooking performance at an accessible price point.

While budget models may lack advanced features, they are perfect for casual grillers who prioritize functionality over luxury. These grills are typically easier to maintain and repair, making them a practical choice for beginners or those who grill occasionally.

Top Mid-Range 5-Burner Gas Grills

Mid-range 5-burner gas grills, priced between $500 and $1,000, offer a balance between performance and affordability. These grills often include additional features such as higher BTU outputs, more durable construction, and improved heat distribution. The Char-Broil Performance Series 5-Burner Gas Grill is a popular choice in this segment, offering robust performance and enhanced grilling capabilities.

Mid-range grills are suited for frequent grillers who want more than just basic functionality. They provide better durability and performance, ensuring a more consistent grilling experience without the premium price tag of luxury models.

Top Premium 5-Burner Gas Grills

Premium 5-burner gas grills, priced over $1,000, are designed for serious grill enthusiasts who demand the best in quality, performance, and features. These grills often include high-tech features such as integrated lighting, advanced ignition systems, and superior build quality. The Weber Summit E-670 5-Burner Gas Grill is an excellent example, offering unmatched cooking performance and versatility.

Investing in a premium grill ensures a long-lasting appliance that can handle a wide variety of cooking tasks with precision. These models are perfect for those who grill regularly and want a feature-rich, reliable grill that enhances their outdoor cooking experience.

Comparing Features Across Price Points

When comparing 5-burner gas grills across different price points, several features stand out as indicators of quality and value. Budget models often focus on essential functions, while mid-range and premium models offer enhancements that improve the grilling experience. Features such as built-in thermometers, side burners, and rotisserie systems can significantly affect the overall value and utility of the grill.

Feature Budget Grills Mid-Range Grills Premium Grills
Material Powder-coated steel Stainless steel with powder coating High-grade stainless steel
BTUs 40,000 - 50,000 50,000 - 60,000 60,000+
Additional Features Basic Side burner, warming rack Infrared burner, rotisserie kit

Maintenance Costs and Longevity Considerations

Maintenance costs and longevity are crucial considerations when purchasing a 5-burner gas grill. Regular maintenance, including cleaning and protective covers, can significantly extend the lifespan of your grill. Premium models, made with higher-grade materials, often require less maintenance and offer greater durability.

Investing in a cover and conducting routine inspections of burners and gas lines can prevent costly repairs and ensure the grill remains in optimal condition for years.

Where to Purchase 5-Burner Gas Grills

5-burner gas grills are widely available from major retailers and online stores. Platforms like Home Depot and BBQ Galore offer a range of options across all price segments, providing detailed specifications and customer reviews to assist in making an informed decision.

Shopping online allows for easy price comparisons and access to the latest models, while in-store purchases offer the advantage of seeing the grill in person before buying.

Conclusion: Choosing the Right Grill for Your Budget

Selecting the right 5-burner gas grill depends on your budget, grilling needs, and desired features. While budget-friendly options are great for occasional grillers, mid-range models offer enhanced features for avid grillers. Premium grills provide the ultimate in performance and durability, perfect for those who prioritize quality and versatility.

By understanding the price range and features available, you can choose a grill that best fits your lifestyle and enhances your outdoor cooking experience.
Sources

Why Choose Us

Here's what sets us apart

  • Premium grilling experience at accessible pricing

    We position ourselves as delivering high-end outdoor cooking features and performance without premium-brand pricing, emphasizing “Quality Grills. Unbelievable Value.”

  • Wide range of outdoor cooking products for every use case

    We offer gas grills, pellet grills, griddles, smokers, pizza ovens, portable/tabletop grills, electric grills, accessories, and replacement parts — allowing customers to stay within one ecosystem for all outdoor cooking needs.

  • Innovation-focused outdoor cooking with smart technology

    We differentiate ourselves through smart grilling products like the Oakford smart pellet grill, including app-connected cooking controls and modern outdoor cooking technology.

What Our Clients Say

Don't just take our word for it

“I’ve been using the Nexgrill Daytona 4-Burner Gas Griddle for a while now, and I’ve been really happy with it. First off, it’s super sturdy and feels really well-made, like it’s going to last me a long time. The cooking space is awesome—plenty of room for making big meals. So far I’ve cooked pancakes, burgers, bacon and some veggies. The 4 burners make it easy to control the heat in different areas. I love that I can keep one side hotter for searing and leave the other side cooler for things that don’t need as much heat. Plus, it heats evenly, which I was really glad to see. The shelves underneath and on its sides are a nice bonus. I’ve used them to keep things like plates, tools, and ingredients handy while I’m cooking, it’s very convenient. Cleaning it is super simple too. Once it cools down, I just wipe off the cooking surface and let the grease funnel into the trap. It’s quick and easy, and honestly, it barely looks like I even used it. If I had to nitpick, the grease trap can fill up kind of quickly during bigger cooking sessions, but as long as you keep an eye on it, it’s not a big deal. Overall, this griddle has been great. It’s sturdy, easy to use, and makes cooking outside a lot of fun. If you’re into grilling or want something versatile, I think this is a solid choice. Originally posted on influenster.com”

M
martind23_2941
Sturdy, easy to use, and perfect for cooking big m

“took about 2-3 hrs for complete assembly. took about 15-20 minutes to fully heat to 700. used a pan liner and a drip cup liner due to previous issues with those rusting away. this is about the 3-4 grill i have assembled. dont try to do it alone or ask the wife for help with the firebox its awkward. always check the directions 2-3 times before tightening down and dont over tighten the screws. hopeing for 5 years of grilling on this but i havent checked the warrenty yet.”

DT
Dave the Griller
finally got around to building this.bought in 2025

“We just bought this guy and I recommend always buy it assembled, we just use the grill 2 times and really works good; is perfect size and the side burn is very useful plus the caddy attach for spices; the material quality is in medium rate; no too cheap no too expensive I'll be glad if it works for minimum 5 years. Nexgrill could improve with the way, and cleaners to not damage the grates and the burners. I protect the removable pan with heavy duty aluminum foil, when the grease drop I only change the foil. Well I am enjoying my new Nexgrill !!! P.s. always clean the grill after use it....ALWAYS :-)”

KA
Karl A
Nice Grill

“Thank you to Influencer and Nexgrill for sending this to me for free, in exchange for my honest opinion. My 17 year old son put this together for me. It was easy but time consuming, it took about 2 hours. This is great for families, because you can cook a good amount of food in a short time. We did tacos, but it’s also great for breakfast, pancakes, eggs, breakfast burritos. It’s easy to clean if you have the right tools, you’ll need a scraper and metal spatula. Overall I would recommend this flat grill, it’s a great addition to our household. Originally posted on influenster.com”

K
KellyL
Quick and easy cooking

“My old Nexgrill is 25 years old and still looking and performing well! This new one is going on our back patio to partner with the old one in our courtyard. Obviously quality products to last that long. I hope the new one does as well. The only concern I have is that the sides are painted metal rather than stainless like the old one. I hope it doesn’t rust over time. But, We are very happy grillers!”

JS
Judy S
New grill to partner with my old one

“Bought grill 3 years ago stainless grates rusted out had to order new ones to replace Yes, I recommend this product.”

G
GaryS329
Stainless

“I’ve always been a smoker, fryer kind of guy. But recently with my new job keeping me super busy I’ve been cooking on my father in-laws 2 burner grill and it takes so long to cook ribs and chicken. I love just lighting the burners and cooking so I decided to upgrade by buying my own and I got this 5 burner with side burner for veggies , took me maybe 20 minutes to get all the dinner done tonight after I seasoned the grill with an onion. Love it so far, I hope it lasts a long time! It’s beautiful!”

JB
Jason B
Love it so far! My first propane grill I’ve ever bought myself!

“I love your grills. This is a replacement grill for a fully stainless steel one (was suppose to be). We originally bought it for our daughter's new townhouse, but her patio was not "ready" for it. We have kept it for 5 years now. My husband passed, I sold the house and move it, in the original box, with me and just put it together. The”

LG
Lisa G
Replacement

“Purchased a 5 burner with side burner grill probably 7-8 years ago. You can only replace things for so long. Opted on a smaller 4 burner grill this time. Hoping to get lots of use for many years to come.”

BS
Brian S
2nd grill with out

“Easy grill to use & grills well. Last grill lasted a little over 6 years. Had to replace burners twice (just worn out - lots of use). Here is old grill & new grill.”

RE
Russell E
2nd Nexgrill

“I had either recieved or bought a grill from either webber or Charbroil. Both had lasted roughly 5 years each before rusting out. For the price point and the way this grill feels I think this one should last longer. Looks awsome new so hopes are high.”

VA
Victor A
3rd grill so far...

“I’m just setting up my second 5 burner nexgrill!!! My first one was purchased in 2015!! I live in New England and the grill lived outside for 7 1/2 years!! That is an impressive lifespan for a grill in my area! I’ll be a loyal Nexgrill customer for life. Thanks very much. Yes, I recommend this product.”

L
Litch
Robust grill with Longevity to boot

“This grill is good for an economy grill. My 10 year old assembled most of it. I knew that I was getting a budget grill and didn't expect a Cadillac. I bought it mainly because the burners have flame on the left and right, instead of one row on the top. I checked the temperature gauge vs my digital and it runs 50° high, didn't expect it to be right on. The burner tents are higher in the front, making it hotter in the front. I have snips so I'll cut the front to set level. I seasoned the grill with bacon, it leaked from the screw to the drip pan, which was tight. The corners are sharp. I had corner protectors for my smoker and put some on the Nexgrill, hoping to get more life from the cover. Overall it's pretty good for the price.”

DK
Daniel K
Easy to assemble
4.7/ 5
13 reviews

Keep reading

Related Articles

Nexgrill 4-Burner Gas Grill with Side Burner in BlackGas Grills

Nexgrill Gourmet Pro 6-Burner Manual: A How-To Guide for Owners Who Already Built the Grill

Your Gourmet Pro 6-Burner Is Built - Now Make the Manual Work for You Most owners read the booklet once, during assembly, then file it in a drawer. That is a waste. The manual that shipped with your six-burner gas grill is the only document that describes the operating sequence, leak-test procedure, and troubleshooting matrix for the exact unit sitting on your patio. Once the frame is bolted together, the useful half of that booklet begins: how to light it in the correct burner order, how to configure a two-zone cook on three burners per side, and what to check when a burner stops lighting. This guide treats the manual as a field reference for an already-built grill. It walks through six practical steps - confirming your revision, running the leak test at the start of the season, following the lighting order, setting up zones, inspecting burner tubes and heat tents, and working the troubleshooting matrix - then covers the maintenance cadence and part-sourcing path that keep a six-burner running for years. If your grill is still in pieces, this is not the article for you; go back to the assembly section. The manual is written around a fuel system under pressure. Every step below assumes the gas supply is off and the lid is open before you begin. The CPSC's grilling safety guidance treats LP gas handling as the single most important thing a backyard cook controls. What the Manual Actually Covers (It's More Than Assembly) A typical Nexgrill gas grill manual runs 20 to 40 pages, and assembly generally occupies the middle third. The sections owners skip are the ones that matter after the frame is standing: Safety and leak-test pages near the front, including the soapy-water method and the warning against testing with a flame. Lighting instructions with a stated burner order and a match-lighting fallback for ignition failure. Cooking guidance covering preheat time, direct versus indirect zones, and lid position. Care and maintenance with a cleaning schedule and storage guidance for the LP cylinder. A troubleshooting matrix at the back, indexed by symptom - low flame, flashback, popping, no ignition. An exploded parts diagram with part numbers for burners, heat tents, igniters, and regulators. That parts diagram is worth dog-earing now. In two or three seasons, when a heat tent rusts through or an electrode cracks, the diagram is far faster than a support call. Prerequisites: Five Things to Gather Before You Open the Book Set these out before you start, so you are not hunting mid-procedure: the manual itself, a spray bottle of soapy water (one part dish soap to three parts water), a flashlight for inspecting burner tubes, a screwdriver for removing heat tents, and a photo of your data plate. The data plate is typically on the inside of the cabinet door or the back panel, and it carries the model number (often a 720-xxxx or 810-xxxx string) plus the serial number. Write both down; every support interaction starts there. Step 1: Confirm Which Manual Revision You Own - Once

Oct 21, 20266 min read
Read more
Nexgrill 4-Burner Propane Gas Grill in Black with Stainless Steal main lidGas Grills

Nexgrill 720-1046A Review: How to Evaluate a 4-Burner Grill in 20 Minutes

What a '720-1046A Review' Really Means (It Starts With Identification) Searching for a “Nexgrill 720-1046A review” usually means one of three things: you’re eyeing a used unit on Facebook Marketplace, you need a part and want to match the SKU exactly, or you’re cross-checking a retailer listing that uses a marketing name instead of the model number. The 720-1046A is not a grill family - it’s a specific SKU printed on the rating label. Retail listings often sell the same grill as the “4-Burner Gas Grill with Side Burner in Black,” so the label is your only reliable identifier. This guide gives you a 20-minute inspection protocol you can run on any 720-1046A before you buy, sell, or fire it up for the season. No spec-sheet guessing - just observable tests. The 720-1046A label is usually inside the cabinet door or on the back panel. Photograph it before you commit to a used grill - it’s your key to parts matching later. What You Need Before You Start (and What to Bring to a Used-Grill Meetup) For a thorough review, gather these items. Most fit in a small bag and cost under $20 total. A bright flashlight (phone light works but a focused beam is better) A spray bottle with soapy water (1 part dish soap to 3 parts water) A clean rag or paper towels A thermometer (instant-read or infrared) to verify hood temperature Your phone to photograph the label and any damage A notepad or notes app to record condition signals If you’re inspecting a used grill at a seller’s location, also bring a small adjustable wrench and a propane tank - you’ll need gas to run the leak and heat-up tests. Ask the seller beforehand if the tank is included; if not, bring your own. Plan for 20 minutes of hands-on time, plus setup. Step 1: Read the Rating Label - Where to Find 720-1046A and What Each Line Tells You Open the cabinet door and look for a silver or white sticker, typically on the inside left panel or the back of the firebox. You’re looking for the model number “720-1046A” and a serial number. The label also lists gas type (propane), manifold pressure, and clearance requirements. Photograph the entire label - you’ll need it for parts lookup. If the label is missing or unreadable, treat the grill as unidentified and walk away unless the price is negligible. Cross-check the label against any paperwork or the seller’s listing. The 720-1046A appears in Nexgrill’s catalogue under a descriptive name; you can confirm current listings on the All Products page . Don’t rely on BTU or cooking-area figures from memory - those vary by production year. The label is the authority. Step 2: Inspect the Burner Tubes and Heat Tents With a Flashlight Remove the cooking grates and set them aside. Shine your flashlight down each burner tube. You’re checking for three things: blockages (spider webs, grease clogs), rust-through, and warping. A healthy burner tube is straight, with clean ports (the small holes) and no flaking metal. If you see heavy rust or holes, plan on replacing burners - a set typically costs $40-$80 USD, depending on the year. Next, lift out the heat tents (the V-shaped metal shields above the burners). They should be intact, not rusted through, and sit flat. Warped or heavily corroded tents cause uneven heating and flare-ups. Replacement tents run about $25-$50 USD for a set. If both burners and tents are shot, factor that into your offer. Step 3: Run a Soapy-Water Leak Test on Every Connection Safety first: never test for leaks with a flame. Connect a propane tank (if available) and turn the tank valve on slowly. Brush or spray soapy water on the tank-to-regulator connection, the regulator-to-manifold hose, and the manifold-to-burner connections if accessible. Watch for bubbles - growing bubbles mean a leak. If you see bubbling, turn off the tank and tighten the connection; if it persists, the hose or regulator needs replacement. NFPA and USFA both recommend a soapy-water leak test before first use each season and after any gas component change. Never use a match or lighter to check for leaks. Step 4: Test the Igniter and Check Burner-to-Burner Continuity With the lid open and gas off, press the igniter button. You should hear a sharp click and see a spark at each burner’s electrode. If you don’t see a spark, check the battery (usually AA) and the wire connections. A weak or intermittent spark often means a corroded electrode or a failing igniter module - replacement parts are usually under $20. If the igniter works, turn the gas on and light one burner at a time, starting from the left. As each burner lights, the flame should carry over to the next through the crossover tube. If a burner fails to light, turn everything off and investigate that burner’s tube for blockages. A burner that lights but has a lazy, yellow flame indicates a spider egg sac or grease clog in the tube. Step 5: Examine the Grease Tray, Cart, and Lid for Corrosion Slide out the grease tray. It should be intact, with no holes or heavy rust. A tray that’s rusted through will drip grease onto your patio and is a fire hazard. Replacement trays are often available for $20-$40 USD. Check the cart legs and bottom panel for rust - surface rust is common and manageable, but flaking metal or holes indicate structural decay. Open and close the lid. It should move smoothly without binding. Inspect the lid interior for peeling enamel or heavy grease buildup (a sign of neglected cleaning). The lid’s exterior should be free of deep scratches or dents that could compromise the metal. Step 6: Time the Heat-Up - A 10-Minute Proxy for Burner Health Light all burners on high, close the lid, and start a timer. A healthy 4-burner grill should reach 400-450°F within 10-12 minutes on a moderate day (70°F). If it takes longer than 15 minutes, or if the hood temperature plateaus below 400°F, you likely have clogged burner tubes, a weak regulator, or low gas flow. Record the time and temperature - this baseline helps you track performance after cleaning or part replacements. Once you’ve completed these steps, you have a clear picture of the grill’s condition and the likely cost to bring it to top shape. Try comparing two products side by side below to see which fits best - for example, a used 720-1046A versus a new 4-burner model from Nexgrill’s current line.

Oct 19, 20269 min read
Read more
Nexgrill 4-Burner Propane Gas Grill in Black with Stainless Steal main lidGas Grills

Nexgrill 720-0925PG Review: How to Inspect, Run & Keep a Used 4-Burner Alive

Why the 720-0925PG Model Number Gets Searched So Often Most grill searches are aspirational. This one usually isn't. If you typed 720-0925PG into a search bar, you are probably standing next to a grill you already own, or looking at a used listing you are about to drive across town to see. Four distinct readers land on this page: the owner who pulled the number off the badge behind the lid, the secondhand buyer who pasted it from a Marketplace photo, the parts hunter whose heat tents have rusted through, and the comparison shopper wondering whether a four-burner Nexgrill is worth it at all. That fragmented intent is exactly why a straight spec recital is useless. Nexgrill does not surface a dedicated 720-0925PG product page today; searching the full catalogue returns the brand's current four-burner gas listings, and the closest present-day match in layout and packaging is the 4-Burner Gas Grill in Black with Stainless Steel Main Lid . BTU figures, grate dimensions, and warranty terms varied across production runs, so treat anything you read online as a starting point and confirm against the manual that shipped with your unit. If you need the exact manual or a part number, the fastest route is a direct request through Nexgrill's contact page with your model number and serial ready. Step 1: Decode the Badge - What '720-0925PG' Tells You Before You Lift the Lid The number is not random. Read it in two halves. The leading 720 is the family prefix Nexgrill uses across a large block of its propane grills. The 0925 cluster identifies the specific configuration. And the PG suffix is the part most people miss: it denotes propane gas, not natural gas. That single detail decides which regulator, hose, and orifice set the grill needs - and it's the most common source of confusion when someone buys a used unit that was previously converted or partially rebuilt. The 4 in the badge family points to a four-burner main cooking array, typically paired with a side burner on this class of cart grill. Before you lift the lid on any used unit, find the rating plate - usually a silver sticker on the back panel or inside the cabinet door - and photograph it. A plate that disagrees with the listing photos is your first red flag. Where the 720-0925PG Actually Sits in Nexgrill's Line-Up Nexgrill has been building outdoor cooking equipment since 1993 and now sells under both Nexgrill and KitchenAid badges, so the catalogue is wide. The 720-0925PG sits in the mainstream four-burner propane tier - the workhorse size for a household that grills two to three times a week and hosts a handful of larger cooks per season. Tier Typical buyer What matters most 2-burner cart Couples, balconies, weeknight cooks Footprint, fast heat-up 4-burner (720-0925PG class) Families, regular hosts Zone control, parts availability Pellet smoker Low-and-slow enthusiasts Temperature stability over hours If you are comparison shopping rather than repairing, the current four-burner gas line and the Oakford 875 Pro Pellet Smoker Grill represent the two most common upgrade paths from this class. Before You Fire It Up: The Three Things You Need in Place A spray bottle of soapy water - roughly one part dish soap to three parts water. This is your leak detector and it costs pennies. A known-good propane tank - not the one that came with a used grill unless you can see the date stamp and it is within certification. Twenty minutes of daylight - do not run these checks at dusk with a phone torch. You need to see bubbles and flame colour clearly. Never leak-test with a flame. The U.S. Consumer Product Safety Commission is explicit that soapy-water testing is the correct method - a lit match near a fitting is how garage fires start. Step 2: Run the Leak Test Before Anything Else Connect the tank, then brush soapy water on every joint in the gas path: the tank valve thread, the regulator-to-hose connection, the hose-to-manifold fitting, and each burner tube inlet. Open the tank valve slowly - a quarter turn, then full. Watch for expanding bubbles. Slow, steady bubbling at the regulator means the diaphragm is tired; bubbling at a threaded joint usually means a missing or hardened O-ring. This step matters more on a used grill than a new one because regulators and hoses age in the weather. A grill that sat uncovered for two winters in a Florida backyard and one stored in a California garage present very different risk profiles, and neither seller is going to mention it in the listing. Step 3: Check the Igniter Spark and Burner Continuity With the lid open and the gas off, press the ignition button and listen for a crisp tick at each collector box. Weak or silent clicks point to a corroded electrode or a cracked ceramic insulator - both replaceable. Then light the burners one at a time and read the flame. You want a blue body with a small orange tip and flame carrying evenly down the length of each tube. Yellow, lazy flames or a burner that lights and then lifts off the ports signals a blocked orifice or a spider nest in the venturi - common on grills stored outdoors. 1 in 4 Roughly one in four used gas grills inspected by experienced buyers needs an igniter or burner tube replaced before the first cook (owner-reported, varies by storage history) Step 4: Inspect Grease Management and Heat Tents Pull the cooking grates and look at the heat tents (the angled metal shields above each burner). Surface rust is normal; rust-through holes are not, because dripping fat will hit the burner directly and flare. Then slide out the grease tray. A tray caked with a season of hardened fat tells you the previous owner never cleaned it, which usually means the cabinet floor has been damp and the cart is softer than it looks. Step 5: The First Cook - What to Watch For in the First 20 Minutes Preheat on high with the lid closed for ten to fifteen minutes, then drop to medium. Watch for a burner that won't hold a low setting, hot spots larger than a burger patty, or a temperature that climbs despite the knob being turned down - all signs of a worn valve. Start with something cheap and forgiving, like chicken thighs, before you commit a $40 ribeye to an untested grill. Which Readers Should Compare Two Grills Side by Side If you are repairing an existing 720-0925PG, run the steps above and you'll know within an hour whether it's worth saving. If you're the secondhand buyer, you're deciding between this grill and something else on the market. And if you're the comparison shopper, you're weighing a four-burner gas cart against a pellet smoker or a griddle entirely. All three of you can put two models head to head below to see which fits your cooking reality:

Oct 18, 202610 min read
Read more
Nexgrill 4-Burner Propane Gas Grill in Black with Stainless Steal main lidGas Grills

Nexgrill 720-0830H Assembly Instructions: Build Order, Tools, and Pitfalls

Before You Open the Box: Space, Helper, and Tools to Line Up The single biggest mistake people make with the 720-0830H is starting the build on a hard driveway with a single screwdriver and a bad attitude. The grill arrives as a flat-pack of steel panels, burner tubes, and several small hardware bags, and the cart frame alone needs room to lay flat while you square it up. Give yourself a 10-foot by 10-foot patch of level ground - a garage floor or a covered patio is ideal - and lay down a moving blanket or a flattened appliance carton. Cardboard protects both your finish and your knees, and it makes dropped screws visible instead of invisible against dark concrete. Line up a Phillips screwdriver, a socket set with an adjustable wrench as backup, a flashlight or headlamp for the cart's interior corners, and a small cup or muffin tin for sorting hardware. If you can recruit a second person for 15 minutes of the build, do it - the firebox lift over the cart rails is the physical failure point of this assembly, and one person balancing a firebox while threading a bolt is how brackets get bent. Plan for a second set of hands even if that person only shows up for that one phase. Tip: Before touching a single bolt, pull the owner's manual and any assembly PDF from the Nexgrill support pages. Models in this long-running 4-burner LP family have shipped in more than one variation, so confirm the cover of your manual matches your carton before you assume a side burner or a specific hardware count. Inventory the Hardware Bags Against Your Manual's Callouts The most reported friction in this build is not difficulty - it's labeling. Manual step callouts might say "use bolt (34)," while the actual bag is printed "34A," and a second bag holds a near-identical bolt one millimeter shorter. If you dump all hardware into one pile, you will guess, and guessing on thin sheet steel is how you cross-thread a weld nut. So do an audit first. Open every bag, empty it into its own labeled cup, and count against the manual's parts list. This typically takes 10 to 15 minutes and routinely saves more than that. Note anything short or damaged immediately - replacement hardware through the Nexgrill contact page is straightforward, but only if you catch it before Step 8. Group by the step number that first calls for that bolt, not by size. Set aside the bolts used for the firebox-to-cart phase in a separate cup - those are the ones you'll reach for while supporting weight. Keep washers and lock washers in their own dishes; mixing them up is a classic mid-build stall. Photograph the sorted layout on your phone so a dropped bag can be re-identified later. The Build Order That Saves an Hour: Cart, Firebox, Then Trim Follow the manual's order, but understand why it's ordered that way so you don't "optimize" yourself into re-work. The practical sequence is: build and square the cart, mount the firebox to the cart rails, then attach the lid, side burner, and shelves. Attaching shelves early looks productive and then makes the cart frame wider and harder to flip or shift while you square it. Phase What you're doing Helper needed? 1. Cart frame Assemble legs, panels, and wheels; keep bolts finger-tight Solo is fine 2. Square and tighten Check diagonals, then final-tighten the frame Solo is fine 3. Firebox lift Set firebox on cart rails and start mounting bolts Two people strongly advised 4. Side burner and lid Bolt burner body and valve, then lid and handle Helper helps with lid 5. Shelves and trim Side shelves, front panel, grease tray, warming rack Solo is fine Warning: Do not flip, tilt, or roll an assembled firebox-to-cart unit by yourself. Weight shifts suddenly once the lid and side burner are on, and the cart legs are the wrong thing to grab when it does. Mounting the Firebox to the Cart Without Scratching the Finish This is the step that separates a clean build from one with two scratches on the front panel. Set the firebox on the cart rails with the control panel facing forward and the valve stems lined up with their cart openings, then get one bolt started on each side before tightening either. Starting all bolts loose and tightening in a cross pattern keeps the firebox from shifting a few millimeters and misaligning the last hole. If the manual calls for spacers or heat shields between the firebox and cart, install them before the bolts - they are nearly impossible to slide in afterward. Check your manual for exact placement. And resist the urge to torque the firebox bolts down hard: steel bolts threaded into thin formed sheet can deform the metal around the hole. Snug, then a quarter turn, is enough. Lid, Side Burner, and Shelves: What Bolts On Before What Counterintuitively, the side burner body and its valve assembly typically bolt to the firebox or cart before the lid goes on - and per your manual, you should validate this against your specific illustrations before proceeding. The reason is access: the lid is heavy, it blocks light and working room over the firebox, and the hinge pins are easier to seat when you can see the back of the hinge bracket. Sequence that works: side burner body, side burner valve and gas line connection, then lid and handle. Hinge pins often need a helper to hold the lid at roughly 45 degrees while you push the pin through. Once the lid is on, check that it closes evenly against the firebox before attaching shelves - a misaligned lid traced back to a loose hinge is a five-minute fix, but only if you catch it before shelving obstructs access. Side shelves go last, and their brackets usually share bolts with the front panel, so finger-tight everything until both are seated. Ready to weigh two builds against each other? If you're deciding between this 4-burner cart grill and a flat-top or pellet alternative, try comparing two products side by side below to see which fits your patio and cooking style.

Oct 18, 20269 min read
Read more

Featured products

From our catalog

4-Burner Gas Grill in Stainless Steel with Side Burner
Gas Grills

Nexgrill

4-Burner Gas Grill in Stainless Steel with Side Burner

Fortress™ 2-Burner Cast Aluminum Gas Grill with Gourmet Plus™ Cooking System
Gas Grills

Nexgrill

Fortress™ 2-Burner Cast Aluminum Gas Grill with Gourmet Plus™ Cooking System

5 Burner Propane Gas Grill with Side Burner in Black
Gas Grills

Nexgrill

5 Burner Propane Gas Grill with Side Burner in Black

2-Burner Stainless Steel Portable Gas Grill
Gas Grills

Nexgrill

2-Burner Stainless Steel Portable Gas Grill

4 Burner Liquid Propane Gas Grill with Side Burner and Charcoal Tray in Black
Gas Grills

Nexgrill

4 Burner Liquid Propane Gas Grill with Side Burner and Charcoal Tray in Black

2 Burner Liquid Propane Gas Grill in Black
Gas Grills

Nexgrill

2 Burner Liquid Propane Gas Grill in Black

Deluxe 4-Burner Gas Grill with Searing Side Burner
Gas Grills

Nexgrill

Deluxe 4-Burner Gas Grill with Searing Side Burner

Nexgrill Daytona™ 4-Burner Propane Gas Grill with Griddle Top
Gas Grills

Nexgrill

Nexgrill Daytona™ 4-Burner Propane Gas Grill with Griddle Top

5-Burner Gas Grill with Searing Side Burner
Gas Grills

Nexgrill

5-Burner Gas Grill with Searing Side Burner

3-Burner Gas Grill with Side Shelves
Gas Grills

Nexgrill

3-Burner Gas Grill with Side Shelves

Deluxe 6-Burner Gas Grill w/ Ceramic Searing Side Burner and Rotisserie Kit
Gas Grills

Nexgrill

Deluxe 6-Burner Gas Grill w/ Ceramic Searing Side Burner and Rotisserie Kit

4-Burner Propane Gas Grill with Stainless Steel Side Burner
Gas Grills

Nexgrill

4-Burner Propane Gas Grill with Stainless Steel Side Burner

Why Choose Us

Here's what sets us apart from the competition

Premium grilling experience at accessible pricing

We position ourselves as delivering high-end outdoor cooking features and performance without premium-brand pricing, emphasizing “Quality Grills. Unbelievable Value.”

Wide range of outdoor cooking products for every use case

We offer gas grills, pellet grills, griddles, smokers, pizza ovens, portable/tabletop grills, electric grills, accessories, and replacement parts — allowing customers to stay within one ecosystem for all outdoor cooking needs.

Innovation-focused outdoor cooking with smart technology

We differentiate ourselves through smart grilling products like the Oakford smart pellet grill, including app-connected cooking controls and modern outdoor cooking technology.

Browse by Category

Grills

Grills

Expert tips, buying guides, comparisons, and inspiration for choosing and getting the most out of your grill.

Troubleshooting

Troubleshooting

Practical guides for cleaning, maintenance, common grill issues, and performance optimization.

Recipes

Recipes

Step-by-step grilling recipes, cooking techniques, and meal ideas for every occasion and skill level.

Lifestyle

Lifestyle

Backyard entertaining ideas, seasonal grilling inspiration, and stories that celebrate outdoor cooking culture.

Accessories

Accessories

Helpful articles covering grilling tools, cookware, maintenance gear, and must-have accessories for outdoor cooking.

Griddles

Griddles

Find griddle recipes, cooking techniques, cleaning tips, and outdoor meal ideas designed for Nexgrill griddles.

Frequently Asked Questions

Find answers to common questions

Nexgrill offers a variety of gas grills, including standard models, portable options, and premium designs with advanced features. Each is designed to cater to different grilling needs and preferences.

To clean your Nexgrill gas grill, regularly scrape down the grates, empty the grease tray, and wipe down exterior surfaces. Consult your model's manual for specific maintenance instructions and recommended cleaning products.

Nexgrill gas grills are designed to use either propane or natural gas, depending on the model. Ensure you read the specifications to determine the appropriate fuel type for your grill.

Many Nexgrill models can be converted from propane to natural gas with a conversion kit. Check the owner's manual for compatibility and details on the conversion process.

If your Nexgrill gas grill is not lighting, first check the fuel supply, ensure the gas lines are free of obstructions, and verify that the igniter is functioning. Consult the user manual for troubleshooting tips specific to your model.