Nexgrill Oakford 580 Manual: Your Essential Guide
Step-by-step instructions and maintenance tips for the Nexgrill Oakford 580.
In This Article
Versatile Cooking
Easy Setup
Maintenance Made Simple
Overview of the Nexgrill Oakford 580
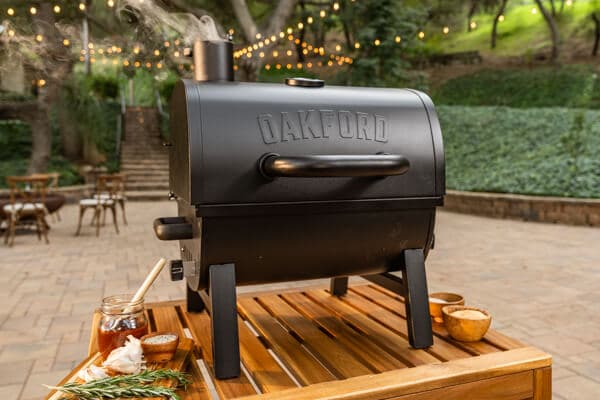
The Oakford line is built around the idea of outdoor cooking that feels approachable, social, and dependable, which matches Nexgrill’s broader brand positioning as a welcoming grilling brand for a wide range of users. The brand guidelines emphasize that outdoor cooking should bring people together, with a tone that is casual, resourceful, and inclusive, not overly technical or intimidating . If you are using this manual as a first-time owner, the goal is not just to light the grill, but to build a repeatable routine for setup, cooking, and cleaning that makes each session easier than the last.
For model context, Nexgrill’s Oakford product family includes pellet smoker grills such as the Oakford 875 Pro Pellet Smoker Grill, which shows the line’s focus on smoke-driven flavor and practical outdoor use . The Oakford 580 manual should be read the same way: as a working guide for getting stable heat, clean smoke, and predictable results. In practical terms, that means understanding your fuel, giving the grill enough time to warm up, and learning how small adjustments in airflow, pellet quality, and food placement change the outcome.
A simple setup routine can prevent most early cooking issues.
Setting Up Your Nexgrill Oakford 580
Before assembly, clear a flat outdoor work area, unpack every component, and compare the contents with your hardware list. Keep fasteners grouped by size so you do not lose time searching later. A careful first pass matters because pellet grills rely on aligned parts, a secure fire pot area, and unobstructed airflow. If a connection is loose or a panel is slightly misaligned, ignition and temperature consistency can suffer.
Warning: Do not plug in the grill or attempt first ignition until all assembly steps are complete and every internal part is seated correctly.
A good setup process usually follows this sequence: attach the cart or base components, secure the cooking chamber, install the hopper and internal heat-management pieces, then fit the grates and drip management parts. After that, check that the lid opens smoothly and that nothing rubs against the auger path or burn area. If your grill has leveling feet or locking casters, adjust them now so the unit sits firmly and does not wobble when loaded with food.
| Setup Step | Why it matters | What to check |
|---|---|---|
| Base and cart assembly | Supports the full weight of the grill | Even stance, tightened bolts, locked wheels |
| Internal fire and drip parts | Affects heat flow and grease control | Seated correctly, no gaps or rattles |
| Pellet hopper and feed path | Feeds fuel consistently to the fire pot | Dry pellets, clear auger path, lid closes fully |
Once assembled, perform a dry safety check before adding food. Open and close the lid, make sure the grease tray is properly positioned, and confirm that the power cord reaches a safe outlet without creating a tripping hazard. If the grill is new, wipe away packaging dust and any residue from handling. Then fill the hopper with quality wood pellets designed for pellet grilling. Dry storage matters: pellets that absorb moisture can swell, break apart, and create feed problems.
Step-by-Step Operation Guide
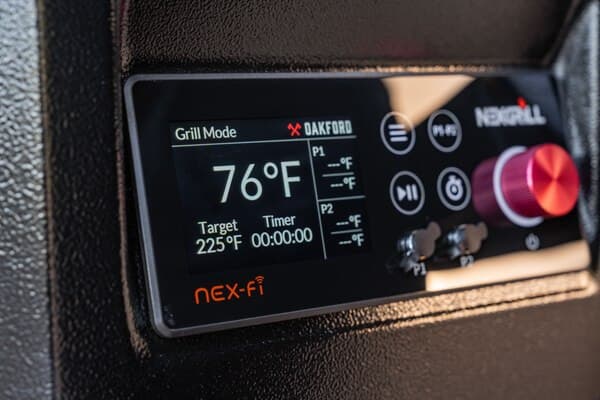
To start the grill, follow a steady routine instead of rushing. Turn the controller on, allow the startup cycle to run, and let the fire pot stabilize before placing food inside. During the first burn, it is normal to let the grill run empty for a short period so you can remove manufacturing residues and confirm that ignition, auger feed, and fan operation are all behaving normally. This is also the best time to listen for unusual scraping, clicking, or weak airflow that could signal a setup issue.
When the grill reaches operating temperature, preheat it with the lid closed. Pellet grills perform best when the chamber is allowed to stabilize rather than being opened repeatedly during warm-up. If you are cooking something forgiving like chicken thighs or vegetables, you will have more room for adjustment. For steaks, fish, and delicate cuts, consistency matters more, so let the grate fully heat before loading the food.
Tip: Use a quick visual log of your preferred pellet type, set temperature, and cook time. That record helps you repeat the results that work best for your backyard.
A practical cooking rhythm looks like this: preheat, place food, avoid frequent lid opening, monitor internal food temperature, and rest the meat after cooking. If the grill offers multiple zones or hot spots, use the hotter area for searing and the cooler side for finishing. For larger cuts, move from higher heat to lower heat once the surface color is set. The manual is most useful when you treat it as a repeatable workflow rather than a one-time reference.
Cooking Techniques for Various Foods
The Oakford 580 is best understood as a smoke-forward cooker that can handle more than one style of food. For brisket, pork shoulder, and ribs, use lower temperatures and plan on longer cook times. These foods benefit from steady smoke, especially in the early part of the cook. For poultry, use moderate heat and keep a close eye on skin color so it does not over-brown before the interior is finished. For vegetables, corn, and potatoes, a hotter preheated grate helps create better browning.
For weeknight meals, pellet grills are especially useful because they give you outdoor flavor without the steep learning curve of charcoal fire management. You can roast salmon with a mild pellet blend, sear bone-in chops after preheating, or cook a tray of mixed vegetables alongside the main dish. If you are serving a crowd, plan the menu around foods that finish in similar temperature ranges so you are not constantly juggling timings.
Tip: Match the pellet flavor to the protein. Mild fruitwoods work well for chicken and fish, while stronger profiles are better suited to beef or pork.
A final check before you move on is simple: make sure the grill is stable, the hopper is dry, the grates are clean, and you know your starting temperature. Once those basics are in place, you can compare two products side by side below to see which setup or feature set fits your cooking style best.
Essential Maintenance Tips
Once you have compared options and settled into a cooking routine, the next thing that determines long-term satisfaction is maintenance. The Oakford line is built to support shared meals and repeat use, and Nexgrill’s brand materials lean heavily into dependable, real-world grilling rather than one-off performance moments . That makes regular care especially important: a pellet grill that is cleaned on schedule will usually light more consistently, hold temperature more predictably, and produce cleaner smoke.
Start with the parts that affect airflow and grease control. After the grill cools, empty ash from the fire area, wipe grease from the drip system, and remove residue from the grates. Ash buildup can interrupt ignition and airflow, while grease buildup can create flare-up risk and unwanted flavors. If you cook frequently, build a weekly habit of inspecting the burn area and hopper interior. If you cook only occasionally, do that inspection before each use instead.
Tip: Keep pellets in a sealed container indoors or in a dry shed. Moisture is one of the most common causes of feed and startup issues in pellet grills.
The exterior matters too. Wipe stainless or painted surfaces with a soft cloth and mild cleaner, then dry them thoroughly so moisture does not sit on seams or hardware. Cover the grill after it has fully cooled. Nexgrill’s broader product and brand presence includes a range of outdoor cooking gear and accessories, which reflects how important storage and upkeep are to the overall ownership experience . In a typical U.S. backyard setting, that means protecting the grill from rain, pollen, dust, and sun exposure between weekend cooks.
| Maintenance Task | How often | Primary benefit |
|---|---|---|
| Clean grates and drip areas | After each cook | Better flavor and easier start-up next time |
| Vacuum ash and inspect fire pot | Weekly or before heavy use | Improved ignition and airflow |
| Check cord, controller, and joints | Monthly | Safer operation and fewer surprises |
Common Mistakes to Avoid
Most first-time problems come from a short list of habits. The first is skipping preheat time. Pellet grills need a stable cooking chamber, and food added too early often comes out pale, uneven, or underdeveloped on the surface. The second is opening the lid too often, which lets heat escape and stretches cooking times. The third is using damp or poor-quality pellets, which can cause temperature swings, erratic smoke, or failed ignition.
Warning: If the grill fails to ignite, do not keep cycling power repeatedly without checking pellets, ash buildup, and airflow first.
Another common mistake is ignoring the difference between direct heat, indirect heat, and smoking. Not every food should be cooked the same way. Thin burgers or vegetables may need a hotter surface, while large roasts benefit from indirect cooking and a longer finishing period. If you try to rush every recipe at the same temperature, you will usually end up with dry meat outside and undercooked centers inside. Finally, do not store the grill uncovered for long periods if weather exposure can be avoided. Even durable outdoor equipment benefits from routine protection.
User Experiences and Testimonials
Owners tend to value pellet grills when they want a backyard setup that is easier to live with than a charcoal fire but still more flavorful than a basic indoor-style approach. In practical terms, that means people often appreciate fast weekday startup, straightforward temperature control, and the ability to cook several different foods in one session. One common theme in user feedback is that once the grill is dialed in with dry pellets and a reliable preheat routine, the results become much more repeatable.
Tip: Keep a simple notebook or phone note with pellet type, ambient temperature, and cook time. Small patterns become obvious after just a few sessions.
A typical testimonial from a backyard cook might sound like this: “After the first setup, the grill became part of our weekend routine. The biggest improvement came from learning not to rush preheat and from storing pellets properly.” Another might come from a family host who says, “We like that we can cook a main dish and side vegetables at the same time without babysitting the fire.” Those experiences reflect the Oakford brand’s emphasis on shared meals, approachable outdoor cooking, and dependable everyday use .
If you are using the Oakford 580 manual to solve a specific problem, focus first on the basics: fuel condition, ash cleanup, and proper startup. Those three variables resolve a surprising number of issues. From there, refine your process one cook at a time until the grill becomes predictable enough that you can plan menus around it instead of adjusting the menu around the grill.