Nexgrill
Griddles

Understanding the Pricing of the 4-Burner Griddle with Lid

A comprehensive guide to pricing factors and value considerations for 4-burner griddles with lids.

3 min read
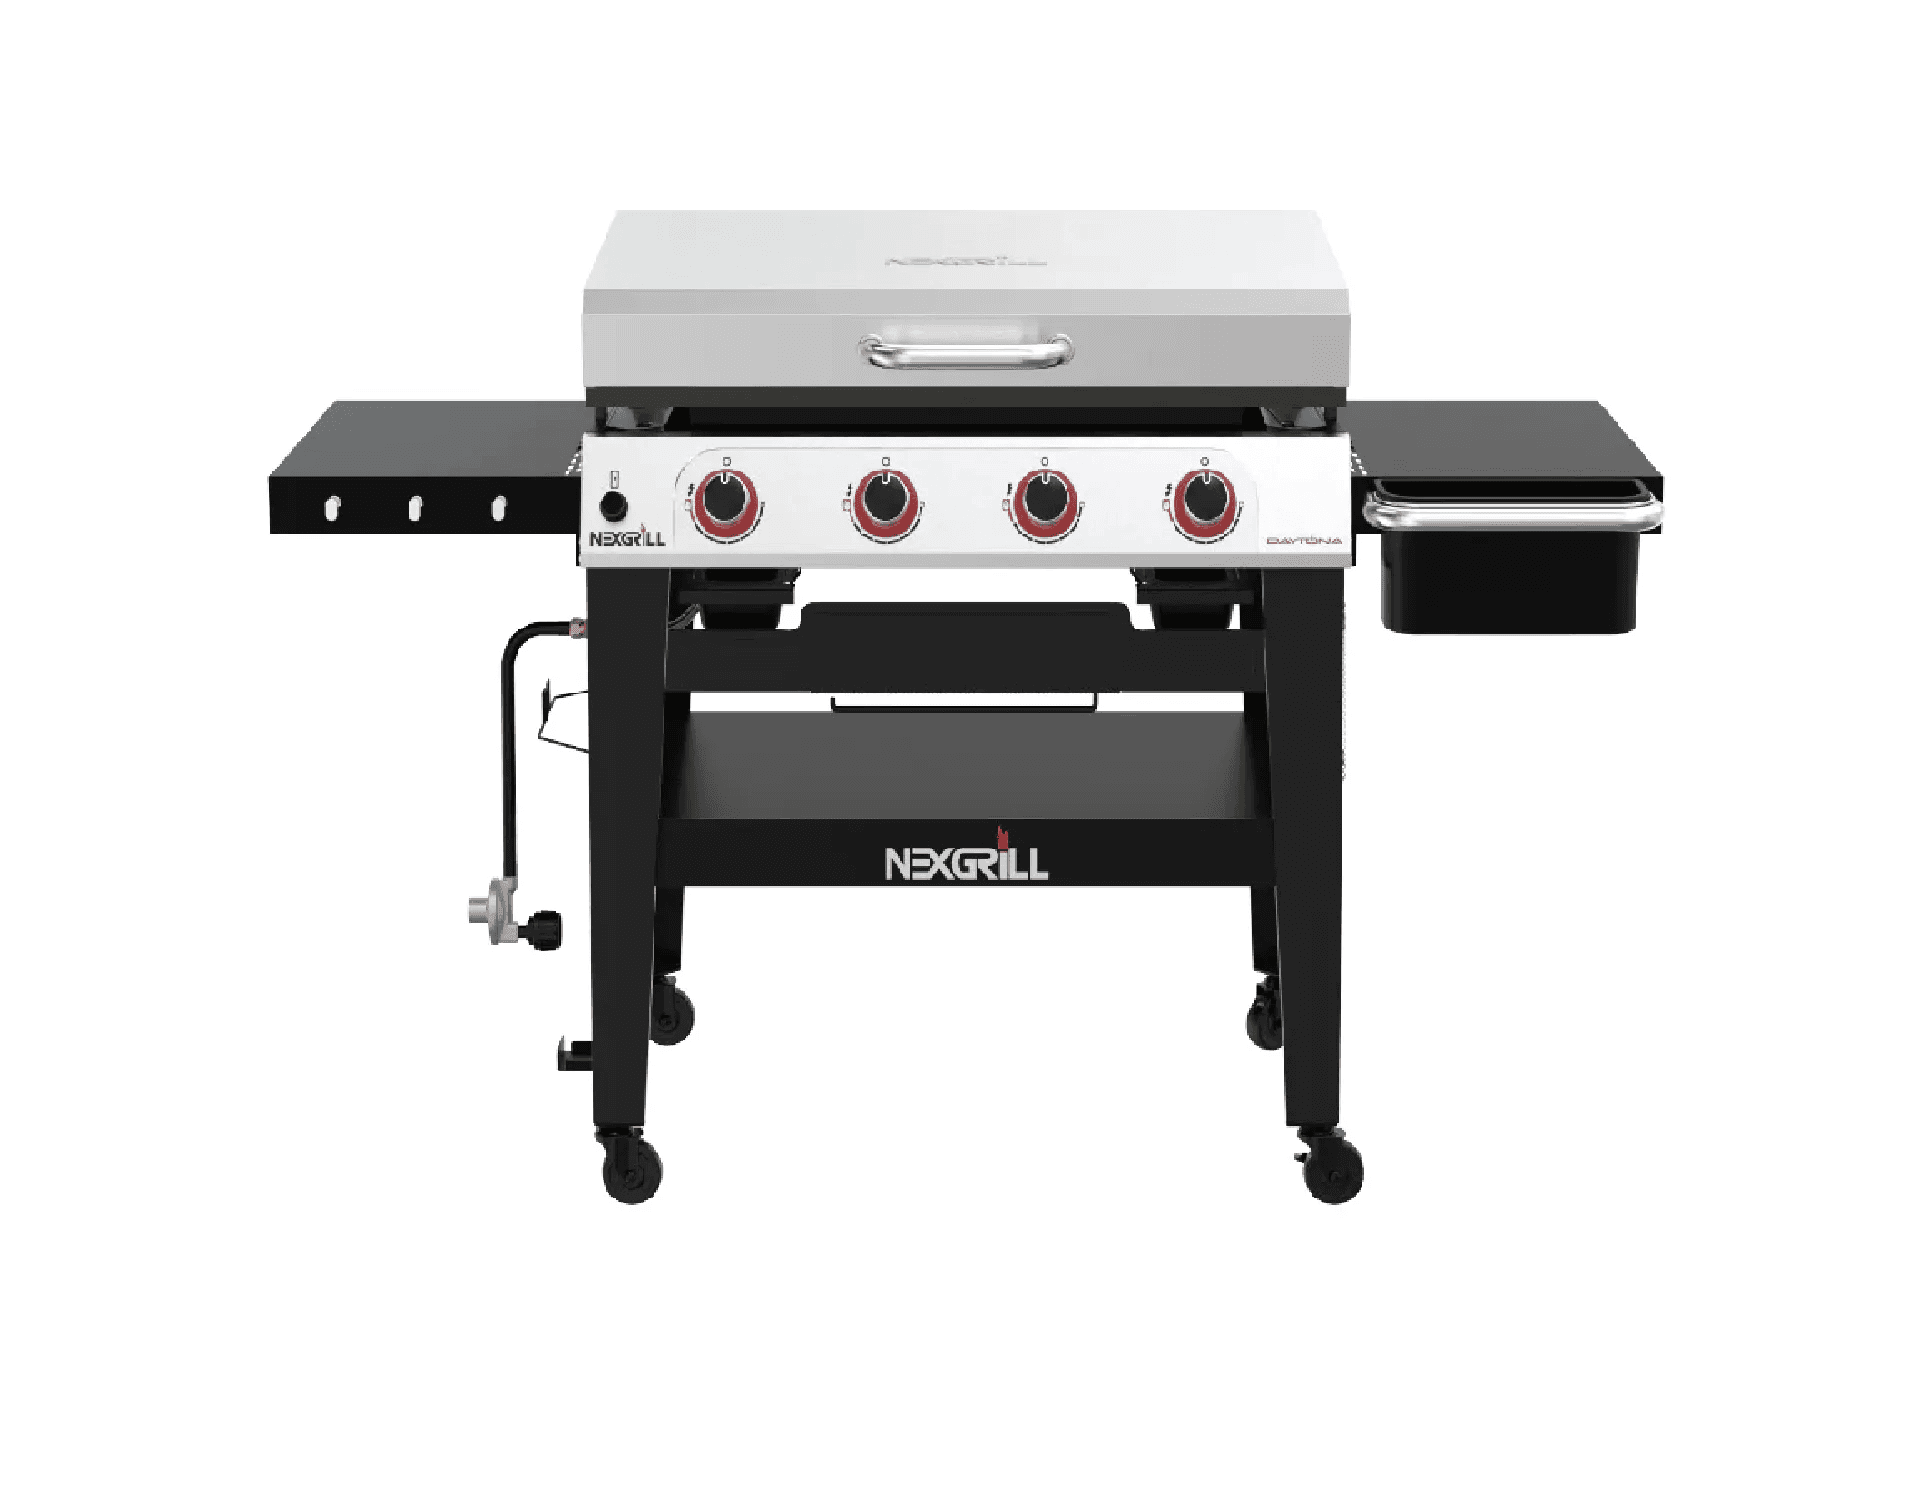
Nexgrill Daytona 2-Burner Gas Griddle with Lid

In This Article

Key Pricing Factors

Material and brand influence griddle prices.

Feature Impact

Advanced features increase cost.

Value Assessment

Consider durability and performance.

Introduction to 4-Burner Griddles with Lids

The 4-burner griddle with a lid is a versatile piece of outdoor cooking equipment that offers both extensive cooking space and the ability to cover food, helping to retain heat and infuse flavors. These griddles are popular among outdoor cooking enthusiasts who need a large surface area to prepare meals for gatherings or family events. Understanding the different factors influencing their price can help consumers make informed purchasing decisions.

Tip: Consider the cooking surface material when evaluating griddle prices, as this affects both performance and longevity.

Key Factors Influencing Price

The price of a 4-burner griddle with a lid can vary based on several factors, including material quality, brand reputation, added features, and market demand. Higher-end griddles often feature stainless steel construction, which provides excellent durability and resistance to rust. Mid-range models might use hot-rolled steel, balancing cost with performance.

  • Material: Stainless steel is more expensive but offers superior longevity.
  • Brand: Established brands like Nexgrill often command higher prices due to their reputation for quality.
  • Features: Griddles with customizable heat zones, integrated grease management systems, and durable lids will typically be priced higher.

Price Range Overview

Brand Material Price Range (USD)
Nexgrill Stainless Steel $300 - $500
Generic Cast Iron $200 - $350

Info: Market fluctuations and seasonal promotions can affect griddle prices, so keep an eye out for deals.

What to Consider When Buying

When choosing a 4-burner griddle with a lid, consider the frequency of use, the typical number of people you cook for, and the types of meals you prepare most often. A more expensive model may offer better features and durability, making it a worthwhile investment for regular users.

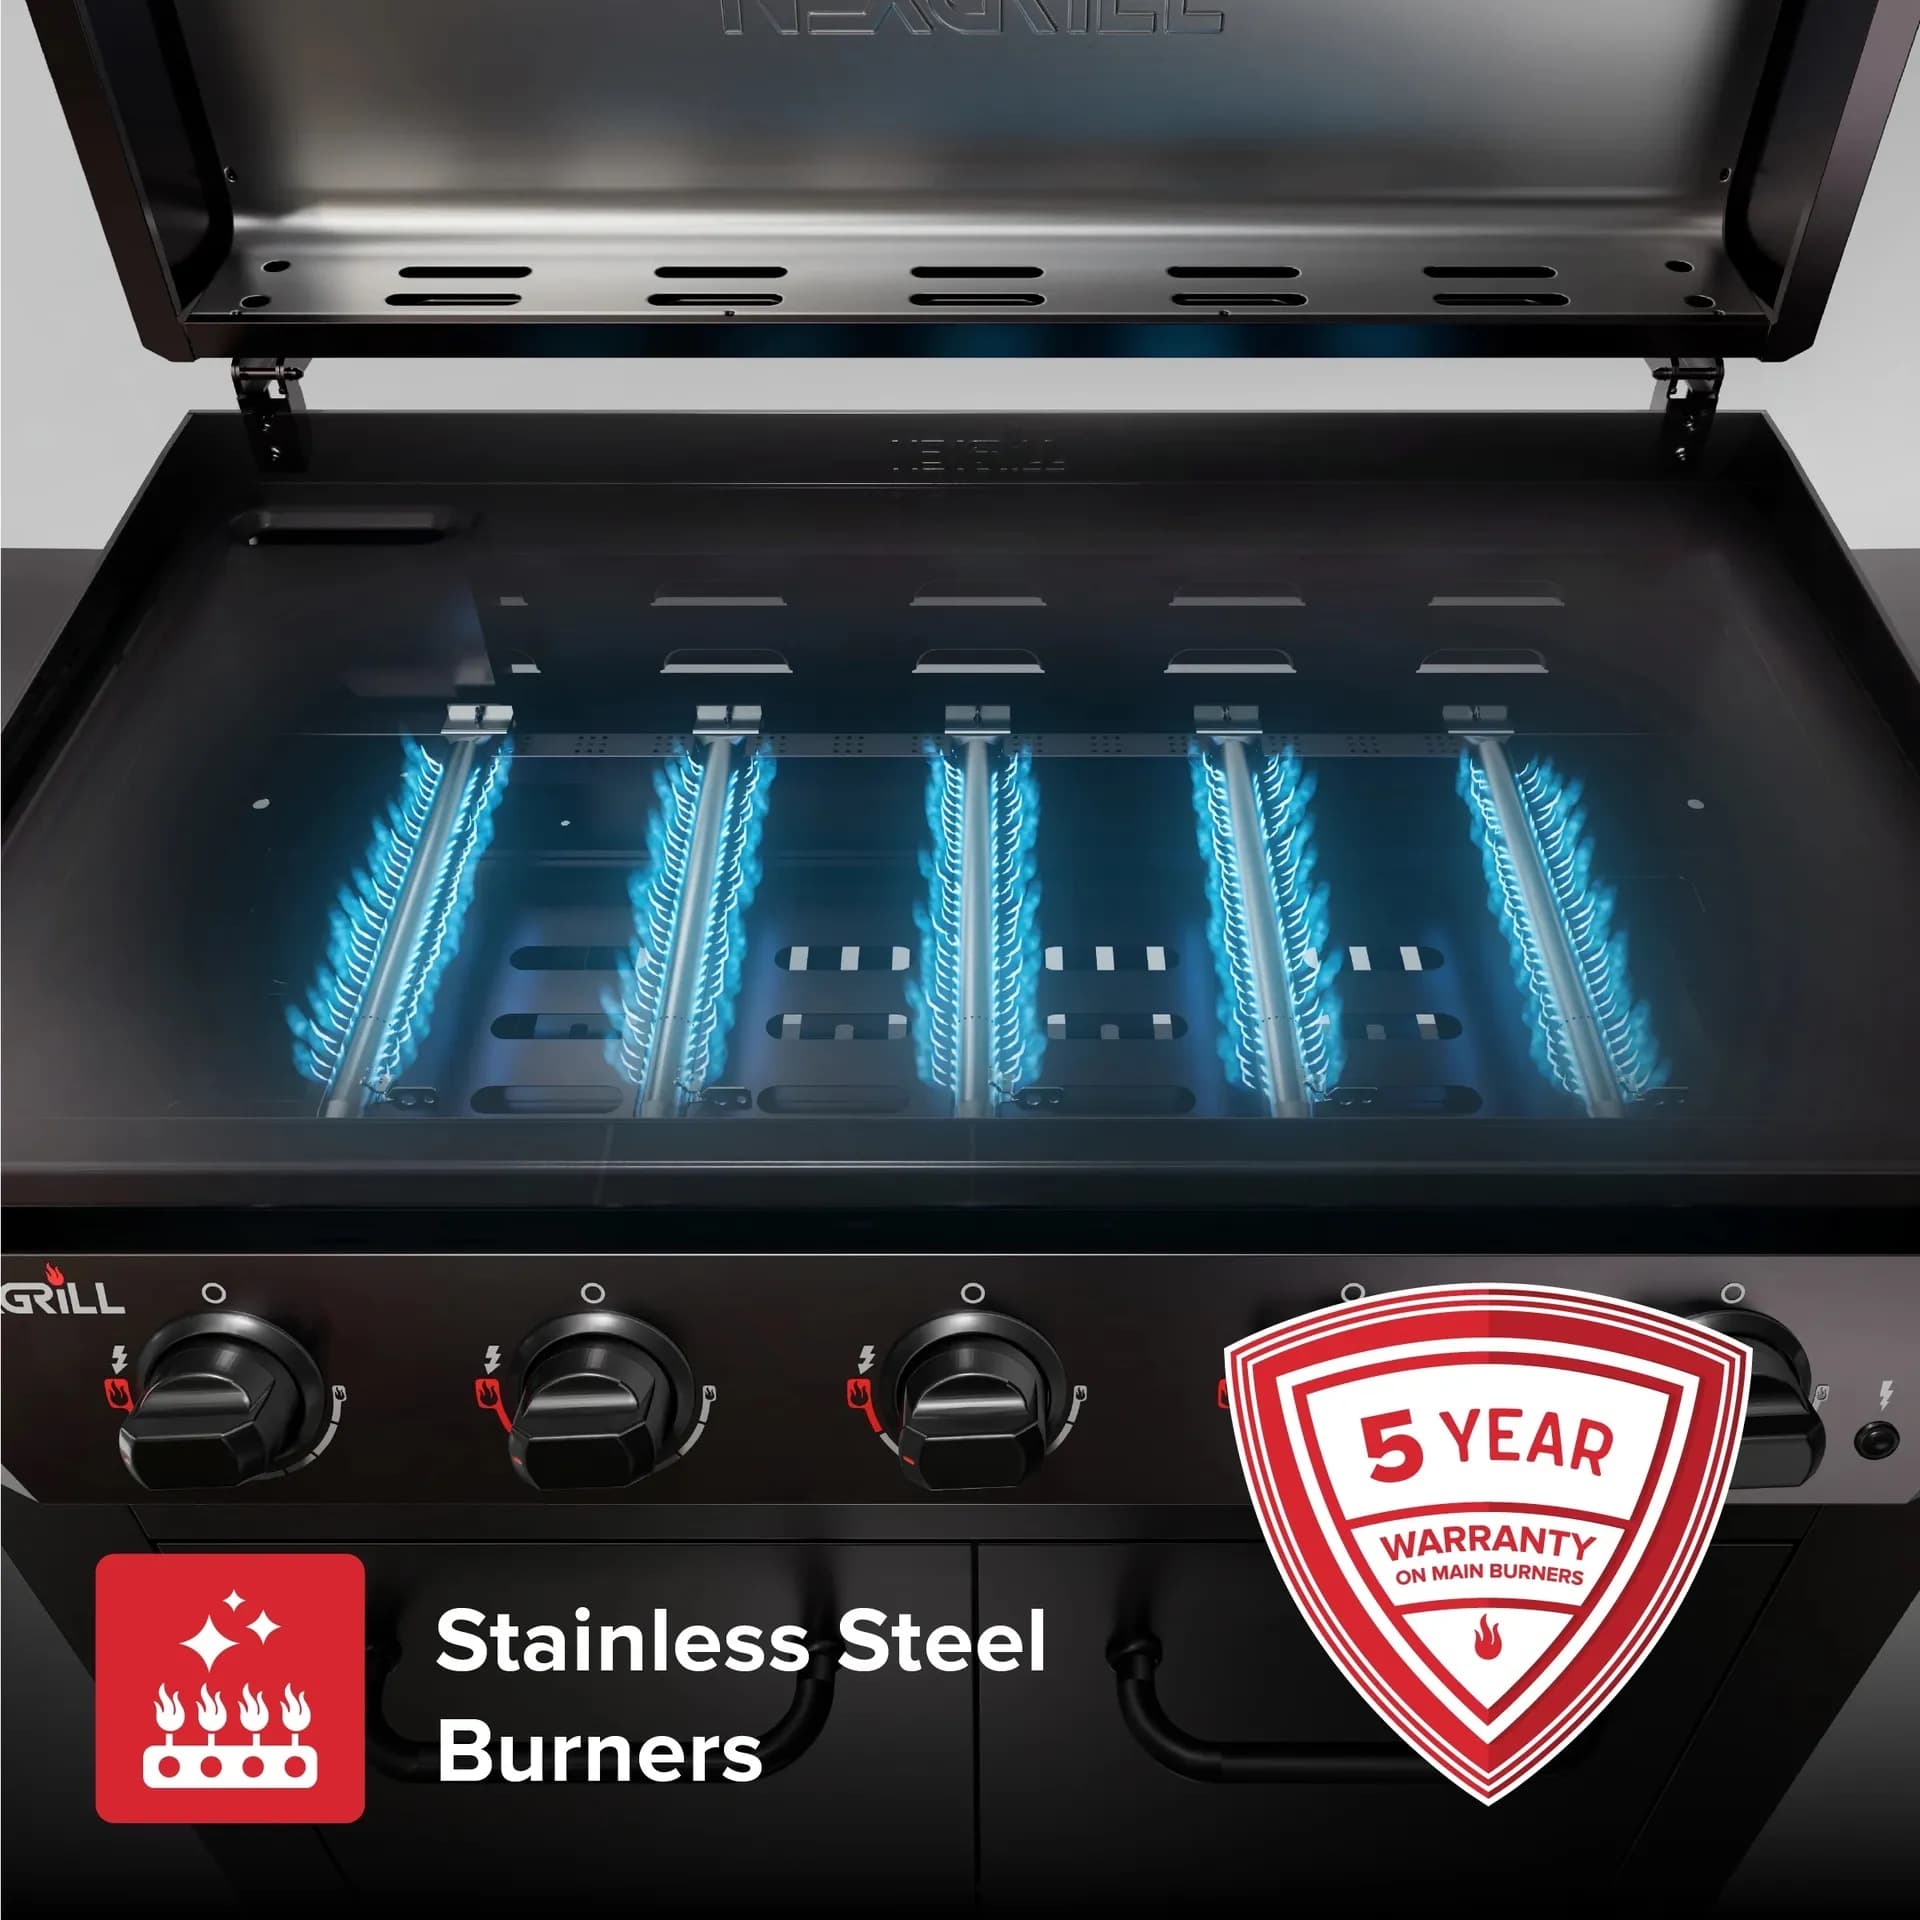
Remember to evaluate warranty options as well. A good warranty can safeguard your investment by covering defects or issues that may arise post-purchase.

Comparing Features and Their Impact on Cost

Features such as heat distribution and ease of cleaning can significantly impact the cost of a 4-burner griddle with a lid. Models with advanced grease management systems and easy-to-clean surfaces may have higher upfront costs but offer savings in maintenance and longevity.

Feature Description Impact on Price
Heat Zones Allows for different cooking temperatures on the same surface. Increases
Grease Management Efficiently collects and disposes of grease. Increases

Warning: Avoid budget models with poor heat distribution, as they can lead to uneven cooking.

Evaluating Value for Money

To determine the best value for your investment, assess not only the purchase price but also the expected lifespan and performance of the griddle. More expensive models typically offer enhanced features that can save time and effort in the long run.

Look for models with positive reviews from other users, focusing on aspects like build quality, cooking performance, and customer service. A robust customer service policy can enhance the overall ownership experience, providing support and assistance as needed.

Conclusion: Making an Informed Choice

Ultimately, the best 4-burner griddle with a lid for you will align with your cooking needs, budget, and long-term grilling goals. By understanding the various factors that influence griddle pricing, you can make a more informed decision that balances cost with the features and benefits you value most.

Consider the investment in a high-quality griddle as an enhancement to your outdoor cooking lifestyle, offering the ability to enjoy diverse culinary experiences right in your backyard.

Sources

Why Choose Us

Here's what sets us apart

  • Premium grilling experience at accessible pricing

    We position ourselves as delivering high-end outdoor cooking features and performance without premium-brand pricing, emphasizing “Quality Grills. Unbelievable Value.”

  • Wide range of outdoor cooking products for every use case

    We offer gas grills, pellet grills, griddles, smokers, pizza ovens, portable/tabletop grills, electric grills, accessories, and replacement parts — allowing customers to stay within one ecosystem for all outdoor cooking needs.

  • Innovation-focused outdoor cooking with smart technology

    We differentiate ourselves through smart grilling products like the Oakford smart pellet grill, including app-connected cooking controls and modern outdoor cooking technology.

What Our Clients Say

Don't just take our word for it

“I’ve been using the Nexgrill Daytona 4-Burner Gas Griddle for a while now, and I’ve been really happy with it. First off, it’s super sturdy and feels really well-made, like it’s going to last me a long time. The cooking space is awesome—plenty of room for making big meals. So far I’ve cooked pancakes, burgers, bacon and some veggies. The 4 burners make it easy to control the heat in different areas. I love that I can keep one side hotter for searing and leave the other side cooler for things that don’t need as much heat. Plus, it heats evenly, which I was really glad to see. The shelves underneath and on its sides are a nice bonus. I’ve used them to keep things like plates, tools, and ingredients handy while I’m cooking, it’s very convenient. Cleaning it is super simple too. Once it cools down, I just wipe off the cooking surface and let the grease funnel into the trap. It’s quick and easy, and honestly, it barely looks like I even used it. If I had to nitpick, the grease trap can fill up kind of quickly during bigger cooking sessions, but as long as you keep an eye on it, it’s not a big deal. Overall, this griddle has been great. It’s sturdy, easy to use, and makes cooking outside a lot of fun. If you’re into grilling or want something versatile, I think this is a solid choice. Originally posted on influenster.com”

M
martind23_2941
Sturdy, easy to use, and perfect for cooking big m

“took about 2-3 hrs for complete assembly. took about 15-20 minutes to fully heat to 700. used a pan liner and a drip cup liner due to previous issues with those rusting away. this is about the 3-4 grill i have assembled. dont try to do it alone or ask the wife for help with the firebox its awkward. always check the directions 2-3 times before tightening down and dont over tighten the screws. hopeing for 5 years of grilling on this but i havent checked the warrenty yet.”

DT
Dave the Griller
finally got around to building this.bought in 2025

“We just bought this guy and I recommend always buy it assembled, we just use the grill 2 times and really works good; is perfect size and the side burn is very useful plus the caddy attach for spices; the material quality is in medium rate; no too cheap no too expensive I'll be glad if it works for minimum 5 years. Nexgrill could improve with the way, and cleaners to not damage the grates and the burners. I protect the removable pan with heavy duty aluminum foil, when the grease drop I only change the foil. Well I am enjoying my new Nexgrill !!! P.s. always clean the grill after use it....ALWAYS :-)”

KA
Karl A
Nice Grill

“Thank you to Influencer and Nexgrill for sending this to me for free, in exchange for my honest opinion. My 17 year old son put this together for me. It was easy but time consuming, it took about 2 hours. This is great for families, because you can cook a good amount of food in a short time. We did tacos, but it’s also great for breakfast, pancakes, eggs, breakfast burritos. It’s easy to clean if you have the right tools, you’ll need a scraper and metal spatula. Overall I would recommend this flat grill, it’s a great addition to our household. Originally posted on influenster.com”

K
KellyL
Quick and easy cooking

“My old Nexgrill is 25 years old and still looking and performing well! This new one is going on our back patio to partner with the old one in our courtyard. Obviously quality products to last that long. I hope the new one does as well. The only concern I have is that the sides are painted metal rather than stainless like the old one. I hope it doesn’t rust over time. But, We are very happy grillers!”

JS
Judy S
New grill to partner with my old one

“Bought grill 3 years ago stainless grates rusted out had to order new ones to replace Yes, I recommend this product.”

G
GaryS329
Stainless

“I’ve always been a smoker, fryer kind of guy. But recently with my new job keeping me super busy I’ve been cooking on my father in-laws 2 burner grill and it takes so long to cook ribs and chicken. I love just lighting the burners and cooking so I decided to upgrade by buying my own and I got this 5 burner with side burner for veggies , took me maybe 20 minutes to get all the dinner done tonight after I seasoned the grill with an onion. Love it so far, I hope it lasts a long time! It’s beautiful!”

JB
Jason B
Love it so far! My first propane grill I’ve ever bought myself!

“I love your grills. This is a replacement grill for a fully stainless steel one (was suppose to be). We originally bought it for our daughter's new townhouse, but her patio was not "ready" for it. We have kept it for 5 years now. My husband passed, I sold the house and move it, in the original box, with me and just put it together. The”

LG
Lisa G
Replacement

“Purchased a 5 burner with side burner grill probably 7-8 years ago. You can only replace things for so long. Opted on a smaller 4 burner grill this time. Hoping to get lots of use for many years to come.”

BS
Brian S
2nd grill with out

“Easy grill to use & grills well. Last grill lasted a little over 6 years. Had to replace burners twice (just worn out - lots of use). Here is old grill & new grill.”

RE
Russell E
2nd Nexgrill

“I had either recieved or bought a grill from either webber or Charbroil. Both had lasted roughly 5 years each before rusting out. For the price point and the way this grill feels I think this one should last longer. Looks awsome new so hopes are high.”

VA
Victor A
3rd grill so far...

“I’m just setting up my second 5 burner nexgrill!!! My first one was purchased in 2015!! I live in New England and the grill lived outside for 7 1/2 years!! That is an impressive lifespan for a grill in my area! I’ll be a loyal Nexgrill customer for life. Thanks very much. Yes, I recommend this product.”

L
Litch
Robust grill with Longevity to boot

“This grill is good for an economy grill. My 10 year old assembled most of it. I knew that I was getting a budget grill and didn't expect a Cadillac. I bought it mainly because the burners have flame on the left and right, instead of one row on the top. I checked the temperature gauge vs my digital and it runs 50° high, didn't expect it to be right on. The burner tents are higher in the front, making it hotter in the front. I have snips so I'll cut the front to set level. I seasoned the grill with bacon, it leaked from the screw to the drip pan, which was tight. The corners are sharp. I had corner protectors for my smoker and put some on the Nexgrill, hoping to get more life from the cover. Overall it's pretty good for the price.”

DK
Daniel K
Easy to assemble
4.7/ 5
13 reviews

Keep reading

Related Articles

Nexgrill Stainless Steel Daytona 4-burner flat top griddle grillGriddles

Nexgrill Daytona 2-Burner Griddle Review: Season It, Run It, Keep It Cooking

Which Daytona 2-Burner Are You Actually Reading About? Search for a Nexgrill Daytona 2-burner review and you will land on two different products that share a burner count and almost nothing else. The first is the Daytona 2-Burner Propane Gas Griddle with Lid - a freestanding flat-top with a hard lid that clamshells over the cooking surface. The second is the Daytona 2-Burner Propane Gas Griddle with Foldable Cart , which trades the lid for legs that collapse. Both are flat-top griddles, not open-grate grills. If you were looking for the Fortress 2-Burner - a lidded grill with exposed grates for steaks and chicken - you are in the wrong review. The Daytona 1-Burner is the smaller sibling with a single control knob. This piece covers only the two 2-burner flat-tops, and the reason it matters is practical: the lid model and the cart model season, cook, and clean identically, but they store completely differently. That single difference decides which one a renter, a tailgater, or a couple with a small patio should buy. Nexgrill has been building outdoor cooking equipment since 1993 from its California base, and the Daytona line is its flat-top answer to the smash-burger era. The griddle plate - not the burner count - is the product here. What You Need Before the First Cook: Prerequisites and Unboxing Do not unbox onto a wooden deck and start cooking. Assemble on a flat, fire-safe surface with the propane still disconnected, because a wobbly cart and a half-seated regulator are the two things that turn a first cook into a bad memory. Have on hand: a propane tank (1 lb for short sessions or a standard 20 lb cylinder for a full season), two clean lint-free cloths, a silicone or cotton mop for oil, a metal scraper, and a bottle of high-smoke-point cooking oil - canola, avocado, grapeseed, or refined peanut all work. Nexgrill does not publish one fixed specification sheet that applies to both SKUs, and figures such as total BTU, cooking area, and unit weight are best confirmed on the live product page before you buy, because retailer listings and model years differ. The same applies to warranty: frequently a limited term, so confirm the stated term on the product page rather than trusting a marketplace summary. Prices sit in the mid-hundreds of USD depending on retailer and season - treat any single quoted number as a snapshot, not a promise. Leak-Check the Propane Hookup in Five Minutes Every new connection deserves a soapy-water test before the first ignition. Mix a teaspoon of dish soap into a cup of water, brush it over the regulator-to-tank joint and the hose-to-manifold joint, open the tank valve, and watch. Bubbles that grow mean a leak - tighten, retest, and if it persists, stop and contact the retailer. A 1 lb bottle screws straight onto the regulator; a 20 lb cylinder needs the collar seated and the coupler hand-tight only. Never use a flame to check for gas. I have watched a first-timer skip this step, cook anyway, and smell gas the whole meal. Five minutes now saves a genuinely dangerous afternoon later - and repeat the test any time you swap tanks or move the cart. Step-by-Step: Seasoning a Cold-Rolled Steel Griddle Top The griddle plate ships with a protective factory coating - usually a waxy film - and it must come off. Wipe the plate with a warm, damp cloth and a drop of mild dish soap, then dry it thoroughly. That is the only time soap touches the cooking surface. Now season: Coat thinly. Pour a teaspoon of high-smoke-point oil onto the cold plate and spread it with a cloth until it looks almost dry. If you can see pooled oil, you used too much. Heat to smoking. Light both burners on medium and let the oil smoke, then kill the heat and let the plate cool completely. Repeat two or three times. Thin coats over heat build a hard, black-brown polymer layer. Each pass should look glossier and darker than the last. Test with an egg. A properly seasoned plate slides a fried egg with almost no sticking. If it grabs, do one more thin coat. Use high-smoke-point oil, not olive oil or butter. A reader I know seasoned with extra-virgin olive oil, triggered a smoke alarm, and ended up with a tacky, sticky plate that had to be stripped and reseasoned with canola in three thin coats. Preheat, Oil, Cook: Your First Meal on Two Burners A cold-rolled steel plate takes a real 10 to 15 minutes to reach a proper cooking temperature across its full width. Light both burners, close the lid (if you have the lid model), and wait. When a drop of water skitters across the surface, you are ready. Wipe on a very thin film of oil just before the food lands, and keep it thin - a puddle of oil is a deep fryer, not a griddle. Your first cook should be forgiving: bacon, onions, or a batch of pancakes. Bacon is ideal because the fat seasons the plate further as it renders. For a Sunday breakfast of eggs, bacon, and pancakes for two, you are using only a third of the plate, and you are learning the single most valuable skill on this machine - where the hot zone ends and the holding zone begins. Two Burners, Two Zones: The Left-Sear, Right-Hold Layout This is the whole justification for two burners instead of one. Assign the left burner as your sear side and the right burner as your hold side. Smash burgers go on the left, get their crust, then slide right to finish slowly while the next patty goes down. Hash browns brown on the left; the finished eggs wait on the right at low heat. On the foldable-cart model, the same logic applies - you just gain no lid to trap heat between cooks. Zone Burner setting What goes there Sear side (left) Medium to medium-high Burgers, chops, hash browns, stir-fry vegetables Hold side (right) Low, or off after warm-through Eggs, pancakes, finished patties, tortillas Lid Model or Foldable Cart: The Trade-Off That Actually Divides These Two This is not a performance decision; it is a storage and usage decision. The lid model protects the seasoned plate from rain, dust, and neighborhood cats between cooks, which makes it the friendlier choice for a balcony or a small patio where the griddle stays outside. The foldable-cart model wins for anyone whose griddle lives in a garage or trunk: it collapses, sits low, and survives the trip to a parking lot. Neither is more of a

Oct 21, 202610 min read
Read more
Nexgrill Daytona Pro 5 Burner Nitroguard Propane Gas GriddleGriddles

Nexgrill Daytona Pro 5-Burner Manual: Set Up and Season Your Flat Top

You Just Wheeled a Cold Flat Top Onto the Deck - Start Here The cart is assembled and you're standing over a matte steel cooking surface that looks nothing like the grates you've grilled on. That's the moment a Daytona Pro 5-Burner owner actually needs the manual - not for a spec sheet, but to answer one question: what do I do with this steel before I cook on it? This walkthrough follows the booklet's order, so the steps below map to what you'll read in the printed guide. A flat-top griddle is a different machine from a five-burner gas grill. You're not burning factory residue off cast-iron grates or learning indirect zones for a lid-down roast. You're curing a cold-rolled steel plate, learning where the heat zones sit across a wide surface, and building a seasoning layer that handles smash burgers, breakfast hash, and stir-fry without sticking. Do not cook on the Daytona Pro before reading the seasoning section. The factory coating that protects the steel in transit is not food-safe seasoning - wash it off and replace it with a cured oil layer first. Find Your Model and Serial Before You Download Anything Nexgrill publishes manuals by model, and a manual for a different 5-burner unit can be wrong in the details that matter most - burner tube layout, igniter wiring, and regulator type. Photograph the rating plate first; on most Nexgrill carts it sits inside the cabinet door or on the rear panel of the cart frame and carries both model and serial numbers. Then tape a copy inside the cabinet. Serial numbers fade, stickers peel, and the cart gets hosed down. Every time you need a part, a manual revision, or a support rep, that photo answers their first three questions. 60-120 min Typical two-person assembly window for a cart-style 5-burner griddle With the plate in hand, go to Nexgrill.com , open the support and manuals section via the footer, and search the model string exactly as printed. If the digital copy won't load, the contact page is the route for a paper copy. Retail partners also host a per-SKU "Use and Care Manual" PDF on the live product listing - a legitimate fallback, but never pull it from a guessed file path. For a comparable 5-burner setup, see our Nexgrill Gourmet Pro 5-Burner manual guide if you're cross-referencing assembly details. What the Daytona Pro 5-Burner Manual Covers (and What Lives on the Product Page Instead) Owners waste time hunting a PDF for information that was never in the booklet. Here's the split. Topic In the printed manual On the product page Parts list and hardware blister mapping Yes - lettered calls match the blister pack No Burner output, total BTU May differ by revision Yes - confirm current specs here Leak-test procedure Yes - soapy-water method No Seasoning and cure steps Yes - core of first use Summary copy only Igniter battery type and electrode gap Yes No Clearance figures Yes - read your own revision Not always listed Warranty terms Reference only Yes - Nexgrill's stated terms Use the booklet for anything involving a wrench, a flame, or a flame-free leak test, and the Daytona Pro product page for current spec figures. Don't quote clearance distances from a forum post - pull them from your revision, because they vary between printings. Tools, Tank, and Space: Prerequisites the Manual Assumes You Have The tools list is short: a Phillips screwdriver, an adjustable wrench or socket set, and a helper for the lid and cart stages. Everything else is in the blister pack. What it doesn't tell you is what to prepare before opening the hardware bag. Two people for lifting the cooking body onto the cart - the lid-and-body stage is where backs get tweaked. A flat, non-combustible surface with the clearances your manual states, away from siding, railings, and overhead branches. A filled standard 20 lb / 5 gal propane cylinder. Tank exchange in most U.S. markets runs roughly $20-$25 as an estimate - worth knowing before the tank is empty at step one of the leak test. Dish soap and a spray bottle for the leak test, plus a rag. Never a match. An AA battery for the push-button electronic igniter, if your revision calls for one. Stage the hardware blister pack by letter before you start. The manual references letters, not descriptions, and matching a lettered bag to a step takes seconds instead of minutes. Steps 1-6: Assembling and Leak-Testing in the Manual's Order Build in order and you'll never have to disassemble to reach a bolt you buried under a shelf. Cart frame and legs. Assemble upside down or on its side as instructed, and leave fasteners finger-tight until the frame is square. Side shelves and front panel. Attach before the body goes on - reach is easier now. Body onto cart. Two people. This is the heavy lift, and the manual flags it. Burner tubes and control panel connections. Verify each burner tube seats over its valve orifice. A tube that slips off during the lift is the most common cause of a weak or uneven flame later. Flat-top plate and lid. Set the griddle surface per your revision; confirm it sits level so oil pools evenly during the cure. Leak test - before the first cook. Connect the regulator, then apply soapy water to the cylinder valve, regulator connection, and every hose fitting. Open the cylinder valve slowly and watch for expanding bubbles. Bubbles mean a leak: close the valve, reseat, retest. No flame, ever. Store the cylinder upright and outside the cart - not inside the cabinet or under the shelf. When done cooking, the cylinder valve goes off first, then the burner knobs, so residual gas burns off cleanly. Seasoning the Nitroguard Flat Top: The Curing Sequence, Explained This is where flat-top owners diverge from grill owners, and where a skipped step ruins a first breakfast. Wash the plate. Warm soapy water and a cloth remove the factory protective oil. Rinse and dry completely - water left on cold-rolled steel flashes to rust quickly. Oil thinly. A high-smoke-point cooking oil wiped on in a thin film, edge to edge. Too much oil cures tacky and gummy, not slick. Heat in stages. Bring the surface up gradually across the burners rather than slamming all five to high, so the steel expands evenly and the film sets without scorching one end. Expect smoke. The first cure smokes - that's the oil polymerizing, not a defect. Ventilate and keep the surface clear. Repeat two or three times. Cool, re-oil thin, reheat. Each pass darkens the surface toward the near-black patina that releases food cleanly. The payoff is a surface that handles a smashed patty and diced onions without welding them to the steel. The cost of skipping it is scrubbing a rust-flecked plate on a Sunday morning. Try Comparing Two Options Side by Side Below to See Which Fits Best If the manual confirmed your griddle but you're weighing a 5-burner flat top against a narrower cart-style model, use the comparison tool below to put two Nexgrill griddles or grills against each other on footprint, burner count, and cooking style. The next half of this guide picks up after the comparison - with the five mistakes behind most "it won't light" complaints and a five-minute diagnostic flow.

Oct 20, 202611 min read
Read more
Nexgrill Stainless Steel Daytona 4-burner flat top griddle grillGriddles

Nexgrill Daytona 1-Burner Manual: How to Find, Download, and Use It

What the Nexgrill Daytona 1-Burner Manual Actually Covers If you are searching for a "Nexgrill Daytona 1-burner manual," the fastest path to the right document is understanding what that manual contains - and what single-burner means in Nexgrill's lineup. A single-burner manual for a tabletop or portable griddle in this class typically covers five things: the exact model and serial number identification, the propane connection and regulator specification, a parts list and hardware diagram, the ignition and flame-adjustment procedure, and a cleaning and storage schedule. It usually also includes a leak-test procedure and a warning against using an unregulated fuel supply. One honest caveat before you spend time hunting: Nexgrill's public catalog lists Daytona 2-burner models (including a foldable-cart version and a lid version), the 36" 4-burner, the Daytona Pro 5-Burner Nitroguard, and a stainless steel 4-burner flat top - but not a product literally named "Daytona 1-Burner." That means your unit is most likely a single-burner tabletop/portable variant, a discontinued or region-specific SKU, or a model whose burner count you have mis-remembered. This guide teaches you how to confirm that, then walks through assembly, leak testing, seasoning, and ignition for any single-burner Nexgrill griddle or tabletop grill. Tip: The manual is the only reliable source for your regulator's pressure spec. Guessing here is the most common cause of poor flame performance on single-burner units. Before You Search: Three Things You Need in Hand Do not start downloading PDFs until you have these three items. Without them you will collect documents that look correct but do not match your hardware. The model/serial plate photo. This is usually on the back of the firebox, inside the cabinet door, or under a side shelf. Aim your phone at it and zoom in - the model number is often a short alphanumeric string separate from the serial number. Your fuel setup. Single-burner units in this class typically run on a 1 lb disposable propane cylinder or a hose to a 20 lb tank. The regulator either screws directly onto the cylinder or sits at the end of the hose. Note which one you have. The purchase channel. Nexgrill is sold heavily through Home Depot, and those listings frequently host a "Use and Care Guide" PDF. Knowing where you bought it narrows your search. Step 1 - Confirm Your Real Model Number (Not Just the Name) "Daytona" is a family name, not a model number. The model number is what matches you to a manual. Write it down exactly - including dashes, letters, and any suffix. If the plate is unreadable, check your order confirmation email or the Home Depot order history, which usually preserves the SKU. If you bought secondhand and the plate is gone, photograph the burner tube, the regulator, and the control knob arrangement; support can often identify the unit from those. Step 2 - Where Nexgrill Manuals Live and How to Download Them Manuals are commonly distributed as PDFs. The most reliable route is to start with the brand's own support contact page and the product listing where you bought the grill. If the product page does not show a manual link, the support team can point you to the correct document for your model number. Save the PDF locally and rename it with your model number so you are not searching again next season. Save the PDF to your phone and to cloud storage. Paper manuals vanish; your fuel spec should not. Step 3 - Unboxing and Assembly Order for a Single-Burner Unit Assembly on a single-burner tabletop is short, but sequence matters. Lay out hardware by size. Attach the legs or cart frame first, then the body, then the side shelf or lid if your model has one. Leave fasteners finger-tight until everything is aligned, then tighten in a cross pattern. Do not over-tighten the burner or venturi connection - a crushed gasket or distorted venturi is a common cause of uneven flame on one-burner units. Step 4 - Leak Test the Regulator and Hose Before First Ignition This is the step people skip, and it is the one that matters most. Mix a 50/50 solution of liquid dish soap and water. With the control knob OFF, connect the cylinder or hose, then brush the soapy water on the regulator-to-cylinder joint, the hose-to-regulator joint, and the hose-to-manifold connection. Turn the fuel on slowly. If you see growing bubbles, you have a leak - turn the fuel off, reseat the connection, and retest. Never test with a flame. If bubbles persist after reseating, stop. Do not ignite. A leaking regulator or hose needs replacement, not persuasion. Step 5 - Burn-Off and Seasoning a Single-Burner Griddle Top Raw steel cooking surfaces ship with a protective coating. Wipe it off, then run a burn-off at medium heat for about 10-15 minutes. Let the surface cool slightly, apply a very thin layer of high-smoke-point oil (flaxseed, canola, or avocado), and heat until it darkens and stops smoking. Repeat two to four times. A properly seasoned single-burner top turns deep brown-black and becomes naturally non-stick. Step 6 - Ignition Sequence and Flame Adjustment Follow your manual's ignition order precisely: fuel on, lid open, knob to ignite position, press the igniter, then adjust. A healthy single-burner flame in this size class is blue with slight yellow tips; typical output is roughly 10,000-15,000 BTU on units of this type (an estimate range, not a Nexgrill-published specification for a "Daytona 1-Burner"). If the flame is mostly yellow or lifting off the burner, the air shutter or venturi may need adjustment - the manual shows the location. Step 7 - Cleaning, Covering, and Off-Season Storage Scrape the griddle top while warm, wipe with a thin oil film, and empty the grease tray after each cook. For storage, disconnect the cylinder, cover the unit, and store it out of direct rain. An uncovered griddle in a humid climate can rust the cooking surface within a single season - covering is not optional. Common Mistakes That Void Performance (and Sometimes Safety) Skipping the soapy-water leak test before first ignition. Using a regulator that does not match the unit's spec. Not seasoning raw steel, then wondering why food sticks. Over-tightening burner or venturi fasteners. Storing uncovered through the off-season. Assuming a 2-burner Daytona manual applies to a single-burner unit. Single-Burner vs. Multi-Burner: Which Manual Applies to You? Feature Single-Burner Tabletop 2-Burner Cart Griddle 4/5-Burner Griddle Manual applicability Use only its own model manual 2-burner manuals 4/5-burner manuals Typical fuel 1 lb cylinder or hose to 20 lb tank 20 lb tank 20 lb tank Regulator Often cylinder-mounted, low output Hose-mounted Hose-mounted, higher flow Ignition zones 1 2 4-5 Try comparing two products side by side below to see which fits best:

Oct 14, 20269 min read
Read more
Nexgrill Stainless Steel Daytona 4-burner flat top griddle grillGriddles

Nexgrill Daytona 1-Burner Griddle Review

Overview of the Nexgrill Daytona 1-Burner Griddle The Nexgrill Daytona 1-Burner Griddle is built for cooks who want flat-top convenience without giving up too much patio space. That makes it a sensible option for apartment balconies, compact decks, tailgate setups, or a second cooking surface beside a larger grill. Nexgrill’s broader brand positioning emphasizes accessible outdoor cooking for everyday gatherings, and that mindset shows up clearly in the Daytona line’s practical, user-friendly approach . For a review like this, the most important question is not whether the griddle can do everything a full-size multi-burner flat top can do. It is whether the single-burner format offers enough cooking area, temperature control, and cleanup simplicity for the way most people actually cook. If you usually make breakfast sandwiches, smash burgers, quesadillas, stir-fry vegetables, or quick weeknight protein-and-veg meals, a compact griddle can be easier to live with than a heavier, larger appliance. The biggest advantage of a 1-burner griddle is focus: one zone is easier to understand, easier to preheat, and easier to clean than a more complicated outdoor setup. The Daytona 1-Burner Griddle also fits a specific buyer mindset. Some people want a griddle as their primary outdoor cooker for small households. Others want a flat top because it handles foods that slip through grill grates and because it creates a more continuous cooking surface for chopped foods, eggs, or toasted buns. In either case, the compact footprint lowers the barrier to entry while keeping the cooking style versatile enough for regular use. Nexgrill’s product philosophy around inclusion and approachable outdoor cooking supports that kind of practical, low-friction ownership experience . One detail worth noting is how a compact griddle changes the rhythm of cooking. Instead of managing multiple burners and large heat zones, you spend more time mastering preheat, oiling, and batch cooking. That can be a benefit for beginners because it narrows the number of variables. For experienced cooks, it creates a fast, controlled surface for sides, breakfast, and small-family meals. Try comparing two products side by side below to see which fits best: Key Features and Specifications Nexgrill’s Daytona series is positioned as a griddle family, and the product pages in the line emphasize flat-top versatility, usable cooking space, and a design that works well for everyday outdoor meals . For the 1-burner version, the most relevant specifications are the ones that affect actual cooking: burner output, cooking surface size, ignition reliability, grease handling, and cart or tabletop stability. Because the listing is compact-focused, buyers should pay closer attention to footprint and workflow than to headline features alone. Buying factor Why it matters on a 1-burner griddle What to look for Cooking surface Determines whether you can cook breakfast for two or dinner for the family in batches. Enough usable flat-top area for your most common meals. Burner control Single-burner griddles rely on even heat and quick adjustments. A responsive knob and consistent flame spread. Ignition A reliable start keeps the griddle easy to use for short weekday cooks. Simple, repeatable lighting without extra fuss. Grease management Flat tops cook a lot of fatty foods, so cleanup design matters. A channel or tray that makes scraping and disposal straightforward. Footprint Compact buyers need the griddle to fit the patio, not just the catalog photo. A size that leaves room for prep, traffic flow, and storage. 1 zone means you should value heat consistency and workflow more than burner count. The compact format also changes what “spec value” means. On a large griddle, more burners can reduce hot spots and let you isolate zones. On a one-burner unit, the benefit comes from predictable operation and less wasted space. In practice, that means the griddle should heat evenly across its usable center area and recover quickly after food is added. If you are planning to cook smash burgers, eggs, bacon, or fajita vegetables, that quick heat recovery is more useful than a long list of features you may never use. For compact outdoor cooking, the best spec is the one you can feel during service: stable heat, manageable cleanup, and a layout that does not force awkward reaching. How to Use the Nexgrill Daytona Griddle Using a flat-top well is mostly about process. Before the first cook, read the product instructions carefully and place the griddle on a stable surface with enough clearance around it. The Daytona 1-Burner format rewards good setup because small surfaces heat quickly, and that means mistakes show up fast. A level unit is especially important: if the griddle tilts, grease and oil will migrate in the wrong direction and cooking results become uneven. A practical first-cook routine Preheat the griddle with the lid open, then let the cooking surface come fully up to temperature before adding oil. Use a thin layer of high-smoke-point oil and spread it evenly with a paper towel or cloth held by tongs. Start with foods that benefit from direct contact, such as eggs, onions, chopped potatoes, tortillas, or thin patties. Keep a metal spatula and scraper nearby so you can turn, chop, and clean as you cook. After cooking, scrape debris into the grease collection area while the surface is still warm. That sequence matters because griddles work best when the surface is seasoned and the heat is controlled. The Nexgrill griddle cooking tips page reinforces basic habits like preheating properly, managing oil, and keeping the surface clean between uses, all of which help protect the finish and improve food release over time . Do not rush the preheat. A griddle that is only partly heated will brown unevenly and can make delicate foods stick. Think in batches. On a 1-burner griddle, it is usually smarter to cook in waves than to crowd the surface. For example, sear sausage or bacon first, move them to a warm area if available, then use the rendered fat for eggs or potatoes. For lunch, toast buns after the patties are done so you are not fighting for space. That batch-based rhythm is one of the reasons smaller griddles appeal to busy households: they support fast meals without demanding restaurant-scale prep. Common Mistakes to Avoid Most early problems with a compact griddle come from treating it like a grill. A flat top is not mainly about flame marks; it is about surface contact, moisture control, and timing. One common mistake is putting too much food on the griddle at once. Overcrowding drops the surface temperature and turns searing into steaming. Another common issue is using excessive oil, which can make food greasy and create cleanup problems rather than helping release. A second mistake is assuming the single burner can cover every task evenly without adjustment. Because there is only one heat source, the warmest area may be more centered than the edges. Learn your hot and cool spots during the first few cooks, then place the food that needs the most direct heat accordingly. For instance, keep chopped vegetables or tortillas near the more active section of the surface and use the edges for short-term holding when needed. Mistake Why it hurts results Better approach Skipping preheat Food sticks and browning is patchy. Preheat fully before adding oil or food. Overcrowding Heat drops and texture softens. Cook in smaller batches. Using too much oil Food becomes greasy and cleanup gets harder. Use a light, even coat. Ignoring leveling Grease pools and cooking becomes inconsistent. Set the griddle on a stable, level surface. There is also a maintenance mistake many owners make: waiting until residue hardens before cleaning. The grease tray and flat top are easier to manage when the surface is warm, not cold. A quick scrape after the cook protects the next session and reduces the chance of built-up flavor transfer. If you want a compact griddle to stay enjoyable, make cleanup part of the cooking routine instead of a separate chore. For buyers comparing compact griddles, the main question is whether the 1-burner format matches their household and cooking style. If you want a straightforward, space-conscious flat top for breakfasts, small dinners, and quick weeknight meals, the Daytona 1-Burner Griddle has a very clear use case. If you often cook for larger groups or want multiple temperature zones at once, a bigger Daytona model may fit better. In other words, choose the size that matches your real routine, not the one that looks most impressive on paper.

Oct 12, 202610 min read
Read more

Featured products

From our catalog

Daytona™ 3-Burner Propane Gas Grill with Griddle Top in Black
Flat Top Griddles

Nexgrill

Daytona™ 3-Burner Propane Gas Grill with Griddle Top in Black

Daytona™ 3-Burner Propane Gas Grill with Griddle Top
Flat Top Griddles

Nexgrill

Daytona™ 3-Burner Propane Gas Grill with Griddle Top

Stainless Steel Nexgrill Daytona™ 4-Burner Flat Top Griddle Grill
Flat Top Griddles

Nexgrill

Stainless Steel Nexgrill Daytona™ 4-Burner Flat Top Griddle Grill

Daytona™ 1-Burner Propane Gas Grill with Griddle Top
Flat Top Griddles

Nexgrill

Daytona™ 1-Burner Propane Gas Grill with Griddle Top

Nexgrill | Black Daytona™ 2-Burner Propane Gas Griddle with Lid
Gas Grills

Nexgrill

Nexgrill | Black Daytona™ 2-Burner Propane Gas Griddle with Lid

Daytona™ 36" 4-Burner Propane Gas Griddle with Lid in Black
Gas Grills

Nexgrill

Daytona™ 36" 4-Burner Propane Gas Griddle with Lid in Black

Fortress 2-Burner Table Top Grill
Flat Top Griddles

Nexgrill

Fortress 2-Burner Table Top Grill

Daytona 2-Burner Propane Gas Griddle with Foldable Cart
Gas Grills

Nexgrill

Daytona 2-Burner Propane Gas Griddle with Foldable Cart

Nexgrill Daytona™ 4-Burner Propane Gas Grill with Griddle Top
Gas Grills

Nexgrill

Nexgrill Daytona™ 4-Burner Propane Gas Grill with Griddle Top

2-Burner Portable Propane Gas Grill with Griddle Top
Gas Grills

Nexgrill

2-Burner Portable Propane Gas Grill with Griddle Top

Rally™ 1-Burner Portable Gas Griddle
Gas Grills

Nexgrill

Rally™ 1-Burner Portable Gas Griddle

Daytona™ 2 Burner Propane Gas Griddle in Black with PVC Cover
Gas Grills

Nexgrill

Daytona™ 2 Burner Propane Gas Griddle in Black with PVC Cover

Why Choose Us

Here's what sets us apart from the competition

Premium grilling experience at accessible pricing

We position ourselves as delivering high-end outdoor cooking features and performance without premium-brand pricing, emphasizing “Quality Grills. Unbelievable Value.”

Wide range of outdoor cooking products for every use case

We offer gas grills, pellet grills, griddles, smokers, pizza ovens, portable/tabletop grills, electric grills, accessories, and replacement parts — allowing customers to stay within one ecosystem for all outdoor cooking needs.

Innovation-focused outdoor cooking with smart technology

We differentiate ourselves through smart grilling products like the Oakford smart pellet grill, including app-connected cooking controls and modern outdoor cooking technology.

Browse by Category

Grills

Grills

Expert tips, buying guides, comparisons, and inspiration for choosing and getting the most out of your grill.

Troubleshooting

Troubleshooting

Practical guides for cleaning, maintenance, common grill issues, and performance optimization.

Recipes

Recipes

Step-by-step grilling recipes, cooking techniques, and meal ideas for every occasion and skill level.

Lifestyle

Lifestyle

Backyard entertaining ideas, seasonal grilling inspiration, and stories that celebrate outdoor cooking culture.

Accessories

Accessories

Helpful articles covering grilling tools, cookware, maintenance gear, and must-have accessories for outdoor cooking.

Griddles

Griddles

Find griddle recipes, cooking techniques, cleaning tips, and outdoor meal ideas designed for Nexgrill griddles.

Frequently Asked Questions

Find answers to common questions

Nexgrill griddle dimensions vary by model. Please refer to the specific product page for detailed measurements.

Nexgrill griddles are typically constructed from high-quality stainless steel and other durable materials designed for outdoor cooking.

To clean your Nexgrill griddle, make sure it is cool, then scrape off food residue with a spatula and wash the surface with warm, soapy water. Regular cleaning helps maintain performance and longevity.

Yes, Nexgrill griddles are designed for versatile cooking and are ideal for preparing breakfast foods such as pancakes, eggs, and bacon.

Yes, Nexgrill offers a warranty on their griddles. Warranty terms can vary by model, so please check the product details for specific coverage information.