Nexgrill
Grills

Mastering Grilling Safety: Tips and Techniques

Ensure a safe and enjoyable grilling experience with these expert tips.
4 min read
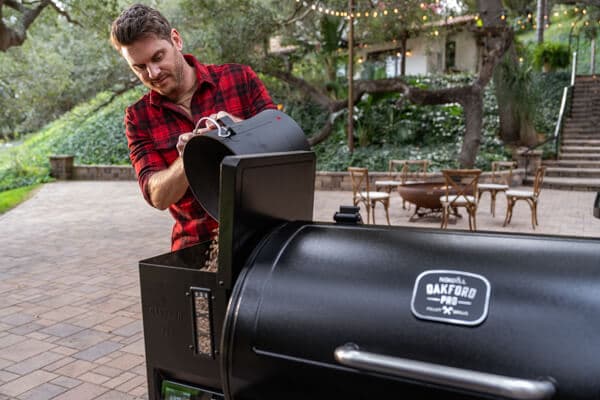
Nexgrill Oakford Pellet Grill with Nex-fi Technology

In This Article

Maintain Your Grill

Regular checks prevent accidents.

Proper Ventilation

Avoid carbon monoxide buildup.

Emergency Prep

Know basic first aid and have tools ready.

Understanding the Importance of Grilling Safety

Grilling is one of the most cherished outdoor activities, but it comes with its own set of safety concerns. Understanding these risks and how to mitigate them is crucial for ensuring a fun and accident-free grilling experience. From gas leaks to fire hazards, being aware of potential dangers can help prevent accidents.

The Role of Equipment Maintenance

Regular maintenance of your grill is essential. This includes checking for gas leaks in propane grills, cleaning grates to prevent flare-ups, and ensuring all parts are intact and functioning properly. A well-maintained grill not only performs better but is also safer to use.

Tip: Conduct a thorough inspection of your grill at the start of each grilling season to catch any potential issues early.

Safe Handling of Grill Fuels

Handling fuels safely is paramount. For gas grills, ensure that connections are tight and that the propane tank is free from leaks. For charcoal grills, use a chimney starter instead of lighter fluid to ignite coals, reducing chemical exposure and flare-up risks.

Fuel TypeSafety Tip
PropaneCheck for leaks using soapy water solution.
CharcoalUse a chimney starter to avoid lighter fluid.

Setting Up Your Grill Area Safely

The location of your grill can significantly impact safety. Always place grills on a stable surface away from flammable materials, such as wooden decks or overhanging branches. Maintain a safe perimeter around the grill to keep children and pets away.

The Importance of Proper Ventilation

Grilling should always be done in a well-ventilated area to prevent the buildup of carbon monoxide. Never use grills indoors or in enclosed spaces such as garages.

Warning: Carbon monoxide is a colorless, odorless gas that can be deadly. Ensure adequate airflow to avoid poisoning.

Essential Grilling Techniques for Safety

Beyond setup and maintenance, employing safe grilling techniques is key. This includes using long-handled tools to keep a safe distance from the heat and wearing appropriate clothing that won't catch fire easily. Being mindful of these techniques can help prevent burns and accidents.

Monitoring grill temperatures and avoiding distractions while grilling are also crucial. Remember, an attentive grill master is a safe grill master.

80%

of grill fires involve gas grills. Stay vigilant.

Try comparing two products side by side below to see which fits best:

Post-Use Safety Measures

Once the grilling is done, safety doesn't stop. Proper cooling and cleaning are essential to prevent accidents and maintain grill longevity. Allow the grill to cool completely before cleaning residues and disposing of charcoal ash safely in a metal container.

The Importance of Regular Cleaning

Regular cleaning prevents grease buildup, which can lead to flare-ups. Use a wire brush to clean cooking grates and inspect burners for clogs that might affect grill performance.

Tip: Cleaning your grill after each use ensures it’s ready for the next meal and extends its lifespan.

Emergency Preparedness

Despite best efforts, emergencies can occur. Having a fire extinguisher nearby and knowing how to use it can be lifesaving. Additionally, familiarize yourself with basic first aid for burns and have a plan for evacuating the area if necessary.

Handling Flare-Ups

Flare-ups are common when grilling fatty foods. To manage them, move food to a cooler part of the grill and close the lid to cut off oxygen. Never use water to douse flames as it can spread grease fires.

Emergency ToolUse
Fire ExtinguisherFor small grease fires.
First Aid KitFor treating burns.

Conclusion: Grilling with Confidence

By following these safety tips and techniques, you can ensure a safer and more enjoyable grilling experience. Remember, preparedness and vigilance are key to preventing accidents and ensuring that your outdoor cooking adventures are both fun and safe.

Explore more grilling tips and safety information at Nexgrill.

Why Choose Us

Here's what sets us apart

  • Premium grilling experience at accessible pricing

    We position ourselves as delivering high-end outdoor cooking features and performance without premium-brand pricing, emphasizing “Quality Grills. Unbelievable Value.”

  • Wide range of outdoor cooking products for every use case

    We offer gas grills, pellet grills, griddles, smokers, pizza ovens, portable/tabletop grills, electric grills, accessories, and replacement parts — allowing customers to stay within one ecosystem for all outdoor cooking needs.

  • Innovation-focused outdoor cooking with smart technology

    We differentiate ourselves through smart grilling products like the Oakford smart pellet grill, including app-connected cooking controls and modern outdoor cooking technology.

What Our Clients Say

Don't just take our word for it

“I’ve been using the Nexgrill Daytona 4-Burner Gas Griddle for a while now, and I’ve been really happy with it. First off, it’s super sturdy and feels really well-made, like it’s going to last me a long time. The cooking space is awesome—plenty of room for making big meals. So far I’ve cooked pancakes, burgers, bacon and some veggies. The 4 burners make it easy to control the heat in different areas. I love that I can keep one side hotter for searing and leave the other side cooler for things that don’t need as much heat. Plus, it heats evenly, which I was really glad to see. The shelves underneath and on its sides are a nice bonus. I’ve used them to keep things like plates, tools, and ingredients handy while I’m cooking, it’s very convenient. Cleaning it is super simple too. Once it cools down, I just wipe off the cooking surface and let the grease funnel into the trap. It’s quick and easy, and honestly, it barely looks like I even used it. If I had to nitpick, the grease trap can fill up kind of quickly during bigger cooking sessions, but as long as you keep an eye on it, it’s not a big deal. Overall, this griddle has been great. It’s sturdy, easy to use, and makes cooking outside a lot of fun. If you’re into grilling or want something versatile, I think this is a solid choice. Originally posted on influenster.com”

M
martind23_2941
Sturdy, easy to use, and perfect for cooking big m

“took about 2-3 hrs for complete assembly. took about 15-20 minutes to fully heat to 700. used a pan liner and a drip cup liner due to previous issues with those rusting away. this is about the 3-4 grill i have assembled. dont try to do it alone or ask the wife for help with the firebox its awkward. always check the directions 2-3 times before tightening down and dont over tighten the screws. hopeing for 5 years of grilling on this but i havent checked the warrenty yet.”

DT
Dave the Griller
finally got around to building this.bought in 2025

“We just bought this guy and I recommend always buy it assembled, we just use the grill 2 times and really works good; is perfect size and the side burn is very useful plus the caddy attach for spices; the material quality is in medium rate; no too cheap no too expensive I'll be glad if it works for minimum 5 years. Nexgrill could improve with the way, and cleaners to not damage the grates and the burners. I protect the removable pan with heavy duty aluminum foil, when the grease drop I only change the foil. Well I am enjoying my new Nexgrill !!! P.s. always clean the grill after use it....ALWAYS :-)”

KA
Karl A
Nice Grill

“Thank you to Influencer and Nexgrill for sending this to me for free, in exchange for my honest opinion. My 17 year old son put this together for me. It was easy but time consuming, it took about 2 hours. This is great for families, because you can cook a good amount of food in a short time. We did tacos, but it’s also great for breakfast, pancakes, eggs, breakfast burritos. It’s easy to clean if you have the right tools, you’ll need a scraper and metal spatula. Overall I would recommend this flat grill, it’s a great addition to our household. Originally posted on influenster.com”

K
KellyL
Quick and easy cooking

“My old Nexgrill is 25 years old and still looking and performing well! This new one is going on our back patio to partner with the old one in our courtyard. Obviously quality products to last that long. I hope the new one does as well. The only concern I have is that the sides are painted metal rather than stainless like the old one. I hope it doesn’t rust over time. But, We are very happy grillers!”

JS
Judy S
New grill to partner with my old one

“Bought grill 3 years ago stainless grates rusted out had to order new ones to replace Yes, I recommend this product.”

G
GaryS329
Stainless

“I’ve always been a smoker, fryer kind of guy. But recently with my new job keeping me super busy I’ve been cooking on my father in-laws 2 burner grill and it takes so long to cook ribs and chicken. I love just lighting the burners and cooking so I decided to upgrade by buying my own and I got this 5 burner with side burner for veggies , took me maybe 20 minutes to get all the dinner done tonight after I seasoned the grill with an onion. Love it so far, I hope it lasts a long time! It’s beautiful!”

JB
Jason B
Love it so far! My first propane grill I’ve ever bought myself!

“I love your grills. This is a replacement grill for a fully stainless steel one (was suppose to be). We originally bought it for our daughter's new townhouse, but her patio was not "ready" for it. We have kept it for 5 years now. My husband passed, I sold the house and move it, in the original box, with me and just put it together. The”

LG
Lisa G
Replacement

“Purchased a 5 burner with side burner grill probably 7-8 years ago. You can only replace things for so long. Opted on a smaller 4 burner grill this time. Hoping to get lots of use for many years to come.”

BS
Brian S
2nd grill with out

“Easy grill to use & grills well. Last grill lasted a little over 6 years. Had to replace burners twice (just worn out - lots of use). Here is old grill & new grill.”

RE
Russell E
2nd Nexgrill

“I had either recieved or bought a grill from either webber or Charbroil. Both had lasted roughly 5 years each before rusting out. For the price point and the way this grill feels I think this one should last longer. Looks awsome new so hopes are high.”

VA
Victor A
3rd grill so far...

“I’m just setting up my second 5 burner nexgrill!!! My first one was purchased in 2015!! I live in New England and the grill lived outside for 7 1/2 years!! That is an impressive lifespan for a grill in my area! I’ll be a loyal Nexgrill customer for life. Thanks very much. Yes, I recommend this product.”

L
Litch
Robust grill with Longevity to boot

“This grill is good for an economy grill. My 10 year old assembled most of it. I knew that I was getting a budget grill and didn't expect a Cadillac. I bought it mainly because the burners have flame on the left and right, instead of one row on the top. I checked the temperature gauge vs my digital and it runs 50° high, didn't expect it to be right on. The burner tents are higher in the front, making it hotter in the front. I have snips so I'll cut the front to set level. I seasoned the grill with bacon, it leaked from the screw to the drip pan, which was tight. The corners are sharp. I had corner protectors for my smoker and put some on the Nexgrill, hoping to get more life from the cover. Overall it's pretty good for the price.”

DK
Daniel K
Easy to assemble
4.7/ 5
13 reviews

Keep reading

Related Articles

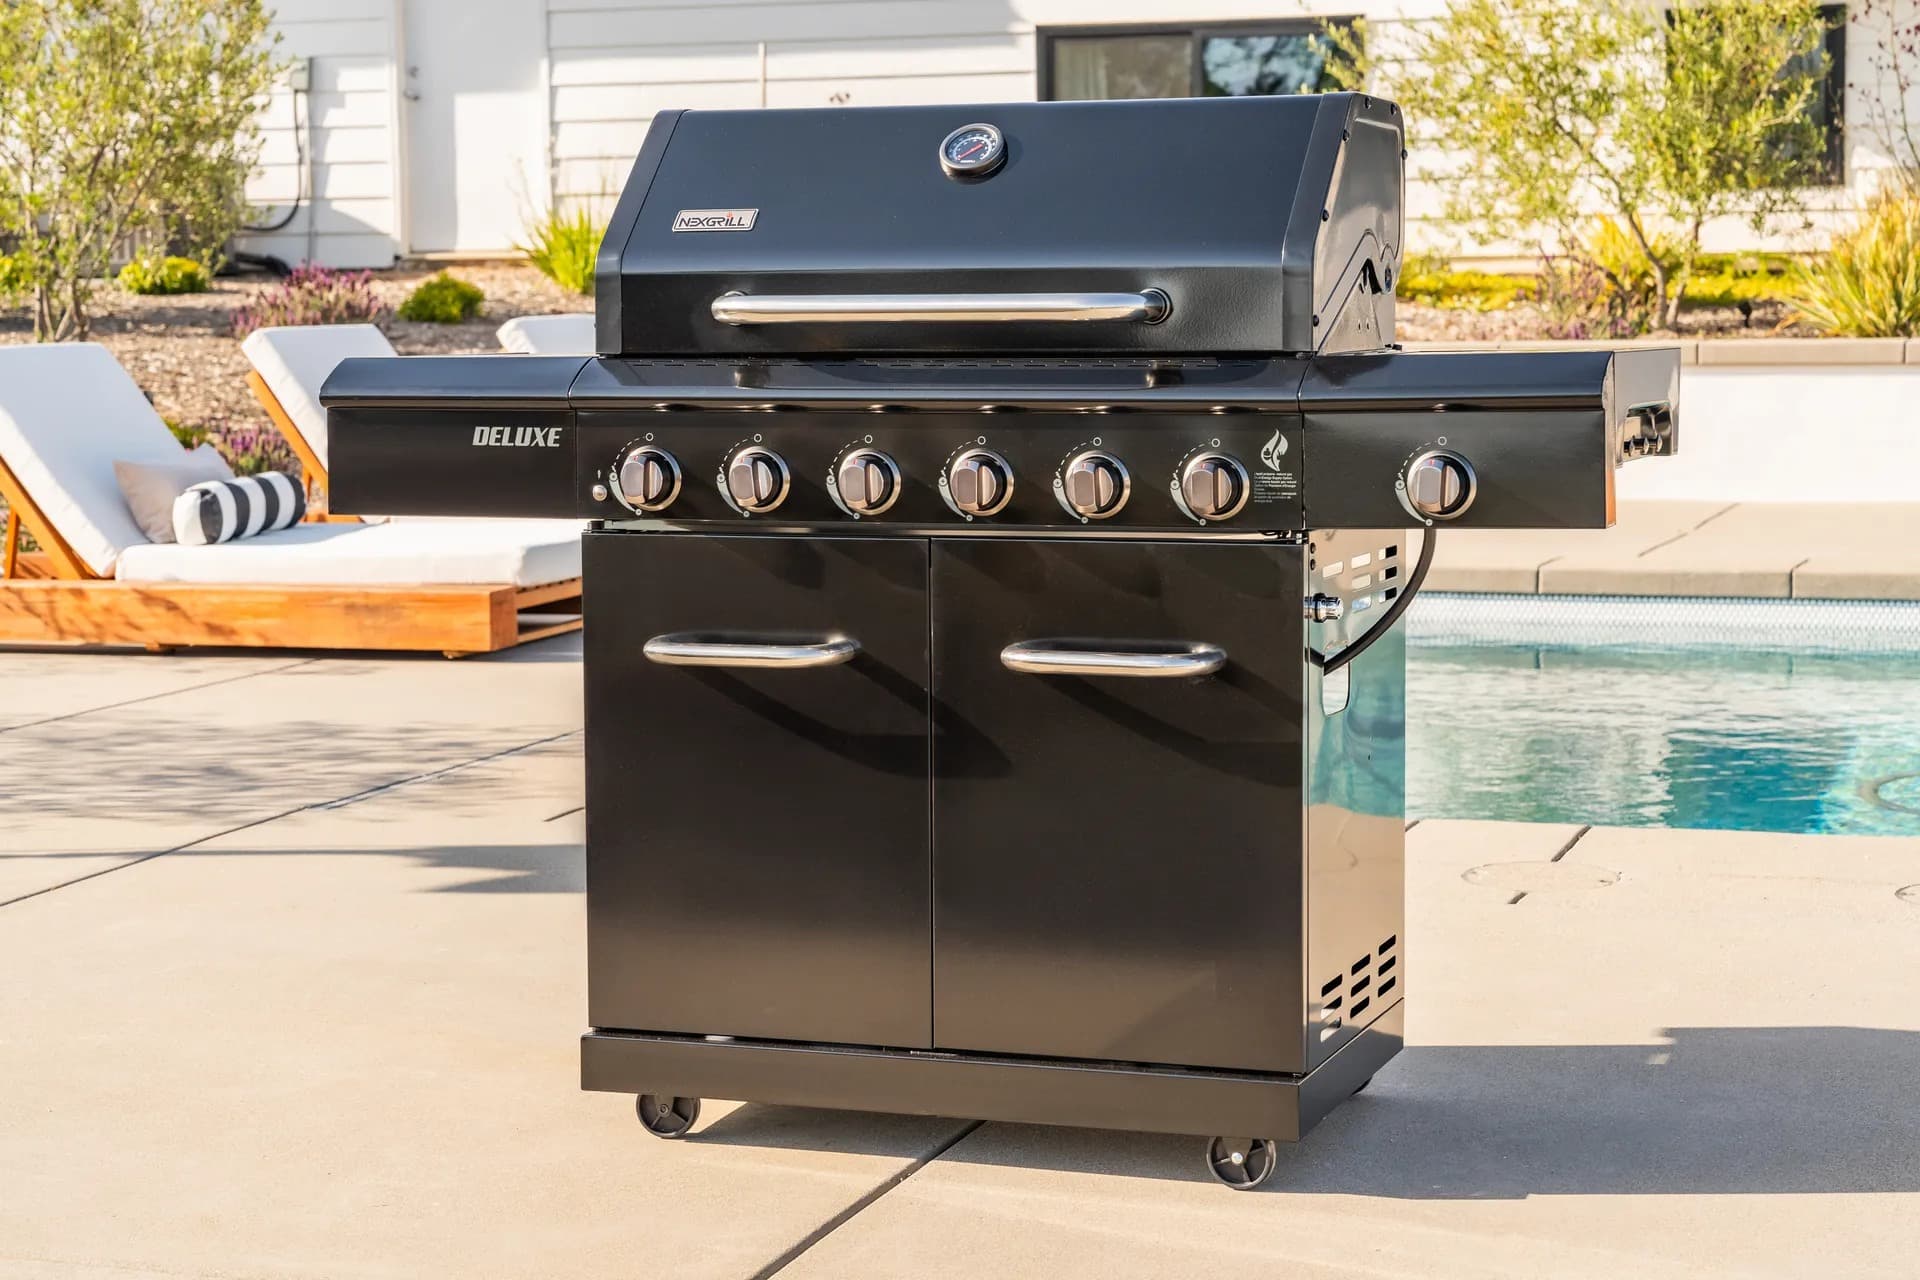
Nexgrill Deluxe 6-Burner Gas Grill with Side BurnerGrills

Nexgrill Fortress 1-Burner vs Char-Broil: How to Run and Judge a Compact Single-Burner Grill

What You're Actually Comparing When One Side Has a Single Burner A single-burner compact gas grill is a different tool from a full-size backyard cooker, so the comparison is not really Nexgrill versus Char-Broil in the abstract - it is how each brand solves a small, one-zone cooking problem. On a compact chassis you are comparing burner architecture, fuel logistics, footprint, and cleanup, not raw BTU bragging rights. Generic single-burner compacts typically land around 8,000-11,000 BTU with roughly 150-220 sq in of primary cooking area; treat all figures here as estimates and verify against the actual spec sheet. Verification note: at the time of writing we could not confirm a Nexgrill model sold specifically as a “Fortress” 1-burner. Before you compare figures, confirm the model plate on the unit or product page. Nexgrill model numbers begin with 720-. Prerequisites: Confirm the Model Plate, the Fuel, and Where You're Allowed to Cook Three things must be true before any spec comparison matters: you know exactly which model you are looking at, you know which fuel it takes, and you know you are permitted to use it where you live. Balcony and patio rules are a genuine blocker in the United States - many apartment leases prohibit open-flame grills on balconies, and local fire codes set minimum distances from walls and combustible railings. Check your lease and your local fire department before you shop. USFA and NFPA both publish grilling safety guidance covering placement away from siding, deck rails, and overhead structures - worth a two-minute read before you commit to a compact grill. Step 1: Read the Model Plate and Spec Sheet Before You Compare Anything Find the plate (usually on the back panel or inside the cabinet) and write down the full 720- number. Then pull the spec sheet and record four numbers only: primary cooking area, total BTU, burner count, and assembled weight. Ignore “total cooking area” figures that fold in a warming rack - on a compact grill, that inflated number can overstate usable space by a third or more. Step 2: Match Fuel Logistics to How You Store and Transport the Grill Most single-burner compacts run on 1 lb disposable propane cylinders, often with an optional adapter hose for a 20 lb tank. The math decides this for you: Fuel Setup Typical Runtime Best For 1 lb disposable cylinder (~0.236 gal) Roughly 1-2 hours at compact output Tailgating, short balcony sessions 20 lb tank via adapter hose Many sessions per refill Home patios, frequent weeknight cooking Per-hour fuel cost is dramatically lower on a 20 lb refill in most US markets, so if the grill lives at home, budget for the adapter hose. Step 3: Judge Heat Control on a One-Zone Grill (This Is Where Buyers Get Burned) One burner means one heat zone. You cannot run a hot side and a cool side with the knobs - so ask how each design helps you manage that limitation. Look for a lid that traps heat for roasting, a grate height that keeps food off the hottest center, and whether the burner runs the full width or sits centrally. On a compact grill, moving food to the cooler edge is your real temperature control. Step 4: Test the Portability and Cleanup Path Before You Commit Lift it, fold it, and trace the grease path. Removable drip trays and dishwasher-friendly grates matter enormously on a small grill you clean weekly. If it is going in an RV or truck bed, assembled weight and whether the legs lock are decisive. Try comparing two products side by side below to see which fits your routine:

Nov 12, 20265 min read
Read more
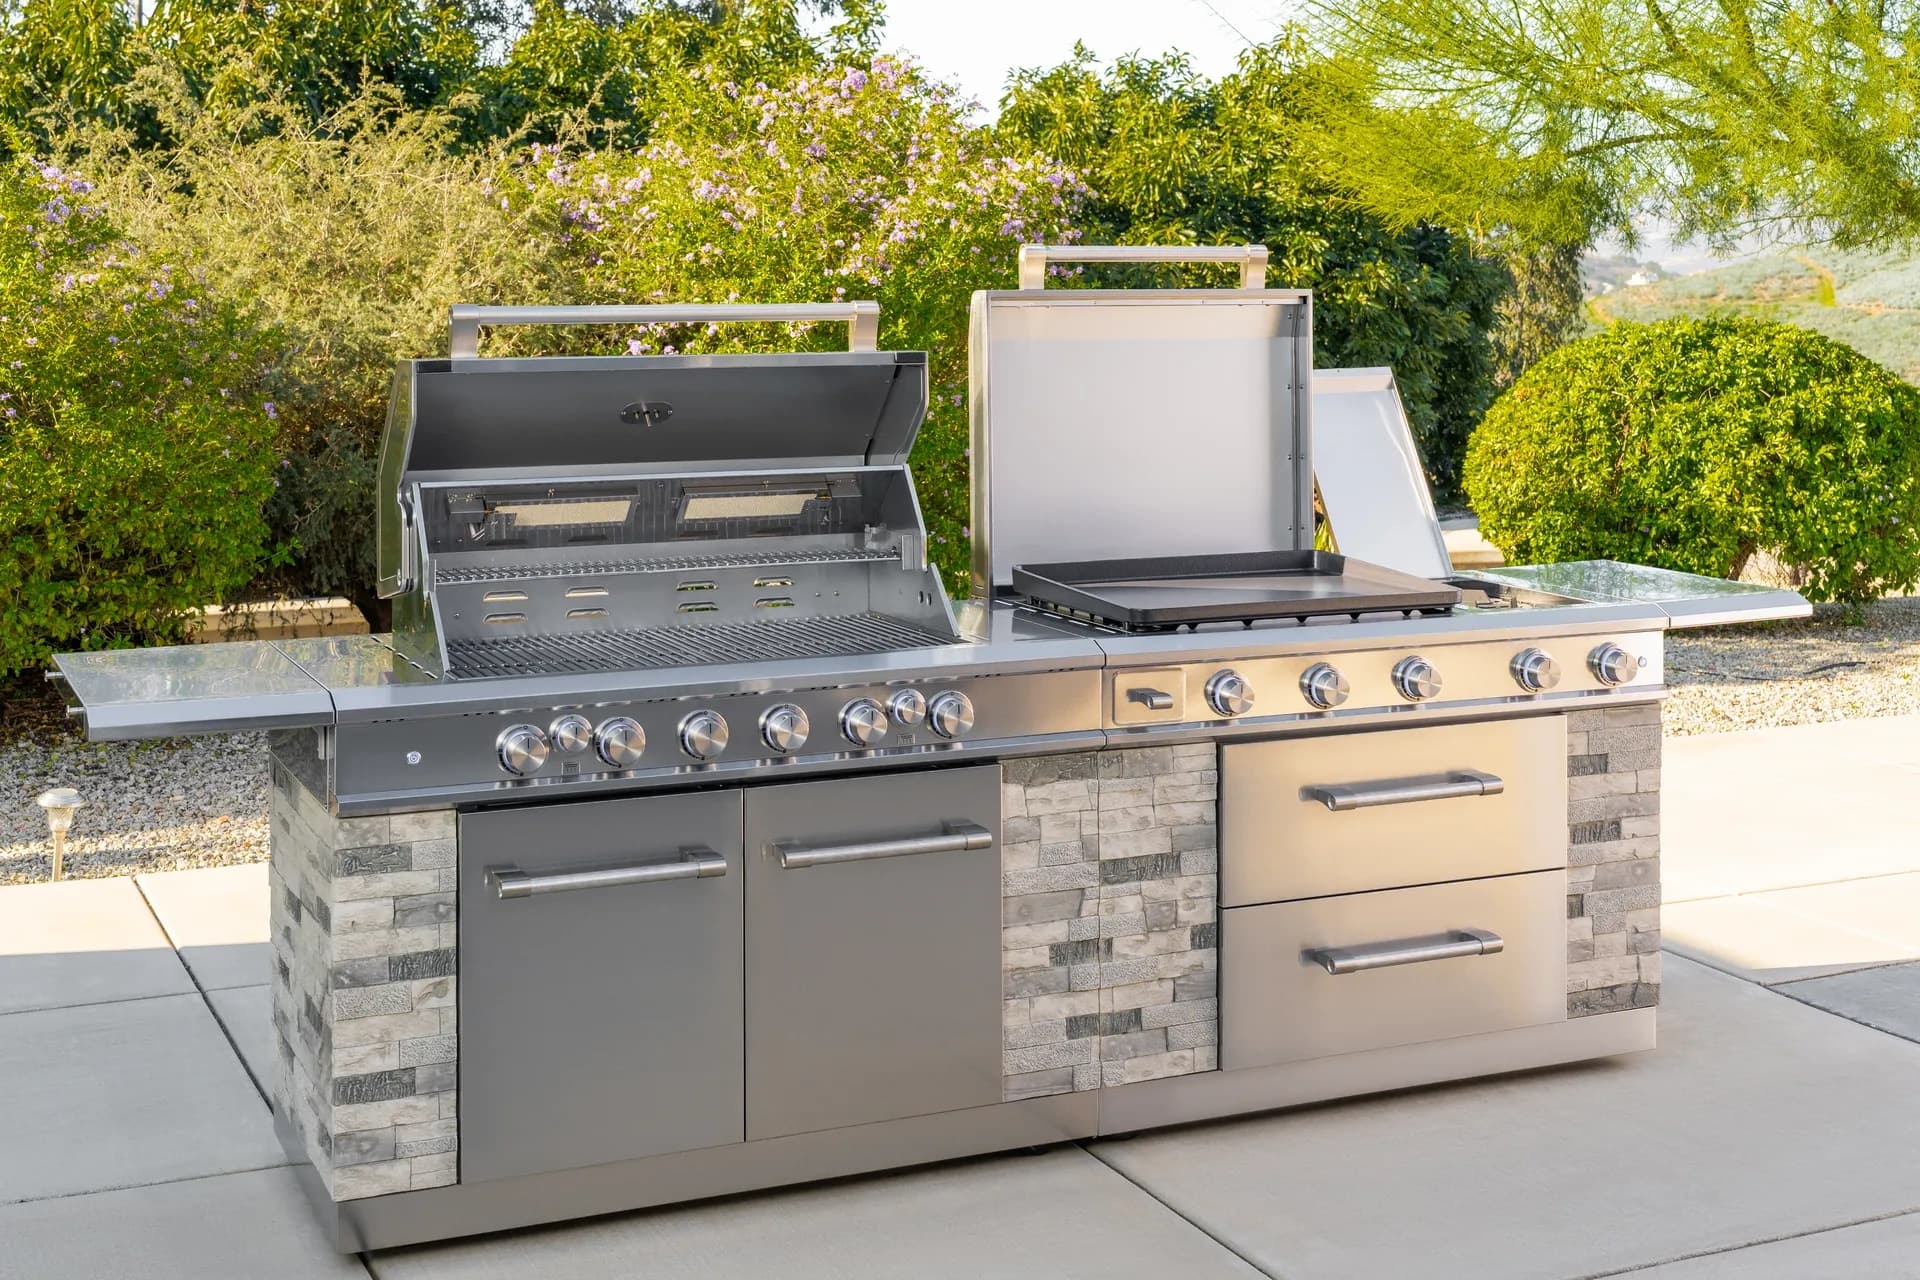
Nexgrill Outdoor Kitchen Gas Grill Island with Griddle InsertGrills

Nexgrill 810-KY002 vs Char-Broil: Identify Your Grill, Price the Wear Items, Then Decide

Why the 810-KY002 Needs an Identification Step Before Any Comparison The suffix KY002 does not appear in Nexgrill's public catalogue or major US retail listings as of this writing-it may be a regional, special-edition, or discontinued SKU. Identification is step one, not a footnote. The badge may also be confused with the documented 810-0025S / 720-0888S family of 4-burner propane grills sold through Home Depot; treat that family only as a reference point if your plate matches, never as confirmed KY002 specs. Do not accept BTU, grate material, or cooking-area numbers from a forum or marketplace listing without matching them to the data plate on your specific unit. A misread badge sends you shopping for parts that will not fit. What to Gather Before You Start: Badge Photo, Manual PDF, and a Tape Measure Put three things on the table: a clear photo of the rating label (usually on the back panel or inside the cabinet door), the manual PDF saved locally, and a tape measure. A magnet helps later for grate identification. Save the manual with the model number in the filename (e.g., nexgrill-810-KY002-manual.pdf ). Step 1: Decode the Data Plate and Confirm What Your Grill Actually Is Read every field: model number, serial number, gas type (LP or NG), input BTU per burner and total, and manifold pressure. Search the Nexgrill support pages for that exact string. If the KY002 suffix does not resolve, photograph the label and use the contact page to request a parts diagram. Nexgrill has been in outdoor cooking since 1993 and is headquartered in California, so the support channel is established-use it. Step 2: Retrieve the Manual and Parts Diagram From the Right Support Page Pull the parts diagram before pricing anything. It numbers each component-burner tube, heat tent, ignition electrode, regulator hose-so you can search by part number rather than description. Char-Broil publishes the same resources at charbroil.com/parts , keeping the comparison symmetrical. Step 3: Build a Wear-Item Basket and Price It in US Dollars Wear items fail on a schedule: burners every 3-5 years in humid climates, heat tents every 2-4, ignition every 2-3, regulator hose every 5-8. Build one basket and add the prices (estimates; verify against current listings). Wear item Typical USD range (per set) Replace when Burner tubes $30-$80 Rust-through or uneven flame Heat tents / flavorizer bars $20-$60 Holes or heavy warping Ignition module or electrode $15-$40 No spark after cleaning Regulator and hose assembly $25-$50 Cracking, stiffness, or date code over 5 years If the basket exceeds 50% of a comparable new unit, replacement deserves serious thought. Step 4: Read the Cooking System Difference Between a Nexgrill Firebox and a Char-Broil Emitter Plate A conventional Nexgrill uses burner tubes below heat tents or flavorizer bars; drippings hit the hot metal and vaporize. Char-Broil's TRU-Infrared system places an emitter plate above the burner, reducing flare-ups and changing sear character-the surface runs hotter and more evenly, but cleaning requires scraping the plate rather than brushing grates alone. Neither is superior; they demand different habits. An infrared emitter plate from a Char-Broil is not designed to drop into a Nexgrill firebox. Measure the firebox opening and confirm mounting points before buying.

Nov 10, 20265 min read
Read more
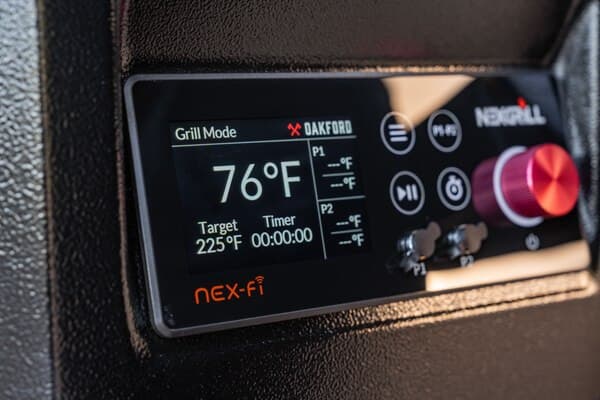
Nexgrill Oakford Pellet Grill with Nex-fi TechnologyGrills

Nexgrill Ora 16 Assembly Instructions: Verify the Model, Build the Compact Grill, Avoid Rework

Start Here: Why a '16' Build Fails Quietly, Not Loudly Compact grill assemblies rarely fail spectacularly-they fail in subtle ways: a burner tube that looks seated but isn't, an ignition wire pinched under the firebox rim, or a gas connection that weeps just enough to matter. On a small single- or dual-burner unit like the class of grill sold as the Nexgrill Ora 16, the build typically takes 15-30 minutes. The high-consequence work is not bolt count; it's getting the burner tube fully over the valve orifice, routing the ignition collector wire away from the hot edge, and running a soapy-water leak test before first light. The 20-Minute Reality-Where Assembly Time Actually Goes Experienced assemblers spend roughly 10 minutes on parts inventory and hardware sorting, 5 minutes on the base and burner seating, and 5 minutes on the lid and gas leak test. Skipping inventory is the most common cause of rework-you end up disassembling legs to retrieve a misplaced washer. Treat the manual's parts list as a checklist before turning a single bolt and the build stays under 30 minutes. On compact grills, the burner tube and valve orifice are close together. Forcing the tube can bend the orifice and create a gas leak-always seat gently and verify by feel, not force. Before the First Bolt: Confirm You Have the Right Unit Marketing names change; data plates don't. 'Ora 16' may be a retail or regional name rather than a spec-sheet model. Before assembly, locate the data plate (usually on the back of the firebox or under the control panel) and the carton label. Compare model and serial numbers-they should match. If the carton is gone, check your order confirmation or the manual's front cover for the manual number. Data Plate vs. Carton Label vs. Marketing Name The data plate gives the precise model and serial; the carton label often includes a retail SKU; the marketing name is what you saw online. When they conflict, trust the data plate. If you can't find it, look for a sticker on the leg or inside the cabinet. A quick photo of the plate saves time if you need support later. Manual Number Lookup: What to Have Ready If the manual is missing, have your model number, serial number, and a photo of the data plate ready when you contact Nexgrill support . They can often provide a digital manual by model number. Do not guess at assembly steps-a wrong manual can lead to incorrect burner orientation or missing hardware. What to Lay Out on the Patio (and the One Tool Most Cartons Skip) You need a flat, non-flammable surface-concrete or a patio, not grass or a slope. Grass hides dropped screws and creates an unstable base; a slope can cause the grill to tip during assembly. Most Nexgrill cartons include a basic wrench, but an adjustable wrench and a Phillips-head screwdriver are faster and less likely to strip hardware. The tool most cartons skip: a magnetic parts tray or muffin tin to keep screws and washers organized by step. Tools, Surface, and a Solo-Build Setup That Works For a solo build, set the carton flat as a work mat. Open the hardware bags and place each bag's contents into a separate compartment of your tray. Keep the manual open to the parts list. A headlamp or clamp light helps when seating the burner tube in shadow. Hardware Sorting: Callout Numbers Beat Bag Colors Bag colors are not standardized across models. Use the manual's callout numbers (e.g., M6x12 bolt) and match them to the parts list. If a bag is unlabeled, count the pieces and compare to the list-this catches shortages before you start. Step-by-Step Build Order for Compact Nexgrill Grills Step 1 - Unbox, Inspect, and Photograph the Hardware Bags Cut the tape carefully to avoid slicing hoses or wires. Photograph the hardware bags as you remove them-this helps if you need to identify a part later. Inspect the firebox and lid for shipping damage; report any dents before assembly. Step 2 - Assemble the Base, Legs, or Folding Stand First Follow the manual's order: base first. Leave bolts hand-tight until all legs or stand components are aligned, then tighten. This prevents cross-threading and ensures the grill sits level. Step 3 - Seat the Burner Tube Fully Over the Valve Orifice This is the critical step. The burner tube must slide fully over the brass valve orifice-usually about 1/2 inch of engagement. Do not force it; if it won't slide, check for burrs or misalignment. A partially seated tube can cause a gas leak or uneven flame. Step 4 - Route the Ignition Collector Wire Off the Hot Edge The ignition wire (often with a ceramic collector) must be routed away from the firebox rim and any sharp edges. Secure it with the provided clip or tie. A wire that touches hot metal will fail prematurely. Step 5 - Mount the Lid and Check Hinge Gap Before Tightening Attach the lid hinges loosely, close the lid, and check the gap between lid and firebox. Adjust until even, then tighten. An uneven gap causes smoke leaks and uneven cooking. Step 6 - Hand-Tighten Gas Connections and Run the Soapy-Water Leak Test Connect the regulator to the propane tank and the hose to the manifold-hand-tighten only. Mix dish soap and water (1:3 ratio) and apply to all joints: tank connection, regulator, hose, and manifold. Turn on the gas; if bubbles form, tighten or reseat. Never use a flame to test for leaks. A leak test is not optional-even on a small grill. Skipping it risks a fire or explosion. If you smell gas, turn off the tank and ventilate before retesting. Comparing Two Compact Options? See Them Side by Side Below If you're still deciding between two compact grills-or want to confirm the Ora 16 is the right size for your patio-use the comparison tool below to see specifications, features, and pricing side by side.

Nov 10, 20268 min read
Read more
Nexgrill Oakford Pellet GrillGrills

Nexgrill Oakford Homestead 24 Assembly Instructions: Kettle Build Walkthrough

Before the First Bolt: Confirm You Have the Homestead 24, Not Its Cart Cousins It is Saturday morning, the carton is open on the driveway, and you are assembling alone with the phone balanced on a patio chair. Start by matching numbers. The model number is printed on the carton label and again on the rating plate riveted to the bowl - check both before you download anything. This matters because the Oakford name covers pellet units such as the Oakford 875 Pro and 1125 Pro, which share a family name but none of this hardware. The Homestead 24 is a 24-inch kettle: bowl, three legs, ash sweeper and catcher linkage, lid with thermometer and handle, tool hooks, and a wire grate. There is no cart frame, cabinet, or shelf panel, which is the one place it differs sharply from Nexgrill's Outpost cart grills. Lay the exploded diagram flat and sort hardware into muffin tins or cups by size. No verified public PDF for this manual exists. Download it from the product page , or request a copy through Nexgrill support . The steps below follow standard kettle practice - reconcile them against your own manual. Set Up a Driveway Workspace That Survives Small Hardware Work on flat concrete, not grass or gravel. A moving blanket protects the lid's finish and stops washers rolling into a lawn. You will need a Phillips screwdriver, an adjustable wrench or the supplied spanner, and a second pair of hands for the bowl lift. Kettle Geometry 101: Why Three Legs Change the Build Order Three points define a plane, so a kettle levels easily - but one leg is the anchor for the ash sweeper linkage. Fit that leg on its marked hole first; every other leg then lines up around it. Get the order wrong and the vent handle binds against the bowl. Step-by-Step: Assembling the Homestead 24 Bowl and Leg Set Bolt the three legs to the bowl's lower band, marked vent leg first, hands snug only. Attach the leg brace ring if your manual includes one, then square all three legs. With a helper, set the bowl upright and confirm it does not rock. Torque everything in a cross pattern; snug is enough, avoid crushing the enamel. Part Qty Orientation note Leg, vent-marked 1 Marked hole only Leg, standard 2 Flat face outward Lid hinge 1 Leaves mirror rear bowl Step 4 in Detail: Mounting the Lid, Hinge, Handle, and Thermometer Hinge plates bolt to matching dimples; align before driving. Feed the thermometer stem through lid, bezel, and nut, then snug only - overtightening can crack the dial housing. Wiring the Air Vent and Ash Sweeper Without Reversing the Linkage Compare each sweeper arm, washer, and nut against the exploded diagram before threading. Reversed ash hardware is the single most common rework on this grill. Five Build Mistakes That Send People Back to the Manual Fully tightening each bolt as you go. Putting the vent leg on an unmarked hole. Reversing the sweeper linkage. Overtightening the thermometer nut. Lifting the bowl alone - a 24-inch assembly commonly runs 25-40 lb; treat that as an estimate and lift as a pair. Once your kettle is square, compare it side by side with another model below to see which fits your deck best.

Nov 9, 20265 min read
Read more

Featured products

From our catalog

29" Charcoal Barrel Grill
Charcoal Grills & Smokers

Nexgrill

29" Charcoal Barrel Grill

Daytona 2-Burner Propane Gas Griddle with Foldable Cart
Gas Grills

Nexgrill

Daytona 2-Burner Propane Gas Griddle with Foldable Cart

4-Burner Gas Grill in Stainless Steel with Side Burner
Gas Grills

Nexgrill

4-Burner Gas Grill in Stainless Steel with Side Burner

Fortress™ 2-Burner Cast Aluminum Gas Grill with Gourmet Plus™ Cooking System
Gas Grills

Nexgrill

Fortress™ 2-Burner Cast Aluminum Gas Grill with Gourmet Plus™ Cooking System

Charcoal Kettle with Cart and Side Table
Charcoal Grills & Smokers

Nexgrill

Charcoal Kettle with Cart and Side Table

Oakford™ 930 Pellet Smoker Grill
Pellet Grills

Nexgrill

Oakford™ 930 Pellet Smoker Grill

5 Burner Propane Gas Grill with Side Burner in Black
Gas Grills

Nexgrill

5 Burner Propane Gas Grill with Side Burner in Black

Oakford™ 715 Pellet Smoker Grill
Pellet Grills

Nexgrill

Oakford™ 715 Pellet Smoker Grill

2-Burner Stainless Steel Portable Gas Grill
Gas Grills

Nexgrill

2-Burner Stainless Steel Portable Gas Grill

4 Burner Liquid Propane Gas Grill with Side Burner and Charcoal Tray in Black
Gas Grills

Nexgrill

4 Burner Liquid Propane Gas Grill with Side Burner and Charcoal Tray in Black

2 Burner Liquid Propane Gas Grill in Black
Gas Grills

Nexgrill

2 Burner Liquid Propane Gas Grill in Black

Deluxe 4-Burner Gas Grill with Searing Side Burner
Gas Grills

Nexgrill

Deluxe 4-Burner Gas Grill with Searing Side Burner

See the Daytona Pro in Action

From sizzling breakfasts to smash burgers and teppanyaki-style dinners, the Daytona Pro 5 Burner NitroGuard™ Griddle delivers powerful heat, fast cooking, and a durable cooking surface built for every backyard cookout. Watch how easy outdoor cooking can be.

Why Choose Us

Here's what sets us apart from the competition

Premium grilling experience at accessible pricing

We position ourselves as delivering high-end outdoor cooking features and performance without premium-brand pricing, emphasizing “Quality Grills. Unbelievable Value.”

Wide range of outdoor cooking products for every use case

We offer gas grills, pellet grills, griddles, smokers, pizza ovens, portable/tabletop grills, electric grills, accessories, and replacement parts — allowing customers to stay within one ecosystem for all outdoor cooking needs.

Innovation-focused outdoor cooking with smart technology

We differentiate ourselves through smart grilling products like the Oakford smart pellet grill, including app-connected cooking controls and modern outdoor cooking technology.

Browse by Category

Grills

Grills

Expert tips, buying guides, comparisons, and inspiration for choosing and getting the most out of your grill.

Troubleshooting

Troubleshooting

Practical guides for cleaning, maintenance, common grill issues, and performance optimization.

Recipes

Recipes

Step-by-step grilling recipes, cooking techniques, and meal ideas for every occasion and skill level.

Lifestyle

Lifestyle

Backyard entertaining ideas, seasonal grilling inspiration, and stories that celebrate outdoor cooking culture.

Accessories

Accessories

Helpful articles covering grilling tools, cookware, maintenance gear, and must-have accessories for outdoor cooking.

Griddles

Griddles

Find griddle recipes, cooking techniques, cleaning tips, and outdoor meal ideas designed for Nexgrill griddles.

Frequently Asked Questions

Find answers to common questions

Gas grills provide instant heat and precise temperature control, making them easier to use. Charcoal grills offer a smoky flavor and high heat for searing but require more time to heat up and manage.

Pellet grills combine the convenience of gas with the flavor of wood, allowing for smoking, baking, and grilling. Traditional gas grills, however, are quicker to start and often easier to clean.

Charcoal grills typically reach higher temperatures quicker than gas grills, making them better for searing meat. However, high-quality gas grills can also provide adequate heat for effective searing.

Nexgrill offers models designed specifically for gas, charcoal, and pellets, allowing users to choose based on their cooking style and flavor preferences. Each type is built to optimize the characteristics of its respective fuel.

Choosing between gas and charcoal grills depends on your cooking preferences and lifestyle. If you value convenience and quick cooking, a gas grill may suit you better; if you prefer the taste and experience of traditional grilling, a charcoal grill would be ideal.