Nexgrill Oakford Homestead 24 Assembly Instructions: Kettle Build Walkthrough
A driveway-side, first-charcoal-grill guide to assembling the 24-inch Homestead kettle - leg order, lid hinge, vent linkage, and a pre-burn checklist.
In This Article
Kettle, Not a Cart
Loosen First, Torque Last
Vent Linkage Goes on Marked Leg
Before the First Bolt: Confirm You Have the Homestead 24, Not Its Cart Cousins
It is Saturday morning, the carton is open on the driveway, and you are assembling alone with the phone balanced on a patio chair. Start by matching numbers. The model number is printed on the carton label and again on the rating plate riveted to the bowl - check both before you download anything. This matters because the Oakford name covers pellet units such as the Oakford 875 Pro and 1125 Pro, which share a family name but none of this hardware.
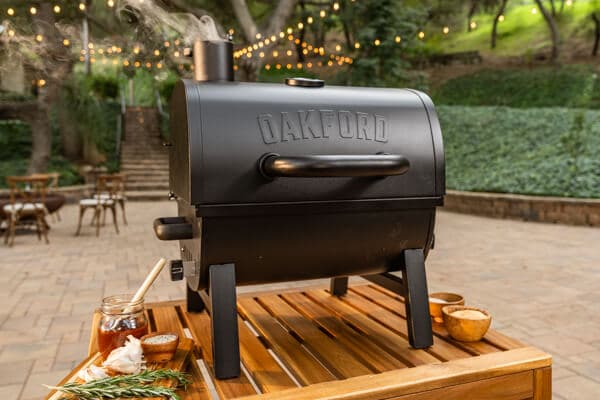
The Homestead 24 is a 24-inch kettle: bowl, three legs, ash sweeper and catcher linkage, lid with thermometer and handle, tool hooks, and a wire grate. There is no cart frame, cabinet, or shelf panel, which is the one place it differs sharply from Nexgrill's Outpost cart grills. Lay the exploded diagram flat and sort hardware into muffin tins or cups by size.
No verified public PDF for this manual exists. Download it from the product page, or request a copy through Nexgrill support. The steps below follow standard kettle practice - reconcile them against your own manual.
Set Up a Driveway Workspace That Survives Small Hardware
Work on flat concrete, not grass or gravel. A moving blanket protects the lid's finish and stops washers rolling into a lawn. You will need a Phillips screwdriver, an adjustable wrench or the supplied spanner, and a second pair of hands for the bowl lift.
Kettle Geometry 101: Why Three Legs Change the Build Order
Three points define a plane, so a kettle levels easily - but one leg is the anchor for the ash sweeper linkage. Fit that leg on its marked hole first; every other leg then lines up around it. Get the order wrong and the vent handle binds against the bowl.
Step-by-Step: Assembling the Homestead 24 Bowl and Leg Set
- Bolt the three legs to the bowl's lower band, marked vent leg first, hands snug only.
- Attach the leg brace ring if your manual includes one, then square all three legs.
- With a helper, set the bowl upright and confirm it does not rock.
- Torque everything in a cross pattern; snug is enough, avoid crushing the enamel.
| Part | Qty | Orientation note |
|---|---|---|
| Leg, vent-marked | 1 | Marked hole only |
| Leg, standard | 2 | Flat face outward |
| Lid hinge | 1 | Leaves mirror rear bowl |
Step 4 in Detail: Mounting the Lid, Hinge, Handle, and Thermometer
Hinge plates bolt to matching dimples; align before driving. Feed the thermometer stem through lid, bezel, and nut, then snug only - overtightening can crack the dial housing.
Wiring the Air Vent and Ash Sweeper Without Reversing the Linkage
Compare each sweeper arm, washer, and nut against the exploded diagram before threading. Reversed ash hardware is the single most common rework on this grill.
Five Build Mistakes That Send People Back to the Manual
- Fully tightening each bolt as you go.
- Putting the vent leg on an unmarked hole.
- Reversing the sweeper linkage.
- Overtightening the thermometer nut.
- Lifting the bowl alone - a 24-inch assembly commonly runs 25-40 lb; treat that as an estimate and lift as a pair.
Once your kettle is square, compare it side by side with another model below to see which fits your deck best.
Once the Kettle Is Square: What the Manual Doesn't Emphasise
Comparison tools confirm dimensions; what they cannot tell you is where assembly friction actually appears. On the Homestead 24 it clusters in three places: the sweeper arms, the hinge leaves, and the leg band. Before torquing, rock each leg while pressing on the bowl rim - a wobble means a bolt is cross-threaded or the band is seated unevenly.
Solo vs. Two-Person Assembly: A Realistic Time and Effort Breakdown
| Phase | Solo | Two people |
|---|---|---|
| Unpack and sort | 15-20 min | 10-15 min |
| Legs and bowl | 40-50 min | 20-30 min |
| Lid and vents | 20-30 min | 15-20 min |
Solo builders should treat the bowl lift as the pause point, not the finish line. Budget about 75-100 minutes total and stop if frustration sets in.
Fit Problems and Fixes: Misaligned Holes, Rocking Legs, and a Lid That Won't Seat
Misaligned holes mean you torqued too early: loosen all bowl bolts half a turn, push legs outward, and re-run the cross pattern. A lid that will not seat usually has the hinge leaves mirrored incorrectly. Rocking legs typically indicate a cross-threaded bolt.
Charcoal must burn outdoors only - never in a garage, porch, or tent. Let ash cool fully (typically overnight) before bagging it in metal. See CPSC carbon monoxide guidance for why indoor burning is dangerous.
First Burn and Seasoning: What to Expect from a New Charcoal Bowl
Run a light load of charcoal for 30-40 minutes with the lid on and vents partly open. The paint cures and may smell faintly. Wipe the cooking grate, oil it lightly, and keep the first cook simple - burgers or chicken thighs - before attempting anything long.
Storage, Cover, and Off-Season Care for a Kettle Grill
Empty ash after every cook, once cold, and never leave it in the bowl through rain. A fitted cover keeps moisture and pollen out of the vent slots.
When to Stop and Contact Nexgrill for Replacement Hardware
Stop if a bolt shears, a threaded insert spins, or a leg band arrives bent. Do not force it. Reach out through Nexgrill support with your carton model number and a photo - and browse all products if you need to compare models.