
Nexgrill
Troubleshooting

Avoiding Common Grill Maintenance Mistakes

Enhance your grilling experience by steering clear of these common pitfalls.
4 min read
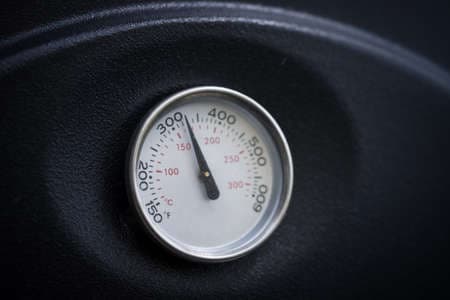
Close up of barbecue or smoke grill circular thermometer, black surface

Image via 123RF

In This Article

Clean Regularly

Avoid buildup for optimal performance.

Inspect for Wear

Regular checks prevent long-term damage.

Protect from Weather

Use covers to extend grill life.

Understanding Grill Maintenance Essentials

Grill maintenance is critical for ensuring longevity and optimal performance. While many grillers are eager to fire up their grills, they often overlook or rush through the maintenance process. This can lead to decreased efficiency, poor cooking results, and even safety hazards. In this article, we'll explore some of the most frequent mistakes and how to avoid them, ensuring your grilling sessions are always a success.

Regular maintenance involves not only cleaning but also checking for wear and tear. It’s essential to identify problems early and address them promptly. Routine checks of the burners, grates, and ignition systems can prevent long-term damage and costly repairs.

Tip: Schedule monthly checks to keep your grill in tip-top shape and prevent unexpected failures during your next barbecue.

Overlooking the Importance of a Clean Grill

A clean grill not only improves flavor but also prevents flare-ups and uneven heating. Many grillers neglect to clean their grills after each use, leading to buildup that affects performance. It's crucial to clean the grates, grease trays, and burners to maintain efficiency. A simple post-cook scrub with a grill brush while the grill is still warm can prevent stubborn residue from hardening.

80%

of grill owners admit to skipping regular cleaning.

Using the right tools is essential. Opt for a brush with stainless steel bristles for a thorough clean. Avoid using harsh chemicals that can leave residues or damage parts. Instead, mild soap and water often suffice.

Ignoring the Signs of Wear and Tear

Over time, your grill will naturally experience wear. Grates can rust, burners can clog, and ignition systems can fail. Regular inspections are key to catching these issues early. Replace rusted grates and clogged burners to maintain optimal cooking conditions. Furthermore, check hoses and connections for leaks to prevent gas-related accidents.

Component Common Issues Maintenance Tip
Grates Rusting Clean and oil regularly
Burners Clogging Check for blockages monthly
Ignition System Failure Inspect connections

While these steps might seem tedious, they are vital for ensuring that your grill remains safe and functional. Regular maintenance not only extends the life of your grill but also enhances your grilling experience by ensuring consistent results.

Warning: Ignoring signs of wear can lead to dangerous situations, including gas leaks and fire hazards.

The Risk of Skipping Pre-Use Checks

Before lighting your grill, it's crucial to perform a quick check. This includes ensuring that the grill is positioned on a stable, heat-resistant surface, checking that gas connections are secure, and making sure that burners are free from obstructions. These simple precautions can prevent accidents and ensure even cooking.

50%

of grill-related accidents could be prevented with pre-use checks.

Always check your fuel levels before starting a grilling session. Running out of propane mid-cook can be frustrating and can result in undercooked food. Consider investing in a fuel gauge to keep track of your propane levels.

Neglecting Weather Protection

Exposure to the elements can significantly affect your grill's longevity. Rain, snow, and extreme temperatures can cause rust and wear. Investing in a high-quality grill cover can protect your grill when it’s not in use. Additionally, storing your grill in a shed or garage during the off-season can prevent unnecessary exposure.

Weather Condition Potential Damage Preventive Measure
Rain Rust Use a waterproof cover
Snow Corrosion Store indoors
Sun Fading and warping Use UV-resistant cover

While a grill cover is a simple investment, it can save you significant costs in repairs or replacements. Quality covers are designed to withstand harsh weather and provide a snug fit to prevent moisture buildup.

Adopting a Proactive Maintenance Mindset

Proactive maintenance is about anticipating potential issues before they arise. Regularly inspect your grill for signs of damage, and address them promptly. This mindset ensures that your grill remains in excellent condition and ready for any grilling opportunity.

Keep a maintenance log to track inspections and repairs. This record can help you stay organized and aware of your grill's condition. Additionally, involving family or friends in the maintenance process can make it more enjoyable and less of a chore.

Tip: Make grill maintenance a shared activity during gatherings to ensure it’s always in peak condition.

Why Choose Us

Here's what sets us apart

  • Premium grilling experience at accessible pricing

    We position ourselves as delivering high-end outdoor cooking features and performance without premium-brand pricing, emphasizing “Quality Grills. Unbelievable Value.”

  • Wide range of outdoor cooking products for every use case

    We offer gas grills, pellet grills, griddles, smokers, pizza ovens, portable/tabletop grills, electric grills, accessories, and replacement parts — allowing customers to stay within one ecosystem for all outdoor cooking needs.

  • Innovation-focused outdoor cooking with smart technology

    We differentiate ourselves through smart grilling products like the Oakford smart pellet grill, including app-connected cooking controls and modern outdoor cooking technology.

What Our Clients Say

Don't just take our word for it

“I’ve been using the Nexgrill Daytona 4-Burner Gas Griddle for a while now, and I’ve been really happy with it. First off, it’s super sturdy and feels really well-made, like it’s going to last me a long time. The cooking space is awesome—plenty of room for making big meals. So far I’ve cooked pancakes, burgers, bacon and some veggies. The 4 burners make it easy to control the heat in different areas. I love that I can keep one side hotter for searing and leave the other side cooler for things that don’t need as much heat. Plus, it heats evenly, which I was really glad to see. The shelves underneath and on its sides are a nice bonus. I’ve used them to keep things like plates, tools, and ingredients handy while I’m cooking, it’s very convenient. Cleaning it is super simple too. Once it cools down, I just wipe off the cooking surface and let the grease funnel into the trap. It’s quick and easy, and honestly, it barely looks like I even used it. If I had to nitpick, the grease trap can fill up kind of quickly during bigger cooking sessions, but as long as you keep an eye on it, it’s not a big deal. Overall, this griddle has been great. It’s sturdy, easy to use, and makes cooking outside a lot of fun. If you’re into grilling or want something versatile, I think this is a solid choice. Originally posted on influenster.com”

M
martind23_2941
Sturdy, easy to use, and perfect for cooking big m

“took about 2-3 hrs for complete assembly. took about 15-20 minutes to fully heat to 700. used a pan liner and a drip cup liner due to previous issues with those rusting away. this is about the 3-4 grill i have assembled. dont try to do it alone or ask the wife for help with the firebox its awkward. always check the directions 2-3 times before tightening down and dont over tighten the screws. hopeing for 5 years of grilling on this but i havent checked the warrenty yet.”

DT
Dave the Griller
finally got around to building this.bought in 2025

“We just bought this guy and I recommend always buy it assembled, we just use the grill 2 times and really works good; is perfect size and the side burn is very useful plus the caddy attach for spices; the material quality is in medium rate; no too cheap no too expensive I'll be glad if it works for minimum 5 years. Nexgrill could improve with the way, and cleaners to not damage the grates and the burners. I protect the removable pan with heavy duty aluminum foil, when the grease drop I only change the foil. Well I am enjoying my new Nexgrill !!! P.s. always clean the grill after use it....ALWAYS :-)”

KA
Karl A
Nice Grill

“Thank you to Influencer and Nexgrill for sending this to me for free, in exchange for my honest opinion. My 17 year old son put this together for me. It was easy but time consuming, it took about 2 hours. This is great for families, because you can cook a good amount of food in a short time. We did tacos, but it’s also great for breakfast, pancakes, eggs, breakfast burritos. It’s easy to clean if you have the right tools, you’ll need a scraper and metal spatula. Overall I would recommend this flat grill, it’s a great addition to our household. Originally posted on influenster.com”

K
KellyL
Quick and easy cooking

“My old Nexgrill is 25 years old and still looking and performing well! This new one is going on our back patio to partner with the old one in our courtyard. Obviously quality products to last that long. I hope the new one does as well. The only concern I have is that the sides are painted metal rather than stainless like the old one. I hope it doesn’t rust over time. But, We are very happy grillers!”

JS
Judy S
New grill to partner with my old one

“Bought grill 3 years ago stainless grates rusted out had to order new ones to replace Yes, I recommend this product.”

G
GaryS329
Stainless

“I’ve always been a smoker, fryer kind of guy. But recently with my new job keeping me super busy I’ve been cooking on my father in-laws 2 burner grill and it takes so long to cook ribs and chicken. I love just lighting the burners and cooking so I decided to upgrade by buying my own and I got this 5 burner with side burner for veggies , took me maybe 20 minutes to get all the dinner done tonight after I seasoned the grill with an onion. Love it so far, I hope it lasts a long time! It’s beautiful!”

JB
Jason B
Love it so far! My first propane grill I’ve ever bought myself!

“I love your grills. This is a replacement grill for a fully stainless steel one (was suppose to be). We originally bought it for our daughter's new townhouse, but her patio was not "ready" for it. We have kept it for 5 years now. My husband passed, I sold the house and move it, in the original box, with me and just put it together. The”

LG
Lisa G
Replacement

“Purchased a 5 burner with side burner grill probably 7-8 years ago. You can only replace things for so long. Opted on a smaller 4 burner grill this time. Hoping to get lots of use for many years to come.”

BS
Brian S
2nd grill with out

“Easy grill to use & grills well. Last grill lasted a little over 6 years. Had to replace burners twice (just worn out - lots of use). Here is old grill & new grill.”

RE
Russell E
2nd Nexgrill

“I had either recieved or bought a grill from either webber or Charbroil. Both had lasted roughly 5 years each before rusting out. For the price point and the way this grill feels I think this one should last longer. Looks awsome new so hopes are high.”

VA
Victor A
3rd grill so far...

“I’m just setting up my second 5 burner nexgrill!!! My first one was purchased in 2015!! I live in New England and the grill lived outside for 7 1/2 years!! That is an impressive lifespan for a grill in my area! I’ll be a loyal Nexgrill customer for life. Thanks very much. Yes, I recommend this product.”

L
Litch
Robust grill with Longevity to boot

“This grill is good for an economy grill. My 10 year old assembled most of it. I knew that I was getting a budget grill and didn't expect a Cadillac. I bought it mainly because the burners have flame on the left and right, instead of one row on the top. I checked the temperature gauge vs my digital and it runs 50° high, didn't expect it to be right on. The burner tents are higher in the front, making it hotter in the front. I have snips so I'll cut the front to set level. I seasoned the grill with bacon, it leaked from the screw to the drip pan, which was tight. The corners are sharp. I had corner protectors for my smoker and put some on the Nexgrill, hoping to get more life from the cover. Overall it's pretty good for the price.”

DK
Daniel K
Easy to assemble
4.7/ 5
13 reviews

Keep reading

Related Articles

Nexgrill stainless steel grill lid with built-in analog temperature gaugeTroubleshooting

Nexgrill Fortress X4 4-in-1 Manual: Run All Four Cooking Modes Safely

You Inherited a 4-in-1 Combo With No Manual-Start Here You bought a Nexgrill Fortress X4 4-in-1 at an estate sale or found it on clearance at Home Depot, but the manual is long gone. That's a common situation for multi-mode combo units, which often change hands without documentation. This guide walks you through the process of locating the correct manual, assembling the unit safely, and testing every gas connection-so you can cook with confidence on all four modes. A 4-in-1 combo typically includes a main gas grill, a side burner, a flat-top griddle insert, and often a rotisserie or smoker box. Each mode adds its own connections and safety considerations. Never attempt to light any mode without first confirming the gas line is leak-free. Before You Download Anything: Find the Rating Plate on Your Fortress X4 The rating plate is a metal tag or sticker that contains your grill's model number and serial number. On most Nexgrill gas grills, you'll find it on the back of the firebox or inside the cabinet door on the right side. Look for a label with a barcode and alphanumeric codes. The model number often starts with a prefix like "720-" or "NEX-", and the serial number is a longer string. Write both down-you'll need them to find the exact manual and to order replacement parts later. If the plate is missing or unreadable, search online for "Nexgrill Fortress X4 model number" using the unit's visual features (number of burners, side burner presence, flat-top insert shape) to narrow down the SKU. Home Depot's product pages often list model numbers in the specifications tab, even for discontinued items. Where the Real Nexgrill Fortress X4 4-in-1 Manual Lives (and What to Do If It Doesn't) Nexgrill maintains a library of product manuals and support documents on its website. Start by visiting the Nexgrill Contact & Support page and use the search function or contact form to request the manual for your specific model. Be ready with your model and serial numbers. Because Nexgrill has produced many Home Depot-exclusive SKUs since its founding in 1993, older model names like "Fortress X4" might not appear in current marketing materials-but support can often cross-reference the SKU and provide the correct document. If the exact manual isn't available, follow this decision tree: Check the rating plate for a model number. Contact Nexgrill support with that number. Search Home Depot's website for your SKU; product pages sometimes host PDFs. Use the generic Nexgrill gas grill safety baseline from the All Products page or CPSC guidelines for assembly and leak testing. Never guess at gas connections or safety procedures. If you cannot find the manual, stick to the universal safety steps outlined below and consult a professional if unsure. What a 4-in-1 Manual Covers That a Single-Mode Grill Manual Doesn't A manual for a multi-mode combo goes beyond basic burner assembly. It typically includes: Separate assembly diagrams for the main grill, side burner, flat-top insert, and any additional accessories. Specific leak-testing instructions for each gas connection point-main manifold, side burner line, and accessory line (e.g., rotisserie burner). Seasoning procedures for different cooking surfaces: cast-iron grates, flat-top griddle, and perhaps a smoker box. Mode-switching safety warnings, such as never operating the flat-top and main burners simultaneously without proper ventilation. Maintenance schedules for each mode, including cleaning and storage tips to prevent rust and grease buildup. If you only have a single-mode manual from another Nexgrill grill, use the assembly steps for the main grill as a baseline, but do not skip the additional leak tests for the side burner and accessory lines. Prerequisites: Tools, Tank, and Space the Manual Assumes You Already Have Before you start, gather these items: Adjustable wrench or socket set (typically 7/16" and 1/2"). Phillips-head screwdriver. Soapy water solution (1 part dish soap to 3 parts water) in a spray bottle-cost is negligible (under $5). Full propane tank (20 lb standard). Leak-test solution or a brush for applying soapy water. Level surface with at least 3 feet of clearance from walls and combustible materials. Two people for lifting heavy components (combo units can weigh over 150 lbs). Ensure you have adequate outdoor space-never assemble or operate a gas grill indoors or in a garage. The CPSC recommends at least 10 feet of clearance from buildings and flammable objects. Steps 1-6: Assembling the Combo in the Manual's Order The following sequence reflects the typical order in Nexgrill multi-mode manuals. Always refer to your specific manual if available, but this framework applies to most Fortress X4-style combos: Unpack and inventory parts: Lay out all components and compare against the parts list. Missing hardware is common in secondhand units-contact Nexgrill support for replacements. Assemble the cart base: Attach legs, casters, and lower shelf. Tighten bolts only finger-tight initially. Mount the firebox: With a helper, lift the firebox onto the cart and secure with bolts. Do not fully tighten until all connections are made. Install the side burner: Attach the side burner assembly to the side shelf, connecting the gas line to the main manifold. Use a new hose if the old one is cracked. Attach the flat-top griddle insert: Place the griddle over the designated burners (usually the left or center section). Ensure it sits flush and does not wobble. Connect the LP hose and regulator: Thread the regulator onto the tank valve (hand-tighten only) and attach the other end to the grill's inlet. Check that the hose is not kinked or touching hot surfaces. After assembly, tighten all bolts securely, but avoid over-tightening, which can strip threads or crack porcelain. Step 7: The Multi-Point Leak Test-Main Burners, Side Burner, and Accessory Line This is the most critical safety step. A 4-in-1 combo has multiple gas connections, so you must test each one individually: Ensure all burner knobs are OFF and the tank valve is closed. Apply soapy water to the following points: the connection between the regulator and tank, the connection between the hose and grill inlet, the main manifold joints (where the side burner line tees off), and the side burner valve connection. Slowly open the tank valve one-quarter turn. Watch for bubbles. Bubbles that grow or burst indicate a leak. Tighten the connection and re-test. If no bubbles appear, open the valve fully and re-test. Close the tank valve, wait 5 minutes, and check that the hose does not swell or show other signs of failure. Pro tip: Use a spray bottle for precise application, and have a rag handy to wipe away soap residue. Never use a flame to test for leaks. Steps 8-9: Seasoning the Flat-Top Insert vs. the Cast-Iron Grates Seasoning protects surfaces from rust and creates a non-stick layer. The flat-top insert (often made of cold-rolled steel) and cast-iron grates require different routines: Flat-top insert: Wash with warm soapy water, dry thoroughly, and coat with a thin layer of flaxseed or canola oil. Heat on medium for 15-20 minutes until it smokes slightly, then let cool. Repeat 3-4 times. Cast-iron grates: Scrub with a brush, rinse, and dry immediately. Apply a thin coat of cooking oil and heat for 30 minutes on medium. Repeat twice. Avoid using soap on cast iron after seasoning, as it can strip the layer. Instead, scrub with a brush and hot water, then re-oil lightly. Try comparing two products side by side below to see which fits best:

Oct 21, 20269 min read
Read more
Close up of barbecue or smoke grill circular thermometer, black surfaceTroubleshooting

Nexgrill 720-1046A Manual: Track Down the Right Revision and Read the Parts Page First

You Probably Need the Parts Page More Than the Assembly Page If you are searching for the Nexgrill 720-1046A manual today, odds are you are not assembling a brand-new grill. You are trying to keep a legacy 720-series gas grill alive. That changes what you need from the document. The assembly script is already done - your grill is built, sitting on the patio, and something has failed. Maybe a burner tube is rusted through, a heat tent has warped, the igniter no longer clicks, or the regulator hose assembly is cracked. In that scenario, the exploded parts diagram with callout numbers is the page you will use most. The step-by-step assembly illustrations are secondary. Nexgrill has been building outdoor cooking equipment since 1993 and sells widely through The Home Depot and nexgrill.com. The 720-1046A belongs to the company’s legacy gas-grill series, and like many grills in that family, it has been out of production for years. Replacement parts are still findable, but only if you match the exact revision. That is why the manual - and specifically the parts list inside it - is your best tool for ordering a burner that fits the first time. The assembly section of a legacy manual is mostly historical. The parts diagram and the leak-test procedure are what keep the grill safe and running. What the 720-1046A Actually Is (and Why the Suffix Letter Decides Everything) In Nexgrill’s numbering, “720-” is the legacy gas-grill series prefix. The string that follows - 1046A - is the SKU. The trailing letter is a revision marker. A 720-1046A and a 720-1046B can look identical from three feet away but use different burner tube lengths, different heat-tent angles, or a different valve-to-manifold fitment. That is not a hypothetical warning. It is the single most common reason a replacement part ordered for a 720-series grill arrives and does not fit. Nexgrill has used revision letters (A, B, H, PG, and others) across the 720 series to denote production changes. When you search for a manual, the letter is part of the model identity, not a decoration. Treat “720-1046A” as a six-character string that must match exactly. If your rating plate says 720-1046, without a letter, photograph the plate and look for a separate revision sticker before you order anything. Prerequisites: Five Things to Have in Hand Before You Open a Search Bar A little staging saves a lot of wrong-part orders. Before you start hunting for the PDF, gather: A phone camera with enough light to read a small rating label. A tape measure or calipers for cross-checking part dimensions later. The exact model string from your grill, including any suffix letter. A notepad or a notes app for callout numbers and measurements. The serial number, if it is still legible - not because the manual needs it, but because Nexgrill support may ask for it when you escalate. The manual itself typically does not print your serial number, so do not worry if the PDF asks for a model only. Serial numbers live on the grill, not in the document. Step 1: Read the Rating Plate and Write Down Six Numbers The rating label on a 720-series grill is usually inside the cabinet, on the firebox, or on the door frame. It is a small metallic or white sticker, and on a grill this age it may be greasy or faded. Wipe it gently and photograph it before you try to read it. From that plate, capture six data points: the full model string (720-1046A, letter included), the serial number, the fuel type (propane or natural gas), the BTU rating, the gas type/orifice marking if present, and the manufacture date or lot code. Those six numbers resolve almost every revision question. They also let Nexgrill support identify your unit without guesswork. If the rating plate is unreadable, stop and contact Nexgrill support before ordering parts. A best-guess model number on a legacy grill is a recipe for returns. Step 2: Search the Exact String, Letter Included Search engines handle “nexgrill-720-1046a-manual” inconsistently because hyphens and suffix letters get normalized. Run the string in quotes first: "720-1046A" . If that returns irrelevant results, try "Nexgrill 720-1046A manual" without quotes. Avoid searching only “Nexgrill 720 manual” - that will surface every 720-series document and bury the one you need. The letter is the filter. You can also search the Nexgrill site directly through the support and contact page, which is where legacy documentation requests are routed. Retailer product pages sometimes retain a “Manuals & Guides” tab even after a grill is discontinued, so check The Home Depot listing for the 720-1046A if a direct search stalls. Step 3: Navigate to the PDF Through Brand Support or the Retailer’s Guides Tab There is no single, permanent public URL for every legacy Nexgrill PDF. The reliable path is through the brand’s support channel or the retailer’s documentation tab. Start at the Nexgrill contact page and look for manual or parts requests; if a direct download is not listed, submit a request with your six rating-plate numbers. On the retail side, open the product page for your exact model and look for a “Manuals & Guides” or “Specifications” section. If neither path produces the PDF, a parts diagram for a closely related 720-series revision can still be useful - but only as a cross-reference, not as a fitment guarantee. Try comparing two grills side by side below before you commit to a rebuild, especially if the parts total starts approaching the cost of a current model.

Oct 19, 20269 min read
Read more
Nexgrill stainless steel grill lid with built-in analog temperature gaugeTroubleshooting

Nexgrill 720-0925PG Manual: A Step-by-Step Field Guide for the Half-Built Grill in Your Driveway

Your Grill Is Half-Built in the Driveway and the Manual Vanished - Here's the Fix It's a familiar scene for anyone who bought a Nexgrill 720-0925PG: the carton is slit open, the lid is leaning against the siding, the hardware bag is zip-tied to something, and the owner's manual - the one document that tells you which bolt goes where and where the regulator hose is supposed to route - is nowhere. Maybe it went out with the packing cardboard. Maybe the previous owner of a used unit never handed it over. Either way, you're staring at a mid-size four-burner propane grill with a side burner and no roadmap. This field guide is written for exactly that situation. It walks you through locating the correct documentation, assembling the grill in the order the manual actually prescribes, running the soap-bubble leak test most people skip, and handling the regulator reset that fixes the single most common "my new grill won't get hot" complaint. Where a step depends on a spec (BTU, cooking area, clearance), we tell you to confirm it against the live listings rather than quoting a number we can't date-stamp. The 720-0925PG is a gas grill, not charcoal. Everything below assumes a propane tank, a regulator, and five gas valves (four main burners plus the side burner). If your carton says 810-KY002, stop - that's a different, charcoal unit. What the 720-0925PG Actually Is (and Why the Manual Model Number Matters) The model number is a code, and reading it correctly saves you from downloading the wrong PDF. In Nexgrill's numbering, the 720- prefix identifies a gas grill. The PG suffix stands for propane gas. The 0925 portion pins down the specific four-burner, side-burner configuration sold primarily through Home Depot channels in the United States. Why does that matter when the manual is missing? Because Nexgrill's support library groups documents by model, and a neighboring gas model may share the same chassis, regulator style, and hardware bag lettering - but differ in burner count or side-burner presence. Pulling a manual for a three-burner unit and following its hose-routing page will leave you one burner short and confused about an extra valve. Always match the full string, not just "Nexgrill gas grill." Step 1: Put Your Hands on the Right Manual in Under 60 Seconds There are three realistic places the document lives, and most people check zero of them before searching the open web and landing on a sketchy third-party upload. Work through these in order. Each is faster than the last search attempt you probably just made. The Three Places the 720-0925PG Manual Really Lives Location What you'll find Best for Cart door, zip-tied bag Full owner's manual, hardware bag, sometimes a quick-start sheet Brand-new units; check before throwing the carton out Nexgrill support hub Model-matched owner's manual, assembly and care PDFs Used grills, lost manuals, second owners Retailer product page "Use and Care Manual" link under the specs/downloads section Confirming the exact SKU you bought Start with the Nexgrill support hub - it's the authoritative source and it won't hand you a watermarked scan. If you bought through Home Depot, open the retailer's product page for your exact SKU and look for the manual download near the specifications. We deliberately don't print a fixed PDF link here: Nexgrill revises documents, and a dead link is worse than no link. Hardware bags are lettered (A, B, C…). Lay the bag on a tray and match each letter to the diagram's callouts before assembly starts - digging through a mixed pile mid-build is how bolts get lost. Quick-Start Insert vs. Full Owner's Manual: Which One Do You Actually Have? Many cartons include a glossy quick-start insert and the full owner's manual. They are not interchangeable. The quick-start sheet shows the five or six major assembly milestones but omits the leak-test procedure wording, the burner-tube alignment callouts, and the regulator reset instructions. If all you have is the insert, use it to get the cart standing and then track down the full manual before you light anything. The full document is the one with the exploded parts diagram and the safety pages printed in bold. Before You Turn a Wrench: The Prerequisites and Workspace Checklist Half the assembly frustration people blame on bad instructions is really a staging problem. Set up correctly and the build takes well under two hours. Skip this and you'll be re-threading bolts in the dark. Two people. The lid-and-cart combination is awkward for one person and cards call for a helper. Box cutter, Phillips screwdriver, and 7/16" and 1/2" wrenches - the two sizes the 0925 hardware actually uses. A flat, level surface at least a few feet clear on all sides. Don't build on grass or gravel. All carton contents laid out and checked against the parts list before step one. A propane tank kept upright and OFF until the leak test passes. Do not tip a full tank sideways during unpacking to make room. A propane tank should stay vertical - tipping it can send liquid propane into the regulator and cause hard-start or low-flame symptoms before the grill has even been lit. Step 2: Assemble in the Manual's Order, Not Yours The single most common assembly error is starting with the cart or burners because they look like the "real" grill. The manual sequences the build so that heavy, awkward pieces go on early while the frame is still light and open. Follow that logic exactly. Lid and Warming Rack First, Then Shelves and Side Burner Attach the firebox lid and warming rack to the cookbox before the cookbox becomes heavy with burners and shelves. Then mount the side shelves and the side burner assembly. The side burner is the fussiest sub-assembly on the 0925 - its brass orifice is a tiny, easily-lost part that sits where the gas line meets the burner. When you fit it, keep the brass orifice in its labeled bag until the line is positioned, and don't overtighten the connection at the burner. Cart, Burners, Heat Shields, Then Hose Routing With the top half assembled, set it onto the cart, then fit burners and heat shields. The critical step most people rush is the final hose routing: the regulator hose must run without kinks, pinches, or contact with hot surfaces, and the regulator's hand-nut should thread on by hand only. Snug by hand, never with a wrench. Overtightening the hand-nut can distort the seal and is one of the leading causes of leak-test failures on new grills. Never use a wrench on the regulator hand-nut. Thread it finger-tight, then leak-test. A wrench here is how threads get cross-threaded and seals get crushed. Step 3: Leak-Test Before You Light It (the Step Everyone Skips) What the Manual's Bold-Print Leak Test Actually Says The leak test is the reason those safety pages are set in bold. The procedure: mix 50/50 dish soap and water, brush it on the tank valve, the regulator-to-tank connection, and the manifold where the hose meets the grill. Turn the tank valve on slowly and watch for growing bubbles. Bubbles mean a leak - shut the tank off, fix the connection, and retest. No bubbles means you're clear to light. Run this test in a well-ventilated area away from flames, and never use a flame to check for leaks. If you can't get a fitting to seal after two attempts, stop and contact support rather than lighting it "just to see." The Nexgrill support team can walk you through the specific fitting on your unit. 3 Test points in the manual's leak test: tank valve, regulator, manifold connection Once the build is done and the leak test passes, the grill is a legitimate four-burner plus side burner - and suddenly the question shifts from "how do I put this together" to "is this the right grill for how I cook." If you're second-guessing the model, or wondering whether a flat-top griddle or a pellet smoker would serve your household better, that's a decision worth weighing carefully before you commit counter space. Try comparing two products side by side below to see which fits best.

Oct 19, 202611 min read
Read more
Close-up focus Barbeque steel Gas stove knob.Troubleshooting

Nexgrill Fuse 400 Manual: Find, Match, and Use the Right Revision Without Guessing

Get the Right Document in Hand Before You Turn a Single Screw If you own a Fuse-line Nexgrill and the manual vanished somewhere between the driveway and the garage, here is the good news: you almost certainly do not need the entire PDF. Assembly, leak testing, first burn, care, and the parts list fit on roughly five pages. Everything else is filler. The bad news is that the Fuse name is shared across gas grills and griddles in multiple burner counts, and manuals are revised between production runs. Pulling the first PDF you find usually means pulling the wrong one. This guide walks through five steps that end with the exact document revision your unit shipped with - and the part numbers that actually match. Before you download anything, get the data plate. It is the small metal or sticker label on the back or underside of the firebox, and it is the only reliable identifier on a Fuse unit. The Four Things to Copy Off Your Data Plate Write these down on paper or photograph the plate before you go searching online: Model number - typically an 810- or 820-prefixed sequence on Nexgrill units Serial number - this is what support uses to pin the production run Fuel type - propane (LP) or natural gas (NG). These are not interchangeable manuals BTU rating and burner count - the printed figure is what tells you which diagram applies If a figure such as BTU output or cooking surface dimensions is not stamped on your plate, do not substitute a number you saw on a listing page. Note it as unconfirmed and verify against your specific unit. Quick-Start Insert vs. Full Owner's Manual: Which One Do You Actually Have? Two different documents ship with these units, and owners routinely confuse them. Document Format What it covers What it omits Quick-start insert Folded card, usually 2-4 panels Assembly order, ignition, first-burn basics Full parts diagrams, warranty terms, deep care notes Full owner's manual Bound booklet or multi-page PDF Everything above plus leak-test procedure, part callouts, care schedule Nothing - it is the complete document If what you have is the folded card, you are missing the parts list and the leak-test page. That is the gap most owners are actually trying to close. Where the Fuse 400 PDF Actually Lives (and Why Search Misses It) Here is the part that frustrates people: Fuse-line documentation tends to live on the retailer product listing, not on the brand homepage. When you search for a model name, brand pages rank first but often cover other product families. The retailer listing for your exact configuration is frequently where the PDF is actually attached. A directly addressable Fuse 400 owner's manual could not be confirmed as a standalone public PDF during preparation of this guide. Do not trust a deep link you cannot open from a live listing page or from Nexgrill support. Step 1: Confirm Which Fuse You Own - Fuel Type and Burner Count Decide Everything Fuse naming spans propane gas grills and flat-top griddles, and the burner count changes the manifold, the grate layout, and the parts diagram. Before you apply any page from any manual, force yourself to answer two questions: Is this a grill with open cooking grates, or a griddle with a solid flat top? How many burners does the control panel show? If your answers are "griddle" and "four," a manual for a two-burner gas grill is not close enough. The ignition wiring and the grease management layout differ. Step 2: Match Your Data Plate Number to a Manual Revision, Not Just a Model Name Model names are marketing. Revision numbers are documentation. Two units sold under the same Fuse name in different years can carry different part numbers for the same visible component - a burner cover, a grate section, a regulator assembly. When you find a candidate PDF, check its revision date or revision code against your serial number's production window. A prior-year PDF may look right and still send you to the wrong figure callout. Step 3: Pull the PDF From the Retailer Listing or Nexgrill Support Two legitimate routes: The product listing page where you bought the unit - attachments and manuals are usually hosted there Nexgrill support via the contact page , with your model and serial number ready Support can confirm which revision applies to your serial. That single step prevents most wrong-PDF problems. Step 4: Extract Only the Five Pages You Need (Assembly Order, Leak Test, First Burn, Care, Parts List) Once you have the correct PDF, do not print forty pages. Extract and keep these five: Assembly order diagram Leak-test procedure First-burn / break-in notes Care and cleaning schedule Parts list with figure numbers Step 5: Cross-Check Part Numbers Against the Parts List Before You Order Anything Fuse parts are shared across sizes. A grate sized for a two-burner unit will not fit a four-burner frame, even if the listing photo looks identical. Match the figure number from your revision's parts list to the actual SKU before you add anything to a cart. Fuse-Line Wiring: How a Changed Revision Quietly Changes Your Part Numbers When a revision rolls, the change is often invisible: a different electrode spacing, a rerouted ignition lead, a substituted regulator. The manual's figure numbers stay in the same sequence, but the SKUs they resolve to shift. This is why a part ordered from a prior-year diagram arrives looking right and fitting wrong. Try comparing two candidate manuals side by side below to see which one matches your data plate before you commit to either.

Oct 16, 20269 min read
Read more

Featured products

From our catalog

17 in. Stainless Steel Grill and Griddle Locking Tongs
Grill Tools

Nexgrill

17 in. Stainless Steel Grill and Griddle Locking Tongs

4 PC Grill Stainless Steel Tool Set
Grill Tools

Nexgrill

4 PC Grill Stainless Steel Tool Set

Stainless Steel Grill Spatula
Grill Tools

Nexgrill

Stainless Steel Grill Spatula

Daytona™ Griddle Scraper With Long Handle
Grill Tools

Nexgrill

Daytona™ Griddle Scraper With Long Handle

Fuse™ 5-Piece Non-Scratch Black Griddle Starter Set
Grill Tools

Nexgrill

Fuse™ 5-Piece Non-Scratch Black Griddle Starter Set

PowerMesh Bristle-Free Stainless Steel Fiber Steam Brush
Grill Tools

Nexgrill

PowerMesh Bristle-Free Stainless Steel Fiber Steam Brush

Daytona 12 in. Stainless Steel Outdoor Kitchen Griddle Dome
Grill Tools

Nexgrill

Daytona 12 in. Stainless Steel Outdoor Kitchen Griddle Dome

29" Charcoal Barrel Grill
Charcoal Grills & Smokers

Nexgrill

29" Charcoal Barrel Grill

4-Burner Gas Grill in Stainless Steel with Side Burner
Gas Grills

Nexgrill

4-Burner Gas Grill in Stainless Steel with Side Burner

Oakford 1400 Pellet Grill Cover
Accessories

Nexgrill

Oakford 1400 Pellet Grill Cover

Fortress™ 2-Burner Cast Aluminum Gas Grill with Gourmet Plus™ Cooking System
Gas Grills

Nexgrill

Fortress™ 2-Burner Cast Aluminum Gas Grill with Gourmet Plus™ Cooking System

Oakford™ 930 Pellet Smoker Grill
Pellet Grills

Nexgrill

Oakford™ 930 Pellet Smoker Grill

Why Choose Us

Here's what sets us apart from the competition

Premium grilling experience at accessible pricing

We position ourselves as delivering high-end outdoor cooking features and performance without premium-brand pricing, emphasizing “Quality Grills. Unbelievable Value.”

Wide range of outdoor cooking products for every use case

We offer gas grills, pellet grills, griddles, smokers, pizza ovens, portable/tabletop grills, electric grills, accessories, and replacement parts — allowing customers to stay within one ecosystem for all outdoor cooking needs.

Innovation-focused outdoor cooking with smart technology

We differentiate ourselves through smart grilling products like the Oakford smart pellet grill, including app-connected cooking controls and modern outdoor cooking technology.

Browse by Category

Grills

Grills

Expert tips, buying guides, comparisons, and inspiration for choosing and getting the most out of your grill.

Troubleshooting

Troubleshooting

Practical guides for cleaning, maintenance, common grill issues, and performance optimization.

Recipes

Recipes

Step-by-step grilling recipes, cooking techniques, and meal ideas for every occasion and skill level.

Lifestyle

Lifestyle

Backyard entertaining ideas, seasonal grilling inspiration, and stories that celebrate outdoor cooking culture.

Accessories

Accessories

Helpful articles covering grilling tools, cookware, maintenance gear, and must-have accessories for outdoor cooking.

Griddles

Griddles

Find griddle recipes, cooking techniques, cleaning tips, and outdoor meal ideas designed for Nexgrill griddles.

Frequently Asked Questions

Find answers to common questions

To clean your Nexgrill grill, ensure it is cooled down first. Use a grill brush to scrub the grates, and wipe down the exterior with warm, soapy water. For deeper cleaning, disassemble parts as per the user manual's instructions.

If your grill won't light, check that the propane tank has gas and that all connections are secure. Ensure the ignition switch is functioning and that there are no obstructions in the burners. Refer to the troubleshooting section of your manual for specific steps.

It's recommended to perform regular maintenance checks after every use, such as cleaning grates and checking gas connections. In addition, a thorough inspection and cleaning every few months can prolong the life of your grill and ensure optimal performance.

To store your grill during the off-season, clean it thoroughly and ensure it is dry to prevent rust. Cover it with a grill cover designed for your model, and store it in a dry, sheltered location if possible.

Uneven heat may occur due to clogged burners or worn-out flame tamers. Check for blockages in the burner ports and clean them as necessary. Additionally, ensure that the grill is level and properly assembled for consistent heat distribution.





